<?xml version="1.0" encoding="utf-8"?><feed xmlns="http://www.w3.org/2005/Atom" ><generator uri="https://jekyllrb.com/" version="4.4.1">Jekyll</generator><link href="https://hunden.linuxkompis.se/feed.xml" rel="self" type="application/atom+xml" /><link href="https://hunden.linuxkompis.se/" rel="alternate" type="text/html" /><updated>2025-12-16T22:58:24+01:00</updated><id>https://hunden.linuxkompis.se/feed.xml</id><title type="html">Hund</title><subtitle>Linux, slow-tech &amp; life</subtitle><entry><title type="html">How to hide the annoying microphone toast message in Microsoft Teams</title><link href="https://hunden.linuxkompis.se/2025/12/08/how-to-hide-the-annoying-microphone-toast-message-in-microsoft-teams.html" rel="alternate" type="text/html" title="How to hide the annoying microphone toast message in Microsoft Teams" /><published>2025-12-08T00:00:00+01:00</published><updated>2025-12-08T16:42:46+01:00</updated><id>https://hunden.linuxkompis.se/2025/12/08/how-to-hide-the-annoying-microphone-toast-message-in-microsoft-teams</id><content type="html" xml:base="https://hunden.linuxkompis.se/2025/12/08/how-to-hide-the-annoying-microphone-toast-message-in-microsoft-teams.html"><![CDATA[<p>It seems like I’m one of those poor souls who’s forced to use Microsoft Teams now. Yay… Teams is a terrible service by a terrible company. We all know it, and I’m not going to rant about it here. I do my best to avoid any negativity on my blog.</p>

<p>There’s a lot of things with Teams that annoy me, one of those things, was the—persistent—toast message that kept reminding me, about every 3 seconds, that my microphone was muted. Well. Great observation, Captain Obvious! It was me who muted the microphone… I’m well aware of the fact that the microphone is muted. Duh.</p>

<p><a href="/img/teams-muted-mic-toast.webp"><img src="/img/teams-muted-mic-toast.webp" alt="" /></a></p>

<p>Anyway. I was able to hide it by using this piece of CSS code:</p>

<div class="language-plaintext highlighter-rouge"><div class="highlight"><pre class="highlight"><code>div:has(&gt; div &gt; div &gt; #ufd_content_DeviceSpeakWhileMuted) {display: none;}
</code></pre></div></div>

<p>The addon <a href="https://addons.mozilla.org/en-US/firefox/addon/styl-us/">Stylus</a> works great if you use Firefox, or any fork of Firefox. However. I use qutebrowser. I simply added the code to a file that I named <code class="language-plaintext highlighter-rouge">custom.css</code>, and then pointed to that file in my configuration file <code class="language-plaintext highlighter-rouge">~/.config/qutebrowser/config.py</code>, like this:</p>

<div class="language-plaintext highlighter-rouge"><div class="highlight"><pre class="highlight"><code>config.set('content.user_stylesheets', ['~/.config/qutebrowser/custom.css'])
</code></pre></div></div>

<p>You can then either restart qutebrowser or just reload the configuration with <code class="language-plaintext highlighter-rouge">config-source</code>.</p>

<h2 id="bonus-tip">Bonus Tip</h2>

<p>I have also found a way to make the left sidebar slightly more compact, simply by hiding the labels and making it thinner.</p>

<p><a href="/img/teams-compact-sidebar.png"><img src="/img/teams-compact-sidebar.png" alt="" /></a></p>

<p>Here’s the code for that:</p>

<div class="language-plaintext highlighter-rouge"><div class="highlight"><pre class="highlight"><code>.fui-AppLayoutArea.___1kr83hz.f1ewtqcl.f1immsc2.f6dzj5z.f10pi13n.f1lvyeyc.fg8on96.f12yfnp8.fibhlys.fav8ueh.f19l78gq.f1asspy.ff8gh7k.fyb0dc9.f1760aly.f1pvy21g.fb2y73i.ffoc445.f4iuumn.f1ceumfd.f1xzzuro.fmq4len.f180iimo.f1w2pcvc.f19xy3ti.f10vmkzp.f1bvojbv.f1o6stv4.f1gyt73z.fwiofl5.f15jae4m.f1gh6hdm.fl4td7.f12vwdbn.f145mhtz.fsxv6q3.fxy6710.f1hwi66u.f1w3aflr.f19sjy7d.f19ayll7.fvu9lbx.f1xunuz7.f1305ibp.f1jtucq0.f1sy8t6p.f1xcw3jt {
	width: 4rem;
}

.fui-FluentProviderr0 {
    --fontSizeBase100: 0px;
}
</code></pre></div></div>

<p>Feel free to share any improvements to this. I’m not, in any way, an expert on CSS.</p>]]></content><author><name></name></author><category term="Tips &amp; Trix" /><category term="Microsoft Teams" /><category term="Firefox" /><category term="qutebrowser" /><category term="CSS" /><summary type="html"><![CDATA[It seems like I’m one of those poor souls who’s forced to use Microsoft Teams now. Yay… Teams is a terrible service by a terrible company. We all know it, and I’m not going to rant about it here. I do my best to avoid any negativity on my blog.]]></summary></entry><entry><title type="html">Using Neovim as a pager</title><link href="https://hunden.linuxkompis.se/2025/11/19/using-neovim-as-a-pager.html" rel="alternate" type="text/html" title="Using Neovim as a pager" /><published>2025-11-19T00:00:00+01:00</published><updated>2025-11-20T11:49:19+01:00</updated><id>https://hunden.linuxkompis.se/2025/11/19/using-neovim-as-a-pager</id><content type="html" xml:base="https://hunden.linuxkompis.se/2025/11/19/using-neovim-as-a-pager.html"><![CDATA[<p>When I couldn’t find a decent pager that supports basic features like proper theming, I turned to the fediverse for some recommendations. I only received <a href="https://polymaths.social/@rl_dane/statuses/01KADV8WG3CTB9QAB9SC4B3BHC">one reply</a>, but luckily enough, it was a really good recommendation. R.L. Dane advised me that I could use my text editor Neovim as a pager like this: <code class="language-plaintext highlighter-rouge">nvim -R +"set scrolloff=999" +"norm L"</code>.</p>

<p>I decided to build upon this idea and add a few additional settings:</p>

<div class="language-sh highlighter-rouge"><div class="highlight"><pre class="highlight"><code><span class="c">#!/bin/sh</span>

nvim <span class="se">\</span>
    <span class="nt">-c</span> <span class="s2">"set filetype=markdown"</span> <span class="se">\</span>
    <span class="nt">-c</span> <span class="s2">"normal! gg"</span> <span class="se">\</span>
    <span class="nt">-c</span> <span class="s2">"set titlestring=Reader"</span> <span class="se">\</span>
    <span class="nt">-c</span> <span class="s2">"Goyo"</span> <span class="se">\</span>
    <span class="nt">-c</span> <span class="s2">"nnoremap &lt;silent&gt; j &lt;C-e&gt;"</span> <span class="se">\</span>
    <span class="nt">-c</span> <span class="s2">"nnoremap &lt;silent&gt; k &lt;C-y&gt;"</span> <span class="se">\</span>
    <span class="nt">-c</span> <span class="s2">"nnoremap q :Goyo&lt;CR&gt;:q!&lt;CR&gt;"</span> <span class="se">\</span>
    <span class="nt">-c</span> <span class="s2">"hi Cursor blend=100"</span> <span class="se">\</span>
    <span class="nt">-c</span> <span class="s2">"set guicursor+=a:Cursor/lCursor"</span> <span class="se">\</span>
    <span class="s2">"</span><span class="nv">$1</span><span class="s2">"</span>
</code></pre></div></div>

<p>These commands does the following things:</p>

<ol>
  <li>Sets the file type to Markdown.</li>
  <li>Opens the document at the top (probably not needed, but why not).</li>
  <li>Sets the title to “Reader”.</li>
  <li>Enables the distraction free mode with <a href="https://hunden.linuxkompis.se/2021/09/23/distraction-free-writing-in-vim-with-goyo.html">Goyo</a>.</li>
  <li>Makes the keys <code class="language-plaintext highlighter-rouge">j</code> and <code class="language-plaintext highlighter-rouge">k</code> to always scroll one step, no matter where the cursor is.</li>
  <li>Hides the cursor. I don’t need it to read text.</li>
  <li>Let’s me exit Neovim with just a single key (<code class="language-plaintext highlighter-rouge">q</code>).</li>
</ol>

<p>And here’s the result:</p>

<figure>
    <a href="/img/reader-nvim-pager.png">
        <img src="/img/t/reader-nvim-pager.png" alt="" />
    </a>
    <figcaption><strong>Left: </strong>Newsboat. <strong>Right: </strong>Neovim as a pager displaying the same article as Newsboat.</figcaption>
</figure>

<p>This solution gives me much more control over the content, how it looks and how I interact with it. It also means that I don’t have to install <em>another</em> tool.</p>]]></content><author><name></name></author><category term="Tips &amp; Trix" /><category term="Neovim" /><category term="Productivity" /><summary type="html"><![CDATA[When I couldn’t find a decent pager that supports basic features like proper theming, I turned to the fediverse for some recommendations. I only received one reply, but luckily enough, it was a really good recommendation. R.L. Dane advised me that I could use my text editor Neovim as a pager like this: nvim -R +"set scrolloff=999" +"norm L".]]></summary></entry><entry><title type="html">How to fix clickbait titles when subscribing to YouTube channels via Newsboat</title><link href="https://hunden.linuxkompis.se/2024/08/23/how-to-fix-clickbait-titles-when-subscribing-to-youtube-channels-via-newsboat.html" rel="alternate" type="text/html" title="How to fix clickbait titles when subscribing to YouTube channels via Newsboat" /><published>2024-08-23T00:00:00+02:00</published><updated>2024-08-26T13:40:21+02:00</updated><id>https://hunden.linuxkompis.se/2024/08/23/how-to-fix-clickbait-titles-when-subscribing-to-youtube-channels-via-newsboat</id><content type="html" xml:base="https://hunden.linuxkompis.se/2024/08/23/how-to-fix-clickbait-titles-when-subscribing-to-youtube-channels-via-newsboat.html"><![CDATA[<p>Clickbait titles (and thumbnails) sucks. And those who use clickbait tactics sucks even more! I usually just boycott crap like that. However, I can make rare exceptions, if the content brings enough value to me.</p>

<p>And I’ve made one exception so far. It’s a channel that I’ve been following for more than a decade. They originally didn’t use crap tactics like this, but they apparently feel that they now have to, thanks to the scumbag algorithm that YouTube uses to make life miserable for everyone.</p>

<h2 id="dearrow-to-the-rescue">DeArrow to the rescue</h2>

<p>DeArrow is an open source browser extension, for crowdsourcing better titles and thumbnails on YouTube. The goal is to replace clickbait titles and thumbnails with accurate titles and thumbnails.</p>

<p>They also provide a <a href="https://wiki.sponsor.ajay.app/w/API_Docs/DeArrow">free API</a> for everyone to use. This means that you could write a script for Newsboat, that replaces clickbait titles with better titles. And this is exactly what <a href="https://fosstodon.org/@Ordoviz">Ordoviz</a> on Mastodon did.</p>

<p>The script comes in two versions, and they can both be found on GitHub:</p>

<ol>
  <li><a href="https://gist.github.com/Ordoviz/c89e158ed1a35171a8aad1f8bb164d6e">Version with support for Shorts</a> (<a href="/uploads/scripts/newsboat_dearrow_shorts.py">My mirror</a>)</li>
  <li><a href="https://gist.github.com/Ordoviz/0f4ed84a21f96e879b11cd1d57728217">Version without support for Shorts</a> (<a href="/uploads/scripts/newsboat_dearrow.py">My mirror</a>)</li>
</ol>

<p>The version with support for <a href="https://en.wikipedia.org/wiki/YouTube_Shorts">Shorts</a>, simply removes any Shorts videos from the feed. A request made by me!</p>

<h2 id="installation">Installation</h2>

<p>Save the script with whatever filename you prefer. I choose the name <code class="language-plaintext highlighter-rouge">newsboat_dearrow.py</code>. Don’t forget to make the script executable:</p>

<div class="language-plaintext highlighter-rouge"><div class="highlight"><pre class="highlight"><code>$ chmod +x &lt;FILE&gt;
</code></pre></div></div>

<p>Not wanting to see the original title next to the new one, I removed the part <code class="language-plaintext highlighter-rouge">{title_element.text}</code> from this line (I left the <code class="language-plaintext highlighter-rouge">◎</code> character, so I know when the title has been modified):</p>

<div class="language-python highlighter-rouge"><div class="highlight"><pre class="highlight"><code>                <span class="n">title_element</span><span class="p">.</span><span class="n">text</span> <span class="o">=</span> <span class="sa">f</span><span class="sh">"</span><span class="si">{</span><span class="n">new_title</span><span class="si">}</span><span class="s">  ◎  </span><span class="si">{</span><span class="n">title_element</span><span class="p">.</span><span class="n">text</span><span class="si">}</span><span class="sh">"</span>
</code></pre></div></div>

<h2 id="usage">Usage</h2>

<p>Apply the script to the beginning of every source in your <code class="language-plaintext highlighter-rouge">urls</code> file, that you wish to use it for:</p>

<div class="language-sh highlighter-rouge"><div class="highlight"><pre class="highlight"><code>filter:~/Scripts/newsboat_dearrow.py:https://www.youtube.com/feeds/videos.xml?channel_id<span class="o">=</span>UCXuqSBlHAE6Xw-yeJA0Tunw <span class="s2">"~Linus Tech Tips"</span>
</code></pre></div></div>

<p>Note that this makes the update of the feed a little bit slower. My recommendation is to only add the filter to problematic feeds.</p>]]></content><author><name></name></author><category term="Tips &amp; Trix" /><category term="Newsboat" /><category term="YouTube" /><category term="DeArrow" /><category term="Python" /><summary type="html"><![CDATA[Clickbait titles (and thumbnails) sucks. And those who use clickbait tactics sucks even more! I usually just boycott crap like that. However, I can make rare exceptions, if the content brings enough value to me.]]></summary></entry><entry><title type="html">My distraction free way of following channels on YouTube</title><link href="https://hunden.linuxkompis.se/2024/08/22/my-distraction-free-way-of-following-channels-on-youtube.html" rel="alternate" type="text/html" title="My distraction free way of following channels on YouTube" /><published>2024-08-22T00:00:00+02:00</published><updated>2024-08-22T18:50:34+02:00</updated><id>https://hunden.linuxkompis.se/2024/08/22/my-distraction-free-way-of-following-channels-on-youtube</id><content type="html" xml:base="https://hunden.linuxkompis.se/2024/08/22/my-distraction-free-way-of-following-channels-on-youtube.html"><![CDATA[<p>My distraction free way of following channels on YouTube, is simply by subscribing to them via web feeds. It may sound boring, but this has actually been my workflow for almost a decade now<sup id="fnref:1"><a href="#fn:1" class="footnote" rel="footnote" role="doc-noteref">1</a></sup>.</p>

<p>And to make things even more boring: I have always used the same web feed client. This happens to be <a href="https://newsboat.org/">Newsboat</a>. It’s an advanced text-based client, that’s highly customizable and distraction free.</p>

<figure>
    <a href="/img/newsboat-youtube.webp">
        <img src="/img/t/newsboat-youtube.webp" alt="" />
    </a>
    <figcaption>Newsboat with my inbox of new videos</figcaption>
</figure>

<p>I then use <a href="https://mpv.io/">mpv</a> and <a href="https://github.com/yt-dlp/yt-dlp">yt-dlp</a> to watch the videos. mpv is a highly customizable, fully keyboard driven and distraction free media player. And it supports plugins! The tool yt-dlp, let you stream content from <a href="https://github.com/yt-dlp/yt-dlp/blob/master/supportedsites.md">multiple websites</a>.</p>

<figure>
    <a href="/img/mpv.webp">
        <img src="/img/t/mpv.webp" alt="" />
    </a>
    <figcaption>mpv with a YouTube video playing.</figcaption>
</figure>

<p>One of the plugins—or scripts as they call it—that I use for mpv, is <a href="https://github.com/po5/mpv_sponsorblock/tree/master">mpv_sponsorblock</a>. It automatically lets me skip sponsored segments of YouTube videos. It uses the <a href="https://github.com/ajayyy/SponsorBlock">SponsorBlock</a> backend. Which is an open source and crowdsourced browser extension. Users can submit when a sponsor happens, and the extension will then automatically skip the sponsored content for the rest of the users. It also supports skipping other categories, such as intros, outros and even reminders to subscribe.</p>

<p>The reason I don’t like using the web (youtube.com), or even clients like <a href="https://github.com/yuliskov/smarttube">SmartTube</a> for Android TV (even it’s a great client, that I personally use on my Android TV), is because I find the inbox workflow to be quite stressful.</p>

<p>I don’t have much time to spend on YouTube (which is partly by choice). This means that my inbox (or whatever it’s called), gets full of new videos, which pushes older videos further down in an endless list of unwatched videos.</p>

<p>With Newsboat, I can simply let my backlog of unwatched videos grow, with the piece of mind that they’ll always be there when I feel like watching some of it. The current backlog is 998 unwatched videos. Massive! I dare anyone to try to manage that backlog on YouTube.com.</p>

<p>Newsboat also supports something called query feeds. This let me create dynamic feeds from subscribed channels. As an example, I have one query feed with all unwatched videos, and another one that I call “Fresh Videos”, which list all videos that’s newer than 7 days. I have also created various categories for all my feeds, which makes it easy to list only a certain type of content.</p>

<p>I also get spared from all the terrible thumbnails! I really don’t get it why everyone has to include their faces (with some sensationalistic expression) in every single thumbnail. It doesn’t matter what the video is about… No offence, but I really don’t care about your face. It just makes me not want to watch the content at all.</p>

<p>Anyway. This is my distraction free way of following channels on YouTube. It’s not unique and it’s probably quite boring, but it what works for me.</p>

<div class="footnotes" role="doc-endnotes">
  <ol>
    <li id="fn:1">
      <p>Well. With one exception. I did try to use <a href="https://github.com/yuliskov/smarttube">SmartTube</a>, exclusively, for a while, but I found it to be quite stressful in the end. <a href="#fnref:1" class="reversefootnote" role="doc-backlink">&#8617;</a></p>
    </li>
  </ol>
</div>]]></content><author><name></name></author><category term="Tips &amp; Trix" /><category term="YouTube" /><category term="mpv" /><category term="Newsboat" /><category term="yt-dlp" /><category term="Productivity" /><category term="SponsorBlock" /><summary type="html"><![CDATA[My distraction free way of following channels on YouTube, is simply by subscribing to them via web feeds. It may sound boring, but this has actually been my workflow for almost a decade now1. Well. With one exception. I did try to use SmartTube, exclusively, for a while, but I found it to be quite stressful in the end. &#8617;]]></summary></entry><entry><title type="html">How to enable real transparency for Conky</title><link href="https://hunden.linuxkompis.se/2024/06/09/how-to-enable-real-transparency-for-conky.html" rel="alternate" type="text/html" title="How to enable real transparency for Conky" /><published>2024-06-09T00:00:00+02:00</published><updated>2024-06-09T17:21:36+02:00</updated><id>https://hunden.linuxkompis.se/2024/06/09/how-to-enable-real-transparency-for-conky</id><content type="html" xml:base="https://hunden.linuxkompis.se/2024/06/09/how-to-enable-real-transparency-for-conky.html"><![CDATA[<p>I recently started using Conky for the first time, in what feels forever. It was quick and easy to setup, except for one thing; getting real transparency to work. See <a href="/img/conky-transparency-not-working.webp">this example image</a> of  how it looked before I got it working.</p>

<figure>
    <a href="/img/my-desktop-2024-06-09.webp">
        <img src="/img/t/my-desktop-2024-06-09.webp" alt="" />
    </a>
    <figcaption>My simple setup with Conky</figcaption>
</figure>

<p>I remeber having the same issue with Conky the first time I tried it almost two decades ago. Thankfully. After trying a billion sugetions from various Internet forums, I found a solution that actually worked.</p>

<p>I found <a href="https://wiki.archlinux.org/title/Conky/Tips_and_tricks#Enable_real_transparency">the solution</a> on the Arch Linux wiki page for Conky. I simply had to make sure to have these settings:</p>

<div class="language-plaintext highlighter-rouge"><div class="highlight"><pre class="highlight"><code> conky.config = {
    own_window = true,
    own_window_transparent = true,
    own_window_argb_visual = true,
    own_window_type = 'desktop',
 }
</code></pre></div></div>

<p>Don’t forget that for real transparency to work, you must have a composite manager running.</p>

<h2 id="my-conky-configuration">My Conky configuration</h2>

<p>If you would like to copy my simple configuration:</p>

<div class="language-plaintext highlighter-rouge"><div class="highlight"><pre class="highlight"><code>conky.config = {
    alignment = 'top_right',
    cpu_avg_samples = 2,
    default_color = 'white',
    double_buffer = true,
    extra_newline = false,
    font = 'DejaVu Sans Mono:size=10',
    gap_x = 50,
    gap_y = 40,
    minimum_height = 5,
    minimum_width = 5,
    net_avg_samples = 2,
    no_buffers = true,
    out_to_x = true,
    own_window = true,
    own_window_class = 'Conky',
    own_window_type = 'desktop',
    own_window_transparent = true,
    own_window_argb_visual = true,
    show_graph_range = false,
    show_graph_scale = false,
    update_interval = 1.0,
    use_spacer = 'none',
    use_xft = true,
}

conky.text = [[
${font Mono:style=Bold:size=10}System $hr${font}

CPU: $alignr$cpu%
RAM: $alignr$memperc%
Swap: $alignr$swapperc%

${font Mono:style=Bold:size=10}Temperature $hr${font}

CPU: $alignr${hwmon 2 temp 1}°C
GPU: $alignr${execi 30 sensors amdgpu-pci-0d00 | grep "junction:" | awk '{print $2}' | sed 's/+//;s/\..*$//'}°C
SSD: $alignr${execi 30 sensors nvme-pci-0100 | grep "Composite:" | awk '{print $2}' | sed 's/+//;s/\..*$//'}°C

${font Mono:style=Bold:size=10}Storage $hr${font}

Total: $alignr${fs_size /}
Free: $alignr${fs_free /}
]]
</code></pre></div></div>]]></content><author><name></name></author><category term="Applications &amp; Tools" /><category term="Conky" /><summary type="html"><![CDATA[I recently started using Conky for the first time, in what feels forever. It was quick and easy to setup, except for one thing; getting real transparency to work. See this example image of how it looked before I got it working.]]></summary></entry><entry><title type="html">My keyboard - May 2024</title><link href="https://hunden.linuxkompis.se/2024/06/07/my-keyboard-may-2024.html" rel="alternate" type="text/html" title="My keyboard - May 2024" /><published>2024-06-07T00:00:00+02:00</published><updated>2024-06-07T22:21:34+02:00</updated><id>https://hunden.linuxkompis.se/2024/06/07/my-keyboard-may-2024</id><content type="html" xml:base="https://hunden.linuxkompis.se/2024/06/07/my-keyboard-may-2024.html"><![CDATA[<p>I just realized that I never posted any pictures of my keyboard with my new keycaps. If they still can be considered new, considering it’s been more than two years since I got them.</p>

<figure>
    <a href="/img/keyboards/20230507-1.webp">
        <img src="/img/keyboards/thumbnails/20230507-1.webp" alt="A bird's eye view of my computer keyboard. It's laying on the balcony railing, enjoying the sun an early spring day." />
    </a>
    <figcaption>My keyboard is out and enjoying the sun.</figcaption>
</figure>

<figure>
    <a href="/img/keyboards/20230507-2.webp">
        <img src="/img/keyboards/thumbnails/20230507-2.webp" alt="My keyboard viewed from the side, to show the height of the keyboard." />
    </a>
    <figcaption>It's reasonable low profile for being a mechanical keyboard. The profile of the case is completely flat.</figcaption>
</figure>

<p>The keycaps are the EnjoyPBT Scandi. The designer was inspired by his sons Scandinavian bedroom decor. The profile is <a href="https://deskthority.net/wiki/Keyboard_profile#Cherry">Cherry</a> and the plastic is <a href="https://deskthority.net/wiki/Keycap_material#PBT">PBT</a>.</p>

<p>Here’s all the specifications for my keyboard:</p>

<table>
  <tbody>
    <tr>
      <td>Form factor:</td>
      <td>60%</td>
    </tr>
    <tr>
      <td>Case:</td>
      <td>Low-profile aluminium case from NPKC (Black)</td>
    </tr>
    <tr>
      <td>Circuit board:</td>
      <td>Aves 60 from I/O Keyboards (Hotswap)</td>
    </tr>
    <tr>
      <td>Switches:</td>
      <td>Gateron G Pro Red Linear (45 gf) (First generation)</td>
    </tr>
    <tr>
      <td>Plate:</td>
      <td>Unbranded universal aluminium plate (Black)</td>
    </tr>
    <tr>
      <td>Stabilizers:</td>
      <td>DUROCK screw-in stabilizers (Clear)</td>
    </tr>
    <tr>
      <td>Keycaps:</td>
      <td>EnjoyPBT Scandi</td>
    </tr>
    <tr>
      <td>Cable:</td>
      <td>Unbranded (USB-C)</td>
    </tr>
  </tbody>
</table>

<p>The idea with this keyboard was to build the best possible keyboard—for me—while keeping the cost reasonable low. My intention was (and it still is), for this keyboard to last for the rest of my life. We’ll see how that goes.</p>

<p>I used parts of an old t-shirt as sound dampening material in the case. A free hack that works better than I thought it would. The switches are factory lubricated, and they feel smooth and sound good. Especially considering the affordable price. The stabilizers are also lubricated, but by me. I think it makes a huge difference in sound, even if it’s high quality stabilizers to begin with.</p>

<p>I have a 5-year-old post about <a href="https://hunden.linuxkompis.se/2019/06/23/this-is-my-custom-keyboard-layout.html">my custom keyboard layout</a>, if you’re interested in how I have programmed it with the QMK firmware. It’s more or less, still the same today.</p>]]></content><author><name></name></author><category term="My Keyboards" /><category term="Mechanical Keyboards" /><category term="Aves 60" /><category term="I/O Keyboards" /><category term="Gateron" /><category term="DUROCK" /><category term="EnjoyPBT" /><category term="NPKC" /><summary type="html"><![CDATA[I just realized that I never posted any pictures of my keyboard with my new keycaps. If they still can be considered new, considering it’s been more than two years since I got them.]]></summary></entry><entry><title type="html">Neovim changed their default colourscheme in version 0.10.0</title><link href="https://hunden.linuxkompis.se/2024/06/01/neovim-changed-their-default-colourscheme-in-version-0.10.0.html" rel="alternate" type="text/html" title="Neovim changed their default colourscheme in version 0.10.0" /><published>2024-06-01T00:00:00+02:00</published><updated>2024-06-01T13:36:18+02:00</updated><id>https://hunden.linuxkompis.se/2024/06/01/neovim-changed-their-default-colourscheme-in-version-0.10.0</id><content type="html" xml:base="https://hunden.linuxkompis.se/2024/06/01/neovim-changed-their-default-colourscheme-in-version-0.10.0.html"><![CDATA[<p>I recently updated to Neovim 0.10.0. And as always, I didn’t read the changelog before updating. I can’t really think of any changes that would excite me, but it looks like I should have read the changelog this time though.</p>

<p>From the changelog for  version 0.10.0:</p>

<blockquote>
  <p>Default color scheme has been updated to be “Nvim branded” and accessible.</p>
</blockquote>

<p>I’m currently using the default colourscheme, and when I fired up Neovim after updating it, I was presented with some rather muted colours.</p>

<figure>
    <a href="/img/neovim-default-colorscheme.webp">
        <img src="/img/t/neovim-default-colorscheme.webp" alt="Two terminals with Neovim, showing of the old and new colours." />
    </a>
    <figcaption>Before and after first updating to Neovim 0.10.0.</figcaption>
</figure>

<p>To solve this, I had to make the following two changes to my configuration file:</p>

<ol>
  <li>Setting the colourscheme from <code class="language-plaintext highlighter-rouge">default</code> to <code class="language-plaintext highlighter-rouge">vim</code>.</li>
  <li>Adding the setting <code class="language-plaintext highlighter-rouge">set notermguicolors</code>.</li>
</ol>

<p>After that, everything was back to normal for me again.</p>]]></content><author><name></name></author><category term="Tips &amp; Trix" /><category term="Neovim" /><summary type="html"><![CDATA[I recently updated to Neovim 0.10.0. And as always, I didn’t read the changelog before updating. I can’t really think of any changes that would excite me, but it looks like I should have read the changelog this time though.]]></summary></entry><entry><title type="html">How I make YouTube (on the web) less annoying and distracting</title><link href="https://hunden.linuxkompis.se/2024/02/25/how-i-make-youtube-on-the-web-less-annoying-and-distracting.html" rel="alternate" type="text/html" title="How I make YouTube (on the web) less annoying and distracting" /><published>2024-02-25T00:00:00+01:00</published><updated>2024-02-25T19:57:48+01:00</updated><id>https://hunden.linuxkompis.se/2024/02/25/how-i-make-youtube-on-the-web-less-annoying-and-distracting</id><content type="html" xml:base="https://hunden.linuxkompis.se/2024/02/25/how-i-make-youtube-on-the-web-less-annoying-and-distracting.html"><![CDATA[<p>There’s no secret that YouTube is an annoying and distracting service to use. Google only care about one thing: you wasting as much time as possible on YouTube. What they don’t care about, is you having a good time on YouTube. A good user experience, seems to mean nothing to them.</p>

<p>Thankfully, there’s a few add-ons, that makes YouTube a little less annoying and distracting to use. At least for me. With the help of the add-on <a href="https://addons.mozilla.org/en-US/firefox/addon/youtube-recommended-videos/">Unhook</a>, I’ve been able to completely disable the default landing page, which is apparently called the “Home feed. Now when I visit youtube.com, I get automatically redirected to my subscriptions page.</p>

<figure>
    <a href="/img/firefox-youtube-startpage.webp">
        <img src="/img/t/firefox-youtube-startpage.webp" alt="My default start page for YouTube, which is the subscription page." />
    </a>
    <figcaption>My default start page for YouTube.</figcaption>
</figure>

<p>Unhook, have also enabled me to hide things like the live chat, screen feed, end screen cards, inapt search results, the Explore and Trending sections and the Shorts Tab.</p>

<p>The second add-on I use for YouTube, is <a href="https://addons.mozilla.org/en-US/firefox/addon/enhancer-for-youtube/">Enhancer for YouTube</a>. It focuses a lot more on the video watching part, but it does a few things that Unhook also does.</p>

<p>With Enhancer for YouTube, I’m able to make things a lot less distracting when I’m watching videos. All I see, is the video. Nothing else. Well. Except for the top header, which I did try to hide, but I wasn’t able to access the search feature then.</p>

<figure>
    <a href="/img/firefox-youtube-player.webp">
        <img src="/img/t/firefox-youtube-player.webp" alt="A video is playing. There's nothing other thatn the video itself visible." />
    </a>
    <figcaption>The video player.</figcaption>
</figure>

<p>The video might look to be in some sort of full screen mode, but it’s just expanded by default, to make use of as much screen space as possible. This means that all the other content, like video title, description, recommended videos, are forced down below the video. Which means that I can’t see it, unless I choose to scroll down to see it.</p>

<p>With the add-on Enhancer for YouTube, I’m also able to always set the playback quality to 4k. By default, YouTube seems to choose some random quality for me. I can also do things like disable autoplay for all videos, automatically expand the videos descriptions and hide Shorts.</p>]]></content><author><name></name></author><category term="Tips &amp; Trix" /><category term="YouTube" /><category term="Firefox" /><category term="Productivity" /><summary type="html"><![CDATA[There’s no secret that YouTube is an annoying and distracting service to use. Google only care about one thing: you wasting as much time as possible on YouTube. What they don’t care about, is you having a good time on YouTube. A good user experience, seems to mean nothing to them.]]></summary></entry><entry><title type="html">How to disable the power button when using elogind</title><link href="https://hunden.linuxkompis.se/2023/11/30/how-to-disable-the-powerbutton-when-using-elogind.html" rel="alternate" type="text/html" title="How to disable the power button when using elogind" /><published>2023-11-30T00:00:00+01:00</published><updated>2024-02-16T19:42:13+01:00</updated><id>https://hunden.linuxkompis.se/2023/11/30/how-to-disable-the-powerbutton-when-using-elogind</id><content type="html" xml:base="https://hunden.linuxkompis.se/2023/11/30/how-to-disable-the-powerbutton-when-using-elogind.html"><![CDATA[<p>My son, who’s currently two years old, loves to press the big shiny button on my computer case. The button, which happens to be the power button, is surrounded with a glowing blue ring, which probably makes it even more irresistible for a kid in his age.</p>

<p>I first tried to cover it with a piece of paper and some tape, but that didn’t work. It probably just made it more annoying for both of us. My second idea was a success though. I was able to disable it in the operating system itself. It took me a few tries (read: reboots), before I figured it out though.</p>

<p>I was trying to solve it via acpid, but I never got it to work. It turns out that if you use elogind, it will steal the power button input and shutdown the computer no matter what. Thank you <a href="https://forums.gentoo.org/viewtopic-p-8589444.html#8589444">Zucca on Gentoo forums</a> for that piece of valuable knowledge.</p>

<h2 id="tldr">TL;DR</h2>

<p>I added <code class="language-plaintext highlighter-rouge">HandlePowerKey=ignore</code> to the <code class="language-plaintext highlighter-rouge">[Login]</code>-section in the file <code class="language-plaintext highlighter-rouge">/etc/elogind/logind.conf</code>. I then restarted elogind using the command <code class="language-plaintext highlighter-rouge"># rc-config restart elogind</code>. Zucca wrote that it would restart your session, but it didn’t for me. I don’t know if I had to or not, but I manually logged out and back in again, just in case.</p>

<p>And that’s all. When my son is now pressing the power button on my computer case, it does absolutely nothing! I’m happy, and my son is happy!</p>]]></content><author><name></name></author><category term="Tips &amp; Trix" /><category term="elogind" /><summary type="html"><![CDATA[My son, who’s currently two years old, loves to press the big shiny button on my computer case. The button, which happens to be the power button, is surrounded with a glowing blue ring, which probably makes it even more irresistible for a kid in his age.]]></summary></entry><entry><title type="html">How I open mailto-links in Mutt with qutebrowser</title><link href="https://hunden.linuxkompis.se/2023/11/21/how-to-open-mailto-links-in-mutt.html" rel="alternate" type="text/html" title="How I open mailto-links in Mutt with qutebrowser" /><published>2023-11-21T00:00:00+01:00</published><updated>2024-02-16T19:42:13+01:00</updated><id>https://hunden.linuxkompis.se/2023/11/21/how-to-open-mailto-links-in-mutt</id><content type="html" xml:base="https://hunden.linuxkompis.se/2023/11/21/how-to-open-mailto-links-in-mutt.html"><![CDATA[<p>This is what I did, to make mailto-links open in Mutt, using my web browser qutebrowser. I think, it should work for all web browsers, and I don’t think that you need to anything more than this. Feel free to correct me, if I’m missing something.</p>

<p>I first created a desktop entry file called <code class="language-plaintext highlighter-rouge">mutt.desktop</code>, in the folder <code class="language-plaintext highlighter-rouge">~/.local/share/applications/</code>, with the following content:</p>

<div class="language-plaintext highlighter-rouge"><div class="highlight"><pre class="highlight"><code>[Desktop Entry]
Type=Application
Name=Mutt 
NoDisplay=true
Exec=/usr/bin/urxvt -e mutt %u
Terminal=true
</code></pre></div></div>

<p>FIY: If you use a desktop environment, and want a fancy shortcut for Mutt, you could consider adding these values as well:</p>

<div class="language-plaintext highlighter-rouge"><div class="highlight"><pre class="highlight"><code>Icon=email
Categories=Internet;
StartupNotify=true
</code></pre></div></div>

<p>I then added the following content to the file <code class="language-plaintext highlighter-rouge">~/.config/mimeapps.list</code>:</p>

<div class="language-plaintext highlighter-rouge"><div class="highlight"><pre class="highlight"><code>[Default Applications]
x-scheme-handler/mailto=mutt.desktop;
</code></pre></div></div>

<p>And then everything just worked for me.</p>]]></content><author><name></name></author><category term="Tips &amp; Trix" /><category term="E-mail" /><category term="Mutt" /><category term="qutebrowser" /><summary type="html"><![CDATA[This is what I did, to make mailto-links open in Mutt, using my web browser qutebrowser. I think, it should work for all web browsers, and I don’t think that you need to anything more than this. Feel free to correct me, if I’m missing something.]]></summary></entry><entry><title type="html">My blog now supports plain-text comments</title><link href="https://hunden.linuxkompis.se/2023/11/18/my-blog-now-supports-plain-text-comments.html" rel="alternate" type="text/html" title="My blog now supports plain-text comments" /><published>2023-11-18T00:00:00+01:00</published><updated>2024-02-16T19:42:13+01:00</updated><id>https://hunden.linuxkompis.se/2023/11/18/my-blog-now-supports-plain-text-comments</id><content type="html" xml:base="https://hunden.linuxkompis.se/2023/11/18/my-blog-now-supports-plain-text-comments.html"><![CDATA[<p>I have always wanted support for comments on my blog, but I could never figure out how to do it, while keeping the website 100% static, and avoiding any complexity or anything that could be considered privacy invasive.</p>

<p>In the end, I decided to go with a static solution that only requires a tiny bit of manual work by me. I don’t expect a lot of comments anyway. It’s all based on the “<a href="https://github.com/aioobe/dead-simple-jekyll-comments">Dead Simple Jekyll Comments</a>” project.</p>

<p>I basically copied their product, removed a bunch of features, made some tweaks to it, to make it work better with how I like things. I removed things like the privacy invasive feature that make calls to the Gravatar service, and the ‘reply to comment’-feature. There’re also no notifications or anything like that. I wanted it to be as simple as possible.</p>

<p>It works by you e-mailing me your comment—using my fancy mailto-link—that you can find in the comment section, located below each post. When I accept your comment, I’ll just send the content to a shell script that does the rest of the work for me.</p>

<p>While this might not be for everyone, I personally really like the simplicity of it.</p>]]></content><author><name></name></author><category term="Hund" /><category term="Comments" /><category term="Plain-text" /><summary type="html"><![CDATA[I have always wanted support for comments on my blog, but I could never figure out how to do it, while keeping the website 100% static, and avoiding any complexity or anything that could be considered privacy invasive.]]></summary></entry><entry><title type="html">Goodbye Gandi</title><link href="https://hunden.linuxkompis.se/2023/11/11/goodbye-gandi.html" rel="alternate" type="text/html" title="Goodbye Gandi" /><published>2023-11-11T00:00:00+01:00</published><updated>2024-02-16T19:42:13+01:00</updated><id>https://hunden.linuxkompis.se/2023/11/11/goodbye-gandi</id><content type="html" xml:base="https://hunden.linuxkompis.se/2023/11/11/goodbye-gandi.html"><![CDATA[<p>As a long-term, and satisfied customer, of <a href="https://www.gandi.net/en">Gandi</a>’s services, I’m sad to have witnessed them being sold to a greedy company like <a href="https://your.online/press-release/">Total Webhosting Solutions B.V.</a>, earlier this year.</p>

<p>I first heard about Gandi, the French cloud service provider, after getting my Ubuntu Membership back in 2009. It turned out that the Ubuntu Membership came with a few perks. One of the perks, happned to be a generous discount rate at Gandi.</p>

<p>I became a customer at Gandi, partly because of the discount, but also because I liked that they both funded and supported various non-profit organizations and open source projects, like Creative Commons, Gnome, Electronic Frontier Foundation, Students for Free Culture, World Wide Fund for Nature, International Federation for Human Rights, Ubuntu and Debian. They also used open source software themselves, at least for some of their services. And their services seemed to be good and reasonable priced as well.</p>

<h2 id="the-new-pricing-at-gandi">The new pricing at Gandi</h2>

<p>Before TWS bought Gandi, I paid about 11 EUR per year, for a .SE-domain. All domains also came with 3 free e-mail accounts, with 3 GB storage for each account. That all changed when TWS took over. My expenses for my domain and my e-mail, went from 11 EUR per year, to about 75 EUR per year. That’s a <strong>681%</strong> (!) price increase.</p>

<p>The 3 free e-mail accounts that used to be included with each domain for free, now costs 4 EUR monthly, per account. Which is a bit pricey for a rather basic e-mail service if you ask me. And my 11 EUR domain, now costs 34 EUR. That’s just not okay.</p>

<p>And yes. I’m well aware that free e-mail was rather generous of them. I would have gladly paid about 1-2 EUR (monthly) for it. If, the domain was still at 11 EUR. TWS took it way too far.</p>

<h2 id="glesys-is-my-new-home-for-my-domain">GleSYS is my new home for my domain</h2>

<p>First: <a href="https://glesys.com">GleSYS</a> <strong>is a sponsor</strong> of <a href="https://linuxkompis.se">Linuxkompis</a>! They have sponsored my Swedish project Linuxkompis, with a VPS since the start of Linuxkompis. And that’s it. They have nothing to with me moving my domain to them. And I get nothing for moving my domain to them either. They’re most likely not even aware of the fact that I have moved my domain to them. The domain “linuxkompis.se”, is paid in full by me, with my own money.</p>

<p>GleSYS is a Swedish cloud service provider that uses <a href="https://glesys.com/company/sustainability">green and sustainable energy</a>. They also happen to charge a much more reasonable yearly fee at 192 SEK (≈16 EUR) for my domain. And as an added bonus, their user interface is way better than the one that Gandi ever had.</p>

<h2 id="mailboxorg-is-now-taking-care-of-my-e-mail-again">Mailbox.org is now taking care of my e-mail (again)</h2>

<p>While GleSYS do provide an e-mail service, they don’t have two-factor-authentication for it, only for the regular cloud account. Which is a big no no for me. It doesn’t matter if they have the most sophisticated e-mail features of all providers out there. If I can’t secure my e-mail account with 2FA, I’m not even going to bother trying them out.</p>

<p>That’s why I went back with <a href="https://mailbox.org">Mailbox.org</a>. I used to be a customer at Mailbox.org in the past, before I moved over to Gandi a couple of years ago. <a href="https://hunden.linuxkompis.se/2021/08/05/i-have-now-replaced-mailbox-with-gandi.html">I wrote about it here</a>.</p>

<p>I did look around for other alternatives, before settling with Mailbox.org. They seem to be the best option out there today. It should also be noted that, since I wrote my last post about them, they have replaced the Google reCAPTCHA spyware with something called <a href="https://friendlycaptcha.com/">Friendly Captcha</a>. Which is a privacy-first and fully GDPR-compliant service from Germany. They also don’t use cookies or store personal data from the users. A wise move by Mailbox.org.</p>

<p>I have only used Mailbox.org for about two months now. Some things are still the same, like their website, which is still, ehh.. confusing and quirky to use. We’ll have to see about the rest, but I have no complaints about the service in general though. They have always provided me with a reliable and high quality service. And to be fair, it’s not like I’m accessing my account via their website that much anyway.</p>]]></content><author><name></name></author><category term="Hund" /><category term="Gandi" /><category term="GleSYS" /><category term="Mailbox.org" /><summary type="html"><![CDATA[As a long-term, and satisfied customer, of Gandi’s services, I’m sad to have witnessed them being sold to a greedy company like Total Webhosting Solutions B.V., earlier this year.]]></summary></entry><entry><title type="html">My $CURRENT YouTube-subscriptions</title><link href="https://hunden.linuxkompis.se/2023/04/16/my-current-youtube-subscriptions.html" rel="alternate" type="text/html" title="My $CURRENT YouTube-subscriptions" /><published>2023-04-16T00:00:00+02:00</published><updated>2024-02-24T16:49:19+01:00</updated><id>https://hunden.linuxkompis.se/2023/04/16/my-current-youtube-subscriptions</id><content type="html" xml:base="https://hunden.linuxkompis.se/2023/04/16/my-current-youtube-subscriptions.html"><![CDATA[<p>These are the channels on YouTube, that I’m currently following. All categories and channels, are ordered in alphabetical order.</p>

<p>I try to keep my subscribed channels to a bare minimum. If I remove a channel, it doesn’t mean that I think it’s bad or boring, it’s just that I’m currently prioritizing something else at the moment.</p>

<p><strong>Page last updated:</strong> February 24, 2024.</p>

<h2 id="biking">Biking</h2>

<ul>
  <li><del><a href="http://www.youtube.com/channel/UCuSEN52fnqKmD99JkfexTGA">Always Another Adventure</a></del></li>
  <li><del><a href="http://www.youtube.com/channel/UC2TvoxhwCPX53QZNbX0zXTQ">Backwoods Bikepacking</a></del></li>
  <li><a href="http://www.youtube.com/channel/UCOpP5PqrzODWpFU961acUbg">Berm Peak Express</a></li>
  <li><a href="http://www.youtube.com/channel/UCu8YylsPiu9XfaQC74Hr_Gw">Berm Peak</a></li>
  <li><a href="http://www.youtube.com/channel/UCyG8fDB-wIkdjprZD-0TI6Q">BIKEPACKING.com</a></li>
  <li><del><a href="http://www.youtube.com/channel/UC3DFdy_qc-cqgKCyQTHLGzA">BKXC</a></del></li>
  <li><del><a href="http://www.youtube.com/channel/UCGamtiY212YK76rDI4IhCGg">CYCLINGABOUT</a></del></li>
  <li><del><a href="http://www.youtube.com/channel/UC41OxU7Kziyi1bVePSx-CUA">Cykelmagasinet</a> (Sv)</del></li>
  <li><del><a href="http://www.youtube.com/channel/UCHOtaAJCOBDUWIcL4372D9A">Fabio Wibmer</a></del></li>
  <li><del><a href="http://www.youtube.com/channel/UCfjzrJwlvxumk0oMWNx7fXQ">Gee Milner</a></del></li>
  <li><del><a href="http://www.youtube.com/channel/UCqiYX6cqxQI9CqhH_kvHeOw">Iohan Gueorguiev</a></del></li>
  <li><a href="http://www.youtube.com/channel/UCPQeFqyxTu9g1IMBlVvG9jg">Keep Smiling Adventures</a></li>
  <li><del><a href="http://www.youtube.com/channel/UCsPZixpYOG6usCju2JNIbKQ">Liam Garrison</a></del></li>
  <li><del><a href="http://www.youtube.com/channel/UCglGlEAlo8XpGlh58E5K2lw">MatthewNorway</a></del></li>
  <li><a href="http://www.youtube.com/channel/UCojs8-4p_xAq5CJNloXBMkQ">Mitch Boyer</a></li>
  <li><a href="http://www.youtube.com/channel/UCzaZ1sPWEuZN-I8_XT6AH8g">Park Tool</a></li>
  <li><a href="http://www.youtube.com/channel/UCVcUzl95VwxrIEQnu9xI21g">Ryan Van Duzer</a></li>
  <li><del><a href="http://www.youtube.com/channel/UC9-ZlLTioqMZowRLZHscozw">Shifter</a></del></li>
  <li><del><a href="http://www.youtube.com/channel/UCsH6xKAJyqKF2Ox0bXJrUaA">Tristan Ridley</a></del></li>
  <li><del><a href="http://www.youtube.com/channel/UC99DEU9s-Z_h4a2U3Hm7ApA">VanCan</a></del></li>
  <li><del><a href="http://www.youtube.com/channel/UCbaipRAqqgImeipfqiFImig">Velofil</a></del></li>
</ul>

<h2 id="creative">Creative</h2>

<ul>
  <li><a href="https://www.youtube.com/@Brick_Crafts">Brickcrafts</a> <span style="color:red;font-weight:bold">← New!</span></li>
</ul>

<h2 id="diy"><del>DIY</del></h2>

<ul>
  <li><del><a href="http://www.youtube.com/channel/UC073quTeFarhKNe8ZuC6Qig">Drew Builds Stuff</a></del></li>
</ul>

<h2 id="entertainment">Entertainment</h2>

<ul>
  <li><del><a href="http://www.youtube.com/channel/UCHL9bfHTxCMi-7vfxQ-AYtg">Abroad in Japan</a></del></li>
  <li><a href="http://www.youtube.com/channel/UC7YT8nZOzkQLKmw95jApMrA">Dashcam Academy</a></li>
  <li><a href="http://www.youtube.com/channel/UCOS7jdle9zw_HnKW4ytZnDw">Dashcam Nation</a></li>
  <li><del><a href="http://www.youtube.com/channel/UCGXllzA9s6Sfcl8Y4M3Qhhw">Dutch Dashcam</a></del></li>
  <li><a href="http://www.youtube.com/channel/UCPDis9pjXuqyI7RYLJ-TTSA">FailArmy</a></li>
</ul>

<h2 id="food--lifestyle"><del>Food &amp; Lifestyle</del></h2>

<ul>
  <li><del><a href="http://www.youtube.com/channel/UCJHA_jMfCvEnv-3kRjTCQXw">Babish Culinary Universe</a></del></li>
  <li><del><a href="http://www.youtube.com/channel/UCc9CjaAjsMMvaSghZB7-Kog">BeardMeatsFood</a></del></li>
  <li><del><a href="http://www.youtube.com/channel/UCMb0O2CdPBNi-QqPk5T3gsQ">James Hoffmann</a></del></li>
  <li><del><a href="http://www.youtube.com/channel/UCyEA3vUnlpg0xzkECEq1rOA">My Name Is Andong</a></del></li>
</ul>

<h2 id="gaming">Gaming</h2>

<ul>
  <li><a href="http://www.youtube.com/channel/UCFKDEp9si4RmHFWJW1vYsMA">EthosLab</a></li>
  <li><del><a href="http://www.youtube.com/channel/UCw7FkXsC00lH2v2yB5LQoYA">jackfrags</a></del></li>
</ul>

<h2 id="graffiti">Graffiti</h2>

<ul>
  <li><a href="http://www.youtube.com/channel/UCrI-GTzLrfttGYB4bsMLWuA">SMOE NOVA</a></li>
</ul>

<h2 id="outdoors">Outdoors</h2>

<ul>
  <li><a href="https://www.youtube.com/@DanBecker">Dan Becker</a> <span style="color:red;font-weight:bold">← New!</span></li>
  <li><a href="https://www.youtube.com/@JensSoderblom">Jens Söderblom</a> (SV) <span style="color:red;font-weight:bold">← New!</span></li>
  <li><a href="http://www.youtube.com/channel/UCSvT1uds0PVPJQWVnp4UN-A">Justin Outdoors</a></li>
  <li><a href="http://www.youtube.com/channel/UCmor-2SRB1E9dHMbcr397_Q">MyLifeOutdoors</a></li>
  <li><a href="http://www.youtube.com/channel/UCHYYsv6OTRaJI1EfASDkglw">Peter Persson</a> (Sv)</li>
  <li><del><a href="http://www.youtube.com/channel/UC2SMpy2oZV6BoyJEYShw9bw">TA Outdoors</a></del></li>
  <li><a href="https://www.youtube.com/@ornmalm">ÖrnMalm</a> <span style="color:red;font-weight:bold">← New!</span></li>
</ul>

<h2 id="technology"><del>Technology</del></h2>

<ul>
  <li><del><a href="http://www.youtube.com/channel/UCbiGcwDWZjz05njNPrJU7jA">ExplainingComputers</a></del></li>
  <li><del><a href="http://www.youtube.com/channel/UCR-DXc1voovS8nhAvccRZhg">Jeff Geerling</a></del></li>
  <li><del><a href="http://www.youtube.com/channel/UCBJycsmduvYEL83R_U4JriQ">Marques Brownlee</a></del></li>
  <li><del><a href="http://www.youtube.com/channel/UC8uT9cgJorJPWu7ITLGo9Ww">The 8-Bit Guy</a></del></li>
  <li><del><a href="http://www.youtube.com/channel/UCEp20NgOZHmgWdbQdHSxgjw">This Does Not Compute</a></del></li>
</ul>

<h2 id="tiny-houses"><del>Tiny houses</del></h2>

<ul>
  <li><del><a href="http://www.youtube.com/channel/UC8EQAfueDGNeqb1ALm0LjHA">Exploring Alternatives</a></del></li>
  <li><del><a href="http://www.youtube.com/channel/UCoNTMWgGuXtGPLv9UeJZwBw">Living Big In A Tiny House</a></del></li>
</ul>]]></content><author><name></name></author><category term="Lists &amp; Collections" /><category term="YouTube" /><summary type="html"><![CDATA[These are the channels on YouTube, that I’m currently following. All categories and channels, are ordered in alphabetical order.]]></summary></entry><entry><title type="html">I have now retired my Raspberry Pi 2</title><link href="https://hunden.linuxkompis.se/2023/04/14/i-have-now-retired-my-raspberry-pi-2.html" rel="alternate" type="text/html" title="I have now retired my Raspberry Pi 2" /><published>2023-04-14T00:00:00+02:00</published><updated>2024-02-16T19:42:13+01:00</updated><id>https://hunden.linuxkompis.se/2023/04/14/i-have-now-retired-my-raspberry-pi-2</id><content type="html" xml:base="https://hunden.linuxkompis.se/2023/04/14/i-have-now-retired-my-raspberry-pi-2.html"><![CDATA[<p>After several years of service, my trustworthy Raspberry Pi 2 with <a href="https://alpinelinux.org">Alpine Linux</a>, is now retired.</p>

<p>My Raspberry Pi 2, was mainly used for running <a href="https://weechat.org">WeeChat</a> with <a href="https://bitlbee.org">BitlBee</a>. WeeChat is a text-based IRC-client, and BitlBee brings instant messaging to IRC-clients. This meant that I could use my IRC-client for <a href="https://xmpp.org">XMPP</a>. Which is my go-to instant messaging platform, since the dawn of times.</p>

<p>The good thing with this setup, was that I could simply use my IRC-client for XMPP. WeeChat is my all-time favourite client. It’s something that I’m comfortable with, and it happens to be a fairly advanced client. You can customize to your liking in any way possible, with the large repository of plugins, that’s available for it.
The bad thing with this setup, was the fact that the latest release of BitlBee is more than 4 years old. And even back then, the support for XMPP was lacking, at best. BitlBee, doesn’t support things like <a href="https://conversations.im/omemo">OMEMO</a> (end-to-end encryption), MAM (Message Archive Management) or simply sending/receiving files.</p>

<p>No support for MAM, means that any message that I receive while offline, is lost forever. Well. For BitlBee at least. Any client that does support MAM, would have fetched the messages and showed them to me, the next time I would have logged in.</p>

<p>That’s why I was running it on a Raspberry Pi. It’s tiny and it doesn’t draw any power at all. Which meant that could always have it running 24/7, without ever worrying about an expensive electricity bill.</p>

<p>While it wasn’t a perfect setup, I was okay enough with it. It was actually a setup, that I used for almost a decade. The reason I decided to retire the setup, was for the fact that I currently don’t spend much time with my computer. And I don’t see that changing in the near future. The time I do spend with my computer, isn’t really spent on IRC or XMPP anyway.</p>

<h2 id="alpine-linux">Alpine Linux</h2>

<p>I also have to give Alpine Linux, some love here. Alpine Linux is an “independent, non-commercial, general purpose Linux distribution designed for power users who appreciate security, simplicity and resource efficiency”. I quoted their website.</p>

<p>Alpine Linux is built around musl libc and busybox. Which makes it small and resource efficient. I think the base installation weights in at about 120 MB disk usage. Another neat thing with the ARM-version, is the fact that I only runs from RAM. This means that your poor SD-card is saved from constant abuse, and could potentially last forever.</p>

<h2 id="my-new-setup">My new setup</h2>

<p>My new setup is simply running a client on my desktop computer. I choose <a href="https://gajim.org">Gajim</a>, which supports both OMEMO, MAM and other fancy things. It’s a pure XMPP client, which means that it doesn’t support the IRC protocol, but the only IRC-channel that I’m still active on these days, are bridged to an XMPP-room anyway.</p>

<p>And yes. Gajim is a graphical client. It’s not usually what I use. It was actually quite difficult, switching to something graphical, but I’m slowly getting used to it. I also don’t like the fact that it’s trying to be ‘modern’, with bloat like “workspaces”, that you can’t even disable… It seems to be the least bad client right now though.</p>

<p>I’ve been using Pidgin in the past, but they lack modern XMPP features like BitlBee as well, but the new major upcoming version of Pidgin, looks promising though! I’m patiently waiting for that to happen.</p>

<p>And the reason that I didn’t choose a text-based client like <a href="https://profanity-im.github.io">Profanity</a> or <a href="https://poez.io/en">Poezio</a>—that both have good support for XMPP—was for the simple fact that this old dog, don’t have the time or motivation to learn new tricks. At least not right now.</p>]]></content><author><name></name></author><category term="Hund" /><summary type="html"><![CDATA[After several years of service, my trustworthy Raspberry Pi 2 with Alpine Linux, is now retired.]]></summary></entry><entry><title type="html">My Desktop - January 2023</title><link href="https://hunden.linuxkompis.se/2023/01/12/my-desktop-january-2023.html" rel="alternate" type="text/html" title="My Desktop - January 2023" /><published>2023-01-12T00:00:00+01:00</published><updated>2024-02-16T19:42:13+01:00</updated><id>https://hunden.linuxkompis.se/2023/01/12/my-desktop-january-2023</id><content type="html" xml:base="https://hunden.linuxkompis.se/2023/01/12/my-desktop-january-2023.html"><![CDATA[<p>It’s a new year, which means that it’s time for another “My desktop”-post. <a href="/2021/11/21/my-desktop-november-2021.html">The last one</a>, was back in November 2021. Not much has really happened since the last time.</p>

<p>In my last post, I was trying out Debian. I had some idea that I wanted to try out something dead simple. I think that idea lasted for about a month, before I went back to Gentoo again.</p>

<div class="grid-container">

<!-- IMAGE #1 -->
<div class="grid-item">
    <a href="/img/my-desktop-2023-01-12--01.png">
        <img src="/img/t/my-desktop-2023-01-12--01.png" alt="A screenshot of my desktop without any visible clients. I have no wallpaper." />
    </a>
    <figcaption></figcaption>
</div>

<!-- IMAGE #2 -->
<div class="grid-item">
    <a href="/img/my-desktop-2023-01-12--02.png">
        <img src="/img/t/my-desktop-2023-01-12--02.png" alt="A second screenshot of my desktop. This time with some clients mashed together in one single screenshot." />
    </a>
    <figcaption></figcaption>
</div>

</div>
<!-- grid-container-->

<p>My desktop looks pretty much the same as the previous years. I haven’t really changed much in.. an eternity ago. Well. Why change something that works.</p>

<h2 id="changes-since-the-last-post">Changes since the last post</h2>

<h3 id="yes-more-panel">Yes more panel</h3>

<p>In the last post I wrote “No more panel”. I turned out that I actually like having a panel. ;)</p>

<h2 id="my-setup">My setup</h2>

<p>Here’s some information about my setup and some of the more frequently used software that I use regularly.</p>

<table>
  <tbody>
    <tr>
      <td>Operating system:</td>
      <td>Gentoo Linux</td>
    </tr>
    <tr>
      <td>Window manager:</td>
      <td>i3</td>
    </tr>
    <tr>
      <td>System panel:</td>
      <td>Polybar</td>
    </tr>
    <tr>
      <td>Shell:</td>
      <td>zsh</td>
    </tr>
    <tr>
      <td>Terminal emulator:</td>
      <td>URxvt</td>
    </tr>
    <tr>
      <td>Terminal typeface:</td>
      <td>Terminus</td>
    </tr>
    <tr>
      <td>Terminal colour scheme:</td>
      <td>Solarized</td>
    </tr>
    <tr>
      <td>Application launcher:</td>
      <td>Rofi</td>
    </tr>
    <tr>
      <td>Notification daemon:</td>
      <td>Dunst</td>
    </tr>
    <tr>
      <td>Text editor:</td>
      <td>Neovim</td>
    </tr>
    <tr>
      <td>File manager:</td>
      <td><a href="https://hunden.linuxkompis.se/2020/08/20/ranger-my-favourite-file-manager.html">Ranger</a></td>
    </tr>
    <tr>
      <td>Web browser:</td>
      <td>qutebrowser</td>
    </tr>
    <tr>
      <td>E-mail client:</td>
      <td>Mutt + mbsync</td>
    </tr>
    <tr>
      <td>Web feed reader:</td>
      <td><a href="https://hunden.linuxkompis.se/2020/07/29/an-introduction-to-the-web-feed-client-newsboat.html">Newsboat</a></td>
    </tr>
    <tr>
      <td>Password manager:</td>
      <td>KeePassC</td>
    </tr>
    <tr>
      <td>Bookmark manager:</td>
      <td>Buku</td>
    </tr>
    <tr>
      <td>Media player:</td>
      <td>mpv</td>
    </tr>
    <tr>
      <td>Image viewer:</td>
      <td><a href="https://hunden.linuxkompis.se/2018/04/12/sxiv-a-simple-vi-like-image-viewer.html">sxiv</a></td>
    </tr>
    <tr>
      <td>Instant messaging client:</td>
      <td>WeeChat + bitlbee</td>
    </tr>
    <tr>
      <td>Document reader:</td>
      <td><a href="https://hunden.linuxkompis.se/2019/02/14/zathura-a-lightweight-vi-like-document-reader.html">Zathura</a></td>
    </tr>
    <tr>
      <td>Calendar:</td>
      <td><a href="https://hunden.linuxkompis.se/2020/08/12/how-to-sync-and-manage-your-caldav-and-carddav-via-the-terminal.html">Khal</a></td>
    </tr>
    <tr>
      <td>Contact book:</td>
      <td><a href="https://hunden.linuxkompis.se/2020/08/12/how-to-sync-and-manage-your-caldav-and-carddav-via-the-terminal.html">Khard</a></td>
    </tr>
    <tr>
      <td>CalDAV/CardDAV-sync:</td>
      <td><a href="https://hunden.linuxkompis.se/2020/08/12/how-to-sync-and-manage-your-caldav-and-carddav-via-the-terminal.html">vdirsync</a></td>
    </tr>
  </tbody>
</table>

<h2 id="share-your-desktop">Share your desktop</h2>

<p>It would be fun to see what your desktop looks like. Feel free to comment on <a href="https://fosstodon.org/@hund/109676639292892702">this post on Mastodon</a> with some pictures and information about your setup.</p>]]></content><author><name></name></author><category term="My Desktop" /><summary type="html"><![CDATA[It’s a new year, which means that it’s time for another “My desktop”-post. The last one, was back in November 2021. Not much has really happened since the last time.]]></summary></entry><entry><title type="html">My thoughts about the Tai-Hao Sunshine Nordic ISO keycaps</title><link href="https://hunden.linuxkompis.se/2023/01/07/my-thoughts-about-the-tai-hao-sunshine-nordic-iso-keycaps.html" rel="alternate" type="text/html" title="My thoughts about the Tai-Hao Sunshine Nordic ISO keycaps" /><published>2023-01-07T00:00:00+01:00</published><updated>2024-02-16T19:42:13+01:00</updated><id>https://hunden.linuxkompis.se/2023/01/07/my-thoughts-about-the-tai-hao-sunshine-nordic-iso-keycaps</id><content type="html" xml:base="https://hunden.linuxkompis.se/2023/01/07/my-thoughts-about-the-tai-hao-sunshine-nordic-iso-keycaps.html"><![CDATA[<p><strong>This is not a sponsored post.</strong> The keycaps has been paid for in full by my partner.</p>

<p>My wife wanted to buy some keycaps for her younger brother as a Christmas present. After asking me for some advice, she decided to buy the <a href="https://shop.tai-hao.com/products/taihao-exotic-layout-sunshine">Tai-Hao Sunshine</a> keycaps. They were available for 449 SEK (≈40 EUR) a few weeks before Christmas.</p>

<div class="grid-container">
    <div class="grid-item single">
        <a href="/img/tai-hao-sunshine-2.jpg">
            <img src="/img/t/tai-hao-sunshine-2.jpg" alt="A photo of the Tai-Hai Sunshine keycaps." />
        </a>
        <figcaption>The Tai-Hao Sunshine keycaps</figcaption>
    </div>
</div>

<p><a href="https://www.tai-hao.com">Tai-Hao</a> is an old company from Taiwan, founded back in 1962. They manufacture computer keyboards, keyboard keycaps, keyboard switches and card readers. This particular set is an “exotic” set, and it’s available in both German and ‘Nordic’. The Nordic language support means that they have combined the Swedish, Finnish, Norwegian and the Danish language on one set of keys.</p>

<div class="grid-container">
    <div class="grid-item single">
        <a href="/img/tai-hao-sunshine-0.jpg">
            <img src="/img/t/tai-hao-sunshine-0.jpg" alt="A photo of the Tai-Hai Sunshine keycaps, showing the content of the box." />
        </a>
        <figcaption>An overview of what's included in the box.</figcaption>
    </div>
</div>

<p>For some reason, they included two tools for removing keycaps. A plastic version and a metal wire version. Don’t use the plastic tool! It will most likely scratch your keycaps.</p>

<p>The complete set consist of 114 colourful and vibrant keys. Nine of them are extra keys, while the rest is standard keys for a full-size Nordic ISO keyboard. The extra keys are:</p>

<ul>
  <li>4 × 1U Blank (R4)</li>
  <li>1 × 1.75U Shift (R1)</li>
  <li>4 × 1U Blank (R0)</li>
</ul>

<p>There’s also <a href="https://shop.tai-hao.com/products/-pbt-104-rainbow-c02rb601">a ‘non-exotic’ ANSI version</a> of this set as well. It seems to have some add-on kits that supports the UK-ISO-layout and some keyboard specific layouts, like the non-standard Razer BlackWidow, the Leopold FC-980M and some other keyboards and layouts.</p>

<h2 id="specifications">Specifications</h2>

<ul>
  <li>Manufacturer: Tai-Hao</li>
  <li>Set: Sunshine</li>
  <li>Language: Nordic</li>
  <li>Profile: OEM</li>
  <li>Plastic: PBT</li>
  <li>Thickness: 1 mm</li>
</ul>

<h2 id="the-bad">The bad</h2>

<p>The bad is honestly not that bad, at least not considering the price and the target audience, which is non-enthusiasts and gamers.</p>

<h3 id="limited-compatibility">Limited compatibility</h3>

<p>The set is compatible with a full-size standard ISO keyboard layout. They have included a few extra keys, but if you have some non-standard layout, you’re most likely out of luck in terms of compatibility—unless if you invest in some of the add-on sets, which might be difficult and/or even a bit too expensive to get your hands on, depending on where you live.</p>

<h3 id="thin-keycaps">Thin keycaps</h3>

<p>The keycaps are only 1 mm thick. If that doesn’t mean anything to you, it’s most likely won’t be of an issue for you. Me personally, prefer keycaps that’s 1.3 to 1.5 mm thick, as they make for a better sound profile.</p>

<h3 id="nordic-language-support">Nordic language support</h3>

<p>The good thing about combining the Nordic languages into one set of keycaps, is that you can keep the price down for the keycaps. The bad thing, is that the keycaps looks cluttered with a lot of extra text.</p>

<h2 id="the-good">The good</h2>

<h3 id="pbt-plastic">PBT-plastic</h3>

<p>I would personally never buy (or even recommend) any keycaps, unless they’re made out of PBT-plastic. The durability, compared to regular keycaps made out of ABS-plastic, is light-years better.</p>

<p>I have owned multiple keycaps in ABS-plastic—before I found out about PBT-keycaps—and they all started to show wear just after a few months of use. And they eventually started to shine not long after that. Compare that, with my oldest PBT-keycaps, which have been used and abused for more than six years now, and they still look pretty close to brand new.</p>

<p>Another thing that I like about PBT-keycaps is the rugged texture they tend to have. This makes for a pleasant experience for the fingertips when you type on them. These keycaps had an extra rugged surface.</p>

<p>It’s also worth mentioning that PBT-plastic, don’t turn yellow by UV-light, like ABS-plastic do. Well. Unless you have dark keycaps, then it doesn’t really matter anyway.</p>

<h3 id="double-shot-moulding">Double-shot moulding</h3>

<p><a href="https://deskthority.net/wiki/Double-shot_molding">Double-shot moulding</a> is the process of moulding plastic around a preformed metal or plastic insert. This has been a popular process to create truly durable keycaps. It used to be a common method back in the 70s and 80s, back when keyboards wasn’t complete rubbish.</p>

<p>The good thing about double-shot moulding is that the legends are razor sharp and fully flush to the keycaps, which makes them pleasant to type on. The legends will also never wear our.</p>

<h3 id="price">Price</h3>

<p>The price is decent, especially considering what you get for the price. If you want any of the ‘enthusiast sets’ (from brands like enjoyPBT), you often have to spend 3 or 4 times the amount of money.</p>

<h2 id="conclusion">Conclusion</h2>

<p>This is an excellent set for anyone who’s looking for a colourful set, which won’t break your bank.</p>]]></content><author><name></name></author><category term="Keyboards" /><category term="Keyboards" /><category term="Keycaps" /><category term="Tai-Hao" /><summary type="html"><![CDATA[This is not a sponsored post. The keycaps has been paid for in full by my partner.]]></summary></entry><entry><title type="html">I’m sorry for yesterdays web feed flood</title><link href="https://hunden.linuxkompis.se/2022/08/28/im-sorry-for-yesterdays-web-feed-flood.html" rel="alternate" type="text/html" title="I’m sorry for yesterdays web feed flood" /><published>2022-08-28T00:00:00+02:00</published><updated>2024-02-16T19:42:13+01:00</updated><id>https://hunden.linuxkompis.se/2022/08/28/im-sorry-for-yesterdays-web-feed-flood</id><content type="html" xml:base="https://hunden.linuxkompis.se/2022/08/28/im-sorry-for-yesterdays-web-feed-flood.html"><![CDATA[<p>I was setting up my websites yesterday, in a way that will allow me to update and build them via my phone.</p>

<p>Unfortunately. I derped a little bit. While I was working on it, I accidentally copied some source files from <a href="https://hund.linuxkompis.se">my Swedish website</a> to this website. The mistake itself was quick and easy to revert. The real issue was that I accidentally published several hundreds of ‘new’ posts here, in Swedish.</p>

<p>My apologies to anyone who happen to be subscribed to my web feed and got flooded with a bunch of Swedish posts from my other website.</p>

<p>Anyway. On to some more positive things. If you read this, it means that I have a working workflow for composting and publishing content using my phone. It’s nothing fancy. It just involves git and running Jekyll on my server, instead of on my desktop computer.</p>]]></content><author><name></name></author><category term="[&quot;Hund&quot;]" /><summary type="html"><![CDATA[I was setting up my websites yesterday, in a way that will allow me to update and build them via my phone.]]></summary></entry><entry><title type="html">I’m considering buying a laptop computer this year</title><link href="https://hunden.linuxkompis.se/2022/01/24/im-considering-buying-a-laptop-computer-this-year.html" rel="alternate" type="text/html" title="I’m considering buying a laptop computer this year" /><published>2022-01-24T00:00:00+01:00</published><updated>2024-02-16T19:42:13+01:00</updated><id>https://hunden.linuxkompis.se/2022/01/24/im-considering-buying-a-laptop-computer-this-year</id><content type="html" xml:base="https://hunden.linuxkompis.se/2022/01/24/im-considering-buying-a-laptop-computer-this-year.html"><![CDATA[<p>I have never in my life owned a laptop computer, but I’m considering buying one this year. I think it would be nice to have something portable that I can carry around with me. Something that I can simply hook up to a battletop station at home, where I have access to a proper keyboard.</p>

<p>My current desktop computer is getting old and while there’s nothing wrong with it, it’s quite a bulky dust magnet that takes up a lot of space. It would  be nice if I could replace it with something that’s portable and takes up a lot less space.</p>

<p>I’m not doing any heavy tasks these days anyway, which is especially true since I replaced Gentoo with Fedora, which is why the limited performance and cooling on a laptop isn’t going to cause any issues for me anyway. And honestly, any modern AMD mobile CPU is probably way faster than my—more than decade old—CPU now anyway.</p>

<p>And with some modern laptop computers you’re also able to connect an external monitor via USB-C and  charge the computer via the same cable. I can only imagine how clean my potential battletop setup would look like.</p>

<h2 id="my-requirements">My requirements</h2>

<p>Feel free to recommend me anything you think would be a good fit for me. My requirements are few and simple:</p>

<ul>
  <li>High quality 13-14” screen
    <ul>
      <li>High resolution (1080p or more)</li>
      <li>Matte finish</li>
    </ul>
  </li>
  <li>Reasonably lightweight</li>
  <li>Reasonable repairability</li>
  <li>Decent keyboard</li>
  <li>USB-C with DisplayPort and charging capabilities</li>
</ul>

<p>I’m fully aware of the <a href="https://frame.work">Framework laptop computer</a>, but it features a blank screen that requires fractional scaling, which doesn’t seem to be working that good in Linux based operating system. It’s also important that it’s usable around any sort of light sources, which is why I don’t want a blank screen.</p>

<p>Another thing that’s important for me, is reasonable repairability. I want to be able to replace both the battery and the disk <strong>when</strong> they go bad and need to be replaced. Any other repairability is a plus, buy not a requirement.</p>

<p>I’m also aware of the fact that a laptop keyboard can’t compare to a proper mechanical keyboard, so I don’t have high expectations here. I just want something that’s decent in terms of laptop computer keyboards.</p>]]></content><author><name></name></author><category term="Personal" /><category term="Hardware" /><category term="Computers" /><summary type="html"><![CDATA[I have never in my life owned a laptop computer, but I’m considering buying one this year. I think it would be nice to have something portable that I can carry around with me. Something that I can simply hook up to a battletop station at home, where I have access to a proper keyboard.]]></summary></entry><entry><title type="html">How to replace libinput with evdev for sane mouse control</title><link href="https://hunden.linuxkompis.se/2022/01/23/how-to-replace-libinput-with-evdev-for-sane-mouse-control.html" rel="alternate" type="text/html" title="How to replace libinput with evdev for sane mouse control" /><published>2022-01-23T00:00:00+01:00</published><updated>2024-02-16T19:42:13+01:00</updated><id>https://hunden.linuxkompis.se/2022/01/23/how-to-replace-libinput-with-evdev-for-sane-mouse-control</id><content type="html" xml:base="https://hunden.linuxkompis.se/2022/01/23/how-to-replace-libinput-with-evdev-for-sane-mouse-control.html"><![CDATA[<p>I try to be pragmatic and open to new things, but some things are just hard to embrace. Especially when they’re bad. One of these things are <a href="https://www.freedesktop.org/wiki/Software/libinput/">libinput</a>.</p>

<p>I tried giving libinput a chance, but I couldn’t come close to finding some sane mouse settings for it. I strongly dislike silly things like mouse acceleration. If I want to quickly move my mouse cursors across the screen, I’ll just quickly move my arm…</p>

<p>Thankfully, it’s possible to go back to evdev, and it’s not that difficult either. You just have to install the package for it. In Fedora the package is named <code class="language-plaintext highlighter-rouge">xorg-x11-drv-evdev</code>.</p>

<p>Then create a file named something like <code class="language-plaintext highlighter-rouge">/etc/X11/xorg.conf.d/50-mouse-acceleration.conf</code>, with the following content:</p>

<div class="language-plaintext highlighter-rouge"><div class="highlight"><pre class="highlight"><code>Section "InputClass"
        Identifier "My Mouse"
        MatchIsPointer "yes"
        Driver "evdev"
        Option "AccelerationScheme" "none"
EndSection
</code></pre></div></div>

<p>Save the file, restart X.org and enjoy your sane mouse settings. I personally set my mouse settings using <code class="language-plaintext highlighter-rouge">xset</code>. I keep my profile flat with <code class="language-plaintext highlighter-rouge">xset m 0/0</code>.</p>]]></content><author><name></name></author><category term="Tips &amp; Trix" /><category term="X.Org" /><category term="libinput" /><category term="evdev" /><summary type="html"><![CDATA[I try to be pragmatic and open to new things, but some things are just hard to embrace. Especially when they’re bad. One of these things are libinput.]]></summary></entry><entry><title type="html">My Keyboard - January 2022</title><link href="https://hunden.linuxkompis.se/2022/01/12/my-keyboard-january-2022.html" rel="alternate" type="text/html" title="My Keyboard - January 2022" /><published>2022-01-12T00:00:00+01:00</published><updated>2024-02-16T19:42:13+01:00</updated><id>https://hunden.linuxkompis.se/2022/01/12/my-keyboard-january-2022</id><content type="html" xml:base="https://hunden.linuxkompis.se/2022/01/12/my-keyboard-january-2022.html"><![CDATA[<p>It’s been exactly four years since I built <a href="https://hund.tty1.se/2018/01/19/my-keyboard-the-black_diamond.html">my last keyboard</a>. It has been a good keyboard that has served me well over the years, but it was time for a long awaited upgrade. I’ve been waiting for any keyboard switch manufacturer to release a light, linear and smooth switch, preferably at an affordable price. And that’s exactly what Gateron recently have done. Finally!</p>

<div class="grid-container">

<!-- IMAGE #1 -->
<div class="grid-item">
    <a href="/img/my_keyboard-2022-01-06-1.jpg">
        <img src="/img/t/my_keyboard-2022-01-06-1.jpg" alt="A picture of my black aluminium keyboard with blank grey keycaps." />
    </a>
</div>

<!-- IMAGE #2 -->
<div class="grid-item">
    <a href="/img/my_keyboard-2022-01-06-2.jpg">
        <img src="/img/t/my_keyboard-2022-01-06-2.jpg" alt="A second picture of my keyboard in another angle." />
    </a>
</div>

</div>
<!-- grid-container-->

<p>It’s—relatively speaking—an economical build. I haven’t counted the total sum for it, but I think it ended up slightly above 200 EURO. Which I consider to be a excellent price for a high quality custom-built keyboard that both sound good and feels buttery smooth to type on.</p>

<h2 id="specifications">Specifications</h2>

<table>
  <tbody>
    <tr>
      <td>Keyboard size:</td>
      <td>60%</td>
    </tr>
    <tr>
      <td>Case:</td>
      <td>NPKC low-profile aluminium case (Black)</td>
    </tr>
    <tr>
      <td>Circuit board:</td>
      <td>Aves 60 (Hotswap) (Prototype)</td>
    </tr>
    <tr>
      <td>Switches:</td>
      <td>Gateron G Pro White Linear Silver (38 gram springs)</td>
    </tr>
    <tr>
      <td>Plate:</td>
      <td>Universal aluminium plate (Black)</td>
    </tr>
    <tr>
      <td>Stabilizers:</td>
      <td>DUROCK screw-in stabilizers (Clear)</td>
    </tr>
    <tr>
      <td>Keycaps:</td>
      <td>Blank keycaps from NPKC (Cherry-profile)</td>
    </tr>
  </tbody>
</table>

<h2 id="the-circuit-board">The circuit board</h2>

<p>The PCB is called Aves 60. It’s a hotswap PCB with an ISO-layout and a split right Shift-key. Hotswap means that it’s basically ‘plug and play’. There’s no soldering required as it is with a ‘regular’ PCB. While soldering the switches is okay, de-soldering them without proper (read: expensive) equipment it’s time-consuming and  everything but pleasant work. That’s why I’m rather excited about my first hotswap PCB.</p>

<p>The Aves 60 is currently just a prototype to make sure that it was designed correctly and that everything works as expected, which it does. This means that we’ll move on to production soon and it should be available in the stores in a few months from now, if everything goes according to plans.</p>

<h3 id="support-for-via-and-vial">Support for VIA and VIAL</h3>

<p>The Aves 60 and the Aves 65 both support QMK, VIA and VIAL. Which is also great news for me! I have until now, used a PCB called S60-X from Sentraq. It’s an old model that’s only supported by QMK. And unfortunately, the physical ISO-layout that I use, isn’t supported by the graphical configuration tool for QMK. This means I’ve been editing the source code, compile the source code and then manually flashing it, whenever I’ve made any changes to my keyboard layout.</p>

<p>This is all in the past now! With VIAL—which is an open source version of VIA—I can program my keyboard in real-time using a graphical application. This means that I can point and click using my mouse and any changes that I make are instant.</p>

<div class="grid-container">
    <div class="grid-item single">
        <a href="/img/vial.png">
            <img src="/img/t/vial.png" alt="A screenshot of VIAL. A tool used to program my new keyboard." />
        </a>
        <figcaption>This is VIAL, the tool I used to configure my new keyboard in real-time.</figcaption>
    </div>
</div>

<p>I haven’t done that many changes since I last wrote about <a href="/2019/06/23/this-is-my-custom-keyboard-layout.html">my custom keyboard layout</a> a couple of years ago, but if you haven’t read that post, I highly suggest you doing it, especially if you’re new to compact and custom keyboards.</p>

<h2 id="the-switches">The switches</h2>

<p>I went with a new switch from Gateron named “G Pro White Linear Silver”. It’s a linear switch that actuates at 37 gf (grams of force) and bottoms out at 45 gf. This makes them into a—really—light switch. They’re probably way too light for most people.</p>

<div class="grid-container">

<!-- IMAGE #1 -->
<div class="grid-item">
    <a href="/img/my_keyboard-2022-01-06-3.jpg">
        <img src="/img/t/my_keyboard-2022-01-06-3.jpg" alt="My keyboard build in progress, showing the keyboard without the keycaps." />
    </a>
    <figcaption>My keyboard build in progress.</figcaption>
</div>

</div>
<!-- grid-container-->

<p>This switch is factory lubricated, which makes them buttery smooth with a more muted sound. If you haven’t listened to a lubricated high quality keyboard before, I can highly suggest that you <a href="https://www.youtube.com/watch?v=aeqnEJpPZVY">do it right away</a>.</p>

<p>The price for 70 switches was about 20 EUR (excluding VAT). This is a good price, especially considering the fact that I’ve spent a lot more on some hyped brands—that even after modifying them—would still not perform as good as these.</p>

<h2 id="the-case">The case</h2>

<p>My previous case was a bulky high-profile case with a five degree typing angle. My new case is a simple and affordable low-profile case with a zero degree typing angle.</p>

<p>There’s not much to say about it. It’s a black, simple and it gets the work done. It sounds a lot better after some sound dampening material in the bottom.</p>]]></content><author><name></name></author><category term="My Keyboards" /><category term="Hund" /><category term="Keyboards" /><category term="QMK" /><category term="VIAL" /><summary type="html"><![CDATA[It’s been exactly four years since I built my last keyboard. It has been a good keyboard that has served me well over the years, but it was time for a long awaited upgrade. I’ve been waiting for any keyboard switch manufacturer to release a light, linear and smooth switch, preferably at an affordable price. And that’s exactly what Gateron recently have done. Finally!]]></summary></entry><entry><title type="html">I’m back with Gentoo</title><link href="https://hunden.linuxkompis.se/2022/01/02/im-back-with-gentoo.html" rel="alternate" type="text/html" title="I’m back with Gentoo" /><published>2022-01-02T00:00:00+01:00</published><updated>2024-02-16T19:42:13+01:00</updated><id>https://hunden.linuxkompis.se/2022/01/02/im-back-with-gentoo</id><content type="html" xml:base="https://hunden.linuxkompis.se/2022/01/02/im-back-with-gentoo.html"><![CDATA[<p>I’m a Gentoo user who recently decided to try an alternative Linux (and binary based) operating system, something that would require no maintaining what so ever. I ended up choosing the most boring operating system that I could think of, which is Debian. <a href="https://hund.tty1.se/2021/11/07/im-now-running-debian.html">And while it started out good</a>, Debian would only last about two months on my computer.</p>

<p>The first annoyance I had with Debian was with Pulseaudio. When I changed the volume—using shortcuts on my keyboard in incremental steps of 5%—the sound would glitch for a second or two for each step. It wasn’t a deal-breaker, but it was somewhat annoying. My second issue was far more annoying though; every time I woke up my computer, the Internet connection would be completely gone. The only way I was able to get it back, was to either reboot my router or my computer.</p>

<p>I also had some minor annoyance, like how the boot process would completely hang without any message about why when it tried to mount a missing storage disk at boot. It took me a while before I figured out that it would continue to boot into some systemd rescue mode if I just waited for a few minutes. After that I was able to debug the issue and finally add the <code class="language-plaintext highlighter-rouge">noauto</code> argument to the disk in my filesystem table. While minor annoyances like this, aren’t any kind of deal-breaker for me, it can be a bit frustrating to deal with, when they stack up on top of each other.</p>

<p>I eventually decided to try upgrading to Debian testing, to see if that would solve any of the issues for me. It didn’t. In fact, it made everything worse. My graphical stack was now completely kaput. I don’t know what happened and I couldn’t figure out how to solve it either. On top of that, I happened to stumble upon the article “<a href="https://www.phoronix.com/scan.php?page=news_item&amp;px=Web-Browser-Packages-Debian">the sad state of web browser support currently within Debian</a>”. I then decided that Debian wasn’t worth it on the desktop for me, and I simply gave up. I wiped everything and installed Arch Linux. It wasn’t one of my top choices, but it was something that I was familiar with.</p>

<p>I actually used to run Arch Linux before switching to Gentoo. It used to be a simple (to use) binary operating system that I never really had any major issues with. I ended up leaving it mainly for three reasons; 1) I was bored and I wanted to try out something new. Gentoo seemed like the natural step for me. 2) The project and the community was (is?) toxic and hostile, especially to new users. 3) I had some annoyances with systemd. Before they switched to systemd, everything worked fine, but when they later switched to systemd, well.. It was ugly. Thankfully, it did mature and become more stable over time, just not as stable as it used to be. In the end it would work okay, but there was always some issues, like how the boot and shutdown process would always freeze as a result of how they just randomly start and stop processes. I wasn’t a fan of them changing things that didn’t need chance either. With systemd, they removed the <code class="language-plaintext highlighter-rouge">ifconfig</code> command and replaced it with another tool that requires multiple commands to show you the same information. The <code class="language-plaintext highlighter-rouge">ifconfig</code> tool has been around for 38 years and is commonly used in UNIX-, BSD- and Linux-based operating systems. Why break and replace things that works?</p>

<p>In Arch Linux, I had the same issues with the sound, as well as some other issues. One of them was some issue with the USB-memory sticks that would not appearing unless I rebooted the computer. Other than that, things seemed to work fine. I only used it for two weeks though. Their small software repository and the fact that I missed Gentoo, was the main reason that I decided to go back to Gentoo again.</p>

<p>I decided to start fresh with a new installation, even though I had a backup of my previous Gentoo installation. It just felt fun and fresh starting over with a brand new install. I just copied some of my previous configuration files, which resulted in a base installation in less than an hour anyway.</p>]]></content><author><name></name></author><category term="Personal" /><category term="Gentoo" /><category term="Debian" /><category term="Arch Linux" /><summary type="html"><![CDATA[I’m a Gentoo user who recently decided to try an alternative Linux (and binary based) operating system, something that would require no maintaining what so ever. I ended up choosing the most boring operating system that I could think of, which is Debian. And while it started out good, Debian would only last about two months on my computer.]]></summary></entry><entry><title type="html">My phone - November 2021</title><link href="https://hunden.linuxkompis.se/2021/11/27/my-phone-november-2021.html" rel="alternate" type="text/html" title="My phone - November 2021" /><published>2021-11-27T00:00:00+01:00</published><updated>2024-02-16T19:42:13+01:00</updated><id>https://hunden.linuxkompis.se/2021/11/27/my-phone-november-2021</id><content type="html" xml:base="https://hunden.linuxkompis.se/2021/11/27/my-phone-november-2021.html"><![CDATA[<p>I just made a ‘<a href="/2021/11/21/my-desktop-november-2021.html">my desktop</a>’ post, why not make one for my phone as well.</p>

<p>My current phone is the Google Pixel 3a from 2019. It’s running the <a href="https://lineageos.org/">LineageOS</a> operating system without the <a href="https://opengapps.org/">Open GApps</a> stack (GApps is short for “Google Apps”). This means there’s no proprietary software or tracking from Google on the phone by default.</p>

<div class="grid-container">
    <div class="grid-item single">
        <a href="/img/my_phone-november-2021.png">
            <img src="/img/t/my_phone-november-2021.png" alt="" />
        </a>
        <figcaption>I have no idea why I have this weird camera icon.</figcaption>
    </div>
</div>

<p>My old trusty phone is still performing well, both in terms of UX experience and battery life. With that said, I’m not a heavy user and I don’t have any bloated applications like Facebook or something similar. I can easily use it for a day without having to worry about it dying on me, which is important.</p>

<h2 id="no-sound-or-vibration">No sound or vibration</h2>

<p>It’s several been years since I turned off both the sound and the vibration. I can’t ever imagine enabling them again either. I find it rather stressful with a device that pokes at me for my attention when I’m doing something else, even if that thing is on the phone.</p>

<p>Well. There’s actually two exceptions for the no sound rule. 1) When I’m expecting an important call, I do enable the sound temporarily. This only happens about once per year. 2) There’s sound permanently enabled for one person; my partner. She only calls me when there’s something important.</p>

<h2 id="minimal-notifications">Minimal notifications</h2>

<p>I have disabled notifications for email and most other things. Not that I really got that many notifications before to begin with.</p>

<p>The only recurring notifications are from Conversations (my XMPP-/Snikket-client), the calendar and Tasks (my to-do manager).</p>

<h2 id="social-media">Social media</h2>

<p>I decided to uninstall Tusky some time ago. I used to spend way too much time there. Honestly speaking, I was probably a bit addicted to it. It’s partly why I took a <a href="https://hund.tty1.se/2020/09/21/im-taking-a-break-from-mastodon.html">30 day break from Mastodon</a> last year. It was a healthy break that lead to me using it a lot less after that.</p>

<p>I have since my break made some additional changes as well. I stopped following most people (It’s nothing personal towards anyone). My brain needed a break from all flood of information my timeline gave me.</p>

<p>I visit Mastodon about every two days now. Each visit lasts about five minutes. I still access it almost exclusively via my phone, but I now use the web based client <a href="https://pinafore.social">Pinafore</a> instead. It’s the same client I’ve been using on my computer for a long time now.</p>

<p>Time saved from not spending time on social media is now spent on being more productive in life. And I really enjoy it.</p>

<h2 id="out-of-sight">Out of sight</h2>

<p>Something that has helped me a lot with not being as distracted by my phone anymore, is to keep it out of sight from myself.</p>

<p>When I get home, I simply put it on the drawer, where it’s out of sight from me for the rest of the day. I used to either keep it in my pocket (even at home) or somewhere near me. This was always distracting as my brain kept poking at me, begging me to keep checking it. My brain didn’t care that I was like 10 seconds ago I checked it the last time.</p>

<p>I have gone from maybe 4-5 hours of screen time per day to about 1-2 hours the past year. With that said, I do use my phone for my own company as well. My ideal screen time would be less than 1 hour per day, but that’s probably not going to happen as long as I have my company.</p>

<h2 id="my-applications">My applications</h2>

<p>I try to keep the applications to a minimum. I consider my phone to be a time saving tool that can make my life easier and more efficient. I always use my computer whenever it’s possible, but I like the fact that I can check my email when I’m commuting to work.</p>

<p>I use <a href="https://f-droid.org/en/packages/eu.bubu1.fdroidclassic/">F-Droid Classic</a> as my main software store. And <a href="https://f-droid.org/en/packages/com.aurora.store/">Aurora Store</a> to access some of my applications that’s only available on Google Play Store.</p>

<h3 id="my-applications-from-f-droid">My applications from F-Droid</h3>

<table>
  <tbody>
    <tr>
      <td><a href="https://f-droid.org/en/packages/com.beemdevelopment.aegis">Aegis Authenticator</a></td>
      <td>Two-factor authentication.</td>
    </tr>
    <tr>
      <td><a href="https://f-droid.org/en/packages/de.danoeh.antennapod">AntennaPod</a></td>
      <td>Audiocast-client.</td>
    </tr>
    <tr>
      <td><a href="https://f-droid.org/en/packages/com.github.muellerma.coffee">Coffee</a></td>
      <td>Keeps the display awake.</td>
    </tr>
    <tr>
      <td><a href="https://f-droid.org/en/packages/eu.siacs.conversations">Conversations</a></td>
      <td>XMPP-client.</td>
    </tr>
    <tr>
      <td><a href="https://f-droid.org/en/packages/at.bitfire.davdroid">DAVx⁵</a></td>
      <td>CalDAV/CardDAV synchronization.</td>
    </tr>
    <tr>
      <td><a href="https://f-droid.org/en/packages/org.billthefarmer.diary">Diary</a></td>
      <td>Plaintext diary/journal.</td>
    </tr>
    <tr>
      <td><a href="https://f-droid.org/en/packages/org.mozilla.fennec_fdroid">Fennec F-Droid</a></td>
      <td>Fennec F-Droid is based on the latest Firefox release (codenamed Fenix).</td>
    </tr>
    <tr>
      <td><a href="https://f-droid.org/en/packages/at.bitfire.icsdroid">ICSx⁵</a></td>
      <td>Subscribe to Webcal calendars.</td>
    </tr>
    <tr>
      <td><a href="https://f-droid.org/en/packages/com.fsck.k9">K-9 Mail</a></td>
      <td>Email-client.</td>
    </tr>
    <tr>
      <td><a href="https://f-droid.org/en/packages/com.kunzisoft.keepass.libre">KeePassDX</a></td>
      <td>Password manager.</td>
    </tr>
    <tr>
      <td><a href="https://f-droid.org/en/packages/ch.deletescape.lawnchair.plah">Lawnchair</a></td>
      <td>Home launcher.</td>
    </tr>
    <tr>
      <td><a href="https://f-droid.org/en/packages/net.gsantner.markor">Markor</a></td>
      <td>Text editor with support for notes and todo-lists. Markdown and todo.txt support.</td>
    </tr>
    <tr>
      <td><a href="https://f-droid.org/en/packages/net.mullvad.mullvadvpn/">Mullvad VPN</a></td>
      <td>VPN-client for Mullvad.</td>
    </tr>
    <tr>
      <td><a href="https://f-droid.org/en/packages/org.schabi.newpipe">NewPipe</a></td>
      <td>YouTube-client.</td>
    </tr>
    <tr>
      <td><a href="https://f-droid.org/en/packages/app.organicmaps/">Organic Maps</a></td>
      <td>Open-source, community-driven maps for travelers, tourists, cyclers &amp; hikers. Uses OpenStreetMap.</td>
    </tr>
    <tr>
      <td><a href="https://f-droid.org/en/packages/com.stoutner.privacybrowser.standard">Privacy Browser</a></td>
      <td>A web browser that respects your privacy.</td>
    </tr>
    <tr>
      <td><a href="https://f-droid.org/en/packages/mobi.omegacentauri.SendReduced/">Send Reduced</a></td>
      <td>Reduces images in size and removes EXIF-data before sharing them.</td>
    </tr>
    <tr>
      <td><a href="https://f-droid.org/en/packages/com.nutomic.syncthingandroid">Syncthing</a></td>
      <td>Decentralized local file synchronization.</td>
    </tr>
    <tr>
      <td><a href="https://f-droid.org/en/packages/org.tasks">Tasks.org</a></td>
      <td>Todo-client.</td>
    </tr>
  </tbody>
</table>

<h3 id="my-applications-from-google-play-store">My applications from Google Play Store</h3>

<table>
  <tbody>
    <tr>
      <td><a href="https://play.google.com/store/apps/details?id=com.purplecover.anylist">AnyList</a></td>
      <td>Shopping list.</td>
    </tr>
    <tr>
      <td><a href="https://play.google.com/store/apps/details?id=com.bankid.bus">BankID</a></td>
      <td>An electronic personal identification system used by various service providers.</td>
    </tr>
    <tr>
      <td><a href="https://play.google.com/store/apps/details?id=com.bookbeat.android">BookBeat</a></td>
      <td>Audio and e-book streaming service.</td>
    </tr>
    <tr>
      <td><a href="https://play.google.com/store/apps/details?id=com.discord">Discord</a></td>
      <td>Client for Discord.</td>
    </tr>
    <tr>
      <td><a href="https://play.google.com/store/apps/details?id=org.mozilla.focus">Firefox Focus</a></td>
      <td>A web browser that blocks tracking and deletes all history when done.</td>
    </tr>
    <tr>
      <td><a href="">Google Camera</a></td>
      <td>Googles own camera application.</td>
    </tr>
    <tr>
      <td><a href="">Google Keyboard</a></td>
      <td>Googles own keyboard.</td>
    </tr>
    <tr>
      <td><a href="https://play.google.com/store/apps/details?id=com.google.android.apps.maps">Google Maps</a></td>
      <td>Maps.</td>
    </tr>
    <tr>
      <td><a href="https://play.google.com/store/apps/details?id=com.Splitwise.SplitwiseMobile">Splitwise</a></td>
      <td>Share expenses between friends and family.</td>
    </tr>
    <tr>
      <td><a href="https://play.google.com/store/apps/details?id=se.bankgirot.swish">Swish payments</a></td>
      <td>Payment service for sending money.</td>
    </tr>
    <tr>
      <td><a href="https://play.google.com/store/apps/details?id=org.wordpress.android">WordPress</a></td>
      <td>A WordPress client that lets you manage your WordPress website.</td>
    </tr>
    <tr>
      <td><a href="https://play.google.com/store/apps/details?id=com.woocommerce.android">WooCommerce</a></td>
      <td>A WooCommerce client that lets you manage your online WooCommerce store.</td>
    </tr>
  </tbody>
</table>

<h3 id="notes">Notes</h3>

<h4 id="fennec-f-droid">Fennec F-Droid</h4>

<p>It has proprietary bits and telemetry removed, but still connects to various Mozilla and Google services that can track users. It’s not ideal, but I only use it for websites that I trust and when I want to save my login credentials, which is something that Privacy Browser currently doesn’t support.</p>

<h4 id="syncthing">Syncthing</h4>

<p>I use this application to mirror the storage on my phone to my computer. It’s nice having a fresh copy of all my data <del>if</del> when something happens. I also use it to sync my password database and my notes that I manage using Markor.</p>

<h4 id="anylist">AnyList</h4>

<p>I use this with my partner to share various shopping lists. It’s not open source, but it works good and it’s a wonderful application for grocery shopping when you’re sharing the list in real-time with someone else. I would like to replace it with something open source, but that’s probably never going to happen.</p>

<h4 id="firefox-focus">Firefox Focus</h4>

<p>This is my backup web browser when some websites do not work with Privacy Browser. It’s not Privacy Browsers fault, it’s just sometimes too secure and some websites doesn’t like that.</p>

<h4 id="google-camera">Google Camera</h4>

<p>I would love to use the default AOSP camera, but it’s just horrible. The photos look like they’re taken with a 10 year older phone with the AOSP camera compared to using Google Camera.</p>

<p>Thankfully. LineageOS lets you block specific applications from accessing the network, which is something I’ve done for the Google Camera and the Google Keyboard application. It’s not an ideal solution, but it’s the one that sucks the least.</p>

<p>To make the camera work, I had to install something called <a href="https://github.com/lukaspieper/Gcam-Services-Provider/releases">Gcam Services Provider</a>. It’s an application that “simulates” the Google Play Services that the Google Camera application (Gcam) requires, allowing the camera application to be used on devices without Google Play Services.</p>

<h4 id="google-maps">Google Maps</h4>

<p>While I prefer to use Organic Maps, there’s unfortunately times when it doesn’t have enough information, and I’m therefore ‘forced’ to use Google Maps to find some specific places.</p>

<h4 id="google-keyboard">Google Keyboard</h4>

<p>I would love to use the default AOSP keyboard, but it’s just horrible.</p>

<h4 id="splitwise">Splitwise</h4>

<p>This is another application that I exclusively use with my partner. It lets you easily keep track of various expenses with others.</p>

<h4 id="swish">Swish</h4>

<p>This is a Swedish payment services used by everyone. Cash money is not common here anymore, and Swish is more or less a requirement these days.</p>

<h4 id="bookbeat">BookBeat</h4>

<p>I tried to stay old school and DRM-free by buying physical audiobooks in CD-format, but it was hard finding good books secondhand, and buying them new would have ruined my wallet. I listen to audiobooks at work, and I average about 20-25 hours per week.</p>

<p>I really like this service though. Their library seems to be good, the pricing is good and their application isn’t full of malicious trackers.</p>

<h4 id="discord-wordpress-and-woocommerce">Discord, WordPress and WooCommerce</h4>

<p>I’m more of less forced to use Discord due to my company. I’m not forced to use WordPress or WooCommerce, but they’re two good applications that makes my life a bit easier managing my company when I’m not home.</p>]]></content><author><name></name></author><category term="My phone" /><category term="Hund" /><summary type="html"><![CDATA[I just made a ‘my desktop’ post, why not make one for my phone as well.]]></summary></entry><entry><title type="html">My desktop - November 2021</title><link href="https://hunden.linuxkompis.se/2021/11/21/my-desktop-november-2021.html" rel="alternate" type="text/html" title="My desktop - November 2021" /><published>2021-11-21T00:00:00+01:00</published><updated>2024-02-16T19:42:13+01:00</updated><id>https://hunden.linuxkompis.se/2021/11/21/my-desktop-november-2021</id><content type="html" xml:base="https://hunden.linuxkompis.se/2021/11/21/my-desktop-november-2021.html"><![CDATA[<p>I decided it was time for a new “my desktop” post. It’s actually been one year since my latest post, simply because my desktop doesn’t see that many changes these days. Which I assume is a good thing? Anyway. I think there’s been just enough changes the past year to make it worth making a new post now.</p>

<div class="grid-container">
    <div class="grid-item single">
        <a href="/img/my_desktop-november-2021.png">
            <img src="/img/t/my_desktop-november-2021.png" alt="A screenshot of my Debian desktop" />
        </a>
        <figcaption>This is my current desktop. It's pretty minimal, if I may say so myself.</figcaption>
    </div>
</div>

<p>As the wallpaper on my desktop shows, I have now moved to Debian. <a href="/2021/11/07/im-now-running-debian.html">I wrote about it here</a>. It’s been about a month since my move, and I really like it so far.</p>

<p>To summarize my decision to jump from Gentoo to Debian (which are two vastly different Linux based operating systems): I don’t have the time or energy to tinker or to care about my setup these days. I just want something that’s rock solid and something that works with the least amount of work as possible. Debian is perfect for that! You install it in a few minutes and you then don’t have to care about anything for the next years.</p>

<h2 id="changes-since-the-last-post">Changes since the last post</h2>

<p>My last post can be found here: <a href="/2020/11/13/my-desktop-november-2020.html">My Desktop - November 2020</a>.</p>

<h3 id="no-more-panel">No more panel</h3>

<p>I decided to hide my Polybar panel as I find it distracting. I really don’t want to know how many unread emails I have, or if someone’s trying to get my attention on XMPP when I’m focusing on something else. I’ll just check my unread messages when I have the time for it.</p>

<h3 id="new-less-distracting-wallpaper">New less distracting wallpaper</h3>

<p>I also decided to go with a simple wallpaper, that’s exactly 0% distracting. I thought about going with no wallpaper at all, but as a visual artist, I like graphics and art. I therefore decided to go with a simple Debian wallpaper that’s only visible when I don’t have any client running at all.</p>

<div class="grid-container">
    <div class="grid-item single">
        <a href="/img/newsboat-floating.png">
            <img src="/img/t/newsboat-floating.png" alt="" />
        </a>
        <figcaption>My view when using Newsboat</figcaption>
    </div>
</div>

<p>I sometimes float my clients to make the content in them easier to read. This is often the case for my web feed client Newsboat. As you can see in the screenshot, the wallpaper isn’t in any way distracting.</p>

<h2 id="my-setup">My setup</h2>

<p>Here’s some information about my setup and some of the more common software that I use.</p>

<table>
  <tbody>
    <tr>
      <td>Operating system:</td>
      <td><del>Gentoo Linux</del> <a href="/2021/11/07/im-now-running-debian.html">Debian GNU/Linux</a></td>
    </tr>
    <tr>
      <td>Window manager:</td>
      <td>i3</td>
    </tr>
    <tr>
      <td>System panel:</td>
      <td><del>Polybar</del></td>
    </tr>
    <tr>
      <td>Shell:</td>
      <td>zsh</td>
    </tr>
    <tr>
      <td>Terminal emulator:</td>
      <td>URxvt</td>
    </tr>
    <tr>
      <td>Terminal typeface:</td>
      <td>Terminus</td>
    </tr>
    <tr>
      <td>Terminal colour scheme</td>
      <td>Solarized</td>
    </tr>
    <tr>
      <td>Application launcher:</td>
      <td>Rofi</td>
    </tr>
    <tr>
      <td>Notification daemon:</td>
      <td>Dunst</td>
    </tr>
    <tr>
      <td>Text editor:</td>
      <td>Neovim</td>
    </tr>
    <tr>
      <td>File manager:</td>
      <td><a href="https://hunden.linuxkompis.se/2020/08/20/ranger-my-favourite-file-manager.html">Ranger</a></td>
    </tr>
    <tr>
      <td>Web browser:</td>
      <td>qutebrowser</td>
    </tr>
    <tr>
      <td>E-mail client:</td>
      <td><del>NeoMutt</del> Mutt + mbsync</td>
    </tr>
    <tr>
      <td>Web feed reader:</td>
      <td><a href="https://hunden.linuxkompis.se/2020/07/29/an-introduction-to-the-web-feed-client-newsboat.html">Newsboat</a></td>
    </tr>
    <tr>
      <td>Password manager:</td>
      <td>KeePassC</td>
    </tr>
    <tr>
      <td>Bookmark manager:</td>
      <td>Buku</td>
    </tr>
    <tr>
      <td>Media player:</td>
      <td>mpv</td>
    </tr>
    <tr>
      <td>Image viewer:</td>
      <td><a href="https://hunden.linuxkompis.se/2018/04/12/sxiv-a-simple-vi-like-image-viewer.html">sxiv</a></td>
    </tr>
    <tr>
      <td>Instant messaging client:</td>
      <td><del>WeeChat + bitlbee</del> Poezio</td>
    </tr>
    <tr>
      <td>Document reader:</td>
      <td><a href="https://hunden.linuxkompis.se/2019/02/14/zathura-a-lightweight-vi-like-document-reader.html">Zathura</a></td>
    </tr>
    <tr>
      <td>Calendar:</td>
      <td><a href="https://hunden.linuxkompis.se/2020/08/12/how-to-sync-and-manage-your-caldav-and-carddav-via-the-terminal.html">Khal</a></td>
    </tr>
    <tr>
      <td>Contact book:</td>
      <td><a href="https://hunden.linuxkompis.se/2020/08/12/how-to-sync-and-manage-your-caldav-and-carddav-via-the-terminal.html">Khard</a></td>
    </tr>
    <tr>
      <td>CalDAV/CardDAV-sync:</td>
      <td><a href="https://hunden.linuxkompis.se/2020/08/12/how-to-sync-and-manage-your-caldav-and-carddav-via-the-terminal.html">vdirsync</a></td>
    </tr>
  </tbody>
</table>]]></content><author><name></name></author><category term="My Desktop" /><summary type="html"><![CDATA[I decided it was time for a new “my desktop” post. It’s actually been one year since my latest post, simply because my desktop doesn’t see that many changes these days. Which I assume is a good thing? Anyway. I think there’s been just enough changes the past year to make it worth making a new post now.]]></summary></entry><entry><title type="html">How to install pipe-viewer in Debian</title><link href="https://hunden.linuxkompis.se/2021/11/14/how-to-install-pipe-viewer-in-debian.html" rel="alternate" type="text/html" title="How to install pipe-viewer in Debian" /><published>2021-11-14T00:00:00+01:00</published><updated>2024-02-16T19:42:13+01:00</updated><id>https://hunden.linuxkompis.se/2021/11/14/how-to-install-pipe-viewer-in-debian</id><content type="html" xml:base="https://hunden.linuxkompis.se/2021/11/14/how-to-install-pipe-viewer-in-debian.html"><![CDATA[<p><a href="https://github.com/trizen/pipe-viewer">pipe-viewer</a> is a lightweight, but yet feature packed application for browsing and watching videos from YouTube.</p>

<div class="grid-container">
    <div class="grid-item single">
        <a href="/img/pipe-viewer.png">
            <img src="/img/t/pipe-viewer.png" alt="A screenshort of the pipe-viewer client." />
        </a>
    </div>
</div>

<p>It works by parsing the YouTube website directly, but is also able to use any Invidious instance as a fallback. This method is usually the most reliable one.</p>

<p>Unfortunately, pipe-viewer isn’t available in the Debian repositories, but it’s thankfully rather simple installing the application yourself.</p>

<h2 id="instructions">Instructions</h2>

<p>Start by installing the dependencies:</p>

<div class="language-plaintext highlighter-rouge"><div class="highlight"><pre class="highlight"><code># apt install git libwww-perl liblwp-protocol-https-perl libdata-dump-perl libjson-perl libmodule-build-perl
</code></pre></div></div>

<p>Download the source code using <code class="language-plaintext highlighter-rouge">git</code>:</p>

<div class="language-plaintext highlighter-rouge"><div class="highlight"><pre class="highlight"><code>$ git clone https://github.com/trizen/pipe-viewer
</code></pre></div></div>

<p>Go to the directory:</p>

<div class="language-plaintext highlighter-rouge"><div class="highlight"><pre class="highlight"><code>$ cd pipe-viewer
</code></pre></div></div>

<p>And to install pipe-viewer:</p>

<div class="language-plaintext highlighter-rouge"><div class="highlight"><pre class="highlight"><code>$ perl Build.PL
# ./Build install
</code></pre></div></div>

<p>You can now use <code class="language-plaintext highlighter-rouge">pipe-viewer</code>.</p>

<h2 id="basic-usage-and-some-examples">Basic usage and some examples</h2>

<p>You can either search for anything by parsing an argument in the shell like this:</p>

<div class="language-plaintext highlighter-rouge"><div class="highlight"><pre class="highlight"><code>$ pipe-viewer "&lt;KEYWORD(S)&gt;"
</code></pre></div></div>

<p>Or by starting <code class="language-plaintext highlighter-rouge">pipe-viewer</code> first, and then searching for whatever you’re looking for.</p>

<h3 id="example-flags">Example flags</h3>

<p>There’s a lot more flags than this, to check out all of them, use the flag <code class="language-plaintext highlighter-rouge">--help</code>.</p>

<table>
  <thead>
    <tr>
      <th>YouTube specific</th>
      <th> </th>
    </tr>
  </thead>
  <tbody>
    <tr>
      <td><code class="language-plaintext highlighter-rouge">-uf, --favorites=&lt;USER&gt;</code></td>
      <td>View all favourites by a specific user.</td>
    </tr>
    <tr>
      <td><code class="language-plaintext highlighter-rouge">-uv, --uploads=&lt;USER&gt;</code></td>
      <td>View all uploaded videos by a specific user.</td>
    </tr>
    <tr>
      <td><code class="language-plaintext highlighter-rouge">-a, --author=&lt;USER&gt;</code></td>
      <td>Search only videos by a specific user.</td>
    </tr>
    <tr>
      <td><code class="language-plaintext highlighter-rouge">-rv, --related=&lt;URL&gt;</code></td>
      <td>Show all related videos to a specific video.</td>
    </tr>
    <tr>
      <td><code class="language-plaintext highlighter-rouge">--comments &lt;URL&gt; </code></td>
      <td>Show video comments for a specific video.</td>
    </tr>
    <tr>
      <td><code class="language-plaintext highlighter-rouge">-sp, --search-pl &lt;KEYWORD&gt;</code></td>
      <td>Search for playlists of videos.</td>
    </tr>
  </tbody>
</table>

<table>
  <thead>
    <tr>
      <th>Filters</th>
      <th> </th>
    </tr>
  </thead>
  <tbody>
    <tr>
      <td><code class="language-plaintext highlighter-rouge">--order=view_count</code></td>
      <td>Sort by view count.</td>
    </tr>
    <tr>
      <td><code class="language-plaintext highlighter-rouge">--duration=&lt;short/long&gt;</code></td>
      <td>Sort by short or long duration.</td>
    </tr>
    <tr>
      <td><code class="language-plaintext highlighter-rouge">--resolution=&lt;VALUE&gt;</code></td>
      <td>Supported resolutions: best, 2160p, 1440p, 1080p, 720p, 480p, 360p, 240p, 144p, audio</td>
    </tr>
    <tr>
      <td><code class="language-plaintext highlighter-rouge">--hd!</code></td>
      <td>Search only for videos available in at least 720p.</td>
    </tr>
  </tbody>
</table>

<table>
  <thead>
    <tr>
      <th>Player options</th>
      <th> </th>
    </tr>
  </thead>
  <tbody>
    <tr>
      <td><code class="language-plaintext highlighter-rouge">-A</code></td>
      <td>Play all results.</td>
    </tr>
    <tr>
      <td><code class="language-plaintext highlighter-rouge">-n, --novideo</code></td>
      <td>Audio only, no video.</td>
    </tr>
  </tbody>
</table>]]></content><author><name></name></author><category term="Applications &amp; Tools" /><category term="Debian" /><category term="pipe-viewer" /><category term="YouTube" /><category term="How-to" /><summary type="html"><![CDATA[pipe-viewer is a lightweight, but yet feature packed application for browsing and watching videos from YouTube.]]></summary></entry><entry><title type="html">I’m now running Debian</title><link href="https://hunden.linuxkompis.se/2021/11/07/im-now-running-debian.html" rel="alternate" type="text/html" title="I’m now running Debian" /><published>2021-11-07T00:00:00+01:00</published><updated>2024-02-16T19:42:13+01:00</updated><id>https://hunden.linuxkompis.se/2021/11/07/im-now-running-debian</id><content type="html" xml:base="https://hunden.linuxkompis.se/2021/11/07/im-now-running-debian.html"><![CDATA[<p>I installed Debian 11 on my computer the last weekend. I have come to the conclusion that I want to try something that’s both super simple to use and maintain. Something that works more like a classic binary based operating system, and not like a meta based operating system that’s designed to be a set of tools to help the user build their own operating system.</p>

<p>The reason I want something that’s as close to zero maintenance as possible, is due to the fact that my time will be—to say the least—limited next year. Not that I’m complaining! The next phase of my life doesn’t have room for me spending time tinkering with Gentoo as I used to.</p>

<p>More on what’s going on later in another post, but you can probably guess what’s up anyway. :)</p>

<h2 id="why-debian">Why Debian?</h2>

<p>Debian has been around for a long time. It’s actually one of the oldest Linux based operating systems. And with Debian, you know what you get; a mature, stable and reliable operating system that value libre software that respects your freedom.</p>

<p>The Debian project is moving slowly with very few to no surprises. If you want the “latest and greatest” software, you should probably look elsewhere, but if you value stability and reability, then Debian is an excellent option for you.</p>

<p>I don’t really care about the “latest and greatest” software. The application stack that I use doesn’t see many changes anyway. My window manager i3 is feature complete and doesn’t see any new features anymore. My email client Mutt is 26 years old and I highly doubt that they’ll come with any new shiny futures that I must have on a regular basis. And while I use ‘modern’ software like NeoVim, all the basic features is already there for me.</p>

<p>Debian is also supported by everyone and everything! If there’s anyone that supports a Linux based operating system, you can be confident that Debian is the one. And while I was okay making my own packages for Gentoo, it’s nice to be able to quickly install some package, as well as not having to care about the burden with maintaining them yourself.</p>

<h3 id="mullvad-vpn">Mullvad VPN</h3>

<p>One thing that I did miss quite a lot while running Gentoo was the Mullvad VPN client. With Gentoo, I had to use the Wireguard client—while it’s an okay client that works as a basic VPN client—it lacks the extra features that makes the Mullvad VPN client the best VPN client out there.</p>

<p>With the Mullvad VPN client you can get up and running with two simple commands, without ever needing any super user permissions. Other things that I like with the Mullvad VPN client is the setting that allow you to deny any traffic (both wide and/or locally) without a VPN connection. You can also easily do things like using a custom DNS server and split tunneling.</p>

<p>And in addition to the regular graphical client, they also provide a CLI based tool, which is perfect for users like me who prefer using text-based interfaces.</p>

<h3 id="systemd">systemd</h3>

<p>Contrary to what some seem to think; I don’t hate systemd and I don’t think it’s the evil end of Linux as we know it. It’s just not my cup of tea. With that said, I used to have rather strong feelings about systemd. Partly because I had a lot of issues with it in the past, but mostly because I don’t like changes and that I had turned into a majorly old grumpy person. Let’s just say that ‘life happened’ the past two years or so. I had major issues with stress and it ended up making me into a rather negative person in general.</p>

<p>That’s past me now though! I have now decided to get back to being that annoyingly positive person that I used to be. To succeed with that I have decided to make multiple changes. A few of them is to just not care about things as much as I used to, to be more pragmatic and to use social media a lot less. I think I need a healthy break from it, for now at least.</p>

<p>That’s why I have decided that I’m not only okay with systemd, I’m even okay using it myself! Well. As long as it makes my life easier, stays out of my way and just work.</p>]]></content><author><name></name></author><category term="Personal" /><category term="Debian" /><category term="Gentoo" /><category term="systemd" /><summary type="html"><![CDATA[I installed Debian 11 on my computer the last weekend. I have come to the conclusion that I want to try something that’s both super simple to use and maintain. Something that works more like a classic binary based operating system, and not like a meta based operating system that’s designed to be a set of tools to help the user build their own operating system.]]></summary></entry><entry><title type="html">How to use yt-dlp instead of yt-dl with mpv</title><link href="https://hunden.linuxkompis.se/2021/10/12/how-to-use-yt-dlp-instead-of-yt-dl-with-mpv.html" rel="alternate" type="text/html" title="How to use yt-dlp instead of yt-dl with mpv" /><published>2021-10-12T00:00:00+02:00</published><updated>2024-02-16T19:42:13+01:00</updated><id>https://hunden.linuxkompis.se/2021/10/12/how-to-use-yt-dlp-instead-of-yt-dl-with-mpv</id><content type="html" xml:base="https://hunden.linuxkompis.se/2021/10/12/how-to-use-yt-dlp-instead-of-yt-dl-with-mpv.html"><![CDATA[<p>I interact with YouTube using the text-based client <a href="https://github.com/trizen/pipe-viewer">pipe-viewer</a>. I then watch any video using my favourite media player <a href="https://mpv.io">mpv</a>. This has always worked perfectly fine thanks to mpv supporting <a href="https://github.com/ytdl-org/youtube-dl">youtube-dl</a>, which unfortunately, now seems to be an abandoned project.</p>

<p>This means that it has been semi-broken for some time now; playing any video results in constant buffering due to Google—once again—have found a way to throttle their users who use youtube-dl instead of their incredibly bloated, slow and privacy invasive website youtube.com.</p>

<p>This is how well youtube-dl is working for me right now:</p>

<div class="language-plaintext highlighter-rouge"><div class="highlight"><pre class="highlight"><code>(Buffering) AV: 00:00:16 / 00:16:29 (2%) A-V:  0.000 Cache: 0.8s/96KB
</code></pre></div></div>

<p>Thakfully, someone have forked the project into a new project called <a href="https://github.com/yt-dlp/yt-dlp">yt-dlp</a>. This new fork works perfectly:</p>

<div class="language-plaintext highlighter-rouge"><div class="highlight"><pre class="highlight"><code>AV: 00:00:29 / 00:16:29 (3%) A-V:  0.000 Cache: 23s/3MB
</code></pre></div></div>

<h2 id="instructions">Instructions</h2>

<p>Add this line to your configuration file for mpv (<code class="language-plaintext highlighter-rouge">~/.config/mpv/mpv.conf</code>):</p>

<div class="language-plaintext highlighter-rouge"><div class="highlight"><pre class="highlight"><code>script-opts-append=ytdl_hook-ytdl_path=yt-dlp
</code></pre></div></div>

<p>It should now use yt-dlp instead of youtube-dl.</p>]]></content><author><name></name></author><category term="Applications &amp; Tools" /><category term="mpv" /><category term="youtube-dl" /><category term="yt-dlp" /><category term="YouTube" /><summary type="html"><![CDATA[I interact with YouTube using the text-based client pipe-viewer. I then watch any video using my favourite media player mpv. This has always worked perfectly fine thanks to mpv supporting youtube-dl, which unfortunately, now seems to be an abandoned project.]]></summary></entry><entry><title type="html">How to launch Steam games using Rofi</title><link href="https://hunden.linuxkompis.se/2021/09/30/how-to-launch-steam-games-using-rofi.html" rel="alternate" type="text/html" title="How to launch Steam games using Rofi" /><published>2021-09-30T00:00:00+02:00</published><updated>2024-02-16T19:42:13+01:00</updated><id>https://hunden.linuxkompis.se/2021/09/30/how-to-launch-steam-games-using-rofi</id><content type="html" xml:base="https://hunden.linuxkompis.se/2021/09/30/how-to-launch-steam-games-using-rofi.html"><![CDATA[<p>I recently figured out how to launch my Steam games from the shell today. This means that I can now start my games via my application launcher Rofi.</p>

<h2 id="instructions">Instructions</h2>

<p>Start by right-clicking on a game in your Steam library. It will then create a <code class="language-plaintext highlighter-rouge">.desktop</code>-file with that game in the folder <code class="language-plaintext highlighter-rouge">~/.var/app/com.valvesoftware.Steam/Desktop/</code>.</p>

<p>In that file, there’s a line that looks like this:</p>

<div class="language-plaintext highlighter-rouge"><div class="highlight"><pre class="highlight"><code>Exec=steam steam://rungameid/&lt;ID&gt;
</code></pre></div></div>

<p>Using that ID, you can then launch the game using this command:</p>

<div class="language-plaintext highlighter-rouge"><div class="highlight"><pre class="highlight"><code>com.valvesoftware.Steam steam://rungameid/&lt;ID&gt;
</code></pre></div></div>

<p>If you use Flatpak:</p>

<div class="language-plaintext highlighter-rouge"><div class="highlight"><pre class="highlight"><code>flatpak run com.valvesoftware.Steam steam://rungameid/&lt;ID&gt;
</code></pre></div></div>

<p>With all that prepared. You can now use this Rofi plugin that I created:</p>

<div class="language-sh highlighter-rouge"><div class="highlight"><pre class="highlight"><code><span class="c">#!/bin/sh</span>

<span class="nv">DIR</span><span class="o">=</span><span class="s2">"/home/</span><span class="si">$(</span> <span class="nb">whoami</span> <span class="si">)</span><span class="s2">/.var/app/com.valvesoftware.Steam/Desktop"</span>

handle_selection<span class="o">()</span> <span class="o">{</span>
  <span class="k">if</span> <span class="o">[</span> <span class="s2">"</span><span class="nv">$1</span><span class="s2">"</span> <span class="o">]</span><span class="p">;</span> <span class="k">then
    </span><span class="nv">ID</span><span class="o">=</span><span class="s2">"</span><span class="si">$(</span><span class="nb">grep</span> <span class="nt">-oP</span> <span class="s1">'(?&lt;=rungameid/).*'</span> <span class="s2">"</span><span class="nv">$DIR</span><span class="s2">"</span>/<span class="s2">"</span><span class="nv">$1</span><span class="s2">"</span>.desktop<span class="si">)</span><span class="s2">"</span>
    flatpak run com.valvesoftware.Steam steam://rungameid/<span class="s2">"</span><span class="nv">$ID</span><span class="s2">"</span> 
    notify-send <span class="s2">"Steam"</span> <span class="s2">"Launching the game </span><span class="se">\"</span><span class="nv">$1</span><span class="se">\"</span><span class="s2">"</span>
  <span class="k">fi</span>
<span class="o">}</span>

handle_selection <span class="s2">"</span><span class="si">$(</span> <span class="nb">cd</span> <span class="s2">"</span><span class="nv">$DIR</span><span class="s2">"</span> <span class="o">||</span> <span class="nb">exit</span><span class="p">;</span> <span class="nb">ls</span> <span class="nt">-t</span>  | <span class="nb">sed</span> <span class="s1">'s/\.desktop//'</span> | rofi <span class="nt">-dmenu</span> <span class="nt">-i</span> <span class="nt">-p</span> <span class="s1">'Launch game'</span> <span class="nt">-hlbg</span> <span class="s1">'#5FA5D7'</span> <span class="nt">-bc</span> <span class="s1">'#5FA5D7'</span> <span class="nt">-bw</span> 3<span class="si">)</span><span class="s2">"</span>
</code></pre></div></div>]]></content><author><name></name></author><category term="[&quot;Applications &amp; Tools&quot;]" /><category term="Rofi" /><category term="Steam" /><category term="Gaming" /><category term="Command-line" /><summary type="html"><![CDATA[I recently figured out how to launch my Steam games from the shell today. This means that I can now start my games via my application launcher Rofi.]]></summary></entry><entry><title type="html">Distraction free writing in Vim with Goyo</title><link href="https://hunden.linuxkompis.se/2021/09/23/distraction-free-writing-in-vim-with-goyo.html" rel="alternate" type="text/html" title="Distraction free writing in Vim with Goyo" /><published>2021-09-23T00:00:00+02:00</published><updated>2024-02-16T19:42:13+01:00</updated><id>https://hunden.linuxkompis.se/2021/09/23/distraction-free-writing-in-vim-with-goyo</id><content type="html" xml:base="https://hunden.linuxkompis.se/2021/09/23/distraction-free-writing-in-vim-with-goyo.html"><![CDATA[<p>I can’t believe that I’ve forgotten to write about one of my most used Neovim plugin ever. The plugin I’m talking about is called <a href="https://github.com/junegunn/goyo.vim">Goyo</a>.</p>

<p>It adds a distraction free mode that helps me focus on my writing by centering the content and hiding all other elements.</p>

<div class="grid-container">
    <div class="grid-item single">
        <a href="/img/goyo.png">
            <img src="/img/t/goyo.png" alt="" />
        </a>
        <figcaption>Neovim in fullscreen with Goyo activated.</figcaption>
    </div>
</div>

<h2 id="usage">Usage</h2>

<p>Toggle Goyo:</p>

<div class="language-plaintext highlighter-rouge"><div class="highlight"><pre class="highlight"><code>:Goyo
</code></pre></div></div>

<p>Turn on and resize Goyo to the dimension <code class="language-plaintext highlighter-rouge">100x50</code>:</p>

<div class="language-plaintext highlighter-rouge"><div class="highlight"><pre class="highlight"><code>:Goyo 100x50
</code></pre></div></div>

<p>Turn off Goyo:</p>

<div class="language-plaintext highlighter-rouge"><div class="highlight"><pre class="highlight"><code>:Goyo!
</code></pre></div></div>

<p>I have bound the toggle feature to the key <code class="language-plaintext highlighter-rouge">&lt;Leader&gt;g</code>:</p>

<div class="language-plaintext highlighter-rouge"><div class="highlight"><pre class="highlight"><code>map &lt;Leader&gt;g :Goyo&lt;CR&gt;
</code></pre></div></div>

<h2 id="my-configuration-changes">My configuration changes</h2>

<p>The plugin works just fine as is, but I did change the text area to 100x50 (as seen in the example image above), as I find that to be a better fit for me.</p>

<p>This is the settings that I added to my configuration file:</p>

<div class="language-plaintext highlighter-rouge"><div class="highlight"><pre class="highlight"><code>let g:goyo_width=100
let g:goyo_height=50
</code></pre></div></div>]]></content><author><name></name></author><category term="[&quot;Applications &amp; Tools&quot;]" /><category term="Vim" /><category term="Goyo" /><category term="Productivity" /><summary type="html"><![CDATA[I can’t believe that I’ve forgotten to write about one of my most used Neovim plugin ever. The plugin I’m talking about is called Goyo.]]></summary></entry><entry><title type="html">I’m back with qutebrowser</title><link href="https://hunden.linuxkompis.se/2021/09/08/im-back-with-qutebrowser.html" rel="alternate" type="text/html" title="I’m back with qutebrowser" /><published>2021-09-08T00:00:00+02:00</published><updated>2024-02-16T19:42:13+01:00</updated><id>https://hunden.linuxkompis.se/2021/09/08/im-back-with-qutebrowser</id><content type="html" xml:base="https://hunden.linuxkompis.se/2021/09/08/im-back-with-qutebrowser.html"><![CDATA[<p>Back in August, I wrote about <a href="https://hund.tty1.se/2021/07/30/ive-had-enough-of-qtwebengine.html">how I was tired of QtWebEngine</a> and that I was switching to Firefox with Vimium to emulate a similar mouse-less workflow. Well. That didn’t last long.</p>

<p>It took me about a week before I was back with qutebrowser again. The Vimium addon is a good addon (for what it is), but it’s simply not good enough for me. While I could use keybindings for a lot of things, unfortunately, some basic things didn’t work at all.</p>

<h2 id="my-issues-with-firefox">My issues with Firefox</h2>

<ul>
  <li>The addressbar in Firefox stole all the focus all the time. This forced me to move my right hand over to the mouse, and then click on any dead area on the website to be able to use the keybindings. And it gets old rather quickly when you’re forced to do this a billion times per day.</li>
  <li>There’s no way to access the bookmarks via any keybindings.</li>
  <li>There’s also no way to copy the website title with any keybinding.</li>
  <li>The graphical user interface is a bit too overwhelming. I really like the minimal user interface with qutebrowser, it only shows you the essential elements and information, in the least distracting way possible.</li>
  <li>Firefox isn’t designed to be used only with the keyboard. There’s no addon that can possibly fix that. While addons like Vimium can make it less worse, Firefox will always be a worse alternative for any serious keyboard user.</li>
</ul>

<h2 id="i-still-dislike-qtwebengine">I still dislike QtWebEngine</h2>

<p>While I still dislike QtWebEngine, the good old trusty web browser qutebrowser simply makes the interaction with the web a lot more enjoyable for me. I simply don’t need or want all the shiny bells and whistles that a ‘modern’ web browser like Firefox comes with. I find all the features and the somewhat massive graphical user interface rather distracting.</p>

<p>And even if I have some issues with the web engine, it does get the job done, and I guess that I can’t use anything else than qutebrowser after all these years with it now. I’m perhaps way too spoiled with the most polished Vi-like web browser out there.</p>]]></content><author><name></name></author><category term="[&quot;Personal&quot;]" /><category term="qutebrowser" /><category term="Firefox" /><category term="Web" /><category term="Hund" /><summary type="html"><![CDATA[Back in August, I wrote about how I was tired of QtWebEngine and that I was switching to Firefox with Vimium to emulate a similar mouse-less workflow. Well. That didn’t last long.]]></summary></entry><entry><title type="html">How to automatically hide your mouse cursor</title><link href="https://hunden.linuxkompis.se/2021/08/29/how-to-automatically-hide-your-mouse-cursor.html" rel="alternate" type="text/html" title="How to automatically hide your mouse cursor" /><published>2021-08-29T00:00:00+02:00</published><updated>2024-02-16T19:42:13+01:00</updated><id>https://hunden.linuxkompis.se/2021/08/29/how-to-automatically-hide-your-mouse-cursor</id><content type="html" xml:base="https://hunden.linuxkompis.se/2021/08/29/how-to-automatically-hide-your-mouse-cursor.html"><![CDATA[<p><a href="https://github.com/Airblader/unclutter-xfixes">unclutter-xfixes</a> is a tool to automatically hide your X mouse cursor when you don’t use it. unclutter-xfixes is a fork of the original tool unclutter from the 90s.</p>

<p>unclutter-xfixes uses the x11-xfixes extension, which means that they don’t use fake windows or pointer grabbing. This should cause fewer problems with window managers and/or applications.</p>

<p>This is one of the tools that I just install once and then forget about it ever being there. I don’t use the mouse that much and it’s rather nice being able to hide it. They recently came out with a new release for the first time in close to 3 years, which reminded me that I should probably mention it on my website.</p>

<h2 id="usage">Usage</h2>

<p>To start it you simply run <code class="language-plaintext highlighter-rouge">unclutter</code>. In <a href="https://github.com/Airblader/unclutter-xfixes/releases/tag/v1.6">a recent update</a>, they added a few new neat features:</p>

<table>
  <tbody>
    <tr>
      <td><code class="language-plaintext highlighter-rouge">--start-hidden</code></td>
      <td>Hides the cursor initially when unclutter-xfixes starts.</td>
    </tr>
    <tr>
      <td><code class="language-plaintext highlighter-rouge">--ignore-button</code></td>
      <td>Lets you specify one or more buttons which does not unhide the cursor.</td>
    </tr>
    <tr>
      <td><code class="language-plaintext highlighter-rouge">--hide-on-touch</code></td>
      <td>Hides the cursor on touch input.</td>
    </tr>
  </tbody>
</table>]]></content><author><name></name></author><category term="[&quot;Applications &amp; Tools&quot;]" /><category term="Mouse cursor" /><category term="unclutter" /><summary type="html"><![CDATA[unclutter-xfixes is a tool to automatically hide your X mouse cursor when you don’t use it. unclutter-xfixes is a fork of the original tool unclutter from the 90s.]]></summary></entry><entry><title type="html">I have now replaced Mailbox with Gandi</title><link href="https://hunden.linuxkompis.se/2021/08/05/i-have-now-replaced-mailbox-with-gandi.html" rel="alternate" type="text/html" title="I have now replaced Mailbox with Gandi" /><published>2021-08-05T00:00:00+02:00</published><updated>2024-02-16T19:42:13+01:00</updated><id>https://hunden.linuxkompis.se/2021/08/05/i-have-now-replaced-mailbox-with-gandi</id><content type="html" xml:base="https://hunden.linuxkompis.se/2021/08/05/i-have-now-replaced-mailbox-with-gandi.html"><![CDATA[<p>I have been using <a href="https://mailbox.org">Mailbox.org</a> since January 2021, and while their service succeed with the core features as a reliable privacy-friendly email service, with support for all the basic features like two-factor authentication and filters, they still leave a lot to ask for.</p>

<p>One of the alternatives to Mailbox that I’ve checked out in the past is <a href="https://gandi.net">Gandi</a>. It’s where I’ve housed my domains since 2015, and it would have been rather convenient to have my email there as well, especially since they offer two <em>free email</em> accounts with all their domains.</p>

<p>The reason I haven’t used their email service in the past is simply because they didn’t support two-factor authentication and filter rules. This is now something that they support and I decided to give them a chance right away.</p>

<p>It took me less than a day for me decide that I wanted to switch over to Gandi. That was about a week ago now, and I still feel just as happy with the switch. I have now decided that I wanted to share my thoughts about it. So. This is not meant to be a proper review of some sorts, it’s just my rambly thoughts.</p>

<h2 id="my-thoughts-about-mailbox">My thoughts about Mailbox</h2>

<p>I don’t want to get too nitpicky or sound too negative here, so I decided to not included all the weird quirks with Mailbox. Quirks like the fact that <em>some</em> settings are randomly split behind two different menus and only one of these menus are mobile friendly, or the fact that the web interface is sometimes utterly horrible to use. It contains bugs that actually make you feel like that they’re not using the web interface themselves.</p>

<h3 id="the-good">The good</h3>

<ul>
  <li>Environmentally friendly.</li>
  <li>Based in Germany. This is good from a privacy standpoint.</li>
  <li>They use some opens source software. They use software like Postfix, Dovecot and Open-Xchange, which are all open source software. Things that they’ve written themselves is not open sourced though, which doesn’t rhyme well for me though, but at least use some open source software.</li>
  <li>Affordable. They used to be more affordable, but they recently deiced to up their prices a bit. Custom domains is no longer available in their €1 tier and you now have to pay €3 to get access to custom domains.</li>
  <li>Support for CalDAV and CardDAV.</li>
  <li>Catch-all aliases.</li>
</ul>

<h3 id="the-bad">The bad</h3>

<ul>
  <li>They’re mostly privacy-friendly. I think they want to do good, but they do stupid things that makes you question their integrity:
    <ul>
      <li>They use <a href="https://en.m.wikipedia.org/wiki/Gravatar">Gravatar</a> for their comments on news and FAQ articles. Gravatar allows <a href="https://www.bleepingcomputer.com/news/security/online-avatar-service-gravatar-allows-mass-collection-of-user-info/">mass collection of user info</a> and is considered unethical and not privacy-friendly.</li>
      <li>They use Google reCaptcha for the registration form!? If you’re selling a product that you claim to be even remotely privacy-friendly, do not use any service from Google, especially not their reCaptcha service. It’s a well known unethical and privacy invasive service[<a href="https://www.theregister.com/2020/11/02/google_ad_privacy/">1</a>][<a href="https://www.fastcompany.com/90369697/googles-new-recaptcha-has-a-dark-side">2</a>][<a href="https://www.makeuseof.com/tag/google-recaptcha-captures-private-information/">3</a>].</li>
    </ul>
  </li>
  <li>Minimum contract period is 12 months for new customers. If you’re an older contract like I was—who didn’t “upgrade”—you can still pay per month and you still get access to their old and cheaper plans.</li>
  <li>The referral doesn’t benefit the referee at all. The person you invite get 3 months for free though. And to make things worse; you’re also forced to invite them by inputting their current email via the control panel on Mailbox, which means that they already need an email account to begin with. Every sane person knows that using a referral link and giving the referee some kickback would have been a much better choice.</li>
  <li>Not all features are available in the mobile version of Mailbox.org, like managing filters.</li>
</ul>

<h3 id="the-ugly">The ugly</h3>

<ul>
  <li>Filters are unreliable. I have added multiple rules that seems to get randomly ignored.</li>
  <li>
    <p>Their two-factor authentication could have been a lot better. It looks like the people behind Mailbox can be a bit ignorant, and they don’t seem to care that a lot of customers have requested proper two-factor authentication for years now[<a href="https://userforum-en.mailbox.org/topic/lets-talk-about-2fa-on-this-website-again">1</a>][<a href="https://userforum-en.mailbox.org/topic/two-factor-authentication-with-regular-password-instead-of-pin">2</a>].</p>

    <p>When you activate two-factor authentication with Mailbox, you can no longer use your password and your <a href="https://en.wikipedia.org/wiki/Time-based_One-Time_Password">TOTP</a> as expected, because your password is now replaced with a 4 digit PIN. They outright refuse to implement proper two-factor authentication support because it’s <a href="https://userforum-en.mailbox.org/topic/lets-talk-about-2fa-on-this-website-again#comment-1110">according to Mailbox themselves</a> “insecure and unsafe” and the customer are basically too stupid to understand basic security.</p>
  </li>
  <li>No support for application passwords. <a href="https://userforum-en.mailbox.org/topic/deviceapp-specific-password#comment-1284">This will ever be a thing for Mailbox either</a>, due to their “high security level”. I don’t work with security, so I don’t claim to be a know-it-all here, but how is it less secure to use your actual master password with an email client, rather than a unique and revocable application password for just that one email client? Other email providers like <a href="https://fastmail.com">Fastmail</a>, even lets you choose what each application password should be limited to, if the password should have access to just IMAP and/or POP3, CalDAV et cetera.</li>
</ul>

<h2 id="my-thoughts-about-gandi">My thoughts about Gandi</h2>

<p>I’ve had my domains at Gandi since 2015. I’ve always been happy with their service, and it’s nice to see that they’re actually actively working on improving their service as well. Their control panel and their services has been noticeable improved over the years. Not that I have ever been unhappy with their service.</p>

<h3 id="the-good-1">The Good</h3>

<ul>
  <li>You get two free email accounts (with 3 GB of storage each) with any domain. You can get 50 GB if you’re willing to pay 1.75 EUR (excluding VAT) per month.</li>
  <li>They use <a href="https://www.sogo.nu/">SOGo</a> and <a href="https://roundcube.net/">Roundcube</a> for their webmail. Both are open source and commonly used by others.</li>
  <li>Unlimited aliases.</li>
  <li>Filters that works.</li>
  <li>Catch-all aliases.</li>
  <li>Affordable. This depends on what domain name you get, but it’s possible to find top domain names like <code class="language-plaintext highlighter-rouge">.eu</code> for about 12 EUR (exluding VAT) per year. And if you pay 3 years (or more) in advance, you get a discount and the yearly price is then 10.02 EUR.</li>
  <li>They promote open source.</li>
  <li>
    <p>Privacy and environmentally friendly. They help and support associations, companies, and alternative projects that share their ethics and values, including environmentalism, open source projects, and those who are helping democratize the internet and technology by protecting our digital rights.</p>

    <p>They support a lot of different projects and organizations like <a href="http://www.ubuntu.com">Ubuntu</a>, <a href="https://www.openstreetmap.org">OpenStreetMap</a> and the <a href="https://www.eff.org/">Electronic Frontier Foundation</a>. You can read more about it <a href="https://www.gandi.net/en/gandi-supports">here</a>.</p>
  </li>
  <li>Support for CalDAV and CardDAV.</li>
  <li>Proper support two-factor authentication.</li>
</ul>

<h3 id="the-bad-1">The bad</h3>

<ul>
  <li>No support for application passwords.</li>
</ul>

<h3 id="the-ugly-1">The ugly</h3>

<ul>
  <li>Nothing.</li>
</ul>

<h2 id="my-gandi-referral-link">My Gandi referral link</h2>

<p>If you like what I had to say about Gandi, and if you decided to give them a chance, feel free to use my referral link:</p>

<p><a href="https://gandi.link/f/7492948f">https://gandi.link/f/7492948f</a></p>

<p>You get 75% off a Simple Hosting S+ pack and 20% off the purchase or transfer of a domain name. In return, I get a €5 promo code when you create your new account and complete your first order.</p>]]></content><author><name></name></author><category term="[&quot;Personal&quot;]" /><category term="Email" /><category term="Gandi" /><category term="Mailbox" /><summary type="html"><![CDATA[I have been using Mailbox.org since January 2021, and while their service succeed with the core features as a reliable privacy-friendly email service, with support for all the basic features like two-factor authentication and filters, they still leave a lot to ask for.]]></summary></entry><entry><title type="html">How to show the battery level of your Bluetooth mouse in the shell</title><link href="https://hunden.linuxkompis.se/2021/07/21/how-to-show-the-battery-level-of-your-bluetooth-mouse-in-the-shell.html" rel="alternate" type="text/html" title="How to show the battery level of your Bluetooth mouse in the shell" /><published>2021-07-21T00:00:00+02:00</published><updated>2024-02-16T19:42:13+01:00</updated><id>https://hunden.linuxkompis.se/2021/07/21/how-to-show-the-battery-level-of-your-bluetooth-mouse-in-the-shell</id><content type="html" xml:base="https://hunden.linuxkompis.se/2021/07/21/how-to-show-the-battery-level-of-your-bluetooth-mouse-in-the-shell.html"><![CDATA[<p><a href="https://upower.freedesktop.org/">UPower</a> is an abstraction for enumerating power devices, listening to device events and querying history and statistics.</p>

<p>It comes with a command-line client called <code class="language-plaintext highlighter-rouge">upower</code>, which makes it possible to check the status of your device via the shell. I have a wireless mouse called Logitech G305 and this is the output I get with <code class="language-plaintext highlighter-rouge">upower --dump</code>:</p>

<div class="language-plaintext highlighter-rouge"><div class="highlight"><pre class="highlight"><code>$ upower --dump
Device: /org/freedesktop/UPower/devices/mouse_hidpp_battery_0
  native-path:          hidpp_battery_0
  model:                G305 Lightspeed Wireless Gaming Mouse
  serial:               4074-61-97-4e-4d
  power supply:         no
  updated:              Wed 21 Jul 2021 12:07:44 PM CEST (4 seconds ago)
  has history:          yes
  has statistics:       yes
  mouse
    present:             yes
    rechargeable:        yes
    state:               fully-charged
    warning-level:       none
    battery-level:       full
    percentage:          100% (should be ignored)
    icon-name:          'battery-full-charged-symbolic'
  History (charge):
    1626862064	100.000	fully-charged

Daemon:
  daemon-version:  0.99.11
  on-battery:      no
  lid-is-closed:   no
  lid-is-present:  no
  critical-action: PowerOff
</code></pre></div></div>

<p>If I have multiple devices and would like to only show information about my mouse, I can then use the flag <code class="language-plaintext highlighter-rouge">-i, --show-info</code> like this:</p>

<div class="language-plaintext highlighter-rouge"><div class="highlight"><pre class="highlight"><code>$ upower -i /org/freedesktop/UPower/devices/mouse_hidpp_battery_0
</code></pre></div></div>

<p>And if I just want to print the battery percentage:</p>

<div class="language-plaintext highlighter-rouge"><div class="highlight"><pre class="highlight"><code>$ upower -i /org/freedesktop/UPower/devices/mouse_hidpp_battery_0 | grep "percentage" | awk '{print $2}'
100%
</code></pre></div></div>]]></content><author><name></name></author><category term="[&quot;Applications &amp; Tools&quot;]" /><category term="Upower" /><category term="Battery" /><category term="Mouse" /><category term="Bluetooth" /><summary type="html"><![CDATA[UPower is an abstraction for enumerating power devices, listening to device events and querying history and statistics.]]></summary></entry><entry><title type="html">My list of recommended systemd-free Linux based operating systems</title><link href="https://hunden.linuxkompis.se/2021/07/20/my-list-of-recommended-systemd-free-linux-based-operating-systems.html" rel="alternate" type="text/html" title="My list of recommended systemd-free Linux based operating systems" /><published>2021-07-20T00:00:00+02:00</published><updated>2024-02-16T19:42:13+01:00</updated><id>https://hunden.linuxkompis.se/2021/07/20/my-list-of-recommended-systemd-free-linux-based-operating-systems</id><content type="html" xml:base="https://hunden.linuxkompis.se/2021/07/20/my-list-of-recommended-systemd-free-linux-based-operating-systems.html"><![CDATA[<p>Not everyone likes systemd. While it’s a great operating system, it lacks a proper init system. ;) Anyway, I thought it would be a good idea to compile a list with some of the more popular systemd-free alternatives out there.</p>

<p>The list is in alphabetical order to not favour anything in particular, but it’s perhaps no secret that I personally like (and use) Gentoo and Alpine Linux myself.</p>

<table>
  <thead>
    <tr>
      <th>Operating system</th>
      <th>Init</th>
    </tr>
  </thead>
  <tbody>
    <tr>
      <td><a href="https://www.alpinelinux.org">Alpine Linux</a></td>
      <td><a href="https://wiki.gentoo.org/wiki/Project:OpenRC">OpenRC</a></td>
    </tr>
    <tr>
      <td><a href="https://artixlinux.org">Artix Linux</a></td>
      <td><a href="https://wiki.gentoo.org/wiki/Project:OpenRC">OpenRC</a></td>
    </tr>
    <tr>
      <td> </td>
      <td><a href="http://smarden.org/runit">runit</a></td>
    </tr>
    <tr>
      <td> </td>
      <td><a href="http://www.skarnet.org/software/s6/index.html">s6</a></td>
    </tr>
    <tr>
      <td> </td>
      <td>Suite66</td>
    </tr>
    <tr>
      <td><a href="https://bedrocklinux.org">Bedrock Linux</a></td>
      <td>Supports any init.</td>
    </tr>
    <tr>
      <td><a href="https://www.calculate-linux.org">Calculate Linux</a></td>
      <td><a href="https://wiki.gentoo.org/wiki/Project:OpenRC">OpenRC</a></td>
    </tr>
    <tr>
      <td><a href="https://crux.nu">CRUX</a></td>
      <td>BSD-style init</td>
    </tr>
    <tr>
      <td><a href="https://www.devuan.org">Devuan</a></td>
      <td><a href="https://wiki.gentoo.org/wiki/Project:OpenRC">OpenRC</a></td>
    </tr>
    <tr>
      <td><a href="https://www.funtoo.org">Funtoo</a></td>
      <td><a href="https://wiki.gentoo.org/wiki/Project:OpenRC">OpenRC</a></td>
    </tr>
    <tr>
      <td> </td>
      <td><a href="http://smarden.org/runit">runit</a></td>
    </tr>
    <tr>
      <td> </td>
      <td><a href="http://www.skarnet.org/software/s6/index.html">s6</a> + s6-rc</td>
    </tr>
    <tr>
      <td> </td>
      <td><a href="http://www.nongnu.org/sysvinit/">sysvinit</a></td>
    </tr>
    <tr>
      <td><a href="https://www.gentoo.org">Gentoo</a></td>
      <td><a href="https://wiki.gentoo.org/wiki/Project:OpenRC">OpenRC</a></td>
    </tr>
    <tr>
      <td> </td>
      <td><a href="http://smarden.org/runit">runit</a></td>
    </tr>
    <tr>
      <td> </td>
      <td><a href="http://www.skarnet.org/software/s6/index.html">s6</a></td>
    </tr>
    <tr>
      <td> </td>
      <td><a href="http://www.nongnu.org/sysvinit/">sysvinit</a></td>
    </tr>
    <tr>
      <td><a href="https://guix.gnu.org/">Guix</a></td>
      <td><a href="https://www.gnu.org/software/shepherd/">Shepherd</a></td>
    </tr>
    <tr>
      <td><a href="https://www.hyperbola.info">Hyperbola</a></td>
      <td><a href="https://wiki.gentoo.org/wiki/Project:OpenRC">OpenRC</a></td>
    </tr>
    <tr>
      <td><a href="https://k1sslinux.org">KISS</a></td>
      <td>Supports any init.</td>
    </tr>
    <tr>
      <td><a href="https://www.linuxfromscratch.org">Linux From Scratch</a></td>
      <td><a href="http://www.nongnu.org/sysvinit/">sysvinit</a></td>
    </tr>
    <tr>
      <td><a href="https://web.obarun.org">Obarun</a></td>
      <td><a href="http://www.skarnet.org/software/s6/index.html">s6</a></td>
    </tr>
    <tr>
      <td><a href="https://www.parabola.nu">Parabola</a></td>
      <td><a href="https://wiki.gentoo.org/wiki/Project:OpenRC">OpenRC</a></td>
    </tr>
    <tr>
      <td><a href="https://www.pclinuxos.com">PCLinuxOS</a></td>
      <td><a href="http://www.nongnu.org/sysvinit/">sysvinit</a></td>
    </tr>
    <tr>
      <td><a href="https://pentoo.ch">Pentoo</a></td>
      <td><a href="http://www.nongnu.org/sysvinit/">sysvinit</a></td>
    </tr>
    <tr>
      <td><a href="http://www.slackware.com">Slackware</a></td>
      <td><a href="http://www.nongnu.org/sysvinit/">sysvinit</a></td>
    </tr>
    <tr>
      <td><a href="https://voidlinux.org/">Void Linux</a></td>
      <td><a href="http://smarden.org/runit">runit</a></td>
    </tr>
  </tbody>
</table>

<h2 id="a-few-notes-about-the-list">A few notes about the list</h2>

<p>I have tried most of them myself, but not all of them. I did not add every alternative that’s available out there. My criteria for this list is that they’re widely known and has been around for a considerable time.</p>

<p>If you’re looking for a beginner-friendly and easy to set up and use alternatives, I can personally recommend Devuan, which is a fork of Debian by multiple people from Debian and the community. Another options are PCLinuxOS, which is intended to be easy to use. I have not tried it myself though.</p>

<p>And feel free to send me any recommendation that you think should be on this list as well.</p>

<h2 id="feedback">Feedback</h2>

<h3 id="mx-linux">MX Linux</h3>

<p>A couple of people have recommended me MX Linux. I have chosen to not include MX Linux. Partly because they include systemd by default—even though they default to sysvinit—and partly because I feel like they’re a bit too political for my liking.</p>

<h2 id="updates">Updates</h2>

<ul>
  <li><strong>2021-08-24</strong> - Added Guix.</li>
</ul>]]></content><author><name></name></author><category term="[&quot;Linux&quot;]" /><summary type="html"><![CDATA[Not everyone likes systemd. While it’s a great operating system, it lacks a proper init system. ;) Anyway, I thought it would be a good idea to compile a list with some of the more popular systemd-free alternatives out there.]]></summary></entry><entry><title type="html">How I clean my home in an eco-friendly fashion</title><link href="https://hunden.linuxkompis.se/2021/07/18/how-i-clean-my-home-as-an-eco-friendly-minimalist.html" rel="alternate" type="text/html" title="How I clean my home in an eco-friendly fashion" /><published>2021-07-18T00:00:00+02:00</published><updated>2024-02-16T19:42:13+01:00</updated><id>https://hunden.linuxkompis.se/2021/07/18/how-i-clean-my-home-as-an-eco-friendly-minimalist</id><content type="html" xml:base="https://hunden.linuxkompis.se/2021/07/18/how-i-clean-my-home-as-an-eco-friendly-minimalist.html"><![CDATA[<p>I use something rather old school. Green soap! It’s a pine oil based soap that’s all natural, environmentally safe, non-toxic and it has been around in the Swedish homes for more than 125 years now.</p>

<p>Pine oil is a by-product of the pulp and paper industry. It can be used to clean everything in your home, it’s cheap and widely available in all local stores. It can’t get any better than that.</p>

<p>You shouldn’t get fooled by all the expensive (and often exclusive and hard to get) hip “eco-friendly” products that’s designed for just one specific part of your home. It just hurts your wallet and most importantly; it hurts the planet with unnecessary waste if you have to buy a dozen of different products to clean your home.</p>

<p>And perhaps most importantly; whatever you do, don’t buy chemical-based cleaning products. It’s bad for both the environment and your health. I ditched my chemical-based and toxic products long before I was made aware of the environmental issues we’re facing today. I switched to natural products when I noticed that my asthma was getting worse by the very products that was supposed to keep me safe and healthy in my clean home.</p>

<p>Other than that, I clean my home like any other person. I have a vacuum cleaner, washable knitted dishcloths (that my mom made me), and a (synthetic) feather-duster.</p>]]></content><author><name></name></author><category term="[&quot;Hund&quot;]" /><summary type="html"><![CDATA[I use something rather old school. Green soap! It’s a pine oil based soap that’s all natural, environmentally safe, non-toxic and it has been around in the Swedish homes for more than 125 years now.]]></summary></entry><entry><title type="html">How I create fancy PDF-documents in Markdown</title><link href="https://hunden.linuxkompis.se/2021/07/14/how-i-create-fancy-pdf-documents-in-markdown.html" rel="alternate" type="text/html" title="How I create fancy PDF-documents in Markdown" /><published>2021-07-14T00:00:00+02:00</published><updated>2024-02-16T19:42:13+01:00</updated><id>https://hunden.linuxkompis.se/2021/07/14/how-i-create-fancy-pdf-documents-in-markdown</id><content type="html" xml:base="https://hunden.linuxkompis.se/2021/07/14/how-i-create-fancy-pdf-documents-in-markdown.html"><![CDATA[<p>I haven’t had the need to create any ‘fancy’ document in ages, but the other day I had to create a PDF-document with fancy formatting for a work related thing.</p>

<p>After some testing of various solutions and tools, I ended up with a setup using <a href="https://pandoc.org">Pandoc</a>, <a href="https://weasyprint.org/">WeasyPrint</a> and <a href="https://en.wikipedia.org/wiki/Markdown">Markdown</a>. I consider Markdown to be the best markup language and I use it for everything!</p>

<div class="grid-container">
    <div class="grid-item single">
        <a href="/img/pandoc-pdf.png">
            <img src="/img/t/pandoc-pdf.png" alt="" />
        </a>
        <figcaption>My example document</figcaption>
    </div>
</div>

<p>The source for this PDF-document looks like this:</p>

<div class="language-plaintext highlighter-rouge"><div class="highlight"><pre class="highlight"><code># H1 Header

I really like using Markdown.

1. First item
2. Second item
3. Third item
4. Fourth item

&gt; This is some quoted text.

```sh
#!/bin/sh
echo "This is a code block."
```
</code></pre></div></div>

<p>And this is the CSS I used:</p>

<div class="language-css highlighter-rouge"><div class="highlight"><pre class="highlight"><code><span class="nd">:root</span> <span class="p">{</span>
  <span class="py">--blue</span><span class="p">:</span> <span class="nx">#3465A4</span><span class="p">;</span>
<span class="p">}</span>

<span class="k">@font-face</span> <span class="p">{</span>
    <span class="nl">font-family</span><span class="p">:</span> <span class="s2">'NotoSans'</span><span class="p">;</span>
    <span class="nl">src</span><span class="p">:</span> <span class="nf">url</span><span class="p">(</span><span class="s2">'NotoSans-Condensed.ttf'</span><span class="p">)</span> <span class="nf">format</span><span class="p">(</span><span class="s2">'ttf'</span><span class="p">)</span>
<span class="p">}</span>

<span class="nt">html</span> <span class="p">{</span>
    <span class="nl">font-family</span><span class="p">:</span> <span class="s2">'NotoSans'</span><span class="p">;</span>
    <span class="nl">line-height</span><span class="p">:</span> <span class="m">1.45em</span><span class="p">;</span>
<span class="p">}</span>

<span class="nt">h1</span> <span class="p">{</span>
    <span class="nl">font-size</span><span class="p">:</span> <span class="m">26px</span><span class="p">;</span>
    <span class="nl">color</span><span class="p">:</span> <span class="nf">var</span><span class="p">(</span><span class="l">--blue</span><span class="p">);</span>
    <span class="nl">padding-bottom</span><span class="p">:</span> <span class="m">0.15em</span><span class="p">;</span>
    <span class="nl">border-bottom</span><span class="p">:</span> <span class="m">1px</span> <span class="nb">solid</span> <span class="nx">#CCC</span><span class="p">;</span>
<span class="p">}</span>

<span class="nt">pre</span> <span class="p">{</span>
    <span class="nl">background-color</span><span class="p">:</span> <span class="nf">rgba</span><span class="p">(</span><span class="m">0</span><span class="p">,</span><span class="m">0</span><span class="p">,</span><span class="m">0</span><span class="p">,</span><span class="m">0.05</span><span class="p">);</span>
    <span class="nl">border</span><span class="p">:</span> <span class="m">1px</span> <span class="nb">solid</span> <span class="nf">rgba</span><span class="p">(</span><span class="m">0</span><span class="p">,</span><span class="m">0</span><span class="p">,</span><span class="m">0</span><span class="p">,</span><span class="m">0.1</span><span class="p">);</span>
    <span class="nl">padding</span><span class="p">:</span> <span class="m">1em</span><span class="p">;</span>
    <span class="nl">font-size</span><span class="p">:</span> <span class="m">12px</span><span class="p">;</span>
  <span class="p">}</span>

<span class="nt">blockquote</span> <span class="p">{</span>
    <span class="nl">background-color</span><span class="p">:</span> <span class="nf">rgba</span><span class="p">(</span><span class="m">0</span><span class="p">,</span><span class="m">0</span><span class="p">,</span><span class="m">0</span><span class="p">,</span><span class="m">0.05</span><span class="p">);</span>
    <span class="nl">border-left</span><span class="p">:</span> <span class="m">5px</span> <span class="nb">solid</span> <span class="nf">rgba</span><span class="p">(</span><span class="m">0</span><span class="p">,</span><span class="m">0</span><span class="p">,</span><span class="m">0</span><span class="p">,</span><span class="m">0.1</span><span class="p">);</span>
    <span class="nl">padding</span><span class="p">:</span> <span class="m">0.1em</span> <span class="m">0.75em</span><span class="p">;</span>
<span class="p">}</span>
</code></pre></div></div>

<p>And this is the command I used to render the document:</p>

<div class="language-plaintext highlighter-rouge"><div class="highlight"><pre class="highlight"><code>$ pandoc --pdf-engine weasyprint -c style.css demo.md -s -o demo.pdf 
</code></pre></div></div>

<h2 id="installation">Installation</h2>

<p>To make this work you need to install Pandoc and WeasyPrint. In Gentoo the packages are called <code class="language-plaintext highlighter-rouge">app-text/pandoc</code> and <code class="language-plaintext highlighter-rouge">dev-python/weasyprint</code>.</p>

<p>With that said. I did not install Pandoc from source myself. It simply requires way too many packages for my liking (when compiled from source):</p>

<div class="language-plaintext highlighter-rouge"><div class="highlight"><pre class="highlight"><code># emerge pandoc
[...]
Total: 133 packages (133 new), Size of downloads: 165,258 KiB
</code></pre></div></div>

<p>I instead used a binary package that’s available from their <a href="https://github.com/jgm/pandoc/releases/">GitHub-page</a>. The archive weights in at about 14 MB and unpacked at about 68 MB. I then just put the folder in <code class="language-plaintext highlighter-rouge">~/.local/bin/</code> and created a symbolic link to the binary file.</p>]]></content><author><name></name></author><category term="[&quot;Applications &amp; Tools&quot;]" /><category term="Markdown" /><category term="Pandoc" /><category term="WeasyPrint" /><category term="PDF" /><category term="Documents" /><summary type="html"><![CDATA[I haven’t had the need to create any ‘fancy’ document in ages, but the other day I had to create a PDF-document with fancy formatting for a work related thing.]]></summary></entry><entry><title type="html">I’m now using a binary kernel with Gentoo</title><link href="https://hunden.linuxkompis.se/2021/06/25/im-now-using-a-binary-kernel-with-gentoo.html" rel="alternate" type="text/html" title="I’m now using a binary kernel with Gentoo" /><published>2021-06-25T00:00:00+02:00</published><updated>2024-02-16T19:42:13+01:00</updated><id>https://hunden.linuxkompis.se/2021/06/25/im-now-using-a-binary-kernel-with-gentoo</id><content type="html" xml:base="https://hunden.linuxkompis.se/2021/06/25/im-now-using-a-binary-kernel-with-gentoo.html"><![CDATA[<p>Yesterday when I was using the tool <code class="language-plaintext highlighter-rouge">diff</code> to compare the changes from my current minimal custom kernel configuration to the new kernel configuration that came with the latest kernel in Gentoo, I thought to myself: “Is this really worth it?”.</p>

<p>I don’t gain any performance, and no resource or disk space improvements, so why should I be bothered using my own custom kernel when it takes a considerable amount of time maintaining it? I’ve only been rolling my own custom kernel because it’s fun and a good learning experience.</p>

<p>Wait. I said what now? No disk space improvements? Well. Relativity speaking, my custom kernel is a lot smaller than the binary kernel that Gentoo provides. Technically speaking, I save about 75 MB by only including the absolute bare minimum required for my computer.</p>

<p>The little disk space I gained there, is actually lost to the fact that I always have to keep a copy of the source for the current kernel. The source for the kernel takes up about 52 MB in its compressed state, and about 150 MB uncompressed. Is it really worth all the time and effort for saving 23 MB?</p>

<p>The reason I used to use my own custom kernel to beging with, was for the simple fact that it was fun! It’s a fun learning experience and it’s a fun challenge. That’s it.</p>

<p>Time changes tough. When I was younger I used to have an infinite amount of time to spend on whatever I felt like, but that time has since passed. I’m currently busy with life in general, and I don’t have much time to spend on my hobbies. And with a limited free time, does it really make any sense (for me) to spend the little free time I have on things like a custom kernel, especially when I don’t have to?</p>

<p>And yes. I know that some are probably shouting at their monitors right now; “Why use Gentoo if you’re going to use a binary kernel?”.</p>

<p>Well. It’s a semi-valid question. Let’s have a look at the <a href="https://www.gentoo.org/get-started/philosophy/">Gentoo philosophy</a> first:</p>

<blockquote>
  <p>Every user has work they need to do. The goal of Gentoo is to design tools and systems that allow a user to do that work as pleasantly and efficiently as possible, as they see fit. Our tools should be a joy to use, and should help the user to appreciate the richness of the Linux and free software community, and the flexibility of free software. 
[…]
The goal of Gentoo is to strive to create near-ideal tools. Tools that can accommodate the needs of many different users all with divergent goals.</p>
</blockquote>

<p>I even made my own post about <a href="https://hund.tty1.se/2020/05/25/why-i-like-gentoo.html">why I like Gentoo</a> last year. A tl;dr of that post would be something like:</p>

<ul>
  <li>Gentoo provides the tools to build an operating system that’s tailored for just me. Unlike most other mainstream Linux based operating systems, you’re not limited to what they see fit for you.</li>
  <li>I like the friendly and helpful community surrounding Gentoo.</li>
  <li>Highly advanced package manager.</li>
  <li>Multiple good init systems to choose from.</li>
  <li>Good documentation.</li>
  <li>It’s stable and reliable.</li>
</ul>

<p>The first point is the main reason why Gentoo call themselves a <a href="https://www.gentoo.org/get-started/about/">metadistribution</a>. Gentoo can be anything you like, there’s really no right or wrong way of doing it, it’s only your way of doing it. And that’ what I like about Gentoo, there’re no incentives, hard coded paths or unwritten rules that you have to follow.</p>

<h2 id="tldr">tl;dr</h2>

<p>I now use a binary kernel with Gentoo to gain all the benefits from using Gentoo, while saving time from not having to maintain my own kernel. Time that I can spend on things I find more important (in my currently busy life with limited time and energy), things like this post.</p>

<p>And who knows, I might go back to my own custom kernel later in the future, when I don’t have work and have more time for my hobbies again.</p>]]></content><author><name></name></author><category term="[&quot;Personal&quot;]" /><category term="Gentoo" /><category term="Linux" /><summary type="html"><![CDATA[Yesterday when I was using the tool diff to compare the changes from my current minimal custom kernel configuration to the new kernel configuration that came with the latest kernel in Gentoo, I thought to myself: “Is this really worth it?”.]]></summary></entry><entry><title type="html">How I automatically run things after waking up my computer</title><link href="https://hunden.linuxkompis.se/2021/06/22/how-i-automatically-run-things-after-waking-up-my-computer.html" rel="alternate" type="text/html" title="How I automatically run things after waking up my computer" /><published>2021-06-22T00:00:00+02:00</published><updated>2024-02-16T19:42:13+01:00</updated><id>https://hunden.linuxkompis.se/2021/06/22/how-i-automatically-run-things-after-waking-up-my-computer</id><content type="html" xml:base="https://hunden.linuxkompis.se/2021/06/22/how-i-automatically-run-things-after-waking-up-my-computer.html"><![CDATA[<p>Some time ago, Gentoo deprecated <code class="language-plaintext highlighter-rouge">pm-utils</code>, which didn’t come as a surprise considering it hasn’t been updated upstreams for 11 years now.</p>

<p>pm-utils was a small collection of scripts that handles suspend and resume on behalf of HAL. One of the things that pm-utils allowed me to do, was to automatically run any scripts when I woke up the computer.</p>

<p>With the deprecation of pm-utils, I was left with two alternatives; 1) elogind (the systemd project’s logind, extracted to a standalone package) and 2) s2ram. Considering the fact that I’m not a big fan of systemd, I really only had one choice.</p>

<p>While s2ram works just fine, it does lack the ability to automatically run scripts when waking up my computer. To work around this, I modified my <a href="https://hund.tty1.se/2018/09/04/use-a-pixelated-version-of-your-desktop-as-your-lockscreen-with-i3lock.html">i3lock script</a> to run another script called <code class="language-plaintext highlighter-rouge">suspend-resume.sh</code>.</p>

<h2 id="the-solution">The solution</h2>

<p>After a few tries, I figured out that I needed the flag <code class="language-plaintext highlighter-rouge">-n, --nofork</code> for i3lock to get it execute a command after waking up my computer and unlocking the screen:</p>

<div class="language-plaintext highlighter-rouge"><div class="highlight"><pre class="highlight"><code>i3lock -n; suspend-resume.sh 
</code></pre></div></div>

<p>Here’s the complete script:</p>

<div class="language-bash highlighter-rouge"><div class="highlight"><pre class="highlight"><code><span class="c">#!/bin/bash</span>

<span class="nv">icon</span><span class="o">=</span><span class="s2">"</span><span class="nv">$HOME</span><span class="s2">/.config/i3/lock.png"</span>
<span class="nv">img</span><span class="o">=</span><span class="s2">"/tmp/i3lock.png"</span>

<span class="nb">rm</span> <span class="nv">$img</span>
scrot <span class="nv">$img</span>
convert <span class="nv">$img</span> <span class="nt">-scale</span> 10% <span class="nt">-scale</span> 1000% <span class="nv">$img</span>
convert <span class="nv">$img</span> <span class="nv">$icon</span> <span class="nt">-gravity</span> center <span class="nt">-composite</span> <span class="nv">$img</span>

<span class="k">case</span> <span class="nv">$1</span> <span class="k">in
    </span>lock<span class="p">)</span>
        suspend-resume.sh
        i3lock <span class="nt">-u</span> <span class="nt">-i</span> <span class="nv">$img</span> <span class="nt">-n</span><span class="p">;</span> suspend-resume.sh 
        <span class="p">;;</span>
    <span class="nb">suspend</span><span class="p">)</span>
        suspend-resume.sh
        doas s2ram <span class="nt">-f</span>
        i3lock <span class="nt">-u</span> <span class="nt">-i</span> <span class="nv">$img</span> <span class="nt">-n</span><span class="p">;</span> suspend-resume.sh 
        <span class="p">;;</span>
<span class="k">esac</span>
</code></pre></div></div>
<p>And this is what the <code class="language-plaintext highlighter-rouge">suspend-resume-sh</code> script looks like:</p>

<div class="language-plaintext highlighter-rouge"><div class="highlight"><pre class="highlight"><code>#!/bin/bash

weather.sh &amp;
/usr/bin/vdirsyncer sync &amp;
mbsync-notify.sh &amp;
</code></pre></div></div>

<p>I actually ended up liking this solution a lot more than the old one with pm-utils, because this is all run by my own user and not as root pretending to be me.</p>]]></content><author><name></name></author><category term="[&quot;Tips &amp; Trix&quot;]" /><category term="Gentoo" /><category term="Bash" /><category term="Scripts" /><category term="Utils" /><category term="pm-utils" /><summary type="html"><![CDATA[Some time ago, Gentoo deprecated pm-utils, which didn’t come as a surprise considering it hasn’t been updated upstreams for 11 years now.]]></summary></entry><entry><title type="html">How to add shadows to transparent images using CSS</title><link href="https://hunden.linuxkompis.se/2021/05/23/how-to-add-shadows-to-transparent-images-using-css.html" rel="alternate" type="text/html" title="How to add shadows to transparent images using CSS" /><published>2021-05-23T00:00:00+02:00</published><updated>2024-02-16T19:42:13+01:00</updated><id>https://hunden.linuxkompis.se/2021/05/23/how-to-add-shadows-to-transparent-images-using-css</id><content type="html" xml:base="https://hunden.linuxkompis.se/2021/05/23/how-to-add-shadows-to-transparent-images-using-css.html"><![CDATA[<p>This is an transparent image that I made in Inkscape. The shadows is added with CSS.</p>

<p><img src="/img/cmos-tag.png" style="filter: drop-shadow(1px 3px 5px rgba(0,0,0,0.55));" /></p>

<p>The CSS-class looks like this:</p>

<div class="language-plaintext highlighter-rouge"><div class="highlight"><pre class="highlight"><code>img {
    filter: drop-shadow(1px 3px 5px rgba(0,0,0,0.55));
}
</code></pre></div></div>

<p>A good use case for this would be if you want to have shadows around your images in your articles, but don’t want non-square images to look weird.</p>]]></content><author><name></name></author><category term="[&quot;Tips &amp; Trix&quot;, &quot;Web design&quot;]" /><category term="CSS" /><summary type="html"><![CDATA[This is an transparent image that I made in Inkscape. The shadows is added with CSS.]]></summary></entry><entry><title type="html">Better URL management in NeoMutt with urlscan</title><link href="https://hunden.linuxkompis.se/2021/05/22/better-url-management-in-neomutt-with-urlview.html" rel="alternate" type="text/html" title="Better URL management in NeoMutt with urlscan" /><published>2021-05-22T00:00:00+02:00</published><updated>2024-02-16T19:42:13+01:00</updated><id>https://hunden.linuxkompis.se/2021/05/22/better-url-management-in-neomutt-with-urlview</id><content type="html" xml:base="https://hunden.linuxkompis.se/2021/05/22/better-url-management-in-neomutt-with-urlview.html"><![CDATA[<p>There’s one thing that doesn’t work ideal in Mutt or NeoMutt; URLs in messages. While my terminal emulator URxvt supports URLs and I can copy and open URLs, it’s not an ideal workflow when there’s a bunch of URLs in a single message.</p>

<p>Thankfully, this is where <a href="https://github.com/firecat53/urlscan">urlscan</a> comes in the picture and saves the day. urlscan is a piece of software that extract URLs from any message (or any text file) and then allow the user to select and open any URL in the default web browser.</p>

<p>I use the text based web browser Lynx to render HTML messages. It usually looks like this:</p>

<div class="grid-container">
    <div class="grid-item single">
        <a href="/img/lynx-email-message.png">
            <img src="/img/t/lynx-email-message.png" alt="" />
        </a>
    </div>
</div>

<p>As you can see, there’s no visible URLs. They’re all grouped down at the bottom of the message, without any context. This can make it hard to figure out which URL I’m interested in, especially when they’re all annoying obfuscated tracking links.</p>

<p>This is where urlscan comes in. When I press <code class="language-plaintext highlighter-rouge">Ctrl+B</code>, it opens urlscan and presents me the URLs with some context:</p>

<div class="grid-container">
    <div class="grid-item single">
        <a href="/img/urlscan-neomutt.png">
            <img src="/img/t/urlscan-neomutt.png" alt="" />
        </a>
    </div>
</div>

<p>If the environment variable <code class="language-plaintext highlighter-rouge">$BROWSER</code> is set to a browser command, then that specified browser is used. The <code class="language-plaintext highlighter-rouge">$BROWSER</code> environment variable is only honored if the rc-file doesn’t contain the COMMAND option.</p>

<h2 id="installation">Installation</h2>

<p>In Gentoo, it’s available as the package <code class="language-plaintext highlighter-rouge">net-mail/urlscan</code>:</p>

<div class="language-plaintext highlighter-rouge"><div class="highlight"><pre class="highlight"><code># emerge --ask net-mail/urlscan
</code></pre></div></div>

<h2 id="configuration">Configuration</h2>

<p>I have simply added these two macros to NeoMutt:</p>

<div class="language-plaintext highlighter-rouge"><div class="highlight"><pre class="highlight"><code>macro index,pager \cb "&lt;pipe-message&gt; urlscan&lt;Enter&gt;" "call urlscan to extract URLs out of a message"
macro attach,compose \cb "&lt;pipe-entry&gt; urlscan&lt;Enter&gt;" "call urlscan to extract URLs out of a message"
</code></pre></div></div>

<p>And don’t forget to set your <code class="language-plaintext highlighter-rouge">$BROWSER</code> variable. I have this in my <code class="language-plaintext highlighter-rouge">~/.zshrc</code> file:</p>

<div class="language-bash highlighter-rouge"><div class="highlight"><pre class="highlight"><code><span class="nb">export </span><span class="nv">BROWSER</span><span class="o">=</span><span class="s2">"browser.sh"</span>
</code></pre></div></div>

<p>The script <code class="language-plaintext highlighter-rouge">browser.sh</code> contains this:</p>

<div class="language-bash highlighter-rouge"><div class="highlight"><pre class="highlight"><code><span class="c">#!/bin/bash</span>

qutebrowser-tmp <span class="nv">$1</span> <span class="o">&gt;</span>/dev/null 2&gt;&amp;1 &amp; <span class="nb">disown</span> <span class="nt">-a</span>
</code></pre></div></div>

<p>And the script <code class="language-plaintext highlighter-rouge">qutebrowser-tmp</code> is script that creates a temporary session with qutebrowser for me. That script looks like this:</p>

<div class="language-bash highlighter-rouge"><div class="highlight"><pre class="highlight"><code><span class="c">#!/bin/bash</span>

<span class="nv">PROFILEDIR</span><span class="o">=</span><span class="sb">`</span><span class="nb">mktemp</span> <span class="nt">-p</span> /tmp <span class="nt">-d</span> tmp-qb-profile.XXXXXX.d<span class="sb">`</span>
<span class="nb">mkdir</span> <span class="nv">$PROFILEDIR</span>/config
<span class="nb">cp</span> ~/.config/qutebrowser/<span class="o">{</span>user-stylecheet.css,autoconfig.yml<span class="o">}</span> <span class="nv">$PROFILEDIR</span>/config/
<span class="nb">mkdir</span> <span class="nv">$PROFILEDIR</span>/data/userscripts/
<span class="nb">cp</span> ~/.local/share/qutebrowser/userscripts <span class="nv">$PROFILEDIR</span>/data/userscripts/
qutebrowser <span class="nt">--basedir</span> <span class="nv">$PROFILEDIR</span> <span class="nv">$1</span>
<span class="nb">rm</span> <span class="nt">-rf</span> <span class="nv">$PROFILEDIR</span>
</code></pre></div></div>]]></content><author><name></name></author><category term="[&quot;Applications &amp; Tools&quot;]" /><category term="NeoMutt" /><category term="urlscan" /><category term="Lynx" /><summary type="html"><![CDATA[There’s one thing that doesn’t work ideal in Mutt or NeoMutt; URLs in messages. While my terminal emulator URxvt supports URLs and I can copy and open URLs, it’s not an ideal workflow when there’s a bunch of URLs in a single message.]]></summary></entry><entry><title type="html">How and why I compile the QMK keyboard firmware in Alpine Linux</title><link href="https://hunden.linuxkompis.se/2021/05/17/how-and-why-i-compile-the-qmk-keyboard-firmware-in-alpine-linux.html" rel="alternate" type="text/html" title="How and why I compile the QMK keyboard firmware in Alpine Linux" /><published>2021-05-17T00:00:00+02:00</published><updated>2024-02-16T19:42:13+01:00</updated><id>https://hunden.linuxkompis.se/2021/05/17/how-and-why-i-compile-the-qmk-keyboard-firmware-in-alpine-linux</id><content type="html" xml:base="https://hunden.linuxkompis.se/2021/05/17/how-and-why-i-compile-the-qmk-keyboard-firmware-in-alpine-linux.html"><![CDATA[<p>I haven’t touched <a href="https://hund.tty1.se/2019/06/23/this-is-my-custom-keyboard-layout.html">the firmware on my keyboard</a> for a couple of years now, but the other day I decided it was time to make a few minor tweaks to it.</p>

<p>Compiling the QMK firmware in Gentoo means that I have to setup a development toolchain for the Atmel AVR microprocessor, which is what my keyboard uses. While it’s not rocket science to cross compile things in Gentoo, we can’t ignore the fact that I’m lazy.. So. I found it a lot easier and quicker to just set it up on my secondary computer with Alpine Linux instead.</p>

<p>All I had to do was to install the packages <code class="language-plaintext highlighter-rouge">avr-gcc</code> and <code class="language-plaintext highlighter-rouge">avr-libc</code>, I could then simply compile the source code. Flashing the firmware is still done on Gentoo with the tool <code class="language-plaintext highlighter-rouge">dfu-programmer</code>, simply because that’s the machine my keyboard is connected to.</p>

<p>To make things a lot more simpler I wrote a Bash script that lets me edit, compile and flash the firmware:</p>

<ol>
  <li>The <code class="language-plaintext highlighter-rouge">edit</code> option simply opens the <code class="language-plaintext highlighter-rouge">keymap.c</code> file using Neovim.</li>
  <li>The <code class="language-plaintext highlighter-rouge">make</code> option syncs the changes of the source code to my other computer using rsync, it then compiles the new version on my other computer, makes a backup of the old firmware and lastly copies the new firmware back to my desktop computer.</li>
  <li>The third options is called <code class="language-plaintext highlighter-rouge">flash</code>, and run as root because I can’t use the keyboard when it’s put into the bootloader mode and the commands has to be run with privileges. The third option simply erases the storage on the keyboard, flashes the firmware and then boots the keyboard back up.</li>
</ol>

<p>This is what the script looks like:</p>

<div class="language-bash highlighter-rouge"><div class="highlight"><pre class="highlight"><code><span class="c">#!/bin/bash -e</span>

<span class="nv">DIR</span><span class="o">=</span><span class="s2">"/home/johan/Backups/QMK"</span>
<span class="nv">FILE</span><span class="o">=</span><span class="s2">"sentraq-s60x-iso.hex"</span>

<span class="k">case</span> <span class="nv">$1</span> <span class="k">in
    </span>edit<span class="p">)</span>
        nvim <span class="nv">$DIR</span>/qmk_firmware/keyboards/kb/keymaps/default/keymap.c
        <span class="p">;;</span>
    make<span class="p">)</span>
        rsync <span class="nt">-aAXv</span> <span class="nt">-e</span> <span class="s2">"ssh"</span> <span class="nv">$DIR</span>/qmk_firmware/ billy:/home/johan/qmk_firmware/
        ssh johan@billy <span class="nt">-t</span> <span class="s2">"cd /home/johan/qmk_firmware &amp;&amp; make kb:default"</span>
        <span class="k">if </span><span class="nb">test</span> <span class="nt">-f</span> <span class="s2">"</span><span class="nv">$DIR</span><span class="s2">/</span><span class="nv">$FILE</span><span class="s2">"</span><span class="p">;</span> <span class="k">then
            </span><span class="nb">mv</span> <span class="s2">"</span><span class="nv">$DIR</span><span class="s2">/</span><span class="nv">$FILE</span><span class="s2">"</span> <span class="s2">"</span><span class="nv">$DIR</span><span class="s2">/</span><span class="nv">$FILE</span><span class="s2">-</span><span class="si">$(</span><span class="nb">date</span> +%Y-%m-%d--%H%M%S<span class="si">)</span><span class="s2">"</span>
        <span class="k">fi
        </span>rsync <span class="nt">-aAXv</span> <span class="nt">-e</span> <span class="s2">"ssh"</span> billy:/home/johan/qmk_firmware/kb_default.hex <span class="s2">"</span><span class="nv">$DIR</span><span class="s2">/</span><span class="nv">$FILE</span><span class="s2">"</span>
        <span class="p">;;</span>
    flash<span class="p">)</span>
        <span class="nb">echo</span> <span class="s2">"Don't forget to put your keyboard into the bootloader mode!"</span>
        <span class="nb">echo</span> <span class="s2">"5..."</span> <span class="p">;</span> <span class="nb">sleep </span>1
        <span class="nb">echo</span> <span class="s2">"4..."</span> <span class="p">;</span> <span class="nb">sleep </span>1
        <span class="nb">echo</span> <span class="s2">"3..."</span> <span class="p">;</span> <span class="nb">sleep </span>1
        <span class="nb">echo</span> <span class="s2">"2..."</span> <span class="p">;</span> <span class="nb">sleep </span>1
        <span class="nb">echo</span> <span class="s2">"1..."</span> <span class="p">;</span> <span class="nb">sleep </span>1
        <span class="nb">echo</span> <span class="s2">"Flashing keyboard..."</span>
        dfu-programmer atmega32u4 erase <span class="nt">--force</span>
        dfu-programmer atmega32u4 flash <span class="s2">"</span><span class="nv">$DIR</span><span class="s2">/</span><span class="nv">$FILE</span><span class="s2">"</span>
        dfu-programmer atmega32u4 launch
        <span class="p">;;</span>
<span class="k">esac</span>
</code></pre></div></div>

<p>It’s nothing fancy, but it gets the job done. Improvements are always appreciated!</p>]]></content><author><name></name></author><category term="[&quot;Personal&quot;]" /><category term="Keyboards" /><category term="QMK Firmware" /><category term="Alpine Linux" /><summary type="html"><![CDATA[I haven’t touched the firmware on my keyboard for a couple of years now, but the other day I decided it was time to make a few minor tweaks to it.]]></summary></entry><entry><title type="html">How I use temporary keybindings for spellcheck in Neovim</title><link href="https://hunden.linuxkompis.se/2021/05/15/how-i-use-temporary-keybindings-for-spellcheck-in-neovim.html" rel="alternate" type="text/html" title="How I use temporary keybindings for spellcheck in Neovim" /><published>2021-05-15T00:00:00+02:00</published><updated>2024-02-16T19:42:13+01:00</updated><id>https://hunden.linuxkompis.se/2021/05/15/how-i-use-temporary-keybindings-for-spellcheck-in-neovim</id><content type="html" xml:base="https://hunden.linuxkompis.se/2021/05/15/how-i-use-temporary-keybindings-for-spellcheck-in-neovim.html"><![CDATA[<p>I use my text editor Neovim for everything, and I really mean everything. I even use it for inputing text on the web via my web browser qutebrowser and it’s of course the editor I use for all my emails. This also means that I commonly use the spellchecking feature all the time.</p>

<p>And because I use the spellcheck feature all the time, I also want the shortcuts for it to be close to the home row. Unfortunately, I couldn’t find any available keys that felt natural to me to bind the spellcheck commands to, but after some thinking, I got the idea that I could use temporary keybindings.</p>

<p>This means that the keybindings for the spellcheck is only available when I have the spellcheck feature enabled, and I can bind them to keys that I normally use for other things.</p>

<p>After some experimenting, I came up with this solution:</p>

<div class="language-vim highlighter-rouge"><div class="highlight"><pre class="highlight"><code><span class="nb">map</span> <span class="p">&lt;</span><span class="k">silent</span><span class="p">&gt;</span> <span class="p">&lt;</span>F1<span class="p">&gt;</span>
<span class="se">        \</span> <span class="p">:</span><span class="k">set</span> <span class="nb">nospell</span><span class="p">&lt;</span>BAR<span class="p">&gt;</span> <span class="p">:</span><span class="k">silent</span><span class="p">!</span> unmap <span class="nb">ff</span><span class="p">&lt;</span>BAR<span class="p">&gt;</span> <span class="p">:</span><span class="k">silent</span><span class="p">!</span> unmap fF<span class="p">&lt;</span>BAR<span class="p">&gt;</span>
<span class="se">        \</span> <span class="p">:</span><span class="k">silent</span><span class="p">!</span> unmap fa<span class="p">&lt;</span>BAR<span class="p">&gt;</span> <span class="p">:</span><span class="k">silent</span><span class="p">!</span> unmap fn<span class="p">&lt;</span>BAR<span class="p">&gt;</span> <span class="p">:</span><span class="k">silent</span><span class="p">!</span> unmap fd<span class="p">&lt;</span>BAR<span class="p">&gt;</span>
<span class="se">        \</span> <span class="p">:</span><span class="k">redraw</span><span class="p">&lt;</span>BAR<span class="p">&gt;</span> <span class="k">echom</span> <span class="s2">"Spellcheck disabled"</span><span class="p">&lt;</span>CR<span class="p">&gt;</span>

</code></pre></div></div>
<div class="language-vim highlighter-rouge"><div class="highlight"><pre class="highlight"><code><span class="nb">map</span> <span class="p">&lt;</span>F2<span class="p">&gt;</span>
<span class="se">        \</span> <span class="p">:</span><span class="k">setlocal</span> <span class="nb">spell</span> <span class="nb">spelllang</span><span class="p">=</span><span class="k">sv</span><span class="p">&lt;</span>BAR<span class="p">&gt;</span> <span class="p">:</span><span class="nb">noremap</span> <span class="nb">ff</span> <span class="p">]</span>s<span class="p">&lt;</span>BAR<span class="p">&gt;</span> <span class="p">:</span><span class="nb">noremap</span> fF <span class="p">[</span>s<span class="p">&lt;</span>BAR<span class="p">&gt;</span>
<span class="se">        \</span> <span class="p">:</span><span class="nb">noremap</span> fa zg<span class="p">&lt;</span>BAR<span class="p">&gt;</span> <span class="p">:</span><span class="nb">noremap</span> fn z<span class="p">=&lt;</span>BAR<span class="p">&gt;</span> <span class="p">:</span><span class="nb">noremap</span> fd zuw<span class="p">&lt;</span>BAR<span class="p">&gt;</span>
<span class="se">        \</span> <span class="p">:</span><span class="nb">highlight</span> SpellBad ctermfg<span class="p">=</span><span class="m">003</span> ctermbg<span class="p">=</span>none cterm<span class="p">=</span>none<span class="p">&lt;</span>BAR<span class="p">&gt;</span> <span class="p">:</span><span class="k">redraw</span><span class="p">&lt;</span>BAR<span class="p">&gt;</span>
<span class="se">        \</span> <span class="k">echom</span> <span class="s2">"Swedish spellcheck enabled"</span><span class="p">&lt;</span>CR<span class="p">&gt;</span>
</code></pre></div></div>
<div class="language-vim highlighter-rouge"><div class="highlight"><pre class="highlight"><code><span class="nb">map</span> <span class="p">&lt;</span>F3<span class="p">&gt;</span>
<span class="se">        \</span> <span class="p">:</span><span class="k">setlocal</span> <span class="nb">spell</span> <span class="nb">spelllang</span><span class="p">=</span><span class="k">en</span><span class="p">&lt;</span>BAR<span class="p">&gt;</span> <span class="p">:</span><span class="nb">noremap</span> <span class="nb">ff</span> <span class="p">]</span>s<span class="p">&lt;</span>BAR<span class="p">&gt;</span> <span class="p">:</span><span class="nb">noremap</span> fF <span class="p">[</span>s <span class="p">&lt;</span>BAR<span class="p">&gt;</span>
<span class="se">        \</span> <span class="p">:</span><span class="nb">noremap</span> fa zg<span class="p">&lt;</span>BAR<span class="p">&gt;</span> <span class="p">:</span><span class="nb">noremap</span> fn z<span class="p">=&lt;</span>BAR<span class="p">&gt;</span> <span class="p">:</span><span class="nb">noremap</span> fd zuw<span class="p">&lt;</span>BAR<span class="p">&gt;</span>
<span class="se">        \</span> <span class="p">:</span><span class="nb">highlight</span> SpellBad ctermfg<span class="p">=</span><span class="m">003</span> ctermbg<span class="p">=</span>none cterm<span class="p">=</span>none<span class="p">&lt;</span>BAR<span class="p">&gt;</span> <span class="p">:</span><span class="k">redraw</span><span class="p">&lt;</span>BAR<span class="p">&gt;</span>
<span class="se">        \</span> <span class="k">echom</span> <span class="s2">"English spellcheck enabled"</span><span class="p">&lt;</span>CR<span class="p">&gt;</span>

</code></pre></div></div>

<p>This means that when I enable spellcheck I also enable these keybindings:</p>

<table>
  <tbody>
    <tr>
      <td><code class="language-plaintext highlighter-rouge">ff</code></td>
      <td>Go to the next misspelled word.</td>
    </tr>
    <tr>
      <td><code class="language-plaintext highlighter-rouge">fF</code></td>
      <td>Go the previously misspelled word.</td>
    </tr>
    <tr>
      <td><code class="language-plaintext highlighter-rouge">fn</code></td>
      <td>Correct the current misspelled word.</td>
    </tr>
    <tr>
      <td><code class="language-plaintext highlighter-rouge">fa</code></td>
      <td>Add the current word to the dictionary.</td>
    </tr>
    <tr>
      <td><code class="language-plaintext highlighter-rouge">fd</code></td>
      <td>Remove the current word from the dictionary.</td>
    </tr>
  </tbody>
</table>

<p>And when I disable the spellcheck, it then removes the keybindings and restore the default behaviour for the <code class="language-plaintext highlighter-rouge">f</code> key.</p>]]></content><author><name></name></author><category term="[&quot;Tips &amp; Trix&quot;]" /><category term="Neovim" /><category term="Spellchecking" /><summary type="html"><![CDATA[I use my text editor Neovim for everything, and I really mean everything. I even use it for inputing text on the web via my web browser qutebrowser and it’s of course the editor I use for all my emails. This also means that I commonly use the spellchecking feature all the time.]]></summary></entry><entry><title type="html">My keyboard — May 2021</title><link href="https://hunden.linuxkompis.se/2021/05/09/my-keyboard-may-2021.html" rel="alternate" type="text/html" title="My keyboard — May 2021" /><published>2021-05-09T00:00:00+02:00</published><updated>2024-02-16T19:42:13+01:00</updated><id>https://hunden.linuxkompis.se/2021/05/09/my-keyboard-may-2021</id><content type="html" xml:base="https://hunden.linuxkompis.se/2021/05/09/my-keyboard-may-2021.html"><![CDATA[<p>This is the story about the time when I spent a lot of money and <em>almost</em> upgraded my keyboard. Heh..</p>

<div class="grid-container">
    <div class="grid-item single">
        <a href="/img/keyboards/2019-05-05.jpg">
            <img src="/img/keyboards/thumbnails/2019-05-05.jpg" alt="" />
        </a>
        <figcaption>My current keyboard. It's a recyclec picture, because it looks exactly the same as before.</figcaption>
    </div>
</div>

<h2 id="specifications">Specifications</h2>

<table>
  <tbody>
    <tr>
      <td>Keyboard:</td>
      <td>Custom</td>
    </tr>
    <tr>
      <td>Size:</td>
      <td>60%</td>
    </tr>
    <tr>
      <td>Case:</td>
      <td>KBDfans Diamond</td>
    </tr>
    <tr>
      <td>Circuit board:</td>
      <td>Sentraq S60-X</td>
    </tr>
    <tr>
      <td>Switches:</td>
      <td>Gateron Red</td>
    </tr>
    <tr>
      <td>Stabilizers:</td>
      <td>GMK Screw-in stabilizers by GMK Electronic Design (Space bar key)</td>
    </tr>
    <tr>
      <td> </td>
      <td>DUROCK Screw-in stabilizers V2 (Backspace and Enter key)</td>
    </tr>
    <tr>
      <td>Keycaps:</td>
      <td>NPKC Blank PBT (Cherry-profile)</td>
    </tr>
    <tr>
      <td>Birthday:</td>
      <td>2018-01-19</td>
    </tr>
  </tbody>
</table>

<h2 id="the-almost-update">The (almost) update</h2>

<p>After about <a href="https://hund.tty1.se/2019/05/05/2019-05-05-my-keyboard.md.html">two years since the last changes</a> to my keyboard, I decided it was time to make changes to it again. I bought the highly regarded L7 linear switches, screw-in stabilizers and some 55 gram springs, all from DUROCK. I think I spent about 100 EUR on it in total.</p>

<div class="grid-container">
    <div class="grid-item single">
        <a href="/img/durock_switches_and_stabilizers.jpg">
            <img src="/img/t/durock_switches_and_stabilizers.jpg" alt="" />
        </a>
        <figcaption>A pile of my new Durock switches and stabilizers.</figcaption>
    </div>
</div>

<p>The switches are available in various weights, with the lightest weighting in at 62 grams, which is still way to heavy for me. My current switches have 45 gram springs, and I find them just perfect for me. The reason I went with 55 gram springs was simply because it was the only thing available at the moment, and I decided to buy them and take my chances.</p>

<h3 id="modding-the-switches">Modding the switches</h3>

<p>It took me a couple of hours to open the switch houses, replace the spring and then applying the almost invincible switch film on all 63 switches. The film is not required, but it’s a good thing to have it on some switches from certain brands after you have opened them. Some brands are prone to become unstable and wobbly, and it can also impact the sound of the switches as well.</p>

<div class="grid-container">
    <div class="grid-item single">
        <a href="/img/switch_modding.jpg">
            <img src="/img/t/switch_modding.jpg" alt="" />
        </a>
        <figcaption>Me in the progress of replacing all the springs and applying switch films.</figcaption>
    </div>
</div>

<h3 id="building-the-new-keyboard">Building the new keyboard</h3>

<p>My plan was to use a PCB that I bought a couple of years ago; the <a href="https://github.com/evyd13/plain60-b">Plain60-B</a>. I didn’t need it at the time, but it was cheap (about 30 EUR), available and I knew that I—at some point—wanted to build a second custom keyboard, I was just patiently waiting for the right switches; something that was end-game material, but at the same time affordable and something that didn’t need lubrication to be decently smooth. Something like the DUROCK switches that I just bought.</p>

<p>Well. Somehow, I had totally missed that what makes the DUROCK switches good, is the fact that they come slightly factory lubed. And yes. I know that pretty much every single person in the custom keyboard community absolutely love lubricated switches. I’m just not one of them.</p>

<p>While I like the sound and smoothness of lubricated switches, I find them sluggish. I prefer the more ‘mechanical’ feel to my switches, not some rubbery feeling. And yes, I’m aware of the fact that I’m probably never going to have the smoothest switches, but I’m okay with that. Smooth enough is fine for me.</p>

<h4 id="the-pcb">The PCB</h4>

<p>Plain60-B is a rather simple and affordable PCB, that’s designed to support as little layouts as possible without limiting usability for most users. It doesn’t even feature LEDs or underglow.</p>

<p>It supports both the <a href="https://caniusevia.com/">VIA</a> and the <a href="https://qmk.fm/">QMK</a> firmware. And as a creature of habit, I went with QMK as always. If you want to read about my layout, check out <a href="https://hunden.linuxkompis.se/2019/06/23/this-is-my-custom-keyboard-layout.html">my post about my custom keyboard layout</a>. The post is about two years old, so I might do an update on that soon.</p>

<div class="grid-container">
    <div class="grid-item single">
        <a href="/img/keyboard_build.jpg">
            <img src="/img/t/keyboard_build.jpg" alt="" />
        </a>
        <figcaption></figcaption>
    </div>
</div>

<p>After modding all the switches, I soldered them on to the PCB. I then applied the stabilizer foam on the PCB, which helps to dampen the sound when bottoming the keys out as you type. I then assembled the stabilizers. I had also applied stabilizer shrinks on the stabilizer stems and slightly lubed to make them sound better.</p>

<h2 id="the-final-result">The final result</h2>

<p>Then it was time for the big moment, and, well.. It was just one large pile of disappointment. The switches and stabilizers sounded good, but the first travel distance of the switches felt sluggish and it didn’t really help that the springs was slightly too heavy for me. The stabilizers felt quite mushy, but that turned out to be due to the stabilizer shrinks.</p>

<p>I wasn’t happy at all, to the point that after less than a week of usage I actually reverting pretty much all my changes to the keyboard.</p>

<p>I went back to my old PCB, but I did replace the old GMK screw-in stabilizers with the new ones from DUROCK. This time without the stabilizer shrinks, and it was a success, except for the fact that the spacebar felt weird. It felt a big sluggish, and after multiple tweaks and no success, I replaced the stabilizer with the old one from GMK.</p>

<p>The GMK screw-in stabilizers doesn’t sound as good as the ones from DUROCK (not that they sound terrible either, their old models are after all considered to be one of the best stabilizers out there), but in the end; function is more important than sound for me.</p>

<h2 id="future-plans">Future plans</h2>

<p>I don’t have a proper desoldering station, so I’m going to outsource that job to my good friend <a href="https://towhatend.linuxkompis.se/">towhatend</a>. The PCB will be used for a future project (with my favourite switch; Gateron Red) and the DUROCK switches will be sold on the secondhand market to someone who actually likes good sounding, but sluggi.. lubricated switches.</p>]]></content><author><name></name></author><category term="[&quot;My Keyboards&quot;]" /><category term="Keyboards" /><category term="Hund" /><summary type="html"><![CDATA[This is the story about the time when I spent a lot of money and almost upgraded my keyboard. Heh..]]></summary></entry><entry><title type="html">How to select all text in qutebrowser using Ctrl+A</title><link href="https://hunden.linuxkompis.se/2021/05/02/how-to-select-all-text-in-qutebrowser-using-ctrl+a.html" rel="alternate" type="text/html" title="How to select all text in qutebrowser using Ctrl+A" /><published>2021-05-02T00:00:00+02:00</published><updated>2024-02-16T19:42:13+01:00</updated><id>https://hunden.linuxkompis.se/2021/05/02/how-to-select-all-text-in-qutebrowser-using-ctrl+a</id><content type="html" xml:base="https://hunden.linuxkompis.se/2021/05/02/how-to-select-all-text-in-qutebrowser-using-ctrl+a.html"><![CDATA[<p>This is really not a complicated thing to do, but it took me a while to figure out how to bind the command <code class="language-plaintext highlighter-rouge">vvG</code> to a key like <code class="language-plaintext highlighter-rouge">Ctrl+A</code>.</p>

<p>It turned out that the syntax for the keybinding was a bit different then from what I expected it to be:</p>

<div class="language-plaintext highlighter-rouge"><div class="highlight"><pre class="highlight"><code>:bind &lt;Ctrl+a&gt; mode-enter caret ;; selection-toggle ;; move-to-end-of-document
</code></pre></div></div>

<p>I usually try to stay away from <code class="language-plaintext highlighter-rouge">Ctrl+&lt;Key&gt;</code>, but for some things it just makes sense. Especially when it’s something that’s deeply rooted in the muscle memory.</p>]]></content><author><name></name></author><category term="[&quot;Tips &amp; Trix&quot;]" /><category term="qutebrowser" /><summary type="html"><![CDATA[This is really not a complicated thing to do, but it took me a while to figure out how to bind the command vvG to a key like Ctrl+A.]]></summary></entry><entry><title type="html">Twitchy is dead — long live Twitchy</title><link href="https://hunden.linuxkompis.se/2021/04/17/twitchy-is-dead-long-live-twitchy.html" rel="alternate" type="text/html" title="Twitchy is dead — long live Twitchy" /><published>2021-04-17T00:00:00+02:00</published><updated>2024-02-16T19:42:13+01:00</updated><id>https://hunden.linuxkompis.se/2021/04/17/twitchy-is-dead-long-live-twitchy</id><content type="html" xml:base="https://hunden.linuxkompis.se/2021/04/17/twitchy-is-dead-long-live-twitchy.html"><![CDATA[<p>I recently wrote about <a href="https://hunden.linuxkompis.se/2021/01/03/wtwitch-a-twitch-client-written-in-bash.html">wtwitch</a>, a CLI-client for Twitch. It was my replacement client for Twitchy when it died and stopped working.</p>

<p>While wtwitch was (and still is) a good client, I missed one little detail from it; being able to see how long a channel has been online.</p>

<div class="grid-container">
    <div class="grid-item single">
        <a href="/img/rofi-twitchy.png">
            <img src="/img/rofi-twitchy.png" alt="" />
        </a>
        <figcaption>An old screenshot of <a href="https://hunden.linuxkompis.se/2018/09/23/launch-twitch-streams-via-rofi-using-twitchy.html">my Rofi-plugin for Twitchy</a></figcaption>
    </div>
</div>

<p>That’s why I was rather happy when a fellow user of Twitchy decided to <a href="https://github.com/roceb/twitchy">fork Twitchy</a> and make it work by fixing the missing headers for API calls, as well as adding the ‘new’ streaming quality 720p at 60 FPS.</p>

<p>I have no idea what the future is for this fork. It still has the same name and pretty much one commit since the fork, but for as long as it works, I’m going to use it.</p>]]></content><author><name></name></author><category term="[&quot;Applications &amp; Tools&quot;]" /><category term="Twitchy" /><category term="Twitch" /><summary type="html"><![CDATA[I recently wrote about wtwitch, a CLI-client for Twitch. It was my replacement client for Twitchy when it died and stopped working.]]></summary></entry><entry><title type="html">Forecast - A simple Bash script for the weather service Yr.no</title><link href="https://hunden.linuxkompis.se/2021/03/23/forecast-a-simple-bash-script-for-the-weather-service-yr.no.html" rel="alternate" type="text/html" title="Forecast - A simple Bash script for the weather service Yr.no" /><published>2021-03-23T00:00:00+01:00</published><updated>2024-02-16T19:42:13+01:00</updated><id>https://hunden.linuxkompis.se/2021/03/23/forecast-a-simple-bash-script-for-the-weather-service-yr.no</id><content type="html" xml:base="https://hunden.linuxkompis.se/2021/03/23/forecast-a-simple-bash-script-for-the-weather-service-yr.no.html"><![CDATA[<p>Some time ago, my rather old (zsh!) script for checking the current weather from the weather service <a href="https://www.yr.no">Yr.no</a> broke, after some looking around I found a new alternative called <a href="https://github.com/j-jith/forecast.sh">Forecast</a>.</p>

<p>The script is written in Bash, and it’s pretty straightforward. It requires <code class="language-plaintext highlighter-rouge">bash</code>, <code class="language-plaintext highlighter-rouge">curl</code> and <code class="language-plaintext highlighter-rouge">xsltproc</code>.</p>

<p>This is the syntax for how you show the current weather:</p>

<div class="language-bash highlighter-rouge"><div class="highlight"><pre class="highlight"><code><span class="nv">$ </span>forecast.sh <span class="nt">-l</span> <span class="s2">"Sweden/Stockholm/Stockholm"</span>
Stockholm, Sweden
Sunrise: 05:40  Sunset: 18:09
Forecast:
From 2021-03-23 10:00 to 12:00
Outlook: Clear sky 8°C
Wind: Light breeze 3.0 m/s W
Precipitation: 0 mm
Pressure: 1014.9 hPa
</code></pre></div></div>

<p>There are two flags available <code class="language-plaintext highlighter-rouge">-l</code> and <code class="language-plaintext highlighter-rouge">-o</code>. The <code class="language-plaintext highlighter-rouge">-l</code> flag is for location and the location itself is formated like <code class="language-plaintext highlighter-rouge">Country/State/City</code>. The <code class="language-plaintext highlighter-rouge">-o</code> flag is for offset, and the following time periods are available:</p>

<p>There are two flags available:</p>

<table>
  <tbody>
    <tr>
      <td><code class="language-plaintext highlighter-rouge">-l &lt;Country/State/City&gt;</code></td>
      <td>Let’s you set the location.</td>
    </tr>
    <tr>
      <td><code class="language-plaintext highlighter-rouge">-o &lt;N&gt;</code></td>
      <td>Let’s you (optionally) set the time period.</td>
    </tr>
  </tbody>
</table>

<p>The following time periods are available:</p>

<ul>
  <li>23:30-05:30</li>
  <li>05:30-11:30</li>
  <li>11:30-17:30</li>
  <li>17:30-23:30.</li>
</ul>

<p>Period-offset of <code class="language-plaintext highlighter-rouge">0</code> (default) gives the forecast for the current period. A value of <code class="language-plaintext highlighter-rouge">1</code> gives the forecast for the next period and so on.</p>

<h2 id="using-it-with-polybar">Using it with Polybar</h2>

<p>I mainly use it with Polybar to show the current weather like this:</p>

<div class="grid-container">
    <div class="grid-item single">
        <a href="/img/polybar-forecast.png">
            <img src="/img/polybar-forecast.png" alt="" />
        </a>
        <figcaption>A screenshort of my Polybar setup with Forecast.</figcaption>
    </div>
</div>

<p>Since the weather doesn’t change that often, I have chosen to use a cron job that runs once every hour and saves the data to a file that Polybar then reads.</p>

<p>The cron job looks like this:</p>

<div class="language-bash highlighter-rouge"><div class="highlight"><pre class="highlight"><code>forecast.sh <span class="nt">-l</span> <span class="s2">"&lt;Country&gt;/&lt;State&gt;/&lt;City&gt;"</span> <span class="nt">-p</span> 0 | <span class="nb">grep</span> <span class="s2">"Outlook"</span> | <span class="nb">sed</span> <span class="s1">'s/Outlook: //'</span>
</code></pre></div></div>

<p>And the command for Polybar looks like this:</p>

<div class="language-plaintext highlighter-rouge"><div class="highlight"><pre class="highlight"><code>[module/weather]
inherit = script/defaults
exec = cat /tmp/weather.log
format-prefix = " "
format-prefix-foreground = ${colors.blue}
</code></pre></div></div>]]></content><author><name></name></author><category term="[&quot;Applications &amp; Tools&quot;]" /><category term="Weather" /><category term="Scripts" /><category term="Bash" /><summary type="html"><![CDATA[Some time ago, my rather old (zsh!) script for checking the current weather from the weather service Yr.no broke, after some looking around I found a new alternative called Forecast.]]></summary></entry><entry><title type="html">How-to: Coloured manual pages</title><link href="https://hunden.linuxkompis.se/2021/02/17/coloured-manual-pages.html" rel="alternate" type="text/html" title="How-to: Coloured manual pages" /><published>2021-02-17T00:00:00+01:00</published><updated>2024-02-16T19:42:13+01:00</updated><id>https://hunden.linuxkompis.se/2021/02/17/coloured-manual-pages</id><content type="html" xml:base="https://hunden.linuxkompis.se/2021/02/17/coloured-manual-pages.html"><![CDATA[<p>It’s easy to take a lot of things for granted when you’ve been using them for longer than you can remember. Coloured manual pages is one of those things.</p>

<p>By default, there’s no colours for the manual pages, which can make it more difficult to distinguish parts and sections of the documentation than it has to be.</p>

<div class="grid-container">
    <div class="grid-item single">
        <a href="/img/coloured_manpages.png">
            <img src="/img/t/coloured_manpages.png" alt="" />
        </a>
        <figcaption>This is what my manual pages looks like.</figcaption>
    </div>
</div>

<p>If you want to put some colours on your own manual pages; simply add this to your configuration file for your shell:</p>

<div class="language-bash highlighter-rouge"><div class="highlight"><pre class="highlight"><code>man<span class="o">()</span> <span class="o">{</span>
    <span class="nb">env </span><span class="nv">LESS_TERMCAP_mb</span><span class="o">=</span><span class="s1">$'</span><span class="se">\E</span><span class="s1">[01;31m'</span> <span class="se">\</span>
    <span class="nv">LESS_TERMCAP_md</span><span class="o">=</span><span class="s1">$'</span><span class="se">\E</span><span class="s1">[01;33;5;74m'</span> <span class="se">\</span>
    <span class="nv">LESS_TERMCAP_me</span><span class="o">=</span><span class="s1">$'</span><span class="se">\E</span><span class="s1">[0m'</span> <span class="se">\</span>
    <span class="nv">LESS_TERMCAP_se</span><span class="o">=</span><span class="s1">$'</span><span class="se">\E</span><span class="s1">[0m'</span> <span class="se">\</span>
    <span class="nv">LESS_TERMCAP_so</span><span class="o">=</span><span class="s1">$'</span><span class="se">\E</span><span class="s1">[38;5;246m'</span> <span class="se">\</span>
    <span class="nv">LESS_TERMCAP_ue</span><span class="o">=</span><span class="s1">$'</span><span class="se">\E</span><span class="s1">[0m'</span> <span class="se">\</span>
    <span class="nv">LESS_TERMCAP_us</span><span class="o">=</span><span class="s1">$'</span><span class="se">\E</span><span class="s1">[04;39;5;146m'</span> <span class="se">\</span>
    man <span class="s2">"</span><span class="nv">$@</span><span class="s2">"</span>
<span class="o">}</span>
</code></pre></div></div>

<p>If you want to change the colour of the yellow text, you have to change the value <code class="language-plaintext highlighter-rouge">33</code> on line 3 and if you want to change the cyan colour, you then have to change the value <code class="language-plaintext highlighter-rouge">36</code> on line 8.</p>

<p>Here are the codes if you haven’t memorised them:</p>

<table>
  <thead>
    <tr>
      <th>Colour</th>
      <th>Code</th>
    </tr>
  </thead>
  <tbody>
    <tr>
      <td>Black</td>
      <td>30</td>
    </tr>
    <tr>
      <td>Red</td>
      <td>31</td>
    </tr>
    <tr>
      <td>Green</td>
      <td>32</td>
    </tr>
    <tr>
      <td>Yellow</td>
      <td>33</td>
    </tr>
    <tr>
      <td>Blue</td>
      <td>34</td>
    </tr>
    <tr>
      <td>Purple</td>
      <td>35</td>
    </tr>
    <tr>
      <td>Cyan</td>
      <td>36</td>
    </tr>
    <tr>
      <td>Light Gray</td>
      <td>37</td>
    </tr>
  </tbody>
</table>]]></content><author><name></name></author><category term="[&quot;Tips &amp; Trix&quot;]" /><category term="Manual pages" /><category term="Shell" /><summary type="html"><![CDATA[It’s easy to take a lot of things for granted when you’ve been using them for longer than you can remember. Coloured manual pages is one of those things.]]></summary></entry><entry><title type="html">How I print my text documents with fancy colours</title><link href="https://hunden.linuxkompis.se/2021/02/13/how-i-print-my-text-documents-with-fancy-colours.html" rel="alternate" type="text/html" title="How I print my text documents with fancy colours" /><published>2021-02-13T00:00:00+01:00</published><updated>2024-02-16T19:42:13+01:00</updated><id>https://hunden.linuxkompis.se/2021/02/13/how-i-print-my-text-documents-with-fancy-colours</id><content type="html" xml:base="https://hunden.linuxkompis.se/2021/02/13/how-i-print-my-text-documents-with-fancy-colours.html"><![CDATA[<p>I often read my plain text documents using <code class="language-plaintext highlighter-rouge">cat</code>. For the most part that works just fine, but for some larger documents—especially documents with documentation that contains a lot of headers, lists and folds—it can be somewhat difficult to read the document.</p>

<p>That’s why I’m using <a href="http://supercat.nosredna.net/">Supercat</a> for things like this. It works just like <code class="language-plaintext highlighter-rouge">cat</code> (hence the name), but it also supports colours using <a href="https://en.wikipedia.org/wiki/Regular_expression">regular expressions</a>.</p>

<div class="grid-container">
    <div class="grid-item single">
        <a href="/img/supercat-markdown.png">
            <img src="/img/supercat-markdown.png" alt="" />
        </a>
        <figcaption>A compact demo with a Markdown document.</figcaption>
    </div>
</div>

<p>The markers “{{{” and “}}}” are Neovim folds. I can’t imagine living without <a href="https://hunden.linuxkompis.se/2019/04/15/getting-started-with-folding-in-vim.html">folds</a>. I use them all the time, even though they do make the file ‘cluttery’ to read with any other standard tool.</p>

<p>It should be noted that this works with a pager as well. If the document is really large, I will page it to <code class="language-plaintext highlighter-rouge">less</code>.</p>

<p>Supercat works by specifying a configuration file and the file you want to print:</p>

<div class="language-plaintext highlighter-rouge"><div class="highlight"><pre class="highlight"><code>$ spc -c ~/.config/supercat/markdown.conf demo.md
</code></pre></div></div>

<p>My configuration file for my Markdown documents looks like this:</p>

<div class="language-bash highlighter-rouge"><div class="highlight"><pre class="highlight"><code><span class="c"># spc configuration file</span>
<span class="c">#</span>
<span class="c"># col - color (blk, red, grn, yel, blu, mag, cya, whi)</span>
<span class="c">#</span>
<span class="c">#   a - color attribute (console_code)</span>
<span class="c">#         ' ':normal          (0)</span>
<span class="c">#         '-':normal          (0)</span>
<span class="c">#         'b':bold            (1)</span>
<span class="c">#         'u':underline       (4)</span>
<span class="c">#         'r':reverse-video   (7)</span>
<span class="c">#         'k':blink           (5)</span>
<span class="c">#</span>
<span class="c">#   n - number of matches,  (' ':1, '1'-'9':1-9, '0':all)</span>
<span class="c">#</span>
<span class="c">#   t - pattern type</span>
<span class="c">#         'c':chars     (strchr)</span>
<span class="c">#         's':string    (strstr)</span>
<span class="c">#         't':regexp    (regcomp) (convert 10-digit unix time to MMDDHHMMSS)</span>
<span class="c">#         'r':regexp    (regcomp)</span>
<span class="c">#         ' ':regexp    (regcomp)</span>
<span class="c">#</span>
<span class="c">#                    col a n t pattern</span>
<span class="c">#################### ### # # # ########################################</span>
H1                   red   1   <span class="o">(</span>^#<span class="se">\s</span>.<span class="k">*</span><span class="nv">$)</span>
H2                   yel   1   <span class="o">(</span>^##<span class="se">\s</span>.<span class="k">*</span><span class="nv">$)</span>
H3                   yel   1   <span class="o">(</span>^###<span class="se">\s</span>.<span class="k">*</span><span class="nv">$)</span>
H4                   yel   1   <span class="o">(</span>^####<span class="se">\s</span>.<span class="k">*</span><span class="nv">$)</span>
Header               red   1   <span class="o">(</span>^---.<span class="k">*</span><span class="nv">$)</span>
Fold                 blk   1   <span class="o">(</span><span class="c"># \}\}\})</span>
Fold                 blk   1   <span class="o">(</span><span class="se">\}\}\}</span><span class="o">)</span>
Fold                 blk   1   <span class="o">(</span><span class="se">\{\{\{</span><span class="o">)</span>
List                 blu   1   <span class="o">(</span>^<span class="se">\s</span><span class="k">*</span><span class="se">\*</span><span class="o">)</span>
</code></pre></div></div>

<p>It only supports headers, lists and folds, which is all that I use for formatting my plaintext documents.</p>]]></content><author><name></name></author><category term="[&quot;Applications &amp; Tools&quot;]" /><category term="Supercat" /><category term="Cat" /><category term="Markdown" /><category term="Plaintext" /><summary type="html"><![CDATA[I often read my plain text documents using cat. For the most part that works just fine, but for some larger documents—especially documents with documentation that contains a lot of headers, lists and folds—it can be somewhat difficult to read the document.]]></summary></entry><entry><title type="html">My Rofi plugin for wtwitch</title><link href="https://hunden.linuxkompis.se/2021/02/05/my-rofi-plugin-for-wtwitch.html" rel="alternate" type="text/html" title="My Rofi plugin for wtwitch" /><published>2021-02-05T00:00:00+01:00</published><updated>2024-02-16T19:42:13+01:00</updated><id>https://hunden.linuxkompis.se/2021/02/05/my-rofi-plugin-for-wtwitch</id><content type="html" xml:base="https://hunden.linuxkompis.se/2021/02/05/my-rofi-plugin-for-wtwitch.html"><![CDATA[<p>I recently wrote about <a href="https://hunden.linuxkompis.se/2021/01/03/wtwitch-a-twitch-client-written-in-bash.html">wtwitch</a> (a CLI-client for Twitch) and while it’s a really good client, I was missing the ability to launch the streams via Rofi like I used to be able to do in the past <a href="https://hunden.linuxkompis.se/2018/09/23/launch-twitch-streams-via-rofi-using-twitchy.html">with Twitchy</a>.</p>

<p>That’s why I adapted my current Rofi script for wtwitch instead of Twitchy:</p>

<p><a href="/img/rofi-wtwitch.png"><img src="/img/rofi-wtwitch.png" alt="" /></a></p>

<p>And here’s the script itself:</p>

<div class="language-bash highlighter-rouge"><div class="highlight"><pre class="highlight"><code><span class="c">#!/bin/bash</span>

handle_selection<span class="o">()</span> <span class="o">{</span>
    <span class="k">if</span> <span class="o">[[</span> <span class="nv">$1</span> <span class="o">]]</span><span class="p">;</span> <span class="k">then
        </span><span class="nv">name</span><span class="o">=</span><span class="si">$(</span><span class="nb">echo</span> <span class="nv">$1</span> | <span class="nb">awk</span> <span class="o">{</span><span class="s1">'print $1'</span><span class="o">}</span> | <span class="nb">sed</span> <span class="s1">'s/\://'</span><span class="si">)</span>
    	notify-send <span class="s2">"wtwitch"</span> <span class="s2">"Launching the livestream with </span><span class="nv">$name</span><span class="s2">"</span>
        streamlink https://twitch.tv/<span class="nv">$name</span> <span class="nt">--title</span> <span class="s2">"{author}: {title} ({category})"</span>
    <span class="k">else
        </span><span class="nb">exit </span>1
    <span class="k">fi</span>
<span class="o">}</span>

handle_selection <span class="s2">"</span><span class="si">$(</span> wtwitch check | <span class="nb">sed</span> <span class="nt">-n</span> <span class="s1">'/Live/,/Settings/p'</span> | <span class="nb">sed</span> <span class="s1">'/Live channels/d;/Settings/d'</span> | <span class="nb">sed</span> <span class="s1">'s/\x1B\[[0-9;]\{1,\}[A-Za-z]//g;s/   //;'</span> | rofi <span class="nt">-font</span> <span class="s2">"xos4terminus 12"</span> <span class="nt">-bw</span> 3 <span class="nt">-dmenu</span> <span class="nt">-i</span> <span class="nt">-p</span> <span class="s1">'wtwitch'</span> <span class="si">)</span><span class="s2">"</span>
</code></pre></div></div>

<p>The only thing it’s missing is the current online time of the channels, but that’s a limitation of wtwitch and not my script.</p>

<p>And I know, I haven’t made a post about Rofi itself yet. I’ve been using it for years now, perhaps it’s time for it soon.</p>]]></content><author><name></name></author><category term="[&quot;Applications &amp; Tools&quot;]" /><category term="wtwitch" /><category term="Rofi" /><category term="Twitch" /><category term="streamlink" /><summary type="html"><![CDATA[I recently wrote about wtwitch (a CLI-client for Twitch) and while it’s a really good client, I was missing the ability to launch the streams via Rofi like I used to be able to do in the past with Twitchy.]]></summary></entry><entry><title type="html">Doas - A lightweight alternative to sudo</title><link href="https://hunden.linuxkompis.se/2021/02/04/doas-a-lightweight-alternative-to-sudo.html" rel="alternate" type="text/html" title="Doas - A lightweight alternative to sudo" /><published>2021-02-04T00:00:00+01:00</published><updated>2024-02-16T19:42:13+01:00</updated><id>https://hunden.linuxkompis.se/2021/02/04/doas-a-lightweight-alternative-to-sudo</id><content type="html" xml:base="https://hunden.linuxkompis.se/2021/02/04/doas-a-lightweight-alternative-to-sudo.html"><![CDATA[<p>I was recently made aware of <a href="https://wiki.gentoo.org/wiki/Doas">doas</a>, a simplified and lightweight alternative to <a href="https://wiki.gentoo.org/wiki/Sudo">sudo</a>, which are two utilities to execute commands as another user. The most common use case for these utilities is to execute commands as the “super user” also known as the root user.</p>

<p>doas was originally written for <a href="https://www.openbsd.org">OpenBSD</a>, but are now <a href="https://github.com/slicer69/doas/">ported</a> to Linux, <a href="https://www.freebsd.org">FreeBSD</a>, <a href="http://netbsd.org">NetBSD</a> and <a href="https://illumos.org/">illumos</a>.</p>

<p>In terms of disk usage, the binary file for doas is about four times smaller than sudo on my computer with Gentoo and about 27 (!) times smaller on my computer with Alpine Linux (1216 KiB vs 44 KiB).</p>

<p>When it comes to the configuration, I would say it’s a bit more straightforward, but not enough to be a dealbreaker. In terms of functionality, it seems like doas have some features that sudo is currently lacking, like denying a user access to a specific command.</p>

<h2 id="example-usage">Example usage</h2>

<p>To allow all users in the <code class="language-plaintext highlighter-rouge">wheel</code> group to gain access to root, add this to the configuration file <code class="language-plaintext highlighter-rouge">/etc/doas.conf</code>:</p>

<div class="language-plaintext highlighter-rouge"><div class="highlight"><pre class="highlight"><code>permit :wheel
</code></pre></div></div>

<p>Allow a user to execute a command without entering the password:</p>

<div class="language-plaintext highlighter-rouge"><div class="highlight"><pre class="highlight"><code>permit nopass &lt;user&gt; cmd &lt;command&gt;
</code></pre></div></div>

<p>Deny users access to commands (even if they’re in the <code class="language-plaintext highlighter-rouge">wheel</code> group):</p>

<div class="language-plaintext highlighter-rouge"><div class="highlight"><pre class="highlight"><code>deny &lt;user&gt; cmd &lt;command&gt;
</code></pre></div></div>]]></content><author><name></name></author><category term="[&quot;Applications &amp; Tools&quot;]" /><category term="doas" /><category term="sudo" /><summary type="html"><![CDATA[I was recently made aware of doas, a simplified and lightweight alternative to sudo, which are two utilities to execute commands as another user. The most common use case for these utilities is to execute commands as the “super user” also known as the root user.]]></summary></entry><entry><title type="html">How-to: Count the number of online channels via wtwitch</title><link href="https://hunden.linuxkompis.se/2021/01/30/how-to-count-the-number-of-online-channels-via-wtwitch.html" rel="alternate" type="text/html" title="How-to: Count the number of online channels via wtwitch" /><published>2021-01-30T00:00:00+01:00</published><updated>2024-02-16T19:42:13+01:00</updated><id>https://hunden.linuxkompis.se/2021/01/30/how-to-count-the-number-of-online-channels-via-wtwitch</id><content type="html" xml:base="https://hunden.linuxkompis.se/2021/01/30/how-to-count-the-number-of-online-channels-via-wtwitch.html"><![CDATA[<p>I recently wrote about my new Twitch client <a href="https://hunden.linuxkompis.se/2021/01/03/wtwitch-a-twitch-client-written-in-bash.html">wtwitch</a>. It’s been a good replacement for my previous client Twitchy (which has been abandoned and stopped working last year), but there has been one thing that I’ve been missing from my previous client, and that’s the ability to count and print the online channels.</p>

<p>With twitchy it was as easy as:</p>

<div class="language-plaintext highlighter-rouge"><div class="highlight"><pre class="highlight"><code>$ twitchy --non-interactive | wc -l
</code></pre></div></div>

<p>I used this command to display the online channels in Polybar like this:</p>

<div class="language-plaintext highlighter-rouge"><div class="highlight"><pre class="highlight"><code>[module/twitch]
inherit = script/defaults

exec = twitchy --non-interactive | wc -l
format-prefix = " "
format-prefix-foreground = ${colors.magenta}
</code></pre></div></div>

<p>And this is what it looks like:</p>

<p><a href="/img/polybar-twitch.png"><img src="/img/polybar-twitch.png" alt="A part screenshot of my Polybar panel showing the amount of online channels on Twitch" /></a></p>

<p>This is also possible with wtwitch, even though it doesn’t support it, I just had to use a few tools to get around it:</p>

<div class="language-plaintext highlighter-rouge"><div class="highlight"><pre class="highlight"><code>$ wtwitch check | sed -n '/Live/,/Settings/p' | sed '/Live channels/d;/Settings/d' | head -n -1 | wc -l
</code></pre></div></div>]]></content><author><name></name></author><category term="[&quot;Tips &amp; Trix&quot;]" /><category term="Twitch" /><category term="wtwitch" /><category term="Polybar" /><category term="Bash" /><summary type="html"><![CDATA[I recently wrote about my new Twitch client wtwitch. It’s been a good replacement for my previous client Twitchy (which has been abandoned and stopped working last year), but there has been one thing that I’ve been missing from my previous client, and that’s the ability to count and print the online channels.]]></summary></entry><entry><title type="html">How to swallow clients in i3 with i3-swallow</title><link href="https://hunden.linuxkompis.se/2021/01/10/how-to-swallow-clients-in-i3-with-i3-swallow.html" rel="alternate" type="text/html" title="How to swallow clients in i3 with i3-swallow" /><published>2021-01-10T00:00:00+01:00</published><updated>2024-02-16T19:42:13+01:00</updated><id>https://hunden.linuxkompis.se/2021/01/10/how-to-swallow-clients-in-i3-with-i3-swallow</id><content type="html" xml:base="https://hunden.linuxkompis.se/2021/01/10/how-to-swallow-clients-in-i3-with-i3-swallow.html"><![CDATA[<p>A neat feature with the tiling window manager <a href="https://dwm.suckless.org/">dwm</a> is the fact that it can swallow clients. This means that when you, for an example open a video with mpv in the terminal (or via <a href="https://hunden.linuxkompis.se/2020/08/20/ranger-my-favourite-file-manager.html">Ranger</a>), you can automatically replace that client with the video. This helps you save a lot of valuable space on your desktop.</p>

<figure>
<video width="460" controls="">
    <source src="/img/i3-swallow.mp4" type="video/mp4" />
    Your browser does not support the video tag.
</video>
    <figcaption>A short video demonstrating the swallow feature. Video filesize: 880 K.</figcaption>
</figure>

<p>This feature is not available in i3 by default, but thanks to an addon called <a href="https://github.com/jamesofarrell/i3-swallow">i3-swallow</a> and the Python library <a href="https://github.com/altdesktop/i3ipc-python">i3ipc-python</a>, it’s possible to have this in i3 as well.</p>

<h2 id="installation">Installation</h2>

<h3 id="i3-swallow">i3-swallow</h3>

<p>The installation is pretty easy, you just have to download the <a href="https://github.com/jamesofarrell/i3-swallow">source code for i3-swallow</a>, preferably using git:</p>

<div class="language-bash highlighter-rouge"><div class="highlight"><pre class="highlight"><code><span class="nv">$ </span>git clone https://github.com/jamesofarrell/i3-swallow
</code></pre></div></div>

<p>Then place the script in <a href="https://hunden.linuxkompis.se/2019/03/26/running-scripts-in-your-shell-without-specifying-the-absolute-path.html">your $PATH</a>. I use the folder <code class="language-plaintext highlighter-rouge">~/local/bin/</code> myself:</p>

<div class="language-bash highlighter-rouge"><div class="highlight"><pre class="highlight"><code><span class="nv">$ </span><span class="nb">ln</span> <span class="nt">-s</span> ~/src/git/i3-swallow/swallow.py ~/.local/bin/
</code></pre></div></div>

<h3 id="i3ipc-python">i3ipc-python</h3>

<p>This package is <a href="https://pypi.org/project/i3ipc/">availbable via pip</a>:</p>

<div class="language-bash highlighter-rouge"><div class="highlight"><pre class="highlight"><code><span class="nv">$ </span>pip <span class="nb">install</span> <span class="nt">--user</span> i3ipc
</code></pre></div></div>

<p>I prefer to keep as much packages as possible via Gentoo’s own package manager, so I made an ebuild for it called <code class="language-plaintext highlighter-rouge">dev-python/i3ipc</code>:</p>

<div class="language-bash highlighter-rouge"><div class="highlight"><pre class="highlight"><code><span class="nv">EAPI</span><span class="o">=</span>7

<span class="nv">PYTHON_COMPAT</span><span class="o">=(</span> python3_<span class="o">{</span>7..9<span class="o">}</span> <span class="o">)</span>

inherit distutils-r1

<span class="nv">DESCRIPTION</span><span class="o">=</span><span class="s2">"An improved Python library to control i3wm and sway."</span>
<span class="nv">HOMEPAGE</span><span class="o">=</span><span class="s2">"https://github.com/altdesktop/i3ipc-python"</span>
<span class="nv">SRC_URI</span><span class="o">=</span><span class="s2">"mirror://pypi/</span><span class="k">${</span><span class="nv">PN</span>:0:1<span class="k">}</span><span class="s2">/</span><span class="k">${</span><span class="nv">PN</span><span class="k">}</span><span class="s2">/</span><span class="k">${</span><span class="nv">P</span><span class="k">}</span><span class="s2">.tar.gz"</span>

<span class="nv">LICENSE</span><span class="o">=</span><span class="s2">"BSD"</span>
<span class="nv">SLOT</span><span class="o">=</span><span class="s2">"0"</span>
<span class="nv">KEYWORDS</span><span class="o">=</span><span class="s2">"amd64"</span>

<span class="nv">RDEPEND</span><span class="o">=</span><span class="s2">"dev-python/python-xlib"</span>
<span class="nv">DEPEND</span><span class="o">=</span><span class="s2">"</span><span class="k">${</span><span class="nv">DEPEND</span><span class="k">}</span><span class="s2">"</span>
</code></pre></div></div>

<h2 id="usage">Usage</h2>

<p>You can now use the script like this:</p>

<div class="language-bash highlighter-rouge"><div class="highlight"><pre class="highlight"><code><span class="nv">$ </span>swallow.py mpv &lt;file&gt;
</code></pre></div></div>]]></content><author><name></name></author><category term="[&quot;Applications &amp; Tools&quot;]" /><category term="i3" /><summary type="html"><![CDATA[A neat feature with the tiling window manager dwm is the fact that it can swallow clients. This means that when you, for an example open a video with mpv in the terminal (or via Ranger), you can automatically replace that client with the video. This helps you save a lot of valuable space on your desktop.]]></summary></entry><entry><title type="html">wtwitch - A Twitch client written in Bash</title><link href="https://hunden.linuxkompis.se/2021/01/03/wtwitch-a-twitch-client-written-in-bash.html" rel="alternate" type="text/html" title="wtwitch - A Twitch client written in Bash" /><published>2021-01-03T00:00:00+01:00</published><updated>2024-02-16T19:42:13+01:00</updated><id>https://hunden.linuxkompis.se/2021/01/03/wtwitch-a-twitch-client-written-in-bash</id><content type="html" xml:base="https://hunden.linuxkompis.se/2021/01/03/wtwitch-a-twitch-client-written-in-bash.html"><![CDATA[<p>I just found out about a new Twitch client called <a href="https://git.sr.ht/~krathalan/wtwitch">wtwitch</a>. It’s written in Bash and it uses the Twitch API and the streamlink package to provide Twitch browsing, subscription, and playback functionality without signing up for a Twitch account and without loading or executing Twitch’s proprietary JavaScript.</p>

<p>Here’s how it looks when you list the online channels you have subscribed to:</p>

<p><a href="/img/wtwitch.png"><img src="/img/wtwitch.png" alt="The default look of wtwitch" /></a></p>

<p>wtwitch has the following commands available:</p>

<div class="language-plaintext highlighter-rouge"><div class="highlight"><pre class="highlight"><code>[w]atch [name]      - Watch [name] streamer.
[s]ub [name(s)]     - Subscribe to [name] streamer.
                      You can subscribe to multiple streamers in one command.
[u]nsub [name(s)]   - Unsubscribe from [name] streamer.
                      You can unsubscribe from multiple streamers in one command.
[c]heck             - View your settings and the status of streamers you are
                      subscribed to.
[e] [search-term]   - Search games/categories for [search-term].
[n] [search-term]   - Search streamers/channels for [search-term].
[g]ame [name]       - View the top streamers for [name] game/category.
[t]op               - View the top games and streamers on Twitch.
[f]                 - Toggle the printing of offline subscriptions with [c]heck.
[l]                 - Toggle the usage of colors in wtwitch output.
[p]layer [program]  - Change the player program that gets passed to streamlink.
[q]uality [quality] - Change the video quality that gets passed to streamlink.
[b]lock [name(s)]   - Block [name] streamer, preventing them from appearing in any
                      output. You can block multiple streamers in one command.
[v]ersion           - Print the current version of wtwitch.
[h]elp              - Print this help.
</code></pre></div></div>

<p>You can install the manual page yourself (see below) or just have a look at the <a href="https://krathalan.net/wtwitch.html">online manual</a> if you need any help.</p>

<h2 id="installation">Installation</h2>

<p>This is a Bash script, so the ‘installation’ is rather simple; you can just put the script in <a href="https://hunden.linuxkompis.se/2019/03/26/running-scripts-in-your-shell-without-specifying-the-absolute-path.html">your $PATH</a> and then run it, but I do recommend creating a symbolic link from the source directory to your $PATH instead. This makes updating the source a lot easier.</p>

<p>This is what I did to create a symbolic link:</p>

<div class="language-bash highlighter-rouge"><div class="highlight"><pre class="highlight"><code><span class="nv">$ </span><span class="nb">ln</span> <span class="nt">-s</span> ~/src/git/wtwitch/src/wtwitch ~/.local/bin
</code></pre></div></div>

<p>Do note that wtwitch requires <a href="https://github.com/streamlink/streamlink">streamlink</a> and <a href="https://stedolan.github.io/jq/">jq</a>, both packages should be available in the repositories for any common Linux based operating systems. In Gentoo, they’re available as <code class="language-plaintext highlighter-rouge">net-misc/streamlink</code> and <code class="language-plaintext highlighter-rouge">app-misc/jq</code>.</p>

<h3 id="manual-page">Manual page</h3>

<p>If, you want to install an offline copy of the manual you need to install the tool <a href="https://git.sr.ht/~sircmpwn/scdoc/">scdoc</a>. It’s available in Gentoo as <code class="language-plaintext highlighter-rouge">app-text/scdoc</code>.</p>

<p>Make sure that you’re in the <code class="language-plaintext highlighter-rouge">src</code> directory and then run <code class="language-plaintext highlighter-rouge">scdoc</code>:</p>

<div class="language-bash highlighter-rouge"><div class="highlight"><pre class="highlight"><code><span class="nv">$ </span>scdoc &lt; wtwitch.1.scd <span class="o">&gt;</span> wtwitch.1
</code></pre></div></div>

<p>You can then view the manual page with the command:</p>

<div class="language-bash highlighter-rouge"><div class="highlight"><pre class="highlight"><code><span class="nv">$ </span>man <span class="nt">-l</span> wtwitch.1
</code></pre></div></div>]]></content><author><name></name></author><category term="Twitch" /><category term="wtwitch" /><category term="Bash" /><summary type="html"><![CDATA[I just found out about a new Twitch client called wtwitch. It’s written in Bash and it uses the Twitch API and the streamlink package to provide Twitch browsing, subscription, and playback functionality without signing up for a Twitch account and without loading or executing Twitch’s proprietary JavaScript.]]></summary></entry><entry><title type="html">I have no sound or vibration on my phone and it’s great</title><link href="https://hunden.linuxkompis.se/2020/12/29/i-have-no-sound-or-vibration-on-my-phone-and-its-great.html" rel="alternate" type="text/html" title="I have no sound or vibration on my phone and it’s great" /><published>2020-12-29T00:00:00+01:00</published><updated>2024-02-16T19:42:13+01:00</updated><id>https://hunden.linuxkompis.se/2020/12/29/i-have-no-sound-or-vibration-on-my-phone-and-its-great</id><content type="html" xml:base="https://hunden.linuxkompis.se/2020/12/29/i-have-no-sound-or-vibration-on-my-phone-and-its-great.html"><![CDATA[<p>It all started a couple of years ago when I started to feel that my phone was becoming too distracting for me. I began to go through my installed applications and I found a few that I could uninstall right away, but I quickly realised that was never the issue as I don’t have that many applications to begin with.</p>

<p>The only applications that actually send me daily notifications is my XMPP-client <a href="https://f-droid.org/en/packages/eu.siacs.conversations/">Conversations</a> and my e-mail client <a href="https://f-droid.org/en/packages/com.fsck.k9/">K-9 Mail</a>. And removing those two applications was never an option. XMPP and e-mail are my two primary (and basically only) way of communicating with my family, friends and the world.</p>

<p>Because e-mail is not used for real-time conversations, I decided to disable the notifications to see if that made any difference for me. Well. It didn’t. I really don’t get that many e-mail messages per day to begin with, it only made me spend more time checking my inbox to see if I haven’t missed anything.</p>

<p><strong>Then one morning, everything changed</strong>. I was sitting in my kitchen, eating my breakfast and listening to some netcast show before getting ready for work when my phone all of a sudden just went silent. I poked at the phone trying to wake it up, but nothing happened. It was dead.</p>

<p>It turned out that my phone had been affected by the notorious “bootloop of death” issue, which seems to be a common issue for both my Nexus 5X and the Nexus 6P. To my knowledge, it’s something that eventually happens to every phone? It seems that I was just lucky that it took me more than 4 years for my phone to turn into an expensive brick.</p>

<p>I was suddenly forced to buy a new phone, something that I wasn’t really thrilled about. I didn’t want to spend either money or time on a new phone. The one I had was perfectly fine, and I’m not even interested in phones anymore. After much hesitation, I ended up ordering the Google Pixel 3a. I know—it’s no secret that I strongly dislike Google—but I want a decently affordable phone with a good camera.</p>

<p><strong>I think I was without a phone for about four or five days</strong>. While it was a bit scary to not be able to call anyone in case of an emergency (I was living alone at the time), it also felt rather nice taking a break from my otherwise distracting phone. When I eventually received my new phone, I found out about a new (new for me) feature called “flip to shhh”. It’s a feature that turns off both the sound and the vibration when you flip the phone upside down flat on any surface. A feature that I instantly fell in love with.</p>

<p>I used it all the time and it didn’t take long before I started to forget about my phone more and more. I just flipped it upside down and I often forgot about it the rest of the day, until it was time to go to sleep. It eventually came to the point where I had gotten so used to having a completely silent phone, that when it did make a sound, it annoyed me!</p>

<p>Then one day I decided to just put it in the “do not disturb” mode, which also turns of all the sound and the vibrations. I could then use phone while it was still completely silent.</p>

<p>Fast-forward a year or so and it’s still in the “do not disturb” mode. It wasn’t my plan, but it was actually really nice to have a silent phone that’s never poking at me for attention. I still flip the phone upside down to not see the display, as that would still be a distraction for me.</p>

<p>It’s sometimes easy to forget that the perfect solutions often are the simplest ones.</p>]]></content><author><name></name></author><category term="[&quot;Personal&quot;]" /><category term="Health" /><category term="Minimalism" /><summary type="html"><![CDATA[It all started a couple of years ago when I started to feel that my phone was becoming too distracting for me. I began to go through my installed applications and I found a few that I could uninstall right away, but I quickly realised that was never the issue as I don’t have that many applications to begin with.]]></summary></entry><entry><title type="html">How to add automatic dark mode for your website using plain CSS</title><link href="https://hunden.linuxkompis.se/2020/12/26/how-to-add-automatic-dark-mode-for-your-website-using-plain-css.html" rel="alternate" type="text/html" title="How to add automatic dark mode for your website using plain CSS" /><published>2020-12-26T00:00:00+01:00</published><updated>2024-02-16T19:42:13+01:00</updated><id>https://hunden.linuxkompis.se/2020/12/26/how-to-add-automatic-dark-mode-for-your-website-using-plain-css</id><content type="html" xml:base="https://hunden.linuxkompis.se/2020/12/26/how-to-add-automatic-dark-mode-for-your-website-using-plain-css.html"><![CDATA[<p>Adding an automatic dark mode for your website using plain CSS is simple. Dark mode is not something that I use myself—it’s actually worse for your eyes—but it was requested by multiple readers, so I decided to add it to my website. It’s only a few lines of CSS anyway.</p>

<p>This is what you need to add to your style sheet:</p>

<div class="language-css highlighter-rouge"><div class="highlight"><pre class="highlight"><code><span class="k">@media</span> <span class="p">(</span><span class="n">prefers-color-scheme</span><span class="p">:</span> <span class="n">dark</span><span class="p">)</span> <span class="p">{</span>
<span class="p">}</span>
</code></pre></div></div>

<p>You then add any CSS-rule in there for the things you want to change when the dark mode is enabled. For an example, let’s say you want a black background with white ext instead of the regular white background with black text:</p>

<div class="language-css highlighter-rouge"><div class="highlight"><pre class="highlight"><code><span class="k">@media</span> <span class="p">(</span><span class="n">prefers-color-scheme</span><span class="p">:</span> <span class="n">dark</span><span class="p">)</span> <span class="p">{</span>
    <span class="nt">html</span> <span class="p">{</span>
        <span class="nl">background</span><span class="p">:</span> <span class="nx">#111</span><span class="p">;</span>
        <span class="nl">color</span><span class="p">:</span> <span class="nx">#fff</span><span class="p">;</span>
    <span class="p">}</span>
<span class="p">}</span>
</code></pre></div></div>

<p>That’s it!</p>]]></content><author><name></name></author><category term="[&quot;Tips &amp; Trix&quot;]" /><category term="Web design" /><summary type="html"><![CDATA[Adding an automatic dark mode for your website using plain CSS is simple. Dark mode is not something that I use myself—it’s actually worse for your eyes—but it was requested by multiple readers, so I decided to add it to my website. It’s only a few lines of CSS anyway.]]></summary></entry><entry><title type="html">How to control mpv via the shell using Playerctl and mpv-pris</title><link href="https://hunden.linuxkompis.se/2020/12/06/how-to-control-mpv-via-the-shell-using-playerctl-and-mpv-mpris.html" rel="alternate" type="text/html" title="How to control mpv via the shell using Playerctl and mpv-pris" /><published>2020-12-06T00:00:00+01:00</published><updated>2024-02-16T19:42:13+01:00</updated><id>https://hunden.linuxkompis.se/2020/12/06/how-to-control-mpv-via-the-shell-using-playerctl-and-mpv-mpris</id><content type="html" xml:base="https://hunden.linuxkompis.se/2020/12/06/how-to-control-mpv-via-the-shell-using-playerctl-and-mpv-mpris.html"><![CDATA[<p>With the help of <a href="https://github.com/altdesktop/playerctl">Playerctl</a> it’s possible to control various media players like mpv, VLC, cmus, mpd, Spotify and even web browsers using the shell. Because I’m only using mpv myself, that’s what I’m going to talk about here.</p>

<p>For this to work you need a plugin called <a href="https://github.com/hoyon/mpv-mpris">mpv-mpris</a>. It adds support for controlling mpv using the standard media keys by implementing support for the <a href="https://specifications.freedesktop.org/mpris-spec/latest/">MPRIS D-Bus Interface Specification</a>.</p>

<h2 id="installation-of-mpv-mpris">Installation of mpv-mpris</h2>

<p>You can either download <a href="https://github.com/hoyon/mpv-mpris/releases/">the latest stable release</a> or clone the latest code using git:</p>

<div class="language-plaintext highlighter-rouge"><div class="highlight"><pre class="highlight"><code>$ git clone https://github.com/hoyon/mpv-mpris         
</code></pre></div></div>

<p>You can then compile the code:</p>

<div class="language-plaintext highlighter-rouge"><div class="highlight"><pre class="highlight"><code>$ make  
</code></pre></div></div>
<div class="language-plaintext highlighter-rouge"><div class="highlight"><pre class="highlight"><code>$ make install 
</code></pre></div></div>

<p>It’s important to <strong>not</strong> use root with <code class="language-plaintext highlighter-rouge">make install</code>, if you do that, it will then copy the plugin to the wrong folder <code class="language-plaintext highlighter-rouge">/root/.config/mpv/scritps/</code> and not to your own folder <code class="language-plaintext highlighter-rouge">~/.config/mpv/scripts/</code>.</p>

<h2 id="installation-of-playerctl">Installation of playerctl</h2>

<p>The package <code class="language-plaintext highlighter-rouge">playerctl</code> should be available in mosts repositories. In Gentoo, it’s called <code class="language-plaintext highlighter-rouge">media-sound/playerctl</code>.</p>

<h2 id="usage">Usage</h2>

<p>You can now control mpv with Playerctl using the command <code class="language-plaintext highlighter-rouge">playerctl &lt;function&gt;</code>. You can list all available commands and features by just executing the command <code class="language-plaintext highlighter-rouge">playerctl</code> without any arguments.</p>]]></content><author><name></name></author><category term="[&quot;Applications &amp; Tools&quot;]" /><category term="mpv" /><category term="Playerctl" /><category term="MPRIS" /><summary type="html"><![CDATA[With the help of Playerctl it’s possible to control various media players like mpv, VLC, cmus, mpd, Spotify and even web browsers using the shell. Because I’m only using mpv myself, that’s what I’m going to talk about here.]]></summary></entry><entry><title type="html">How to convert WebP-images to JPG and PNG using ffmpeg</title><link href="https://hunden.linuxkompis.se/2020/11/24/how-to-convert-webp-images-to-jpg-and-png-using-ffmpeg.html" rel="alternate" type="text/html" title="How to convert WebP-images to JPG and PNG using ffmpeg" /><published>2020-11-24T00:00:00+01:00</published><updated>2024-02-16T19:42:13+01:00</updated><id>https://hunden.linuxkompis.se/2020/11/24/how-to-convert-webp-images-to-jpg-and-png-using-ffmpeg</id><content type="html" xml:base="https://hunden.linuxkompis.se/2020/11/24/how-to-convert-webp-images-to-jpg-and-png-using-ffmpeg.html"><![CDATA[<p>I came across some WebP-image the other day and wanted to convert it to a regular JPG. It turns out that’s rather easy with a Linux based operating system, all that you need is ffmpeg.</p>

<p>Here’s an example:</p>

<div class="language-plaintext highlighter-rouge"><div class="highlight"><pre class="highlight"><code>$ ffmpeg -i input_file.webp output_file.jpg
</code></pre></div></div>

<p>It’s also possible to convert it to a PNG as well.</p>]]></content><author><name></name></author><category term="[&quot;Applications &amp; Tools&quot;]" /><category term="ffmpeg" /><category term="WebP" /><summary type="html"><![CDATA[I came across some WebP-image the other day and wanted to convert it to a regular JPG. It turns out that’s rather easy with a Linux based operating system, all that you need is ffmpeg.]]></summary></entry><entry><title type="html">My proposals for a healthy Christmas</title><link href="https://hunden.linuxkompis.se/2020/11/23/my-proposals-for-a-healthy-christmas.html" rel="alternate" type="text/html" title="My proposals for a healthy Christmas" /><published>2020-11-23T00:00:00+01:00</published><updated>2024-02-16T19:42:13+01:00</updated><id>https://hunden.linuxkompis.se/2020/11/23/my-proposals-for-a-healthy-christmas</id><content type="html" xml:base="https://hunden.linuxkompis.se/2020/11/23/my-proposals-for-a-healthy-christmas.html"><![CDATA[<p>Christmas is approaching fast, just like it does every new year. I myself is as exited as always over this holiday! It’s by far my favourite holiday. Well. It’s actually the only holiday that I actively celebrate, in a traditional Swedish non-Christian way like most of here in Sweden.</p>

<p>Christmas is—for me—all about spending time with friends and family, eating too much food, snacks and candy, drinking (non-alcoholic) <a href="https://en.wikipedia.org/wiki/Gl%C3%B6gg">glögg</a> and <a href="https://en.wikipedia.org/wiki/Julmust">julmust</a>, doing crafts, baking and of course; watching a bunch of Christmas themed movies. I know, I’m a sucker for Christmas.</p>

<h2 id="christmas-can-be-a-stressful-time-for-some">Christmas can be a stressful time for some</h2>

<p>For a lot of people, Christmas is unfortunately everything but how I just described my Christmas. For some, it’s a period filled with stress and anxiety, perhaps it has even become some sort of mandatory service, rather than a cheerful voluntary holiday. They’re stressed for all the things they “have to” do, buy and prepare, all the places they have to visit and be at, all the friends and family they have to spend both time with and money on.</p>

<p>And let’s not forget all the unwritten rules and scheduled traditions some slavishly follow without even question it. That’s not really healthy though. Christmas should be a cheerful holiday, or perhaps nothing at all if you choose to not celebrate it. Because that’s just it, Christmas should be what you want it to be, and why not make it to something that you actually enjoy and look forward each year?</p>

<h3 id="were-overconsuming">We’re overconsuming</h3>

<p>A large issue with Christmas is the fact that we’re <a href="https://en.wikipedia.org/wiki/Overconsumption">overconsuming</a> food and presents. I’m from the relatively small country Sweden, we’re about 10 million people here, yet, last year (<a href="https://hui.se/wp-content/uploads/2020/11/HUIs-julrapport-2020.pdf">according to hui</a> <img class="flag" src="/img/flag_sv.png" alt="The Swedish flag" />) we spent 7.8 billion euro on Christmas shopping, and on average we spent 769.8 euro per person. It’s estimated that we’re going to break those numbers this year, just like we always seem to do every year.</p>

<p>All this is rather ironic considering the fact that (<a href="https://www.svenskhandel.se/globalassets/dokument/aktuellt-och-opinion/rapporter-och-foldrar/hogtider/svensk-handels-julrapport-2019.pdf">according to Svensk Handel</a> <img class="flag" src="/img/flag_sv.png" alt="The Swedish flag" />) 41% of the Swedes considers the environment and sustainability aspect to be the most important thing for us. If that’s true, then why are our overconsuming our planet to a rapid death?</p>

<p>Svensk Handel also mentioned that we rated Christmas presents the <strong>seventh</strong> most important thing on Christmas.  That’s after friends &amp; family, food, Christmas decorations, snow, Christmas tree and Christmas music. They also said that 79% of the Swedes likes giving away presents and that only 56% of us actually cares about receiving gifts. Why on earth are we giving away presents to people who don’t even want them and why are these people not saying anything?</p>

<p>I’m not completely surprised though, this is a fairly typical us Swedish people. We’re so afraid of conflicts and being offended that we rather waste money on each other, rather than talking to each other about it. Wouldn’t it be easier to tell our family and friends that we don’t want any presents (or at least not as much) for the next Christmas? For me, that sounds like a lot better option than sitting there and pretending to be happy for some presents that you really don’t want in the first place.</p>

<p>And think about it, we’re all adults, if we really need something, we’ll just buy it! We don’t need to wait up to a year for the next Christmas for someone to—maybe—give us that specific item we need.</p>

<h3 id="were-working-hard-but-for-what-reason">We’re working hard, but for what reason?</h3>

<p>Most of us are working long and hard days, we’re tired after work, to tired to care about what makes life worth living, we neglect time with our friends, our family and ourselves. And for what? If it’s only so that we can afford all those luxurious and excessive presents and food, is it then really worth it?</p>

<p>We’re wasting our planet’s highly limited resources on producing all the food that we “must have” for Christmas, only to eat a fraction of it, then throw it away in the garbage and then continue to spend the rest of the money on presents that no one really needed (or asked for) in the first place. It might sound like a harsh thing to say, but it’s the truth for a lot of people.</p>

<h2 id="my-proposal-for-a-healthy-christmas">My proposal for a healthy Christmas</h2>

<p>With all that said, I’m not implying that we should skip Christmas or any part of it, quite the opposite. I want us all to focus on what truly important and makes Christmas so great. Instead of stressing through a hundred things, I want everyone to focus on the core of Christmas, with the family and the friends we want to spend time with, not the ones we’re expected to spend time with.</p>

<p>I would like to see all of us to just drop all the “rules” and “musts”. If you don’t like something, just don’t bother doing it. If you don’t want to spend five weeks preparing food, then don’t. End of story.</p>

<p>I would also like to see less of that overconsumption from everyone. And no. I promise, it’s not the end of the world if we can’t buy “all the things”, there’s still a lot to for us to do and to even buy.</p>

<h3 id="make-your-own-presents">Make your own presents</h3>

<p>I’m not joking. Making your own presents with things that you already own, can source in the nature and/or via secondhand shopping. It’s an affordable and highly personal way of showing someone that you care about them.</p>

<p>And if you’re not a handy or crafty person, there’s always other options like a framed photo with a personal photograph, a book or a calendar with multiple photos. It’s not as environmentally friendly and cheap as making something from things that already exists, but at least it’s not expensive and it should be something that’s going to last for a long time.</p>

<h3 id="buy-secondhand-presents">Buy secondhand presents</h3>

<p>We should really not underestimate secondhand shopping. It’s a superb option for your wallet and our planet.
Just be aware that secondhand shopping might not be the best place for any last minute shopping, as it sometimes can take a bit of luck and time to find the exact things you’re looking for.</p>

<p>I like browsing around on secondhand stores, and something that I have learned is that people are basically crazy, they give away and sell all kinds of things—in perfectly good condition—all the time, just because it’s not in fashion or that they’re just bored with “the old” and want new shiny things.</p>

<p>Buying secondhand is also good for our planet. If we buy more used items, use what we have, fix what we already have when it breaks or when it just needs maintenance—instead of throwing it away as soon as possible—we don’t have to produce as much of the new stuff that we do today. Our excessive carbon dioxide emissions—caused by our irresponsible overconsumption—is snowballing into a fast and brutal death of our planet. Why waste our frail <a href="https://en.wikipedia.org/wiki/Carbon_budget">emissions budget</a> on things we really don’t need or care that much about to begin with?</p>

<h4 id="even-if-you-dont-care-about-our-planet-consider-this">Even if you don’t care about our planet, consider this</h4>

<p>Even if you don’t care about our planet, consider the fact that spending less money can (and most likely will) improve both your health and the quality of your life. The less money you spend, the more money you can save and the less expenses you have, the less you have to spend of your life working.</p>

<p>With more time on your hands, you could spend more time with things that you actually care about, things that brings actual value and happiness to your life. Hopefully in an environmentally friendly manner.</p>

<h3 id="give-away-experiences-and-consumables">Give away experiences and consumables</h3>

<p>It doesn’t have to be an expensive trip somewhere, it can be something simple as an afternoon tea party at some cozy tavern or café. It often requires little to no effort and money. Make your own card or buy one at a secondhand-store like I do. I actually buy and stock them secondhand for about 0.1 euro each. I really don’t see why you need to spend 2-3 euro on new cards.</p>

<p>Another option is consumables. If you’re not a tea party person, there’s always the option to buy consumables. It can be anything from an environmentally friendly soap, some fancy coffee beans, to perhaps something like a simple chocolate bar.</p>

<h3 id="donate-money-to-non-profits--charities">Donate money to non-profits &amp; charities</h3>

<p>A less common present, but equally appreciated, is donations to non-profit organisations and charities. If you want to give away something truly caring and unselfish, consider making a donation to something that does good for this world. If you’re not sure about where to donate your money to, there’s always <a href="https://www.givewell.org/">GiveWell</a>, an American non-profit charity assessment that search for the charities that save or improve lives the most per dollar.</p>

<h3 id="consider-no-presents-at-all">Consider no presents at all</h3>

<p>No presents at all is actually a valid option as well, as boring as it might sound. Just don’t forget that spending time with your friends and family should be everyone’s number one priority anyway. I really think that excluding presents is something that everyone should understand and be okay with, no questions asked.</p>

<p>If you’re simply not fortunate enough to afford presents and don’t want anyone to know about it, you could simply use the argument about our excessive carbon dioxide emissions as an excuse for not wanting to buy any presents.</p>

<h3 id="consider-potluck-christmas-dinners">Consider potluck Christmas dinners</h3>

<p>A <a href="https://en.wikipedia.org/wiki/Potluck">potluck</a> is a gathering where each guest (or group) contributes with a different, often homemade dish of food to be shared. This means that you can all enjoy the things you like to eat on Christmas, while you at the same time equally shares and distributes the burden, the cost and the time it takes to prepare the food. This should leave everyone with more time for Christmas.</p>

<p>Just don’t forget to think twice about what food you really want for Christmas. You should also consider to only add the most important things, and in moderate portions. If you throw away food, you’re also throwing away your own money, money that you most likely worked hard for by trading away a portion of your highly limited life.</p>

<p>And if potlucks is not your cup of tea and you choose to go for something else, please make sure that everyone is okay with the distribution of the responsibility of the food. It’s unfortunately not uncommon that it’s still a one person (involuntary) job in some homes.</p>]]></content><author><name></name></author><category term="[&quot;Health &amp; Lifestyle&quot;]" /><category term="Christmas" /><category term="Minimalism" /><category term="Sustainability" /><category term="Hund" /><summary type="html"><![CDATA[Christmas is approaching fast, just like it does every new year. I myself is as exited as always over this holiday! It’s by far my favourite holiday. Well. It’s actually the only holiday that I actively celebrate, in a traditional Swedish non-Christian way like most of here in Sweden.]]></summary></entry><entry><title type="html">My Desktop - November 2020</title><link href="https://hunden.linuxkompis.se/2020/11/13/my-desktop-november-2020.html" rel="alternate" type="text/html" title="My Desktop - November 2020" /><published>2020-11-13T00:00:00+01:00</published><updated>2024-02-16T19:42:13+01:00</updated><id>https://hunden.linuxkompis.se/2020/11/13/my-desktop-november-2020</id><content type="html" xml:base="https://hunden.linuxkompis.se/2020/11/13/my-desktop-november-2020.html"><![CDATA[<p>I just noticed that I haven’t done a “my desktop” post here on my website, so why not make one now.</p>

<p>I probably didn’t have to take any new screenshots, I’m that boring that I could have probably used any old screenshot from the last years or so, and that’s because my setup doesn’t see much (if any) changes these days. Believe it or not, but I’m pretty happy with what I got.</p>

<div class="grid-container">

    <div class="grid-item">
        <a href="/img/my_desktop-2020-11-13-000.png">
            <img src="/img/t/my_desktop-2020-11-13-000.png" alt="" />
        </a>
    </div>

    <div class="grid-item">
        <a href="/img/my_desktop-2020-11-13-001.png">
            <img src="/img/t/my_desktop-2020-11-13-001.png" alt="" />
        </a>
    </div>

    <div class="grid-item">
        <a href="/img/my_desktop-2020-11-13-002.png">
            <img src="/img/t/my_desktop-2020-11-13-002.png" alt="" />
        </a>
    </div>

</div>

<p>I tried to make the screenshots as “non-montage-y” as possible. My primary workspace (the second image) features a couple of extra applications that I normally wouldn’t have visible at the same time. I often only have my web browser visible and maybe one more application. I like to distribute my clients across my 10 workspaces, so I can focus on one or two things at the same time.</p>

<p>Check out my post “<a href="https://hunden.linuxkompis.se/2019/03/17/i-went-from-a-multi-monitor-setup-to-just-a-single-monitor-setup.html">I went from a multi monitor setup to just a single monitor setup</a>” if you want to read about how I improved my productivity by going from three monitors to just one monitor.</p>

<p>My third workspace (the third image) often works as my secondary workspace where I have my newsreaders, e-mail client and todo-list easily accessible when I want to check if something new has happened.</p>

<p>Here’s some information about my setup and some of the more common software that I use:</p>

<table>
  <tbody>
    <tr>
      <td>Operating system:</td>
      <td><a href="https://hunden.linuxkompis.se/2020/05/25/why-i-like-gentoo.html">Gentoo Linux</a></td>
    </tr>
    <tr>
      <td>Window manager:</td>
      <td>i3</td>
    </tr>
    <tr>
      <td>System panel:</td>
      <td>Polybar</td>
    </tr>
    <tr>
      <td>Shell:</td>
      <td>zsh</td>
    </tr>
    <tr>
      <td>Terminal emulator:</td>
      <td>URxvt</td>
    </tr>
    <tr>
      <td>Terminal typeface:</td>
      <td>Terminus</td>
    </tr>
    <tr>
      <td>Terminal colour scheme</td>
      <td>Solarized</td>
    </tr>
    <tr>
      <td>Application launcher:</td>
      <td>Rofi</td>
    </tr>
    <tr>
      <td>Notification daemon:</td>
      <td>Dunst</td>
    </tr>
    <tr>
      <td>Text editor:</td>
      <td>Neovim</td>
    </tr>
    <tr>
      <td>File manager:</td>
      <td><a href="https://hunden.linuxkompis.se/2020/08/20/ranger-my-favourite-file-manager.html">Ranger</a></td>
    </tr>
    <tr>
      <td>Web browser:</td>
      <td>qutebrowser</td>
    </tr>
    <tr>
      <td>E-mail client:</td>
      <td>NeoMutt</td>
    </tr>
    <tr>
      <td>Web feed reader:</td>
      <td><a href="https://hunden.linuxkompis.se/2020/07/29/an-introduction-to-the-web-feed-client-newsboat.html">Newsboat</a></td>
    </tr>
    <tr>
      <td>Password manager:</td>
      <td>KeePassC</td>
    </tr>
    <tr>
      <td>Bookmark manager:</td>
      <td>Buku</td>
    </tr>
    <tr>
      <td>Media player:</td>
      <td>mpv</td>
    </tr>
    <tr>
      <td>Image viewer:</td>
      <td><a href="https://hunden.linuxkompis.se/2018/04/12/sxiv-a-simple-vi-like-image-viewer.html">sxiv</a></td>
    </tr>
    <tr>
      <td>Instant messaging client:</td>
      <td>WeeChat + bitlbee</td>
    </tr>
    <tr>
      <td>Document reader:</td>
      <td><a href="https://hunden.linuxkompis.se/2019/02/14/zathura-a-lightweight-vi-like-document-reader.html">Zathura</a></td>
    </tr>
    <tr>
      <td>Calendar:</td>
      <td><a href="https://hunden.linuxkompis.se/2020/08/12/how-to-sync-and-manage-your-caldav-and-carddav-via-the-terminal.html">Khal</a></td>
    </tr>
    <tr>
      <td>Contact book:</td>
      <td><a href="https://hunden.linuxkompis.se/2020/08/12/how-to-sync-and-manage-your-caldav-and-carddav-via-the-terminal.html">Khard</a></td>
    </tr>
    <tr>
      <td>CalDAV/CardDAV-sync:</td>
      <td><a href="https://hunden.linuxkompis.se/2020/08/12/how-to-sync-and-manage-your-caldav-and-carddav-via-the-terminal.html">vdirsync</a></td>
    </tr>
  </tbody>
</table>

<p>I added links to software that I have talked about in the past. If you want me to talk about any of the others, just let me know. I will probably talk about them eventually, when I feel inspired to do so.</p>]]></content><author><name></name></author><category term="[&quot;My Desktop&quot;]" /><summary type="html"><![CDATA[I just noticed that I haven’t done a “my desktop” post here on my website, so why not make one now.]]></summary></entry><entry><title type="html">How I got started with Vim</title><link href="https://hunden.linuxkompis.se/2020/11/12/how-i-got-started-with-vim.html" rel="alternate" type="text/html" title="How I got started with Vim" /><published>2020-11-12T00:00:00+01:00</published><updated>2024-02-16T19:42:13+01:00</updated><id>https://hunden.linuxkompis.se/2020/11/12/how-i-got-started-with-vim</id><content type="html" xml:base="https://hunden.linuxkompis.se/2020/11/12/how-i-got-started-with-vim.html"><![CDATA[<p>A long time ago my web browser of choice was Mozilla Firefox, and as most normal people I was using it primarily with my mouse and occasionally with some simple keybindings. That all changed back in 2011 when I started to get really invested in tiling window managers (and not long after a lot of text-based applications), simply because I found them to be the most efficient alternative for me. With the keyboard I could do swift actions in a matter of milliseconds, compared to the mouse where some actions could take multiple seconds to execute.</p>

<div class="grid-container">
    <div class="grid-item single">
        <a href="/img/my_desktop_may_2011.png">
            <img src="/img/t/my_desktop_may_2011.png" alt="" />
        </a>
        <figcaption>
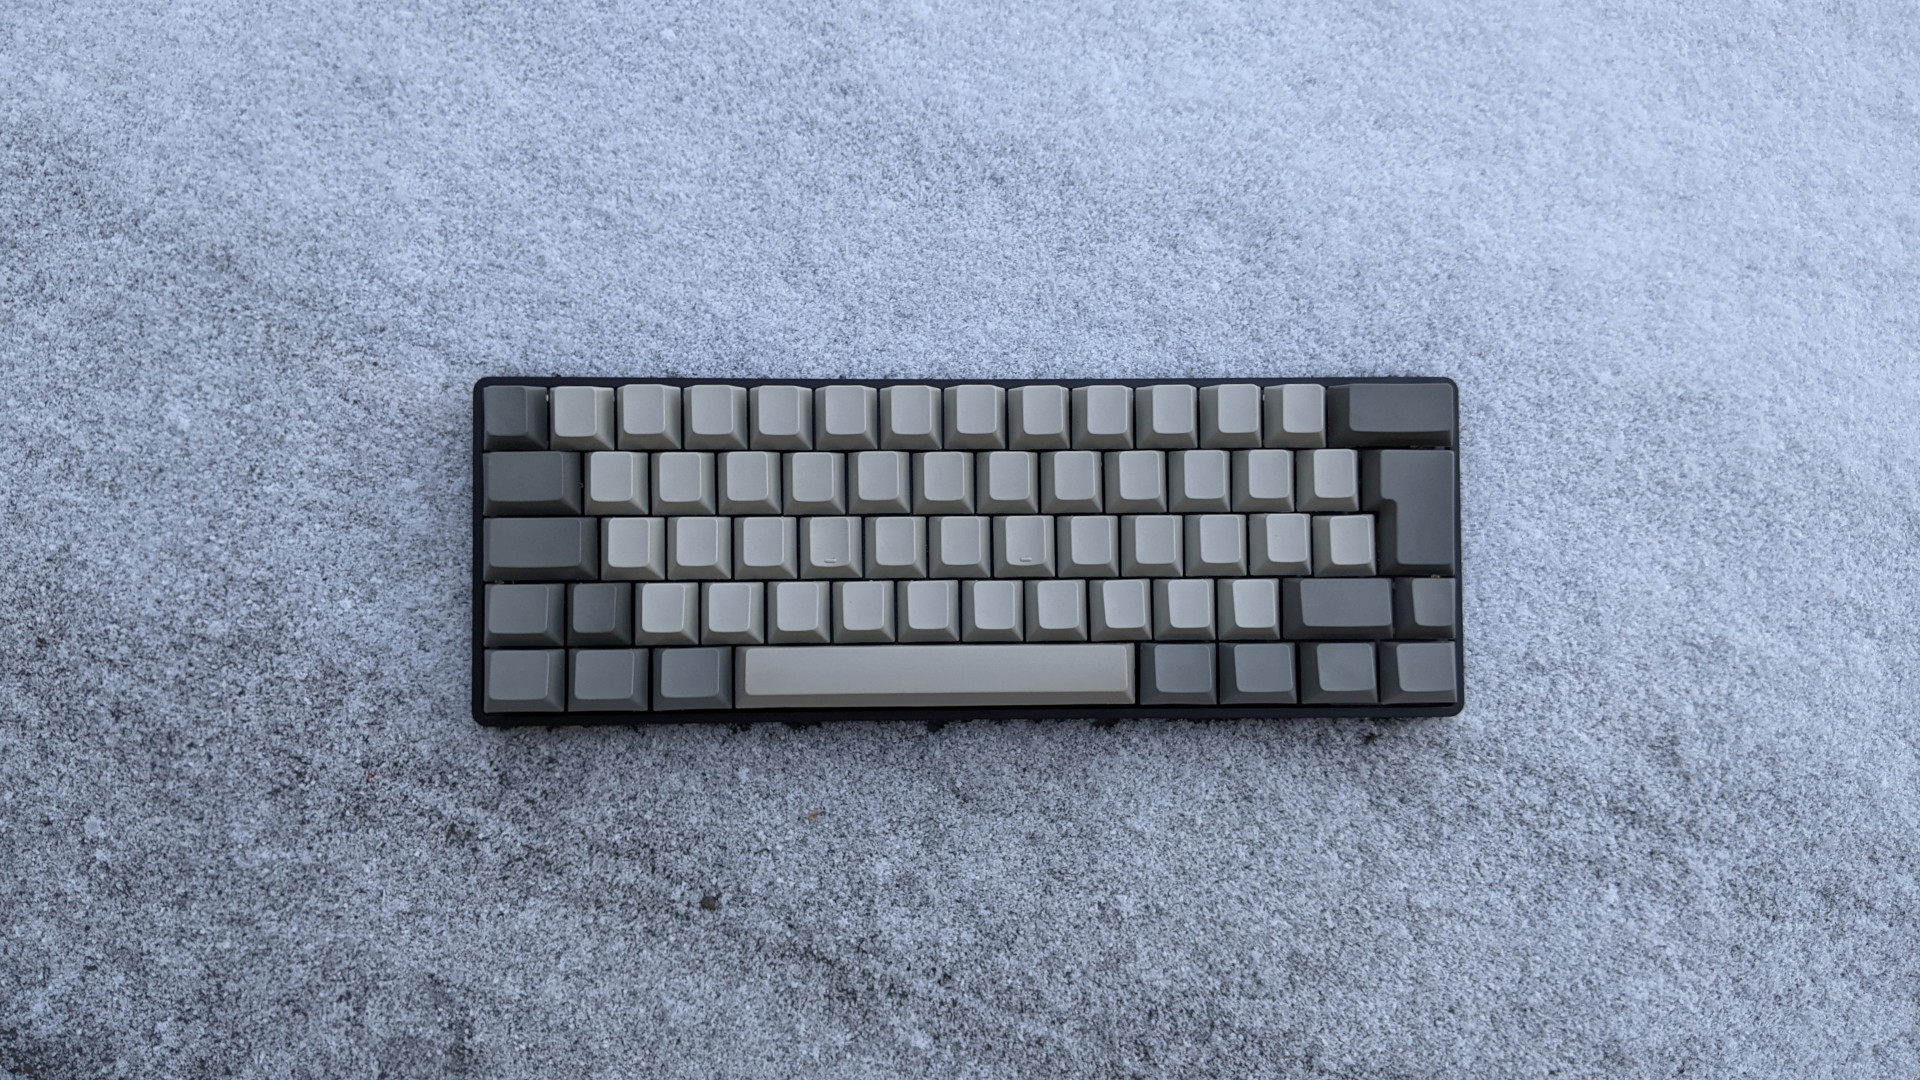
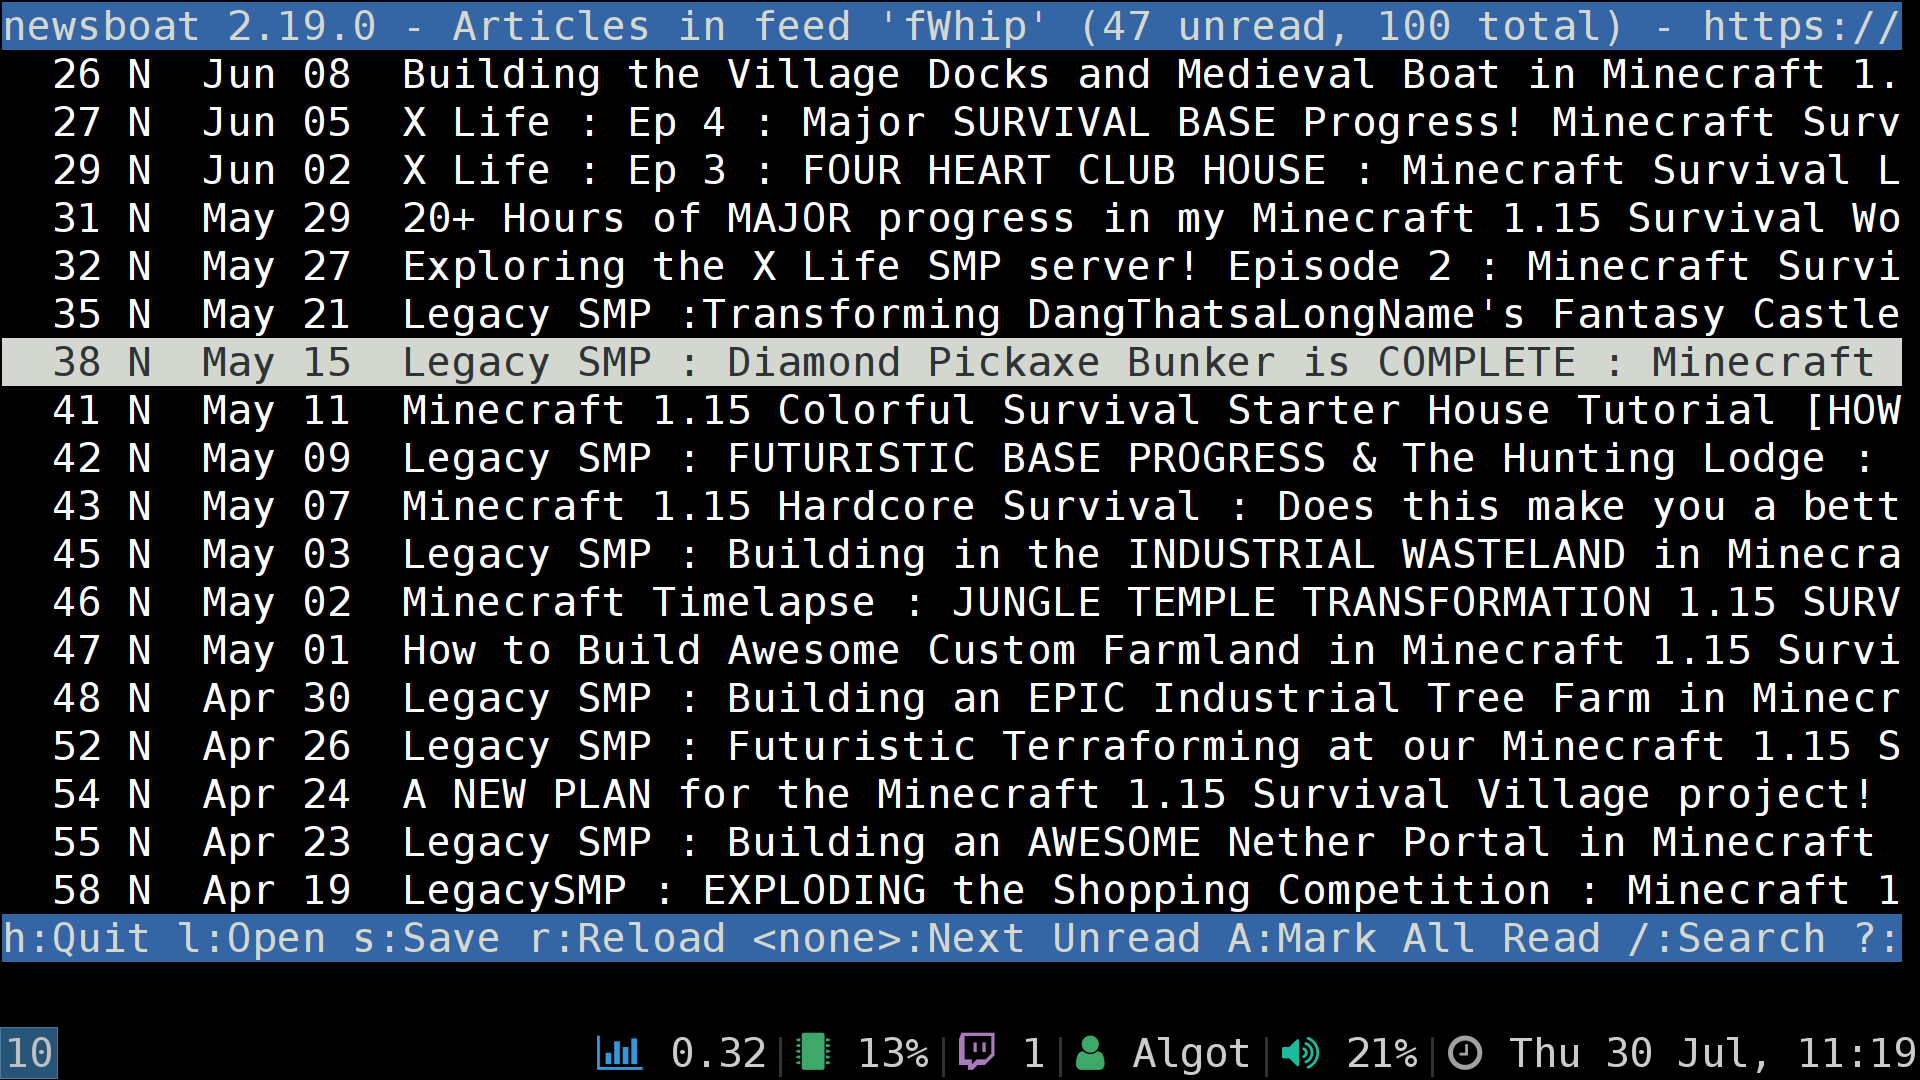
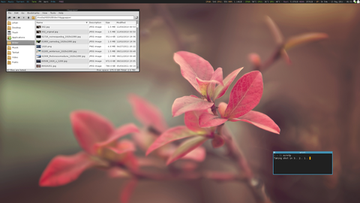
My desktop from 2011 running the tiling window manager <a href="https://github.com/xorg62/wmfs">WMFS</a>.</figcaption>
    </div><!-- END grid-item -->
</div>
<!-- END grid-container -->

<p>The more I used my new setup with WMFS, the more conscious I got about my workflow in general, almost to the point where I became obsessed with optimizing everything in regard to how I used my computer. Bothered by how I was using Firefox, I had no choice but to look into how I could make my web browsing workflow more efficient.</p>

<p>I started out with the most obvious thing I could think of; I read the documentation for Firefox to see what keybindings they supported. And, well.. It turned out there’s actually quite a few commands! The issue was that they only made sense for a person with three arms.</p>

<p>Seriously speaking though. Some shortcuts require both of my hands and I do understand that they exist for people with disabilities, but I didn’t have any disability, I was just looking to make my experience more efficient from a power-user perspective.</p>

<p>Thankfully this was back when ‘good old’ Firefox was still supporting the old type of add-ons (for better and worse). I therefore decided to go out and look for any add-on that could hopefully solve this issue for me, or at least make it better in any way possible. This was a long time ago and I can’t really remember what I was looking for, or what I was expecting to find, but I somehow ended up with an add-on called <a href="https://en.m.wikipedia.org/wiki/Vimperator">Vimperator</a>, an add-on designed to provide a more “efficient user interface for keyboard-fluent users”. The design of Vimperator was heavily inspired by the well known text editor <a href="https://en.wikipedia.org/wiki/Vim_(text_editor)">Vim</a>.</p>

<p>I was well aware of what Vim was back then, that’s why I also had no intention of trying Vim out myself. Younger and grumpy me was perfectly happy with my modeless editor, which probably was <a href="https://en.wikipedia.org/wiki/Geany">Geany</a> at the time.</p>

<p>The reason I decided to give this “Vim-like add-on” a chance, was for the simple reason that it actually seemed like a decently simple and straightforward add-on when I read about it. While it did add a bunch of features, they were at the same time all optional to use. One of the features that cought my attention was some really neat and simple—one handed—keybindings.</p>

<p>Here’s a few examples comparing the default keybindings in Firefox and how they worked in Vimperator:</p>

<table>
  <thead>
    <tr>
      <th>Action</th>
      <th>Firefox default</th>
      <th>Vimperator</th>
    </tr>
  </thead>
  <tbody>
    <tr>
      <td>Close tab</td>
      <td><code class="language-plaintext highlighter-rouge">Ctrl+W</code></td>
      <td><code class="language-plaintext highlighter-rouge">d</code></td>
    </tr>
    <tr>
      <td>Undo closed tab</td>
      <td><code class="language-plaintext highlighter-rouge">Ctrl+Shift+T</code></td>
      <td><code class="language-plaintext highlighter-rouge">u</code></td>
    </tr>
    <tr>
      <td>Search</td>
      <td><code class="language-plaintext highlighter-rouge">Ctrl+F</code></td>
      <td><code class="language-plaintext highlighter-rouge">/</code></td>
    </tr>
    <tr>
      <td>Next search hit</td>
      <td><code class="language-plaintext highlighter-rouge">Ctrl+G</code></td>
      <td><code class="language-plaintext highlighter-rouge">n</code></td>
    </tr>
    <tr>
      <td>Previous search hit</td>
      <td><code class="language-plaintext highlighter-rouge">Ctrl+Shift+G</code></td>
      <td><code class="language-plaintext highlighter-rouge">p</code></td>
    </tr>
    <tr>
      <td>Go to top</td>
      <td><code class="language-plaintext highlighter-rouge">Ctrl+↑</code></td>
      <td><code class="language-plaintext highlighter-rouge">gg</code></td>
    </tr>
    <tr>
      <td>Go to bottom</td>
      <td><code class="language-plaintext highlighter-rouge">Ctrl+↓</code></td>
      <td><code class="language-plaintext highlighter-rouge">Shift+g</code></td>
    </tr>
    <tr>
      <td>Refresh page</td>
      <td><code class="language-plaintext highlighter-rouge">Ctrl+R</code></td>
      <td><code class="language-plaintext highlighter-rouge">r</code></td>
    </tr>
    <tr>
      <td>Open search in new foreground tab</td>
      <td><code class="language-plaintext highlighter-rouge">Ctrl+Shift+Enter</code></td>
      <td><code class="language-plaintext highlighter-rouge">Shift+o</code></td>
    </tr>
  </tbody>
</table>

<p>It took me literally minutes to get used to Vimperator and it instantly made my workflow a lot more efficient! I was really pleased with it from day one, even as a grumpy non-Vim user.</p>

<p>
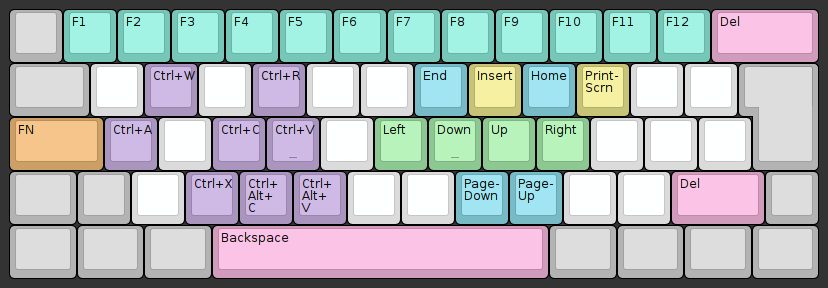
Over time, I picked up and used even more shortcuts and features. It eventually came to the point where I ended up hiding all the graphical elements in Firefox, which included the navigation buttons and the address bar. I was still using the mouse at this time, but I was efficient enough with the keyboard shortcuts to not need any of the visual buttons anymore. When I wanted to open a website I just used the key <code class="language-plaintext highlighter-rouge">o</code> to open the address field and <code class="language-plaintext highlighter-rouge">O</code> to open the website in a new tab.</p>

<div class="grid-container">
    <div class="grid-item single">
        <a href="/img/firefox_with_vimperator.png">
            <img src="/img/t/firefox_with_vimperator.png" alt="" />
        </a>
        <figcaption>My Firefox setup with Vimperator and my custom modded <a href="https://www.deviantart.com/hundone/art/Firefox-Flat-Modded-576634167">userstyle</a>.</figcaption>
    </div><!-- END grid-item -->
</div>
<!-- END grid-container -->

<p>I’m a person who has always been interested in minimalism in some way or another, and having a clean looking web browser like this felt like I had visually achieved my end-game setup.</p>

<p>Over time, I started to depend less on the mouse and more on the keyboard, even though some things would always require the mouse in Firefox. After all, Firefox is designed around the philosophy of a graphical ‘point and click’ interface and an add-on is limited in how much magic it can do.</p>

<p>
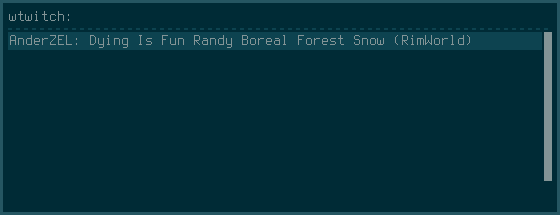
How does anyone browse the web without a mouse? It’s simple! You use something called hints. Hints work by activating ‘visual hints’ using the key <code class="language-plaintext highlighter-rouge">f</code> and then just typing the combination of the alphanumeric letters for the link you wish to visit. It automatically opens the first hit, so there’s no need to confirm with the Enter key.</p>

<div class="grid-container">
    <div class="grid-item single">
        <a href="/img/qutebrowser_hints.png">
            <img src="/img/t/qutebrowser_hints.png" alt="" />
        </a>
        <figcaption>
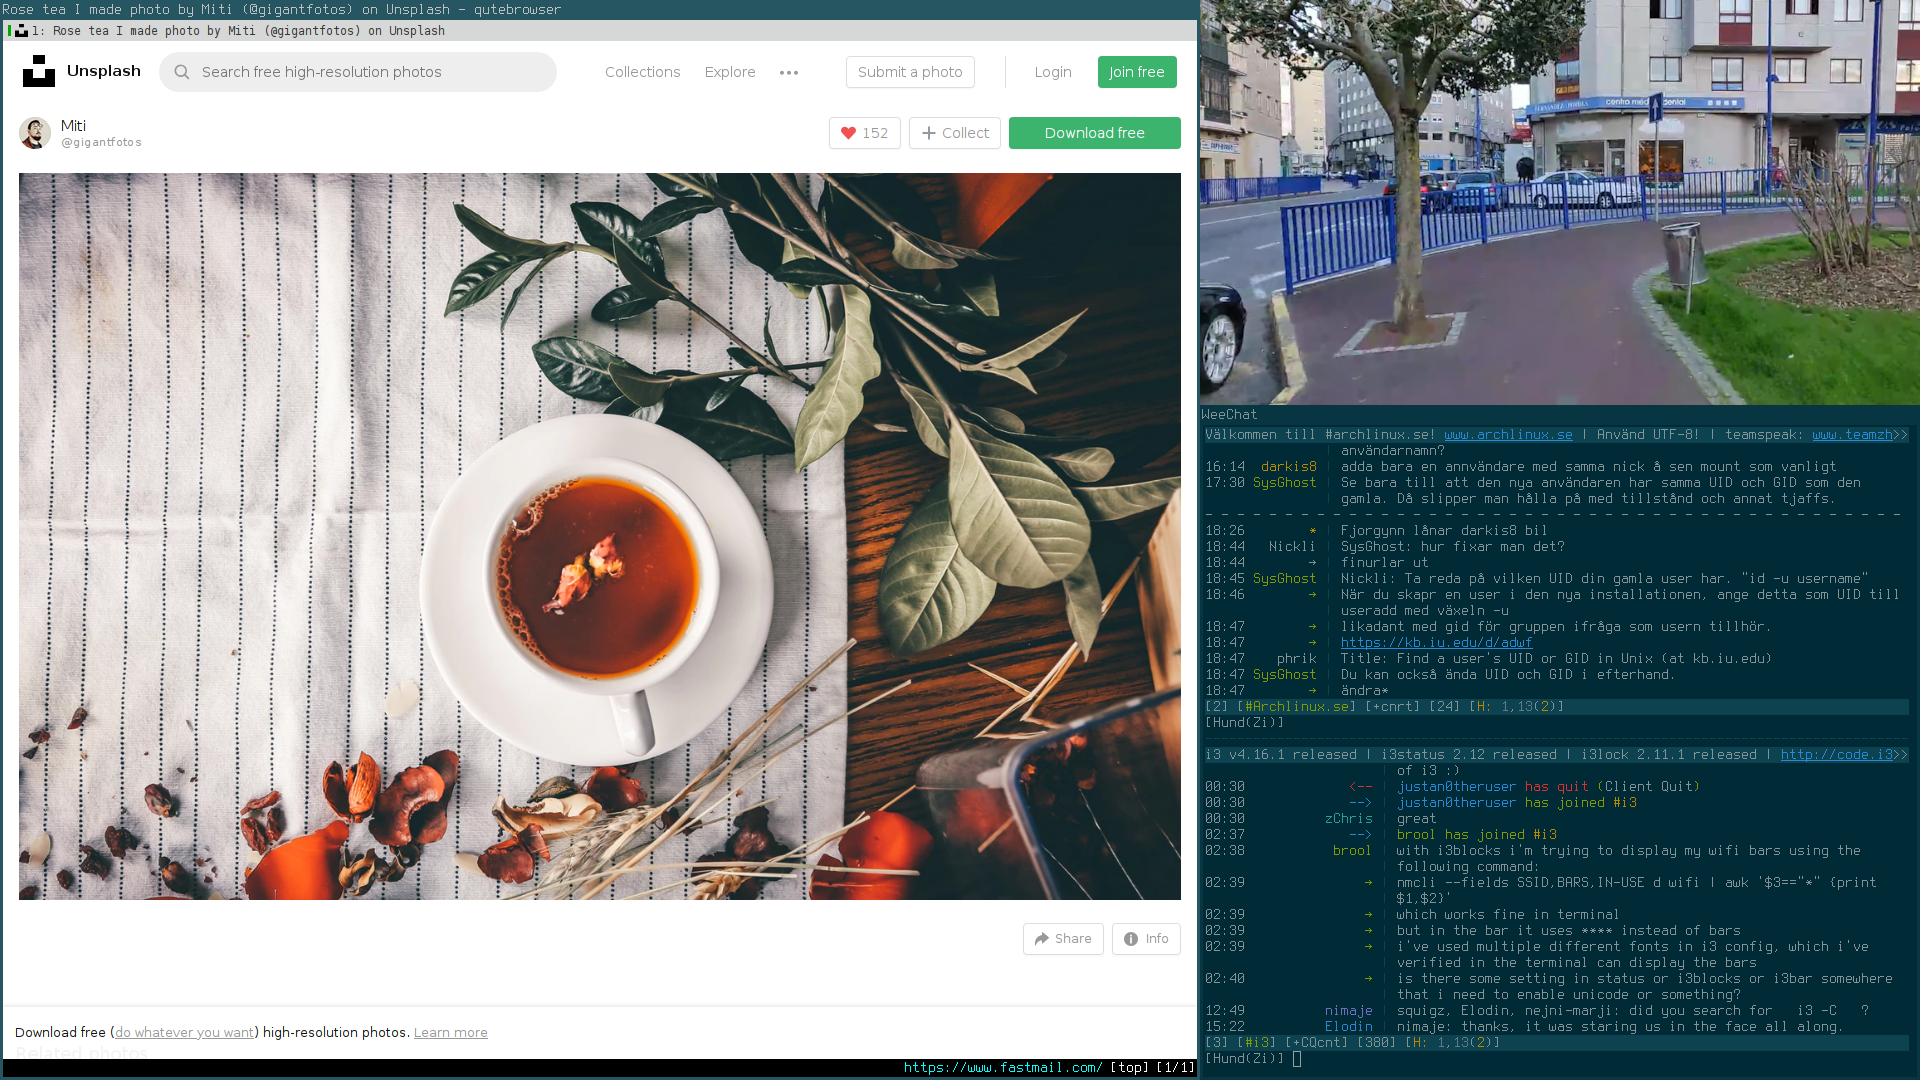
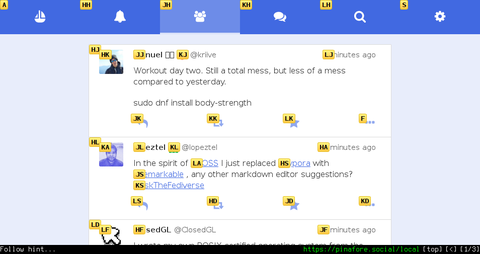
This is how it looks when browsing with hints in qutebrowser.</figcaption>
    </div><!-- END grid-item -->
</div>
<!-- END grid-container -->

<p>And if you want to open a link in a new tab you just use the key <code class="language-plaintext highlighter-rouge">F</code>. It might be even more ways to use hints than this, but that’s going to depend a lot on what web browser and/or add-on you’re using. A cool feature that I like in qutebrowser (my current web browser, but more on that later) is a feature called “rapid hints”. I activate it with <code class="language-plaintext highlighter-rouge">;r</code> and it then shows me all the hints, the only difference now is that it open all links in a new tab by default and the hints stays open, which means that I can rapidly open multiple links.</p>

<h2 id="vimperator-eventually-convinced-me-to-try-vim">Vimperator eventually convinced me to try Vim</h2>

<p>At one point in time I remember asking myself “If the Vimperator add-on can make Firefox as good as it is right now, perhaps that Vim editor isn’t so bad after all?”. So. I decided it was time to give Vim a fair chance!</p>

<p>
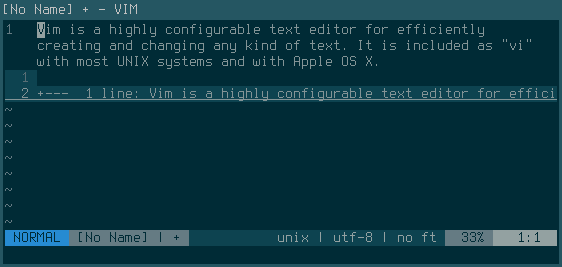
The first few days with Vim was honestly pretty slow and awkward for me, I kept forgetting about the different modes and instead of typing text, I constantly kept screwing up the text by selecting parts of the text, randomly jumping all over the place and doing all kinds of impressive accidents in swift motions.</p>

<p>Once I learned the basics of Vim, it became really fun to use it. My hands and my wrists was also thankful for not having to reach for the mouse all the time. I had never really considered how much time I actually spend in a text editor before I started to use Vim.</p>

<p>And while I wasn’t magically 9999% more efficient over a night, it did make editing text about 9999% more enjoyable for me.</p>

<h2 id="vim-changed-my-life">Vim changed my life</h2>

<p>I didn’t take long for me to come to the conclusion that Vim is the best text editor ever, for me. With my new-found awareness of Vim and its magic, I also started to notice that there’s a lot of Vim-like applications that supports keybindings and features similar to Vim. This lead me on a quest to Vim-ify both my desktop and workflow. Years later, I can safely say I did quite well with this task. There’s not much that doesn’t work like Vim on my computer these days.</p>

<p>
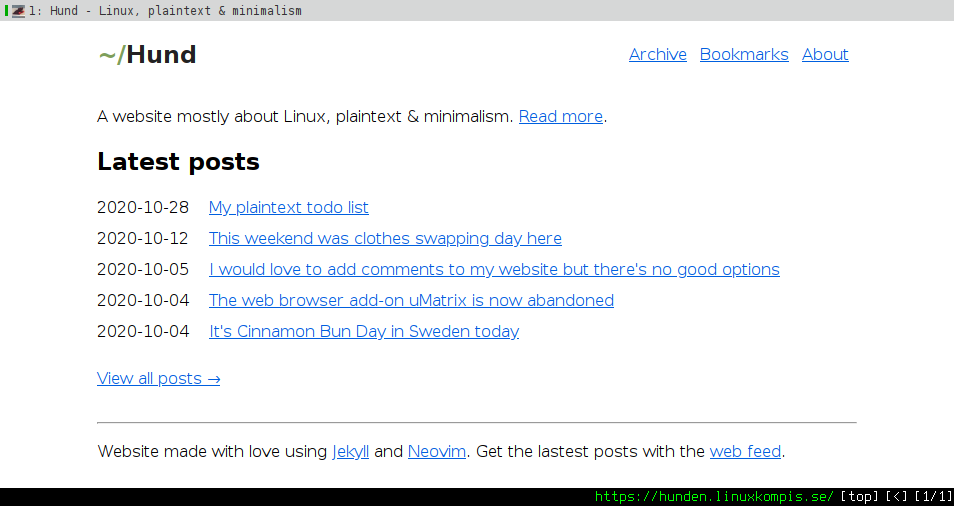
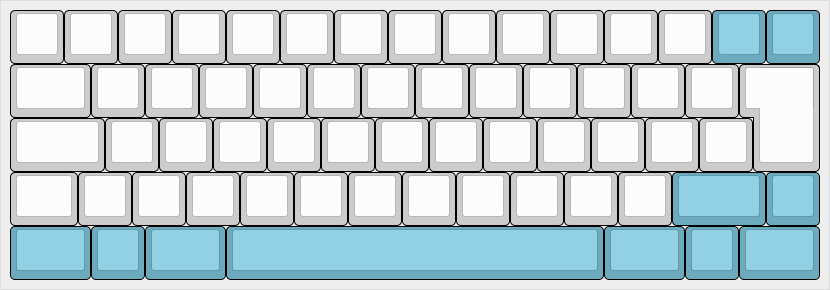
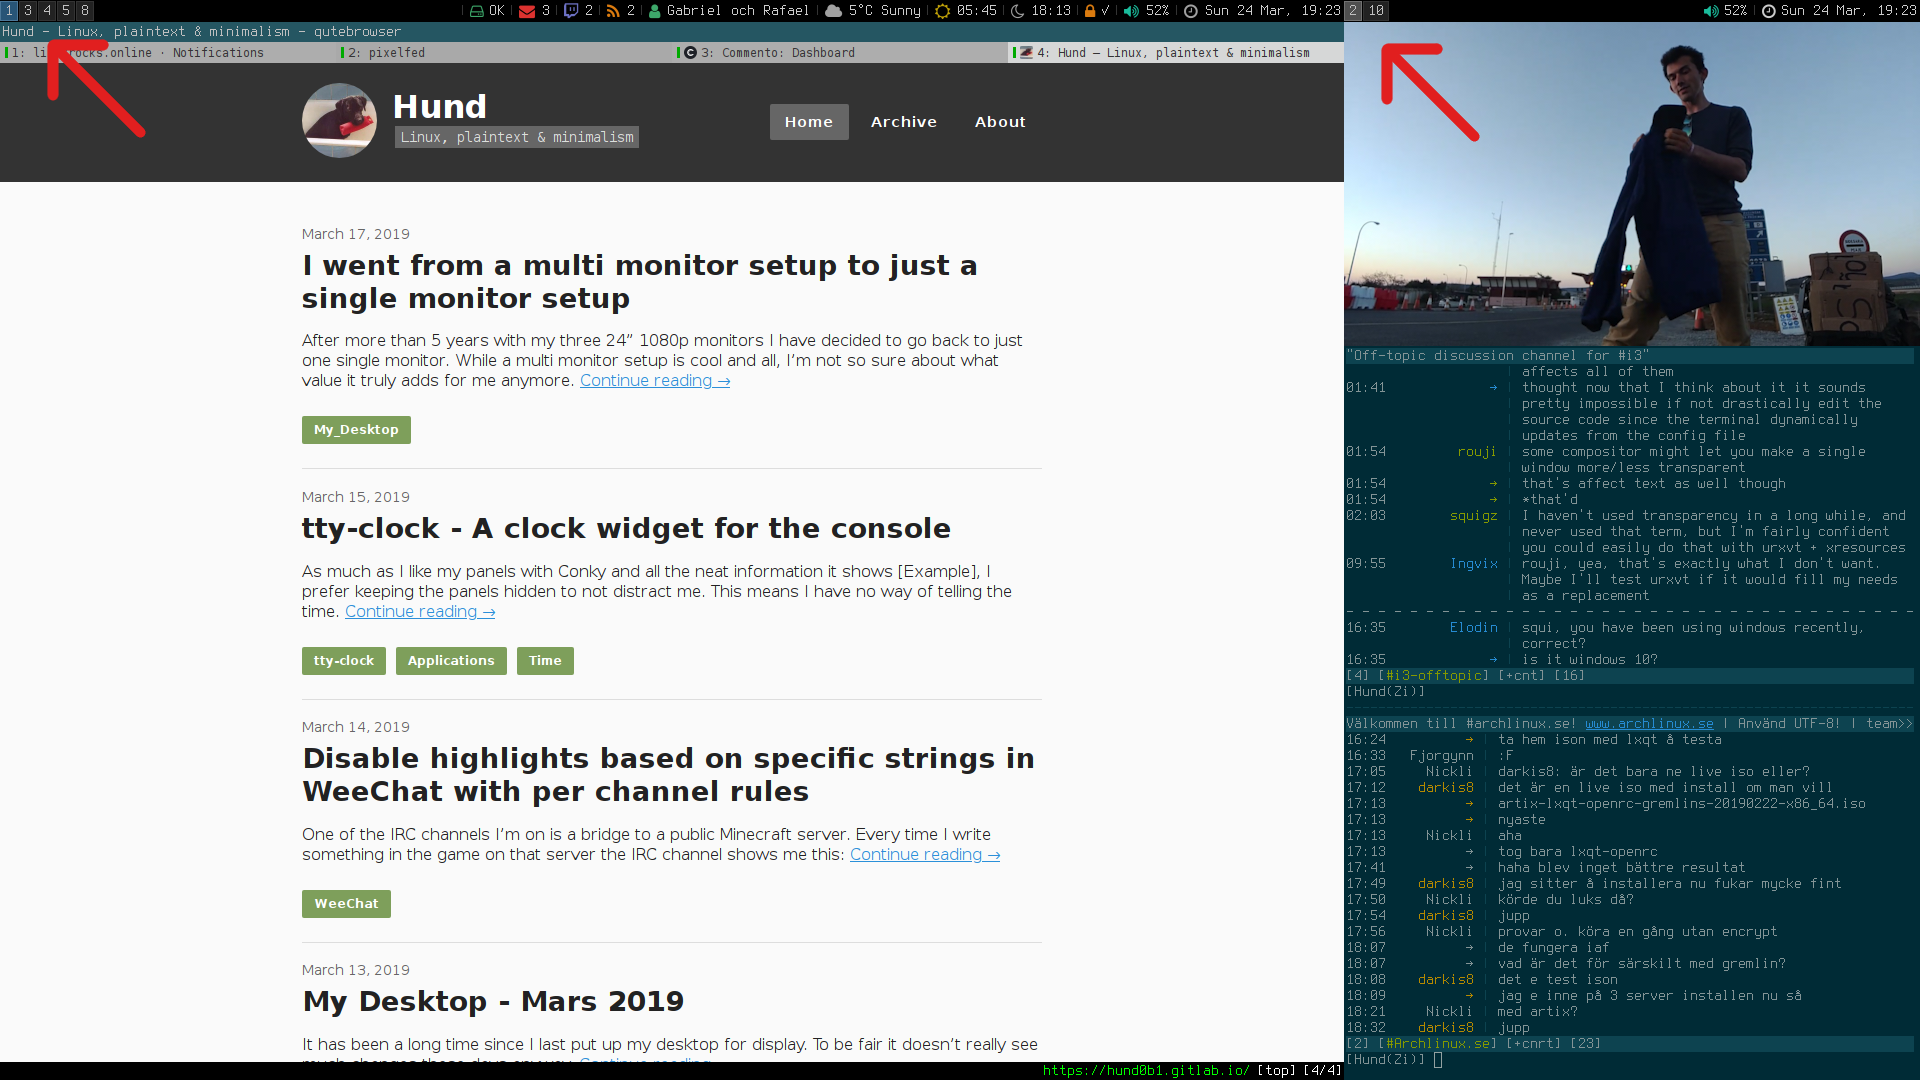
I have also at one point in time replaced Firefox with <a href="https://qutebrowser.org/">qutebrowser</a>, a keyboard-focused web browser with a minimal graphical user interface, highly inspired by (but not limited to) the Vimperator add-on and the Vi-like web browser <a href="https://wiki.archlinux.org/index.php/DWB">dwb</a>.</p>

<div class="grid-container">
    <div class="grid-item single">
        <a href="/img/qutebrowser.png">
            <img src="/img/t/qutebrowser.png" alt="" />
        </a>
        <figcaption>qutebrowser with its minimal userinterface.</figcaption>
    </div><!-- END grid-item -->
</div>
<!-- END grid-container -->

<p>With qutebrowser I don’t have to use the mouse at all. Well. Some websites are so poorly designed that they don’t work without a pointing device. And yes, boohoo me, but let’s not forget about the people with disabilities who actually have no choice but to fully rely on the keyboard to access the web. <a href="https://www.w3.org/WAI/perspective-videos/keyboard/">All websites must be keyboard compatible</a>.</p>

<p>My web browser is pretty much the only graphical application that I still use on a regular basis. Other graphical applications that I also use, but less frequently, are the PDF-viewer <a href="https://hunden.linuxkompis.se/2019/02/14/zathura-a-lightweight-vi-like-document-reader.html">Zathura</a> and the image viewer <a href="https://hunden.linuxkompis.se/2018/04/12/sxiv-a-simple-vi-like-image-viewer.html">sxiv</a>, which are both using Vi-like keybindings, a minimal graphical user interface and does not require any pointing device.</p>

<p>I even use the mouse so little that I let it automatically hide after a few seconds of inactivity with <a href="https://hunden.linuxkompis.se/2018/07/13/automatically-hide-your-mouse-cursor-with-unclutter.html">Unclutter</a>. It’s really nice to be able to hide the mouse when you rarely use it.</p>

<h2 id="vim-even-inspired-me-to-learn-proper-touch-typing">Vim even inspired me to learn proper touch typing</h2>

<p>Vim itself can’t take all credit for it though, it was more precisely efficient Vim-users and the keyboard community who inspired me to learn proper touch typing. And by “proper touch typing” I mean <a href="https://en.wikipedia.org/wiki/Touch_typing">touch typing</a> with <a href="https://en.wikipedia.org/wiki/File:FingerHandPosUSA.gif">all your ten fingers with the correct placement</a> on the keyboard.</p>

<p>I have been a touch typist for a long time, but I was a self-taught using my own style with 2.5 fingers, unaware of any proper technique for the longest time. When I eventually found out about the right way I was too used to my own technique to be bothered starting over.</p>

<p>Eventually, that all changed when I saw some real world touch typist (from the keyboard community) typing really fast without breaking a sweat or even lifting their hands to reach all the alphanumeric keys. It was that and some inspiring Vim-wizards doing their magic with Vim that inspired me to finally re-learn touch typing the proper way.</p>

<p>I started out by doing typing tests on the website <a href="https://10fastfingers.com/">10FastFingers</a>. I was frustratingly slow the first day, typing at around 20 words per minute. Any attempts to participate in any form of real time conversation drove me nuts, but what kept me going was the fact that my hands felt rather relaxed when I typed. My hand didn’t rush all over the keyboard anymore, they just gently rested on the wrist rest and my fingers did most if not all the jobs.</p>

<p>
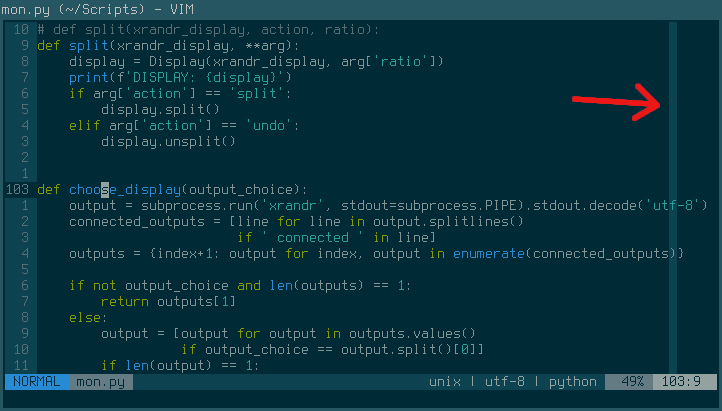
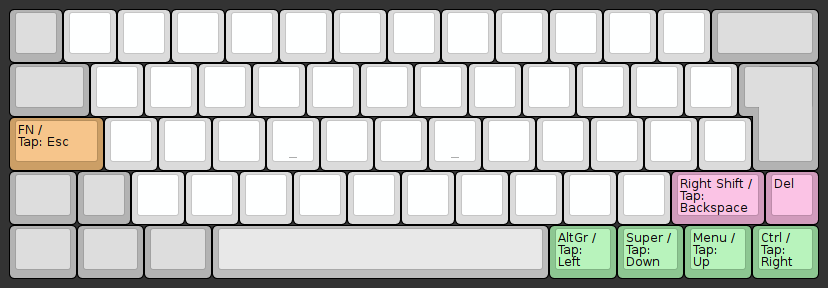
Things did take a humorous turn when I fired up Vim the first time though. My muscle memory was completely reset in more than one way, it turned out that I was now no longer capable of finding the <a href="https://en.wikipedia.org/wiki/List_of_typographical_symbols_and_punctuation_marks">punctuation characters</a>. Why didn’t I just peak at the keyboard? Well.. I use blank keycaps on my keyboard.</p>

<div class="grid-container">
    <div class="grid-item single">
        <a href="/img/my_keyboard_may_2019.jpg">
            <img src="/img/t/my_keyboard_may_2019.jpg" alt="" />
        </a>
        <figcaption>My custom-built keyboard. [<a href="https://hunden.linuxkompis.se/2019/05/05/2019-05-05-my-keyboard.md.html">Read more</a>]</figcaption>
    </div><!-- END grid-item -->
</div>
<!-- END grid-container -->

<p>Re-learning to properly touch-type was one of the most frustrating thing I have ever done in my life, but at the same time it was also the most rewarding thing I have ever done. I think it took my muscle memory about one month to get back at my old typing speeds, by then I was also a lot more accurate. It didn’t take long after that for me to also increase my typing speed. Today I’m actually more than 20 words per minute faster than before.</p>

<p>You should really consider learning to properly touch type if you haven’t already done so. It changed my life for the better and I’m forever thankful to myself that I eventually did it.</p>

<h2 id="i-have-also-replaced-vim-with-neovim">I have also replaced Vim with Neovim</h2>

<p>As much as I love Vim, there’s a few things that I like less about it. The development cycle with Vim is slow, like really slow, they release a new version every two or three years. This is usually not an issue for me as I don’t care about bleeding edge software, but one day when I needed a feature in Vim that didn’t exist yet, I had to look for solutions. One of those solutions was to either install a plugin or try Neovim, who already had implemented the feature I was looking for.</p>

<p><a href="https://neovim.io/">Neovim</a> is a fork of Vim that strives to improve the extensibility and maintainability of Vim. Neovim looked like a fresh breeze and I decided to try it out. It turned out to be quite a nice surprise. While it wasn’t a huge change in terms of functionally, or at least in the way I used it, I did notice that Neovim performed a bit faster. Not that I ever had any real issues with how Vim performed.</p>

<p>Another thing that I noticed with Neovim was some <a href="https://neovim.io/doc/user/vim_diff.html#vim-differences">better defaults</a>. It made me aware of small quality of life features that I previously didn’t know about. Because of this I could also remove a surprisingly large part of my configuration file, while I still gained new functionally.</p>

<h2 id="vi-vim-neovim-what">vi, Vim, Neovim, what?</h2>

<p>Are you confused by all the names? Hopefully this will clear things out for you:</p>

<ul>
  <li><a href="https://en.wikipedia.org/wiki/Neovim#Neovim">Neovim</a> is a fork of <a href="https://en.wikipedia.org/wiki/Vim_(text_editor)">Vim</a> from 1991. Neovim itself is from 2014.</li>
  <li>Vim is based on <a href="https://en.wikipedia.org/wiki/Stevie_%28text_editor%29">Stevie</a> from 1987.</li>
  <li>Stevie is based on <a href="https://en.wikipedia.org/wiki/Vi">vi</a> from 1976.</li>
  <li>vi was derived from a sequence of UNIX command-line editors, starting with <a href="https://en.wikipedia.org/wiki/Ed_(text_editor)">ed</a> back in 1973, which was a line editor designed to work well on teleprinters, rather than display terminals.</li>
</ul>

<p>As you can see, the ‘Vi-family’ have quite the history dating all the way back to 1973.</p>

<h2 id="some-recommended-reading">Some recommended reading</h2>

<p>New or old to the vi-family, I can highly recommend you checking out these links:</p>

<ul>
  <li><a href="http://heather.cs.ucdavis.edu/~matloff/UnixAndC/Editors/ViIntro.html">An Extremely Quick and Simple Introduction to the Vi Text Editor</a> (2006)</li>
  <li><a href="https://yehudakatz.com/2010/07/29/everyone-who-tried-to-convince-me-to-use-vim-was-wrong/">Everyone Who Tried to Convince Me to use Vim was Wrong (2010)</a></li>
  <li><a href="https://danielmiessler.com/study/vim/">Learn vim For the Last Time: A Tutorial and Primer</a> (2020)</li>
</ul>

<p>Probably in that order as well. I have a few more links to some interesting articles in <a href="https://hunden.linuxkompis.se/bookmarks/articles.html#vi-and-derivatives">my bookmarks section</a>  if you want to do some more reading.</p>

<p>Anyway. I hope you enjoyed reading my post about how I got started with Vim!</p>]]></content><author><name></name></author><category term="[&quot;Personal&quot;]" /><category term="Vim" /><category term="Neovim" /><summary type="html"><![CDATA[A long time ago my web browser of choice was Mozilla Firefox, and as most normal people I was using it primarily with my mouse and occasionally with some simple keybindings. That all changed back in 2011 when I started to get really invested in tiling window managers (and not long after a lot of text-based applications), simply because I found them to be the most efficient alternative for me. With the keyboard I could do swift actions in a matter of milliseconds, compared to the mouse where some actions could take multiple seconds to execute.]]></summary></entry><entry><title type="html">My plaintext todo list</title><link href="https://hunden.linuxkompis.se/2020/10/28/my-plaintext-todo-list.html" rel="alternate" type="text/html" title="My plaintext todo list" /><published>2020-10-28T00:00:00+01:00</published><updated>2024-02-16T19:42:13+01:00</updated><id>https://hunden.linuxkompis.se/2020/10/28/my-plaintext-todo-list</id><content type="html" xml:base="https://hunden.linuxkompis.se/2020/10/28/my-plaintext-todo-list.html"><![CDATA[<p>This is take two on my plaintext todo list. I actually wrote about <a href="https://hunden.linuxkompis.se/2019/02/01/my-colourful-plaintext-to-do-list.html">my old setup</a> almost two years ago now.</p>

<p>I have since then made some changes to it, I have skipped both the Bash-script and the <a href="http://supercat.nosredna.net/">Supercat</a> tool and I have also replaced Syncthing with Nextcloud for the syncronisation of this task.</p>

<p>My current setup consist of a plaintext file called <code class="language-plaintext highlighter-rouge">todo.txt</code>, which is located in the folder <code class="language-plaintext highlighter-rouge">$HOME/nextcloud/notes/</code>. The content of the file uses Markdown formatting (as always) and it looks like this:</p>

<div class="language-markdown highlighter-rouge"><div class="highlight"><pre class="highlight"><code><span class="gh"># todo
------
</span>
<span class="gu">## Monday</span>
<span class="p">
*</span> [x] Plan dinners for the week
<span class="p">*</span> [x] Grocery shopping

<span class="gu">## Thuesday</span>
<span class="p">
*</span> [ ] Laundry

<span class="nt">&lt;Note:</span> <span class="na">I</span> <span class="na">did</span> <span class="na">not</span> <span class="na">include</span> <span class="na">the</span> <span class="na">rest</span> <span class="na">of</span> <span class="na">the</span> <span class="na">weekdays</span> <span class="na">here</span> <span class="na">for</span> <span class="na">the</span> <span class="na">sake</span> <span class="na">of</span> <span class="na">this</span> <span class="na">demo</span><span class="nt">&gt;</span>

<span class="gu">## Unspecified</span>
<span class="p">
*</span> [ ] Something that can be done any day
</code></pre></div></div>

<p>When I have completed a task, I cross it off with a checkmark. I intentionally leave the list intact the whole week, so I can see what I have done over the week and then feel good about what I have done. It does actually help with the motivation!</p>

<p>On my phone I can then access and edit the file using Nextcoud Notes. I can also preview the file ‘properly’ using the built-in preview mode and I can even interact with the checkboxes by tapping on them.</p>

<div class="grid-container">
    <div class="grid-item single">
        <a href="/img/todo_list.png">
            <img src="/img/t/todo_list.png" alt="" />
        </a>
        <figcaption>Nextcloud Notes with my todo list.</figcaption>
    </div><!-- END grid-item -->
</div>
<!-- END grid-container -->

<p>I find this way of managing a todo-list a lot simpler than my previous setup. I can’t really see why I need to make things any more complicated than this.</p>

<h2 id="post-updates">Post updates</h2>

<h3 id="2020-11-11">2020-11-11</h3>

<p>To make the managements of my list a lot easier, I have decided to install a Neovim plugin for this called <a href="https://github.com/dkarter/bullets.vim">Bullets.vim</a>. It’s a fairly simple plugin for automated bullet lists. And as nice bonus I can now jump to any task and then press <code class="language-plaintext highlighter-rouge">&lt;Leader key&gt;+x</code> to mark it as completed or uncompleted.</p>]]></content><author><name></name></author><category term="[&quot;Productivity&quot;]" /><category term="Todo" /><category term="Plaintext" /><category term="Productivity" /><summary type="html"><![CDATA[This is take two on my plaintext todo list. I actually wrote about my old setup almost two years ago now.]]></summary></entry><entry><title type="html">This weekend was clothes swapping day here</title><link href="https://hunden.linuxkompis.se/2020/10/12/this-weekend-was-clothes-swapping-day-here.html" rel="alternate" type="text/html" title="This weekend was clothes swapping day here" /><published>2020-10-12T00:00:00+02:00</published><updated>2024-02-16T19:42:13+01:00</updated><id>https://hunden.linuxkompis.se/2020/10/12/this-weekend-was-clothes-swapping-day-here</id><content type="html" xml:base="https://hunden.linuxkompis.se/2020/10/12/this-weekend-was-clothes-swapping-day-here.html"><![CDATA[<p>A few days ago I was at something called “klädbytardagen” here in Sweden where I live. I don’t know if there’s a generally used English name for it, but it translates to something like “clothes swapping day”.</p>

<p>The concept is pretty simple, instead of buying new clothes you swap clothes with each other.</p>

<p>For every piece of clothing you give away you get a ticket, the ticket can then be traded with another item there. There’s usually a maximum amount of items you can give away and at today’s event it was 10 items each. Everything that doesn’t get a new home goes usually to either charity or to a secondhand store.</p>

<div class="grid-container">
    <div class="grid-item single">
        <a href="/img/clothes_swapping_day.jpg">
            <img src="/img/t/clothes_swapping_day.jpg" alt="" />
        </a>
        <figcaption>Cloth swapping day with COVID-19 safe distances.</figcaption>
    </div><!-- END grid-item -->
</div>
<!-- END grid-container -->

<p>I had a lot of fun and I ended up with a bunch of good kids clothes which was nice. I do wish that more guys would attend these kinds of events. It’s usually uncommon to see guys and that makes it rather difficult to find anything for myself and other guys. It’s a lot easier to find clothes for women and kids.</p>

<div class="grid-container">
    <div class="grid-item single">
        <a href="/img/clothes_swapping_day-2.jpg">
            <img src="/img/t/clothes_swapping_day-2.jpg" alt="" />
        </a>
        <figcaption>My findings of the days was a bunch of kids clothes.</figcaption>
    </div><!-- END grid-item -->
</div>
<!-- END grid-container -->

<p>I think this is a great way of updating and refreshing your wardrobe without it costing you any money and more importantly; it’s not impacting the planet with any additional carbon dioxide.</p>

<p>If you didn’t know, the <a href="https://www.cbsnews.com/news/earth-day-2019-fashion-industrys-carbon-impact-is-bigger-than-airline-industrys/">fashion industry’s carbon impact is bigger than the airline industry’s carbon impact</a>. According to the same source <a href="https://quantis-intl.com">Quantis</a> the total greenhouse gas emissions related to textiles production creates around 1.2 billion tons of carbon dioxide annually.</p>

<p>In <a href="http://www.naturvardsverket.se/hallbara-textilier/">a report from Naturvårdsverket</a> (the Swedish Environmental Protection Agency), the average Swede buys about 14 kilos of clothes and textiles per year and only two thirds of those clothes are being used. And it gets worse; we also throw away about 8 kilos of clothes and textiles per person and per year here in Sweden.</p>

<p>Most of those clothes are perfectly fine and could have come to good use for a lot of people, especially for those who’s not fortunate enough to afford new clothes.</p>

<p>The bad thing with wealthy countries is that they have too much money to spend on things they don’t really need to begin with. Swedes is especially good at overconsumption junk we don’t really need. And for some reason a lot of us seems to think that it’s okay to do a lot of shopping as long as you give away your old items to second hand.</p>

<p>This has resulted in the second hand stores here being crammed full of perfectly fine clothes (and other items), but most people don’t even visit the second hand stores to begin with. Perhaps it’s still taboo to buy used clothes for some? Who knows.</p>

<p>What we need to do is to buy way less new stuff and way more of the used and perfectly fine things out there. We need to start to think about tomorrow and what future that lays ahead of us if we continue down the unsustainable path we’re currently on.</p>]]></content><author><name></name></author><category term="[&quot;Personal&quot;]" /><category term="Secondhand" /><category term="Shopping" /><category term="Sustainable living" /><category term="Minimalism" /><summary type="html"><![CDATA[A few days ago I was at something called “klädbytardagen” here in Sweden where I live. I don’t know if there’s a generally used English name for it, but it translates to something like “clothes swapping day”.]]></summary></entry><entry><title type="html">I would love to add comments to my website but there’s no good options</title><link href="https://hunden.linuxkompis.se/2020/10/05/i-would-love-to-add-comments-to-my-website-but-theres-no-good-options.html" rel="alternate" type="text/html" title="I would love to add comments to my website but there’s no good options" /><published>2020-10-05T00:00:00+02:00</published><updated>2024-02-16T19:42:13+01:00</updated><id>https://hunden.linuxkompis.se/2020/10/05/i-would-love-to-add-comments-to-my-website-but-theres-no-good-options</id><content type="html" xml:base="https://hunden.linuxkompis.se/2020/10/05/i-would-love-to-add-comments-to-my-website-but-theres-no-good-options.html"><![CDATA[<p>As the title say, I would love to add comments to my website but there’s no good options out there. I have so far looked at the following alternatives:</p>

<ul>
  <li>Staticman</li>
  <li>Stapsher</li>
  <li>ISSO</li>
  <li>Remarkbox</li>
  <li>JustComments</li>
  <li>CommentBox</li>
  <li>Hyvor Talk</li>
  <li>Discourse</li>
  <li>Talkyard</li>
  <li>Coral</li>
  <li>Commento</li>
  <li>Schnack</li>
  <li>Remark42</li>
  <li>Comntr</li>
  <li>Glosa</li>
  <li>Lambda</li>
  <li>HashOver</li>
</ul>

<p>Some aren’t even open source, so they’re not an option to begin with, some require a GitHub account, some are too expensive (paid hosting) and some self-hosted alternatives are just a pure nightmare to set up.</p>

<p>If I have somehow missed some hidden gem out there, let me know via e-mail or IRC.</p>]]></content><author><name></name></author><category term="[&quot;Personal&quot;]" /><summary type="html"><![CDATA[As the title say, I would love to add comments to my website but there’s no good options out there. I have so far looked at the following alternatives:]]></summary></entry><entry><title type="html">It’s Cinnamon Bun Day in Sweden today</title><link href="https://hunden.linuxkompis.se/2020/10/04/its-cinnamon-bun-day-in-sweden-today.html" rel="alternate" type="text/html" title="It’s Cinnamon Bun Day in Sweden today" /><published>2020-10-04T00:00:00+02:00</published><updated>2024-02-16T19:42:13+01:00</updated><id>https://hunden.linuxkompis.se/2020/10/04/its-cinnamon-bun-day-in-sweden-today</id><content type="html" xml:base="https://hunden.linuxkompis.se/2020/10/04/its-cinnamon-bun-day-in-sweden-today.html"><![CDATA[<p>It’s the fourth of October today and that means it’s Cinnamon Bun Day in Sweden! This is an important day for Swedes. I heard that more than half of our population eats at least one cinnamon bun today, me personally eat about a billion of them.</p>

<p>I prefer to bake myself and this year me and my partner tried a new recipe, and they turned out great!</p>

<div class="grid-container">
    <div class="grid-item">
        <a href="/img/2020-10-04-homemade_cinnamon_buns.jpg">
            <img src="/img/t/2020-10-04-homemade_cinnamon_buns.jpg" alt="A plate of our freshly baked cinnamon buns" />
        </a>
        <figcaption>A plate of our freshly baked cinnamon buns</figcaption>
    </div><!-- END grid-item -->
</div>
<!-- END grid-container -->

<p>We used <a href="https://blogg.alltommat.se/fridasbakblogg/2016/09/18/saftiga-kanelbullar-3/">this recipe</a> (It’s in Swedish) this year and it’s probably my current all-time favourite.</p>

<p>The reason I liked it more than the others is that you only need to ferment the dough once (which saves time) and you don’t heat the milk, which makes the dough easier to work with.</p>

<p>There’s a lot of recipes in English for Swedish cinnamon buns if you want to try them yourself. One of them are from a popular Swedish person called Fredriks Fika. He recently made a <a href="https://fredriksfika.allas.se/swedish-cinnamon-buns-cinnamon-rolls/">recipe in English for classic cinnamon buns</a>.</p>

<p>If you haven’t yet tried Swedish cinnamon buns I can highly recommend you doing so!</p>]]></content><author><name></name></author><category term="[&quot;Food &amp; Sweets&quot;]" /><category term="Sweden" /><category term="Baking" /><category term="Holidays" /><summary type="html"><![CDATA[It’s the fourth of October today and that means it’s Cinnamon Bun Day in Sweden! This is an important day for Swedes. I heard that more than half of our population eats at least one cinnamon bun today, me personally eat about a billion of them.]]></summary></entry><entry><title type="html">The web browser add-on uMatrix is now abandoned</title><link href="https://hunden.linuxkompis.se/2020/10/04/the-web-browser-add-on-umatrix-is-now-abandoned.html" rel="alternate" type="text/html" title="The web browser add-on uMatrix is now abandoned" /><published>2020-10-04T00:00:00+02:00</published><updated>2025-11-10T22:42:03+01:00</updated><id>https://hunden.linuxkompis.se/2020/10/04/the-web-browser-add-on-umatrix-is-now-abandoned</id><content type="html" xml:base="https://hunden.linuxkompis.se/2020/10/04/the-web-browser-add-on-umatrix-is-now-abandoned.html"><![CDATA[<p>The popular and the somewhat essential privacy add-on <a href="https://github.com/gorhill/uMatrix">uMatrix</a> for the web browsers Firefox, Chrom{e,ium} and Opera is now an abandoned project.</p>

<p>uMatrix is an add-on for advanced users to block any class of request made by the web browser, like scripts, iframes and ads. The add-on is created by the same person who also created (and later abandoned) the popular web browser add-on uBlock, an add-on which was transferred to another person who made himself rather unpopular by making some controversial choices.</p>

<p>The original author of uBlock later forked his previous project into a new project called <a href="https://github.com/gorhill/uBlock">uBlock Origins</a>, a project that’s still being maintained today.</p>

<p>Thankfully he didn’t do the same mistake twice and it seems like he’s only abandoning the uMatrix project, with the possibility of <em>maybe</em> resuming it later according to <a href="https://github.com/uBlockOrigin/uMatrix-issues/issues/291#issuecomment-694988696">a comment made by himself on GitHub</a>.</p>

<p>Considering how popular this add-on is, I’m certain that someone will fork this project under a new name and continue the development of it. If you hear anything about a fork or an alternative to uMatrix, feel free to contact me about it and I will update this post with the information.</p>]]></content><author><name></name></author><category term="[&quot;News&quot;]" /><category term="uMatrix" /><category term="Firefox" /><summary type="html"><![CDATA[The popular and the somewhat essential privacy add-on uMatrix for the web browsers Firefox, Chrom{e,ium} and Opera is now an abandoned project.]]></summary></entry><entry><title type="html">I’m taking a break from Mastodon</title><link href="https://hunden.linuxkompis.se/2020/09/21/im-taking-a-break-from-mastodon.html" rel="alternate" type="text/html" title="I’m taking a break from Mastodon" /><published>2020-09-21T00:00:00+02:00</published><updated>2024-02-16T19:42:13+01:00</updated><id>https://hunden.linuxkompis.se/2020/09/21/im-taking-a-break-from-mastodon</id><content type="html" xml:base="https://hunden.linuxkompis.se/2020/09/21/im-taking-a-break-from-mastodon.html"><![CDATA[<p>For an indefinite future. *Dramatic drumroll* Well. Seriosly talking, I just feel like that I might not be using it in a way that I want to be using it anymore.</p>

<p>I feel like that I would like to take a break from Mastodon[1] and see what happens with my phone usage in general. I access Mastodon 95% of the time via my phone and according to my phone I have opened Tusky (my Mastodon-client) in average about 30 to 50 times per day the last month or so. One day it was 100 times! That’s just crazy.</p>

<ol>
  <li>This only applies for my main account, where I spend 99.99% of my time on Mastodon. I still use Mastodon for my project <a href="https://mastodon.linuxkompis.se/@Linuxkompis">Linuxkompis</a> and my company <a href="https://fosstodon.org/@iokeyboards">I/O Keyboards</a>.</li>
</ol>

<p>I can only imagine how much of an effect that distraction must have on my life in general. And since Mastodon is the only distraction I have on my phone these days, I’m hopeful that by removing my account it will result in something positive, like bringing back my passion for weblogs and the old web again.</p>

<p>To be honest, I have always considered myself to be a ‘healthy’ low-usage phone user, mostly spending my time modifying my phone with custom firmwares and icon packs, rather than using it for anything else. And sure, I once was that person, but something obviously happened along the road. I don’t know what, but I intend to find out what happened when I got lost and how I can find my way back again.</p>

<p>I now feel that I want to focus more on my weblog. It would be nice if this website could function more as my social corner of the web, just like how a weblog used to before we had ‘social medias’. For it to be truly social I probably need a commenting system as well. I’m not sure what to use yet, but I’m looking for options.</p>

<p>If you want to contact me and/or leave feedback you can do so via <a href="mailto:">e-mail</a> and IRC (I’m Hund at freenode).</p>]]></content><author><name></name></author><category term="[&quot;Personal&quot;]" /><category term="Health" /><category term="Mastodon" /><category term="Social Medias" /><summary type="html"><![CDATA[For an indefinite future. *Dramatic drumroll* Well. Seriosly talking, I just feel like that I might not be using it in a way that I want to be using it anymore.]]></summary></entry><entry><title type="html">I gave my website a new look</title><link href="https://hunden.linuxkompis.se/2020/09/09/i-gave-my-website-a-new-look.html" rel="alternate" type="text/html" title="I gave my website a new look" /><published>2020-09-09T00:00:00+02:00</published><updated>2024-02-16T19:42:13+01:00</updated><id>https://hunden.linuxkompis.se/2020/09/09/i-gave-my-website-a-new-look</id><content type="html" xml:base="https://hunden.linuxkompis.se/2020/09/09/i-gave-my-website-a-new-look.html"><![CDATA[<p>I gave my website a new look! I wasn’t happy with the code and some parts of the theme. I have also wanted to try a more ‘plain text’ look for some time now and decided to give it try. It turned out to be more challenging than I expected to design something simpler with less visual elements.</p>

<p>I started fresh with a new theme from scratch. This made it easier to improve the parts of the old code that I didn’t like from my previous theme. I was able work with a lot less code which was a lot of fun. I managed to remove 16 kilobytes of code and my website[1] is now down to 220 kilobytes of code.</p>

<ol>
  <li>Pre-build and excluding images and posts.</li>
</ol>

<p>If you like my theme you can find the source code <a href="https://notabug.org/Hund/Jekyll">here</a>. If you have any feedback on the theme itself or my code (good or bad), feel free to contact me and let me know about it.</p>]]></content><author><name></name></author><category term="[&quot;Updates&quot;]" /><category term="Web design" /><category term="Hund" /><summary type="html"><![CDATA[I gave my website a new look! I wasn’t happy with the code and some parts of the theme. I have also wanted to try a more ‘plain text’ look for some time now and decided to give it try. It turned out to be more challenging than I expected to design something simpler with less visual elements.]]></summary></entry><entry><title type="html">Ranger - My favourite file manager</title><link href="https://hunden.linuxkompis.se/2020/08/20/ranger-my-favourite-file-manager.html" rel="alternate" type="text/html" title="Ranger - My favourite file manager" /><published>2020-08-20T00:00:00+02:00</published><updated>2024-02-16T19:42:13+01:00</updated><id>https://hunden.linuxkompis.se/2020/08/20/ranger-my-favourite-file-manager</id><content type="html" xml:base="https://hunden.linuxkompis.se/2020/08/20/ranger-my-favourite-file-manager.html"><![CDATA[<p>Ranger is a file manager written in Python that uses the well-known text-based interface <a href="https://en.wikipedia.org/wiki/Ncurses">ncurses</a>. The layout for displaying files and folder is called <a href="https://en.wikipedia.org/wiki/Miller_columns">Miller columns</a>, a three column based layout that’s commonly used for file managers. Ranger is a Vi-like file manager, which means that the keybindings and workflow is highly inspired from the Vi text editor. It even features some (optional) support for the mouse, but what makes it great (if you ask me) is the epic support for a key-based workflow.</p>

<figure>
  <a href="/img/ranger.png">
    <img src="/img/t/ranger.png" alt="My setup with Ranger and the Solarized colourscheme." />
  </a>
  <figcaption>My setup with Ranger and the Solarized colourscheme.</figcaption>
</figure>

<h2 id="my-adventures-with-ranger">My adventures with Ranger</h2>

<p>Even though I’ve been an avid user of everything text-based for a long time, I was sceptic over using a text-based file manager. Could it really be as fast or as convenient as a graphical file manager? Well. It turned out I was wrong, so wrong!</p>

<p>The first days with Ranger felt a little bit awkward, kind off like how it felt with Vim the first time, but at the same time you instantly knew you were onto something good. I was using the basic navigation with the keys <code class="language-plaintext highlighter-rouge">j</code> and <code class="language-plaintext highlighter-rouge">k</code> to navigate up and down, <code class="language-plaintext highlighter-rouge">gg</code> and <code class="language-plaintext highlighter-rouge">G</code> to jump to the top and bottom and <code class="language-plaintext highlighter-rouge">'&lt;LETTER&gt;</code> for my bookmarks. While it did work, it wasn’t efficient and browsing larger folders took me forever. This could have all been avoided if I hadn’t just quickly skimmed through the documentation and instead thoroughly read (at least most of) the documentation first.</p>

<p>It wasn’t until I read the whole documentation that I found out about the “find” feature, a feature that lets you quickly search for files and folders. It works by hitting the letter <code class="language-plaintext highlighter-rouge">f</code> and then typing some of the characters from the file or folder you’re looking for. If you end up with a unique hit it will open the file or folder directly and you can also at any time navigate between the hits with the keys <code class="language-plaintext highlighter-rouge">n</code> and <code class="language-plaintext highlighter-rouge">tab</code>. This way of navigating made a large impact on the efficiency for me and it also convinced me that a text-based file manager can actually be more efficient.</p>

<p>With that said. I wasn’t 100% satisfied with the find-feature until I found out about a neat little tweak to the it! By rebinding <code class="language-plaintext highlighter-rouge">f</code> to the function <code class="language-plaintext highlighter-rouge">scout -ftsea%space</code> I was now able to visually filter out all non-hits, making it a lot easier to find what I’m looking for. I made a little animated GIF-image to demonstrate what I’m talking about:</p>

<div class="grid-container">
    <div class="grid-item">
        <a href="/img/ranger_find.gif">
            <img src="/img/t/ranger_find.png" alt="The find feature with the visual filter." />
            <figcaption>The find feature with the visual filter.</figcaption>
        </a>
    </div><!-- END grid-item -->
</div>
<!-- END grid-container -->

<p>If you want to do the same thing, add this line to your configuration file <code class="language-plaintext highlighter-rouge">~/.config/ranger/rc.conf</code>:</p>

<div class="language-plaintext highlighter-rouge"><div class="highlight"><pre class="highlight"><code>map f console scout -ftsea%space
</code></pre></div></div>

<h2 id="features">Features</h2>

<p>Ranger comes with a lot of features and if that’s not enough, it’s also possible to add new functionality with scripts and plugins. As this is meant to be an introduction to Ranger I will only cover some basics here.</p>

<h3 id="thumbnails">Thumbnails</h3>

<p>The first thing you might ask yourself is: “What about thumbnails?”. Well. Showing thumbnails for images might be considered to be one of the most basic features a file manager should have by some. And they’re right.</p>

<p>Ranger can show a (single) preview/thumbnail of pretty every file there is—even archives (using atool) and torrent-files (using transmission-show)—the issue is that it can only preview the currently marked file. Which is perfectly fine for everything but images. A solution to this is the image viewer sxiv, which can show thumbnails for images.</p>

<div class="grid-container">
    <div class="grid-item">
        <a href="/img/sxiv.jpg">
            <img src="/img/t/sxiv.jpg" alt="A picture of the image viewer sxiv." />
            <figcaption>An image viewed in sxiv.</figcaption>
        </a>
    </div><!-- END grid-item -->
    <div class="grid-item">
        <a href="/img/sxiv-thumbnails.jpg">
            <img src="/img/t/sxiv-thumbnails.jpg" alt="A picture of the image viewer sxiv." />
            <figcaption>A preview of a folder in sxiv.</figcaption>
        </a>
    </div><!-- END grid-item -->
</div>
<!-- END grid-container -->

<p>I wrote about sxiv back in 2018: “<a href="/2018/04/12/sxiv-a-simple-vi-like-image-viewer.html">sxiv - A simple Vi-like image viewer</a>”. It’s a great lightweight and scriptable image viewer that I highly recommend everyone checking out!</p>

<h3 id="the-keybindings">The keybindings</h3>

<p>What makes Ranger truly great is the keybindings. To give you an idea how it could work, I have included some of the common keybindings for me. Some of them are defaults and some of them are my own. I’m not really sure which ones are the defaults or not though, I’ve been using Ranger for a long time now.</p>

<h3 id="file-management">File management</h3>

<table>
  <thead>
    <tr>
      <th>Command</th>
      <th>Description</th>
    </tr>
  </thead>
  <tbody>
    <tr>
      <td><code class="language-plaintext highlighter-rouge">H</code></td>
      <td>Show hidden files and folders.</td>
    </tr>
    <tr>
      <td><code class="language-plaintext highlighter-rouge">r</code></td>
      <td>Open with <code class="language-plaintext highlighter-rouge">&lt;APPLICATION&gt;</code>.</td>
    </tr>
    <tr>
      <td><code class="language-plaintext highlighter-rouge">D</code></td>
      <td>Delete the marked file or the selected files.</td>
    </tr>
    <tr>
      <td><code class="language-plaintext highlighter-rouge">&lt;Space&gt;</code></td>
      <td>Selects the current file/folder.</td>
    </tr>
    <tr>
      <td><code class="language-plaintext highlighter-rouge">v</code></td>
      <td>Marks all files and folders in the current directory.</td>
    </tr>
    <tr>
      <td><code class="language-plaintext highlighter-rouge">a</code></td>
      <td>Edit the name of the file/folder by putting the cursor last.</td>
    </tr>
    <tr>
      <td><code class="language-plaintext highlighter-rouge">I</code></td>
      <td>Edit the name of the file/folder by putting the cursor first.</td>
    </tr>
    <tr>
      <td><code class="language-plaintext highlighter-rouge">cw</code></td>
      <td>Change the name of the file/folder.</td>
    </tr>
    <tr>
      <td><code class="language-plaintext highlighter-rouge">o</code></td>
      <td>Sort current directory. <code class="language-plaintext highlighter-rouge">oa</code> to sort by time <code class="language-plaintext highlighter-rouge">os</code> to sort by name size and so on.</td>
    </tr>
    <tr>
      <td><code class="language-plaintext highlighter-rouge">'&lt;LETTER&gt;</code></td>
      <td>Jump to bookmark.</td>
    </tr>
    <tr>
      <td><code class="language-plaintext highlighter-rouge">m&lt;LETTER&gt;</code></td>
      <td>Bookmarks the current directory.</td>
    </tr>
    <tr>
      <td><code class="language-plaintext highlighter-rouge">:bulkrename</code></td>
      <td>Lets you bulk rename the selected files and folders by using your $EDITOR.</td>
    </tr>
  </tbody>
</table>

<h3 id="tabs">Tabs</h3>

<table>
  <thead>
    <tr>
      <th>Command</th>
      <th>Description</th>
    </tr>
  </thead>
  <tbody>
    <tr>
      <td><code class="language-plaintext highlighter-rouge">gn</code></td>
      <td>opens a new tab.</td>
    </tr>
    <tr>
      <td><code class="language-plaintext highlighter-rouge">gc</code></td>
      <td>closes the current tab.</td>
    </tr>
    <tr>
      <td><code class="language-plaintext highlighter-rouge">&lt;Tab&gt;</code></td>
      <td>switches tab to the right.</td>
    </tr>
    <tr>
      <td><code class="language-plaintext highlighter-rouge">&lt;Shift&gt;+&lt;Tab&gt;</code></td>
      <td>switches tab to the left.</td>
    </tr>
  </tbody>
</table>

<h3 id="some-of-my-custom-keybindings">Some of my custom keybindings</h3>

<p>This is some of the keybindings that I actually know that I have added myself.</p>

<table>
  <thead>
    <tr>
      <th>Command</th>
      <th>Description</th>
    </tr>
  </thead>
  <tbody>
    <tr>
      <td><code class="language-plaintext highlighter-rouge">F</code></td>
      <td>Executes <code class="language-plaintext highlighter-rouge">detox %f</code> on the current file or folder. <a href="/2018/10/10/clean-up-filenames-with-detox.html">Detox</a> makes file names pretty by removing troublesome characters and spaces.</td>
    </tr>
    <tr>
      <td><code class="language-plaintext highlighter-rouge">Md</code></td>
      <td>Creates a folder.</td>
    </tr>
    <tr>
      <td><code class="language-plaintext highlighter-rouge">U</code></td>
      <td>Uploads the selected file(s) and/or folder(s) to my Nextcloud account using <a href="https://hunden.linuxkompis.se/2019/03/26/how-to-upload-files-to-nextcloud-using-only-a-shell-script.html">shareLinkCreator</a>.</td>
    </tr>
    <tr>
      <td><code class="language-plaintext highlighter-rouge">Pp</code></td>
      <td>Creates a PDF-document of the selected document using Pandoc.</td>
    </tr>
    <tr>
      <td><code class="language-plaintext highlighter-rouge">Ph</code></td>
      <td>Creates a HTML-document of the selected document using Pandoc.</td>
    </tr>
    <tr>
      <td><code class="language-plaintext highlighter-rouge">px</code></td>
      <td>Extracts the archive using <code class="language-plaintext highlighter-rouge">atool</code>.</td>
    </tr>
    <tr>
      <td><code class="language-plaintext highlighter-rouge">pat</code></td>
      <td>Creates an archive using <code class="language-plaintext highlighter-rouge">tar</code>.</td>
    </tr>
    <tr>
      <td><code class="language-plaintext highlighter-rouge">paz</code></td>
      <td>Creates an archive using <code class="language-plaintext highlighter-rouge">zip</code>.</td>
    </tr>
    <tr>
      <td><code class="language-plaintext highlighter-rouge">w</code></td>
      <td>Sets the current image as a wallpaper using <code class="language-plaintext highlighter-rouge">feh</code>.</td>
    </tr>
  </tbody>
</table>

<p>If you’re at any time lost and/or need any kind of help in Ranger, you can just press the key <code class="language-plaintext highlighter-rouge">?</code> to bring up this dialog that will help you:</p>

<div class="language-plaintext highlighter-rouge"><div class="highlight"><pre class="highlight"><code>View [m]an page, [k]ey bindings, [c]ommands or [s]ettings? (press q to abort)
</code></pre></div></div>

<h3 id="plugins">Plugins</h3>

<p>To install a plugin you simply copy it to the folder <code class="language-plaintext highlighter-rouge">$XDG_CONFIG_HOME/ranger/plugins/</code>. I only have one plugin myself and that’s a plugin called <a href="https://hunden.linuxkompis.se/2020/07/30/how-to-hide-files-and-folders-in-ranger.html">plugin_file_filter.py</a>, it’s a plugin that visually hide files and folders. Why? The main reason I installed it is so I can hide the folder <code class="language-plaintext highlighter-rouge">~/Desktop</code>. I don’t have a desktop, so why would I want to see the folder?</p>

<p>You can find more plugins on <a href="https://github.com/ranger/ranger/wiki/Plugins">their wiki</a>.</p>

<h2 id="theres-more">There’s more</h2>

<p>This is far from everything that Ranger can do, my hope is that what I covered here today is enough to help peak the interest for you with Ranger and to try it out yourself!</p>

<p>I highly recommend you checking out their cheatsheet (<a href="https://ranger.github.io/cheatsheet.png">PNG</a> / <a href="https://ranger.github.io/cheatsheet.svg">SVG</a>), <a href="https://github.com/ranger/ranger/wiki/Official-User-Guide">the official user guide</a> and the rest of <a href="https://github.com/ranger/ranger/wiki">the wiki</a> for all the information available about Ranger.</p>

<p>And if you’re interested in looking at my latest public configuration for Ranger it’s available online via my public Git-repository for <a href="https://notabug.org/Hund/dotfiles/src/master/ranger/.config/ranger">Ranger</a> and <a href="https://notabug.org/Hund/dotfiles/">other dotfiles</a>.</p>]]></content><author><name></name></author><category term="[&quot;Applications &amp; Tools&quot;]" /><category term="Ranger" /><category term="File manager" /><category term="Vi" /><category term="Vim" /><category term="Productivity" /><summary type="html"><![CDATA[Ranger is a file manager written in Python that uses the well-known text-based interface ncurses. The layout for displaying files and folder is called Miller columns, a three column based layout that’s commonly used for file managers. Ranger is a Vi-like file manager, which means that the keybindings and workflow is highly inspired from the Vi text editor. It even features some (optional) support for the mouse, but what makes it great (if you ask me) is the epic support for a key-based workflow.]]></summary></entry><entry><title type="html">How to make eix in Gentoo look good with the Solarized colourscheme</title><link href="https://hunden.linuxkompis.se/2020/08/14/how-to-make-eix-in-gentoo-look-good-with-the-solarized-colourscheme.html" rel="alternate" type="text/html" title="How to make eix in Gentoo look good with the Solarized colourscheme" /><published>2020-08-14T00:00:00+02:00</published><updated>2024-02-16T19:42:13+01:00</updated><id>https://hunden.linuxkompis.se/2020/08/14/how-to-make-eix-in-gentoo-look-good-with-the-solarized-colourscheme</id><content type="html" xml:base="https://hunden.linuxkompis.se/2020/08/14/how-to-make-eix-in-gentoo-look-good-with-the-solarized-colourscheme.html"><![CDATA[<p>Something that has always been bothering me with the tool <a href="https://wiki.gentoo.org/wiki/Eix">eix</a> is the default colours when you use the Solarized colourscheme for your terminal emulator.</p>

<p>Thankfully I found a solution to that today and eix looks a lot better for me now. Here’s a comparison with a before and after images:</p>

<div class="grid-container">
    <div class="grid-item">
        <a href="/img/eix_colours_before.png">
            <img src="/img/t/eix_colours_before.png" alt="" />
            <figcaption>eix with the default colourscheme</figcaption>
        </a>
    </div><!-- END grid-item -->
</div>
<!-- END grid-container -->

<div class="grid-container">
    <div class="grid-item">
        <a href="/img/eix_colours_after.png">
            <img src="/img/t/eix_colours_after.png" alt="" />
            <figcaption>eix with the Solarized colourscheme</figcaption>
        </a>
    </div><!-- END grid-item -->
</div>
<!-- END grid-container -->

<p>I found the solution in <a href="https://forums.gentoo.org/viewtopic-p-7284042.html?sid=a89ed9fb475e2d8536add68fd62336df#7284042">this post</a> over at the Gentoo forums. The solution is to simply set the variable <code class="language-plaintext highlighter-rouge">SOLARIZED=true</code> in your shell. You do this with the command <code class="language-plaintext highlighter-rouge">export SOLARIZED=true</code>. If you want to make it permanent you just add it to your configuration file for your shell.</p>]]></content><author><name></name></author><category term="[&quot;Tips &amp; Trix&quot;]" /><category term="Gentoo" /><category term="eix" /><category term="Solarized" /><category term="Themeing" /><summary type="html"><![CDATA[Something that has always been bothering me with the tool eix is the default colours when you use the Solarized colourscheme for your terminal emulator.]]></summary></entry><entry><title type="html">How to sync and manage your CalDAV-calendars and your CardDAV-addressbooks via the terminal</title><link href="https://hunden.linuxkompis.se/2020/08/12/how-to-sync-and-manage-your-caldav-and-carddav-via-the-terminal.html" rel="alternate" type="text/html" title="How to sync and manage your CalDAV-calendars and your CardDAV-addressbooks via the terminal" /><published>2020-08-12T00:00:00+02:00</published><updated>2024-02-16T19:42:13+01:00</updated><id>https://hunden.linuxkompis.se/2020/08/12/how-to-sync-and-manage-your-caldav-and-carddav-via-the-terminal</id><content type="html" xml:base="https://hunden.linuxkompis.se/2020/08/12/how-to-sync-and-manage-your-caldav-and-carddav-via-the-terminal.html"><![CDATA[<p>If you want to sync and manage both your CalDAV-calendars and your CardDAV-addressbooks via the command-line you’re in luck! There’s three pieces of software called <a href="https://github.com/pimutils/vdirsyncer">vdirsyncer</a>, <a href="https://github.com/pimutils/khal">Khal</a> and <a href="https://github.com/scheibler/khard/">Khard</a> that does just that for you. It happen to be how I’ve been doing it for several years now and I think it’s time to write about it.</p>

<div class="grid-container">

    <div class="grid-item">
        <a href="/img/khal.png">
            <img src="/img/t/khal.png" alt="A screenshot of Khal" />
        </a>
        <figcaption>A screenshot of Khal's interactive mode.</figcaption>
    </div>

    <div class="grid-item">
        <a href="/img/my_desktop-2020-11-13-002.png">
            <img src="/img/t/khard.png" alt="" />
        </a>
        <figcaption>A screenshot of an example with Khard and one made up entry.</figcaption>
    </div>

</div>

<p>Setting it all up is pretty easy and straightforward, as long as you know what to do. You can either read <a href="http://vdirsyncer.pimutils.org/en/stable/config.html">the documentation</a> or just be happily lazy and copy my pretty generic setup that I use with both my Nextcloud account and a public read-only calendar from Google, so I can keep myself à jour with our holidays here.</p>

<h2 id="how-to-get-started-with-vdirsyncer">How to get started with vdirsyncer</h2>

<p>It’s wise to start with the backend. The file file you need to edit is <code class="language-plaintext highlighter-rouge">~/.config/vdirsyncer</code> and this is what my configuration file looks like (It should be safe to copy this and the other configuration files and just make minor obvious adjustments to them):</p>

<div class="language-ini highlighter-rouge"><div class="highlight"><pre class="highlight"><code><span class="nn">[general]</span><span class="w">

</span><span class="c"># A folder where vdirsyncer can store some metadata about each pair.
</span><span class="py">status_path</span><span class="w"> </span><span class="p">=</span><span class="w"> </span><span class="s">"~/.config/vdirsyncer/status/"</span>
<span class="w">
</span><span class="c"># CardDAV
# =======
</span><span class="w">
</span><span class="c"># Operation Tulip
# ---------------
</span><span class="w">
</span><span class="nn">[pair nextcloud_contacts]</span><span class="w">
</span><span class="c"># A `[pair &lt;name&gt;]` block defines two storages `a` and `b` that should be
# synchronized. The definition of these storages follows in `[storage &lt;name&gt;]`
# blocks. This is similar to accounts in OfflineIMAP.
</span><span class="py">a</span><span class="w"> </span><span class="p">=</span><span class="w"> </span><span class="s">"nextcloud_contacts_local"</span>
<span class="py">b</span><span class="w"> </span><span class="p">=</span><span class="w"> </span><span class="s">"nextcloud_contacts_remote"</span>
<span class="w">
</span><span class="c"># Synchronize all collections that can be found.
# You need to run `vdirsyncer discover` if new calendars/addressbooks are added
# on the server.
</span><span class="py">collections</span><span class="w"> </span><span class="p">=</span><span class="w"> </span><span class="s">["from a", "from b"]</span>
<span class="w">
</span><span class="c"># Synchronize the "display name" property into a local file (~/.contacts/displayname).
</span><span class="py">metadata</span><span class="w"> </span><span class="p">=</span><span class="w"> </span><span class="s">["displayname"]</span>
<span class="w">
</span><span class="c"># To resolve a conflict the following values are possible:
#   `null` - abort when collisions occur (default)
#   `"a wins"` - assume a's items to be more up-to-date
#   `"b wins"` - assume b's items to be more up-to-date
#conflict_resolution = null
</span><span class="w">
</span><span class="nn">[storage nextcloud_contacts_local]</span><span class="w">
</span><span class="c"># A storage references actual data on a remote server or on the local disk.
# Similar to repositories in OfflineIMAP.
</span><span class="py">type</span><span class="w"> </span><span class="p">=</span><span class="w"> </span><span class="s">"filesystem"</span>
<span class="py">path</span><span class="w"> </span><span class="p">=</span><span class="w"> </span><span class="s">"~/.config/vdirsyncer/contacts/"</span>
<span class="py">fileext</span><span class="w"> </span><span class="p">=</span><span class="w"> </span><span class="s">".vcf"</span>
<span class="w">
</span><span class="nn">[storage nextcloud_contacts_remote]</span><span class="w">
</span><span class="py">type</span><span class="w"> </span><span class="p">=</span><span class="w"> </span><span class="s">"carddav"</span>
<span class="py">url</span><span class="w"> </span><span class="p">=</span><span class="w"> </span><span class="s">"https://cloud.operationtulip.com/remote.php/dav/addressbooks/users/&lt;USERNAME&gt;/contacts/"</span>
<span class="py">username</span><span class="w"> </span><span class="p">=</span><span class="w"> </span><span class="s">"&lt;USERNAME&gt;"</span>
<span class="py">password</span><span class="w"> </span><span class="p">=</span><span class="w"> </span><span class="s">"&lt;PASSWORD&gt;"</span>
<span class="w">
</span><span class="c"># CalDAV
# ======
</span><span class="w">
</span><span class="c"># Operation Tulip
# ---------------
</span><span class="w">
</span><span class="nn">[pair nextcloud_calendar]</span><span class="w">
</span><span class="py">a</span><span class="w"> </span><span class="p">=</span><span class="w"> </span><span class="s">"nextcloud_calendar_local"</span>
<span class="py">b</span><span class="w"> </span><span class="p">=</span><span class="w"> </span><span class="s">"nextcloud_calendar_remote"</span>
<span class="py">collections</span><span class="w"> </span><span class="p">=</span><span class="w"> </span><span class="s">["personligt", "fdelsedagar", "temadagar"]</span>
<span class="w">
</span><span class="c"># Calendars also have a color property
</span><span class="py">metadata</span><span class="w"> </span><span class="p">=</span><span class="w"> </span><span class="s">["displayname", "color"]</span>
<span class="w">
</span><span class="nn">[storage nextcloud_calendar_local]</span><span class="w">
</span><span class="py">type</span><span class="w"> </span><span class="p">=</span><span class="w"> </span><span class="s">"filesystem"</span>
<span class="py">path</span><span class="w"> </span><span class="p">=</span><span class="w"> </span><span class="s">"~/.config/vdirsyncer/calendars/"</span>
<span class="py">fileext</span><span class="w"> </span><span class="p">=</span><span class="w"> </span><span class="s">".ics"</span>
<span class="w">
</span><span class="nn">[storage nextcloud_calendar_remote]</span><span class="w">
</span><span class="py">type</span><span class="w"> </span><span class="p">=</span><span class="w"> </span><span class="s">"caldav"</span>
<span class="py">url</span><span class="w"> </span><span class="p">=</span><span class="w"> </span><span class="s">"https://cloud.operationtulip.com/remote.php/dav/"</span>
<span class="py">username</span><span class="w"> </span><span class="p">=</span><span class="w"> </span><span class="s">"&lt;USERNAME&gt;"</span>
<span class="py">password</span><span class="w"> </span><span class="p">=</span><span class="w"> </span><span class="s">"&lt;PASSWORD&gt;"</span>
<span class="w">
</span><span class="c"># Helgdagar
# ---------
</span><span class="w">
</span><span class="nn">[pair helgdagar]</span><span class="w">
</span><span class="py">a</span><span class="w"> </span><span class="p">=</span><span class="w"> </span><span class="s">"helgdagar_local"</span>
<span class="py">b</span><span class="w"> </span><span class="p">=</span><span class="w"> </span><span class="s">"helgdagar_remote"</span>
<span class="py">collections</span><span class="w"> </span><span class="p">=</span><span class="w"> </span><span class="s">null</span>
<span class="w">
</span><span class="nn">[storage helgdagar_local]</span><span class="w">
</span><span class="py">type</span><span class="w"> </span><span class="p">=</span><span class="w"> </span><span class="s">"filesystem"</span>
<span class="py">path</span><span class="w"> </span><span class="p">=</span><span class="w"> </span><span class="s">"~/.config/vdirsyncer/calendars/helgdagar/"</span>
<span class="py">fileext</span><span class="w"> </span><span class="p">=</span><span class="w"> </span><span class="s">".ics"</span>
<span class="w">
</span><span class="nn">[storage helgdagar_remote]</span><span class="w">
</span><span class="py">type</span><span class="w"> </span><span class="p">=</span><span class="w"> </span><span class="s">"http"</span>
<span class="py">url</span><span class="w"> </span><span class="p">=</span><span class="w"> </span><span class="s">"https://calendar.google.com/calendar/ical/sv.swedish%23holiday%40group.v.calendar.google.com/public/basic.ics"</span>
<span class="py">read_only</span><span class="w"> </span><span class="p">=</span><span class="w"> </span><span class="s">"true"</span>
</code></pre></div></div>

<p>(My calendar “fdelsedagar” is actually named “Födelsedagar”, vdirsyncer just removed the letter “ö” for some reason.)</p>

<p>When you’re done setting up vdirsyncer you need to ‘discover’ both the calendars and the addressbooks with the command:</p>

<div class="language-plaintext highlighter-rouge"><div class="highlight"><pre class="highlight"><code>$ vdirsyncer discover
</code></pre></div></div>

<p>You can then synchronize everything with the command:</p>

<div class="language-plaintext highlighter-rouge"><div class="highlight"><pre class="highlight"><code>$ vdirsyncer sync
</code></pre></div></div>

<p>And you’re done! I highly recommend you scheduling the command using Cron. I have this in my configuration file for it to sync every three hours:</p>

<div class="language-plaintext highlighter-rouge"><div class="highlight"><pre class="highlight"><code>*/180 * * * * vdirsyncer sync
</code></pre></div></div>

<h2 id="how-to-get-started-with-khal">How to get started with Khal</h2>

<p>The config is located at <code class="language-plaintext highlighter-rouge">~/.config/khal/config</code> and my configuration file looks like this:</p>

<div class="language-ini highlighter-rouge"><div class="highlight"><pre class="highlight"><code><span class="nn">[default]</span><span class="w">

</span><span class="py">default_calendar</span><span class="w"> </span><span class="p">=</span><span class="w"> </span><span class="s">Personligt</span>
<span class="py">highlight_event_days</span><span class="w"> </span><span class="p">=</span><span class="w"> </span><span class="s">true</span>
<span class="w">
</span><span class="nn">[view]</span><span class="w">

</span><span class="py">dynamic_days</span><span class="p">=</span><span class="w"> </span><span class="s">false</span>
<span class="w">
</span><span class="nn">[locale]</span><span class="w">

</span><span class="py">unicode_symbols</span><span class="w"> </span><span class="p">=</span><span class="w"> </span><span class="s">false</span>
<span class="py">local_timezone</span><span class="w"> </span><span class="p">=</span><span class="w"> </span><span class="s">Europe/Stockholm</span>
<span class="py">default_timezone</span><span class="w"> </span><span class="p">=</span><span class="w"> </span><span class="s">Europe/Stockholm</span>
<span class="py">timeformat</span><span class="w"> </span><span class="p">=</span><span class="w"> </span><span class="s">%H:%M</span>
<span class="py">dateformat</span><span class="w"> </span><span class="p">=</span><span class="w"> </span><span class="s">%d.%m</span>
<span class="py">longdateformat</span><span class="w"> </span><span class="p">=</span><span class="w"> </span><span class="s">%d.%m.%Y</span>
<span class="w">
</span><span class="nn">[calendars]</span><span class="w">

</span><span class="nn">[[Personligt]</span><span class="na">]</span><span class="w">
  </span><span class="py">path</span><span class="w"> </span><span class="p">=</span><span class="w"> </span><span class="s">~/.config/vdirsyncer/calendars/personligt/</span>
<span class="w">  </span><span class="py">color</span><span class="w"> </span><span class="p">=</span><span class="w"> </span><span class="s">light cyan</span>
<span class="w">
</span><span class="nn">[[Födelsedagar]</span><span class="na">]</span><span class="w">
  </span><span class="py">path</span><span class="w"> </span><span class="p">=</span><span class="w"> </span><span class="s">~/.config/vdirsyncer/calendars/fdelsedagar/</span>
<span class="w">  </span><span class="py">color</span><span class="w"> </span><span class="p">=</span><span class="w"> </span><span class="s">dark blue</span>
<span class="w">
</span><span class="nn">[[Helgdagar]</span><span class="na">]</span><span class="w">
  </span><span class="py">path</span><span class="w"> </span><span class="p">=</span><span class="w"> </span><span class="s">~/.config/vdirsyncer/calendars/helgdagar</span>
<span class="w">  </span><span class="py">color</span><span class="w"> </span><span class="p">=</span><span class="w"> </span><span class="s">yellow</span>
</code></pre></div></div>

<p>Once it’s setup you can start using Khal. It comes with both a text-based user interface as well as a command-line interface. The syntax for the commands can be a bit tricky to figure out if you’re new and clueless, but the interactive mode is really simple.</p>

<p>When I was new I had issues remembering the syntax for the time and date. For some reason you format the syntax like this: <code class="language-plaintext highlighter-rouge">&lt;DD&gt;.&lt;MM&gt;. &lt;HH&gt;:&lt;MM&gt; &lt;HH&gt;:&lt;MM&gt;</code>, for an example: <code class="language-plaintext highlighter-rouge">12.08. 18:00 22:00</code>. Which doesn’t make much sense to me. Something more sensible would be something like <code class="language-plaintext highlighter-rouge">12.08 18:00-22:00</code>.</p>

<p>Anyway. Here’s a few examples of what you can do via the command-line:</p>

<h3 id="print-all-available-calendars">Print all available calendars</h3>

<div class="language-plaintext highlighter-rouge"><div class="highlight"><pre class="highlight"><code>$ khal printcalendars
</code></pre></div></div>

<h3 id="print-upcoming-events">Print upcoming events</h3>

<p>List all events between today and 30 days forward:</p>

<div class="language-plaintext highlighter-rouge"><div class="highlight"><pre class="highlight"><code>$ khal list today 30d
Tuesday, 25.08.2020
 Linux födelsedag (R)
</code></pre></div></div>

<h3 id="adding-a-new-entry">Adding a new entry</h3>

<p>On a specific date (in this example it’s October 12 between the clock 18:00 and 22:00):</p>

<div class="language-plaintext highlighter-rouge"><div class="highlight"><pre class="highlight"><code>$ khal new 12.08. 18:00 22:00 "Laundry"
</code></pre></div></div>

<p>You can also specify dynamic dates, alarms, a specific calendar and a description:</p>

<div class="language-plaintext highlighter-rouge"><div class="highlight"><pre class="highlight"><code>$ khal new tomorrow 18:00 22:00 -alarm 10m -a &lt;CALENDAR&gt; "&lt;TITLE&gt; :: &lt;DESCRIPTION&gt;"
</code></pre></div></div>

<p>If you want it to be a recurring event:</p>

<div class="language-plaintext highlighter-rouge"><div class="highlight"><pre class="highlight"><code>$ khal new 12.08. "&lt;EVENT&gt;" -r &lt;yearly/monthly/weekly/daily&gt;
</code></pre></div></div>

<p>There’s also the flag <code class="language-plaintext highlighter-rouge">-u, –until</code> if you want it to be for a limited time only.</p>

<h3 id="searching-for-an-event">Searching for an event</h3>

<div class="language-plaintext highlighter-rouge"><div class="highlight"><pre class="highlight"><code>$ khal search &lt;KEYWORD&gt;
</code></pre></div></div>

<h3 id="editing-an-event">Editing an event</h3>

<p>When you want to edit an event you simply use a search keyword (like “Linus”):</p>

<div class="language-plaintext highlighter-rouge"><div class="highlight"><pre class="highlight"><code>$ khal edit --show-past "Linus"
28.12-28.12 Linus Torvalds födelsedag (R)
Edit?  [n]o  [q]uit  [s]ummary  [d]escription  da[t]etime range  re[p]eat
[l]ocation  [c]ategories  [a]larm  [D]elete: 
</code></pre></div></div>

<h3 id="importing-a-calendar-from-a-file">Importing a calendar from a file</h3>

<p>It’s also possible to import calendars from ICS-files:</p>

<div class="language-plaintext highlighter-rouge"><div class="highlight"><pre class="highlight"><code>$ khal import -a &lt;CALENDAR NAME&gt; &lt;FILE&gt; 
</code></pre></div></div>

<h3 id="the-interactive-mode">The interactive mode</h3>

<p>And if you want to use the interactive mode:</p>

<div class="language-plaintext highlighter-rouge"><div class="highlight"><pre class="highlight"><code>$ khal interactive
</code></pre></div></div>

<div class="grid-container">
    <div class="grid-item">
        <a href="/img/khal.png">
            <img src="/img/t/khal.png" alt="A screenshot of Khal" />
            <figcaption>A screenshot of Khal's interactive mode.</figcaption>
        </a>
    </div><!-- END grid-item -->
</div>
<!-- END grid-container -->

<p>You can add a new event using the interactive mode without first running Khal, even though this method can be a bit annoying if you do it wrong:</p>

<div class="language-plaintext highlighter-rouge"><div class="highlight"><pre class="highlight"><code>$ khal new -i
summary: Test
datetime range: 12.08 13.08 13:00 15:00
critical: Could not parse "12.08 13.08 13:00 15:00".
critical: Please check your configuration or run `khal printformats` to see if this does match your configured [long](date|time|datetime)format.
critical: If you suspect a bug, please file an issue at https://github.com/pimutils/khal/issues/ 
</code></pre></div></div>
<p>To be honest I have no idea how the “datetime” syntax work here. I only use the shell commands myself, but I highly recommend using the proper interactive interface with <code class="language-plaintext highlighter-rouge">khal interactive</code> and then pressing the key <code class="language-plaintext highlighter-rouge">N</code>.</p>

<div class="grid-container">
    <div class="grid-item">
        <a href="/img/khal_new.png">
            <img src="/img/t/khal_new.png" alt="A screenshot of Khal" />
            <figcaption>The dialog for adding a new entry in Khal, using the interactive dialog. Don't mind the colours, I don't know how to fix it.</figcaption>
        </a>
    </div><!-- END grid-item -->
</div>
<!-- END grid-container -->

<p>I also highly recommend you reading <a href="https://khal.readthedocs.io/en/stable/usage.html">the documentation</a> for Khal regarding all the available commands and how they all work.</p>

<h2 id="how-to-get-started-with-khard">How to get started with Khard</h2>

<p>For some reason the name scheme doesn’t follow its sibling. For Khard the configuration file is <code class="language-plaintext highlighter-rouge">~/.config/khard/khard.config</code>. Here’s my configuration file:</p>

<div class="language-ini highlighter-rouge"><div class="highlight"><pre class="highlight"><code><span class="nn">[general]</span><span class="w">

</span><span class="py">debug</span><span class="w"> </span><span class="p">=</span><span class="w"> </span><span class="s">no</span>
<span class="py">default_action</span><span class="w"> </span><span class="p">=</span><span class="w"> </span><span class="s">list</span>
<span class="py">editor</span><span class="w"> </span><span class="p">=</span><span class="w"> </span><span class="s">nvim</span>
<span class="py">merge_editor</span><span class="w"> </span><span class="p">=</span><span class="w"> </span><span class="s">colordiff</span>
<span class="w">
</span><span class="nn">[addressbooks]</span><span class="w">

</span><span class="nn">[[Personal]</span><span class="na">]</span><span class="w">
</span><span class="py">path</span><span class="w"> </span><span class="p">=</span><span class="w"> </span><span class="s">~/.config/vdirsyncer/contacts/contacts</span>
<span class="w">
</span><span class="nn">[contact table]</span><span class="w">

</span><span class="c"># display names by first or last name: first_name / last_name
</span><span class="py">display</span><span class="w"> </span><span class="p">=</span><span class="w"> </span><span class="s">first_name</span>
<span class="w">
</span><span class="c"># group by address book: yes / no
</span><span class="py">group_by_addressbook</span><span class="w"> </span><span class="p">=</span><span class="w"> </span><span class="s">no</span>
<span class="w">
</span><span class="c"># reverse table ordering: yes / no
</span><span class="py">reverse</span><span class="w"> </span><span class="p">=</span><span class="w"> </span><span class="s">no</span>
<span class="w">
</span><span class="c"># append nicknames to name column: yes / no
</span><span class="py">show_nicknames</span><span class="w"> </span><span class="p">=</span><span class="w"> </span><span class="s">no</span>
<span class="w">
</span><span class="c"># show uid table column: yes / no
</span><span class="py">show_uids</span><span class="w"> </span><span class="p">=</span><span class="w"> </span><span class="s">yes</span>
<span class="w">
</span><span class="c"># sort by first or last name: first_name / last_name
</span><span class="py">sort</span><span class="w"> </span><span class="p">=</span><span class="w"> </span><span class="s">first_name</span>
<span class="w">
</span><span class="nn">[vcard]</span><span class="w">

</span><span class="c"># extend contacts with your own private objects
# these objects are stored with a leading "X-" before the object name in the vcard files
# every object label may only contain letters, digits and the - character
# example:
#   private_objects = Jabber, Skype, Twitter
</span><span class="py">private_objects</span><span class="w"> </span><span class="p">=</span><span class="w"> </span><span class="s">Jabber</span>
<span class="w">
</span><span class="c"># preferred vcard version: 3.0 / 4.0
</span><span class="py">preferred_version</span><span class="w"> </span><span class="p">=</span><span class="w"> </span><span class="s">3.0</span>
<span class="w">
</span><span class="c"># Look into source vcf files to speed up search queries: yes / no
</span><span class="py">search_in_source_files</span><span class="w"> </span><span class="p">=</span><span class="w"> </span><span class="s">no</span>
<span class="w">
</span><span class="c"># skip unparsable vcard files: yes / no
</span><span class="py">skip_unparsable</span><span class="w"> </span><span class="p">=</span><span class="w"> </span><span class="s">no</span>
</code></pre></div></div>

<p>Running just <code class="language-plaintext highlighter-rouge">khard</code> prints all the contacts like this:</p>

<div class="language-plaintext highlighter-rouge"><div class="highlight"><pre class="highlight"><code>$ khard
&lt;INDEX NUMBER&gt;   &lt;NAME&gt;       cell: &lt;PHONE NUMBER&gt;        home: &lt;E-MAIL ADRESS&gt;    &lt;ID&gt;
</code></pre></div></div>

<p>You can show an contact with the argument <code class="language-plaintext highlighter-rouge">show</code>:</p>

<div class="language-plaintext highlighter-rouge"><div class="highlight"><pre class="highlight"><code>$ khard show alex
Name: Alexander
Address book: Personal
Phone
    cell: &lt;PHONE NUMBER&gt;
E-Mail
    home: &lt;E-MAIL ADRESSS&gt;
Address
    home: 
        &lt;ADRESS&gt;
Miscellaneous
    UID: &lt;UUID&gt;
</code></pre></div></div>

<p>If you want to edit a contact using your editor:</p>

<div class="language-plaintext highlighter-rouge"><div class="highlight"><pre class="highlight"><code>$ khard edit alex
</code></pre></div></div>

<p>The file is to large to show here, but it contains a lot of sane syntax and comments to help you understand how it works. Here’s the part with “important dates”:</p>

<div class="language-plaintext highlighter-rouge"><div class="highlight"><pre class="highlight"><code># important dates
# Formats:
#   vcard 3.0 and 4.0: yyyy-mm-dd or yyyy-mm-ddTHH:MM:SS
#   vcard 4.0 only: --mm-dd or text= string value
# anniversary
Anniversary : 
# birthday
Birthday : 1970-01-01
</code></pre></div></div>

<p>I once again recommend you reading <a href="https://khard.readthedocs.io/en/latest/commandline.html">the documentation</a> for Khard regarding all the available commands and how they all work.</p>

<p>I didn’t go thought every possible bit, but it should be enough to get you started and going! I hope you enjoy this software as much as I do.</p>]]></content><author><name></name></author><category term="[&quot;Applications &amp; Tools&quot;]" /><category term="vdirsyncer" /><category term="CalDAV" /><category term="CardDAV" /><category term="Khal" /><category term="Khard" /><category term="Calendars" /><category term="Address book" /><category term="Productivity" /><summary type="html"><![CDATA[If you want to sync and manage both your CalDAV-calendars and your CardDAV-addressbooks via the command-line you’re in luck! There’s three pieces of software called vdirsyncer, Khal and Khard that does just that for you. It happen to be how I’ve been doing it for several years now and I think it’s time to write about it.]]></summary></entry><entry><title type="html">How to edit your music data tags using the command-line</title><link href="https://hunden.linuxkompis.se/2020/08/06/how-to-edit-your-music-data-tags-using-the-shell.html" rel="alternate" type="text/html" title="How to edit your music data tags using the command-line" /><published>2020-08-06T00:00:00+02:00</published><updated>2024-02-16T19:42:13+01:00</updated><id>https://hunden.linuxkompis.se/2020/08/06/how-to-edit-your-music-data-tags-using-the-shell</id><content type="html" xml:base="https://hunden.linuxkompis.se/2020/08/06/how-to-edit-your-music-data-tags-using-the-shell.html"><![CDATA[<p>The command-line tool <a href="https://github.com/Daenyth/audiotag">Audiotag</a> is an easy to use Perl-script for editing the data tags in your music files. It supports the formats MP3, OGG Vorbis, MP4, M4A and FLAC.</p>

<h2 id="example-usage">Example usage</h2>

<p>To print information about a track you use the flag <code class="language-plaintext highlighter-rouge">-l, --list-info</code>:</p>

<div class="language-plaintext highlighter-rouge"><div class="highlight"><pre class="highlight"><code>$ audiotag -l 01_Claustrophobic_Amnesia.ogg

*** `01_Claustrophobic_Amnesia.ogg'
=== ALBUM: TENONDERGANG
=== ALBUMARTIST: Ter Ziele
=== ARTIST: Ter Ziele
=== COMMENT: Visit http://terziele.bandcamp.com
=== DATE: 2018
=== TITLE: Claustrophobic Amnesia
=== TRACKNUM: 1
=== TRACKNUMBER: 1
</code></pre></div></div>

<p>I noticed that the track is missing a genre, let’s set the genre for all the tracks of that album:</p>

<div class="language-plaintext highlighter-rouge"><div class="highlight"><pre class="highlight"><code>$ audiotag -g "Depressive suicidal black metal" *.ogg
</code></pre></div></div>

<p>It’s simple as that. To list all available features just use the flag <code class="language-plaintext highlighter-rouge">-h, --help</code>. I also highly recommend using the flag <code class="language-plaintext highlighter-rouge">-p, --pretend</code> to dry run the command if you’re not 100% sure about what you’re about to do.</p>

<h2 id="installation">Installation</h2>

<p>The easiest option is probably to clone <a href="https://github.com/Daenyth/audiotag">the Git-repository on GitHub</a> and copy the script to your <a href="https://hunden.linuxkompis.se/2019/03/26/running-scripts-in-your-shell-without-specifying-the-absolute-path.html">$PATH</a>. Just make sure that you have installed Perl (version 5.6 or newer) and:</p>

<ul>
  <li>For MP3-support: <code class="language-plaintext highlighter-rouge">id3tag</code> or <code class="language-plaintext highlighter-rouge">id3lib</code>.</li>
  <li>For OGG Vorbis-support: <code class="language-plaintext highlighter-rouge">vorbiscomment</code> from <code class="language-plaintext highlighter-rouge">vorbis-tools</code>.</li>
  <li>For FLAC-support: <code class="language-plaintext highlighter-rouge">metaflac</code> from <code class="language-plaintext highlighter-rouge">flac</code>.</li>
</ul>

<p>If you’re using Gentoo, these are packages you might be looking for:</p>

<ul>
  <li>MP3: <code class="language-plaintext highlighter-rouge">media-libs/id3lib</code></li>
  <li>OGG Vorbis: <code class="language-plaintext highlighter-rouge">media-sound/vorbis-tools</code></li>
  <li>FLAC: <code class="language-plaintext highlighter-rouge">media-libs/flac</code></li>
  <li>MP4/M4A: <code class="language-plaintext highlighter-rouge">media-video/atomicparsley</code></li>
</ul>

<p>If you don’t have support for a format it might annoyingly remind you about it every time you use the tool:</p>

<div class="language-plaintext highlighter-rouge"><div class="highlight"><pre class="highlight"><code>$ audiotag -h                                                                                           -- INSERT --
WARNING: `AtomicParsley' not found in path, required for mp4 support!
WARNING: `AtomicParsley' not found in path, required for m4a support!
[...]
</code></pre></div></div>

<p>As you can see I don’t have support for MP4 or M4A and I don’t care. I fixed this issue by commenting out two parts of the script between the lines 473-491:</p>

<div class="language-perl highlighter-rouge"><div class="highlight"><pre class="highlight"><code><span class="c1"># MCM - handle mp4 and m4a using AtomicParsley</span>
<span class="k">elsif</span> <span class="p">(</span><span class="nv">$file</span> <span class="o">=~</span> <span class="sr">/\.mp4$/i</span> <span class="ow">or</span> <span class="nv">$file</span> <span class="o">=~</span> <span class="sr">/\.m4a$/i</span><span class="p">)</span> <span class="p">{</span>
	<span class="nb">push</span> <span class="nv">@cmd</span><span class="p">,</span> <span class="p">"</span><span class="s2">AtomicParsley</span><span class="p">";</span>
	<span class="nb">push</span> <span class="nv">@cmd</span><span class="p">,</span> <span class="nv">$file</span><span class="p">;</span>
	<span class="k">foreach</span> <span class="p">(</span><span class="nb">sort</span> <span class="p">{</span> <span class="nv">$a</span> <span class="ow">cmp</span> <span class="nv">$b</span> <span class="p">}</span> <span class="nb">keys</span> <span class="nv">%$info</span><span class="p">)</span> <span class="p">{</span>
		<span class="c1"># don't need extra track num field</span>
		<span class="sr">/TRACKNUMBER/</span> <span class="o">&amp;&amp;</span> <span class="k">next</span><span class="p">;</span>
		<span class="nv">$plus_tags</span><span class="p">{</span><span class="vg">$_</span><span class="p">}</span> <span class="o">||=</span> <span class="p">"</span><span class="s2">===</span><span class="p">";</span>
		<span class="nb">push</span> <span class="nv">@result</span><span class="p">,</span> <span class="p">"</span><span class="si">$plus_tags</span><span class="s2">{</span><span class="si">$_</span><span class="s2">} </span><span class="si">$_</span><span class="s2">: </span><span class="si">$info</span><span class="s2">-&gt;{</span><span class="si">$_</span><span class="s2">}</span><span class="p">";</span>
	<span class="p">}</span>
	<span class="k">if</span> <span class="p">(</span><span class="nv">$genre</span>   <span class="p">)</span> <span class="p">{</span> <span class="nb">push</span> <span class="nv">@cmd</span><span class="p">,</span> <span class="p">("</span><span class="s2">--genre</span><span class="p">",</span> <span class="nb">uc</span> <span class="nv">$genre</span><span class="p">);</span>		<span class="p">}</span>
	<span class="k">if</span> <span class="p">(</span><span class="nv">$artist</span>  <span class="p">)</span> <span class="p">{</span> <span class="nb">push</span> <span class="nv">@cmd</span><span class="p">,</span> <span class="p">("</span><span class="s2">--artist</span><span class="p">",</span> <span class="nv">$artist</span><span class="p">);</span>		<span class="p">}</span>
	<span class="k">if</span> <span class="p">(</span><span class="nv">$album</span>   <span class="p">)</span> <span class="p">{</span> <span class="nb">push</span> <span class="nv">@cmd</span><span class="p">,</span> <span class="p">("</span><span class="s2">--album</span><span class="p">",</span> <span class="nv">$album</span><span class="p">);</span>		<span class="p">}</span>
	<span class="k">if</span> <span class="p">(</span><span class="nv">$title</span>   <span class="p">)</span> <span class="p">{</span> <span class="nb">push</span> <span class="nv">@cmd</span><span class="p">,</span> <span class="p">("</span><span class="s2">--title</span><span class="p">",</span> <span class="nv">$title</span><span class="p">);</span>		<span class="p">}</span>
	<span class="k">if</span> <span class="p">(</span><span class="nv">$track</span>   <span class="p">)</span> <span class="p">{</span> <span class="nb">push</span> <span class="nv">@cmd</span><span class="p">,</span> <span class="p">("</span><span class="s2">--track</span><span class="p">",</span> <span class="nv">$track</span><span class="p">);</span>		<span class="p">}</span>
	<span class="k">if</span> <span class="p">(</span><span class="nv">$year</span>    <span class="p">)</span> <span class="p">{</span> <span class="nb">push</span> <span class="nv">@cmd</span><span class="p">,</span> <span class="p">("</span><span class="s2">--year</span><span class="p">",</span> <span class="nv">$year</span><span class="p">);</span>			<span class="p">}</span>
	<span class="k">if</span> <span class="p">(</span><span class="nv">$comments</span><span class="p">)</span> <span class="p">{</span> <span class="nb">push</span> <span class="nv">@cmd</span><span class="p">,</span> <span class="p">("</span><span class="s2">--comment</span><span class="p">",</span> <span class="nv">$comments</span><span class="p">);</span>	<span class="p">}</span>
	<span class="nb">push</span> <span class="nv">@cmd</span><span class="p">,</span> <span class="p">("</span><span class="s2">--overWrite</span><span class="p">",</span> <span class="p">"</span><span class="s2">--gapless</span><span class="p">",</span> <span class="p">"</span><span class="s2">true</span><span class="p">");</span>
<span class="p">}</span>
</code></pre></div></div>
<p>And the lines 663-664:</p>

<div class="language-perl highlighter-rouge"><div class="highlight"><pre class="highlight"><code><span class="nv">check_for_prog</span><span class="p">(</span><span class="o">\</span><span class="nv">@filetypes</span><span class="p">,</span> <span class="o">\</span><span class="nv">@missing</span><span class="p">,</span> <span class="p">"</span><span class="s2">mp4</span><span class="p">",</span> <span class="p">"</span><span class="s2">AtomicParsley</span><span class="p">"</span>     <span class="p">);</span>
<span class="nv">check_for_prog</span><span class="p">(</span><span class="o">\</span><span class="nv">@filetypes</span><span class="p">,</span> <span class="o">\</span><span class="nv">@missing</span><span class="p">,</span> <span class="p">"</span><span class="s2">m4a</span><span class="p">",</span> <span class="p">"</span><span class="s2">AtomicParsley</span><span class="p">"</span>     <span class="p">);</span>
</code></pre></div></div>

<p>It then stopped complaining about it.</p>]]></content><author><name></name></author><category term="[&quot;Applications &amp; Tools&quot;]" /><category term="Audiotag" /><category term="Music" /><category term="Audio" /><category term="Command-line" /><category term="ID3" /><category term="MP3" /><category term="OGG Vorbis" /><summary type="html"><![CDATA[The command-line tool Audiotag is an easy to use Perl-script for editing the data tags in your music files. It supports the formats MP3, OGG Vorbis, MP4, M4A and FLAC.]]></summary></entry><entry><title type="html">My text-based media center</title><link href="https://hunden.linuxkompis.se/2020/08/04/my-text-based-media-center.html" rel="alternate" type="text/html" title="My text-based media center" /><published>2020-08-04T00:00:00+02:00</published><updated>2024-02-16T19:42:13+01:00</updated><id>https://hunden.linuxkompis.se/2020/08/04/my-text-based-media-center</id><content type="html" xml:base="https://hunden.linuxkompis.se/2020/08/04/my-text-based-media-center.html"><![CDATA[<p>It’s been more than 4 years since I wrote about my text-based media center over at my <a href="https://hund.linuxkompis.se/2016/02/14/mitt-textbaserade-mediacenter-2016.html">Swedish weblog</a>. I was thinking it’s time to make a post about it here in English and perhaps make some sort of follow up on it.</p>

<p>Like most other people I have my TV connected to a computer so I can play my local media on the TV. I used to have a dedicated computer for it with the ever so popular software <a href="https://en.wikipedia.org/wiki/Kodi_(software)">Kodi</a> and the ridiculously tiny wireless keyboard <a href="https://duckduckgo.com/?q=logitech+dinovo+mini&amp;t=hk&amp;iax=images&amp;ia=images">Logitech DiNovo Mini</a>. It was a solution that worked fine for about a decade or so before I decided it was time for a change.</p>

<div class="grid-container">
    <div class="grid-item">
        <a href="/img/kodi_17.jpg">
            <img src="/img/t/kodi_17.jpg" alt="" />
        </a>
            <figcaption>Kodi, version 17. Source: <a href="https://kodi.tv/article/kodi-v17-krypton-alpha-2">Kodi.tv</a></figcaption>
    </div><!-- END grid-item -->
</div>
<!-- END grid-container -->

<h2 id="my-issues-with-kodi">My issues with Kodi</h2>

<p>While the setup was good enough, I had two issues with it. One was the Bluetooth keyboard, it was regularly—several times per week—dropping the connection and the only way to get it to connect was to remove the battery for a few seconds. I eventually got tired of it and started looking for a new Bluetooth keyboard, but I couldn’t find anything that I liked. This is when I was starting to considering the option to just get a proper wired mechanical keyboard for a lot less money.</p>

<p>The second issue was the YouTube workflow with Kodi. I have never had any TV-channels (by choice), I instead ended up watching various content makers on YouTube, which is kind of ironic considering that I’m generally the last person to adopt anything remotely new or modern.</p>

<p>Back then I was following a crazy amount of channels. The YouTube-client for Kodi was perfectly fine for my needs at the time, at first at least. It had all the basic features one would expect of an Kodi-addon back then. You where able to login to your Google-account, view and subscribe to channels and all that. And it was all fine until one day when my list of subscriptions started queueing up and I ran into an unpleasant issue.</p>

<p>It turned out that the client had a pretty low cap on how many videos it would show in the subscription list with all new videos. It meant that if I wasn’t obsessively bench watching videos I would miss out on them. Well. Unless if I visited all the channels manually, one by one.. At this time I was following around 100 channels.</p>

<h2 id="the-solution">The solution</h2>

<p>While I was looking for a solution to my issue I happened to read about YouTube secretly supporting web feeds. As a long time user and an advocate of web feeds I got exited and I instantly knew that this was something I wanted to explore! I tried to find a solution that would involve web feeds and while I was doing it I had this fun idea of setting up an UNIX-like media center. I was already using <a href="https://hunden.linuxkompis.se/2020/07/29/an-introduction-to-the-web-feed-client-newsboat.html">Newsboat</a> and I thought it would be cool to use it in some workflow on my media computer as well.</p>

<p>I ended up with a text-based media center based on my back then number one Linux based operating system; Arch Linux, which was later replaced with Gentoo.</p>

<p>I didn’t have to think this through for long. I instantly knew what I wanted and how I wanted it. I installed my favourite window manager i3, the terminal emulator URxvt, the file manager Ranger, the media player mpv (with youtube-dl), livestreamer-curses and a few other things. I didn’t really have to make any major changes to anything other than changing a few keybindings to better fit a workflow that would not require me to use both my hands. I know how lazy I can be when I’m laying down in the sofa and I also use blank keycaps, so I need to be able to use my muscle memory.</p>

<div class="grid-container">
    <div class="grid-item">
        <a href="/img/media_setup_2020.png">
            <img src="/img/t/media_setup_2020.png" alt="" />
        </a>
            <figcaption>My current text-based media center.</figcaption>
    </div><!-- END grid-item -->
</div>
<!-- END grid-container -->

<p>With Newsboat as my new ‘YouTube-client’ I was in full control of the content. I didn’t have to worry about missing videos and I could easily filter out content that I didn’t want to see. I could also easily mark any videos as seen, a process that was utterly complicated in Kodi. To mark a video as seen in Kodi I had to either watch the whole video or fast forward to the end for it to mark it as seen.</p>

<p>And then it was the quality! With Kodi I was stuck at low resolution videos at 720p with 30 FPS. With mpv (and with the help of youtube-dl) I could watch videos in any quality I wanted. Almost.. My media computer was over a decade old and it turned out that I was limited to 1440p at 60 FPS if I wanted a smooth video without audio sync issues. This turned out to be just fine as well. I could not see any differences in the qulity with a slightly higher bitrate from my sofa a few meters away from the TV.</p>

<p>My new setup also improved my workflow by a lot. With Kodi I had to close the application I was using and then browse to the next thing, which always required far too many steps and a lot of time. In i3 I can just leave it in the background and instantly switch to anything else on another workspace with the keys <code class="language-plaintext highlighter-rouge">Alt+&lt;N&gt;</code>.</p>

<p>The only downside with my text-based setup is the movie part. I don’t have access to fancy covers, metadata and things like that, but that’s okay since I don’t have a huge movie collection or anything.</p>

<h2 id="some-changes-happened-to-my-setup-back-in-2019">Some changes happened to my setup back in 2019</h2>

<p>Exactly one year ago I moved to the big city into a new and smaller apartment. I brought both my full-size desktop computer with me, but after a few months I decided that they took up way too much space and that I had to do something about it.</p>

<p>I also liked the idea of having just one computer, so I decided I wanted to try using my desktop computer as my media computer as well.</p>

<div class="grid-container">
    <div class="grid-item">
        <a href="/img/my_htpc_2008.jpg">
            <img src="/img/t/my_htpc_2008.jpg" alt="" />
        </a>
            <figcaption>My media computer back in 2008. It was the same computer that I recently retired.<br />(FIY: I had horrible taste of interiour back then.)</figcaption>
    </div><!-- END grid-item -->
</div>
<!-- END grid-container -->

<p>Here’s what I did:</p>

<ul>
  <li>I kept both keyboards so I don’t have to run around with a keyboard whenever I want to either sit at my computer or watch anything on my TV.</li>
  <li>I’m only using one workspace on my TV. I find my workflow fast enough that if I want to switch from say Newsboat to Ranger I can just press <code class="language-plaintext highlighter-rouge">q</code> to exit Newsboat and then run the command <code class="language-plaintext highlighter-rouge">jo movies</code> to open Ranger in the movies directory on my storage.</li>
  <li>
    <p>I have bound the keys <code class="language-plaintext highlighter-rouge">&lt;Super&gt;+&lt;Enter&gt;</code> to focus workspace 10 on my TV and then spawn URxvt with alternative settings.</p>

    <p>Here’s the config for i3:</p>

    <div class="language-plaintext highlighter-rouge"><div class="highlight"><pre class="highlight"><code>bindsym $super+Return workspace 10; $exec "tvterm"
</code></pre></div>    </div>

    <p>The script <code class="language-plaintext highlighter-rouge">tvterm</code> looks like this:</p>

    <div class="language-plaintext highlighter-rouge"><div class="highlight"><pre class="highlight"><code>#!/bin/bash
urxvt -name URxvt-tv -hold -e sh -c 'printf "\33]2;%s\007" "tvterm"; zsh'
</code></pre></div>    </div>

    <p>The “TV settings” for URxvt looks like this:</p>

    <div class="language-plaintext highlighter-rouge"><div class="highlight"><pre class="highlight"><code>URxvt-tv.font: xft:Monospace:pixelsize=40
URxvt-tv.boldFont:xft:Monospace:pixelsize=40
  
URxvt-tv.background: #000000
URxvt-tv.foreground: #FFFFFF
  
! black dark/light
URxvt-tv.color0:             #2e3436
URxvt-tv.color8:             #6e706b
! red dark/light
URxvt-tv.color1:             #cc0000
URxvt-tv.color9:             #ef2929
! green dark/light
URxvt-tv.color2:             #4e9a06
URxvt-tv.color10:            #8ae234
! yellow dark/light
URxvt-tv.color3:             #edd400
URxvt-tv.color11:            #fce94f
! blue dark/light
URxvt-tv.color4:             #3465a4
URxvt-tv.color12:            #729fcf
! magenta dark/light
URxvt-tv.color5:             #92659a
URxvt-tv.color13:            #c19fbe
! cyan dark/light
URxvt-tv.color6:             #07c7ca
URxvt-tv.color14:            #63e9e9
! white dark/light
URxvt-tv.color7:             #d3d7cf
URxvt-tv.color15:            #eeeeec
</code></pre></div>    </div>

    <p>I wrote about <a href="https://hunden.linuxkompis.se/2020/06/05/how-to-use-alternative-settings-for-urxvt.html">using URxvt with alternative settings</a> before if you want to read more about it.</p>
  </li>
</ul>

<h2 id="even-more-changes-are-expected">Even more changes are expected</h2>

<p>It looks like I’m moving again soon and this time I’m not going to have my computer near my TV anymore. I know for sure that I don’t want a full-size computer as my media center anymore. I might end up getting a Raspberry Pi or something similar. I would highly appreciate any ideas or recommendations for a cheap, tiny and low consumption setup!</p>

<p>And that’s it I guess. My setup is not crazy in any way, but I like it!</p>]]></content><author><name></name></author><category term="[&quot;Personal&quot;]" /><category term="Media center" /><category term="HTPC" /><category term="Computers" /><category term="Kodi" /><summary type="html"><![CDATA[It’s been more than 4 years since I wrote about my text-based media center over at my Swedish weblog. I was thinking it’s time to make a post about it here in English and perhaps make some sort of follow up on it.]]></summary></entry><entry><title type="html">How to visually hide files and folders in Ranger</title><link href="https://hunden.linuxkompis.se/2020/07/30/how-to-hide-files-and-folders-in-ranger.html" rel="alternate" type="text/html" title="How to visually hide files and folders in Ranger" /><published>2020-07-30T00:00:00+02:00</published><updated>2024-02-16T19:42:13+01:00</updated><id>https://hunden.linuxkompis.se/2020/07/30/how-to-hide-files-and-folders-in-ranger</id><content type="html" xml:base="https://hunden.linuxkompis.se/2020/07/30/how-to-hide-files-and-folders-in-ranger.html"><![CDATA[<p>Most users are probably already familiar with the common way to hide files and folders in Linux based operating systems, which is by adding a dot to the beginning of the file or the folder.</p>

<p>That is not always a desirable solution and sometimes not even an option. One example would be the folder <code class="language-plaintext highlighter-rouge">~/Desktop</code> for me, it’s a folder that I never use. I don’t even have a “desktop” to begin with, but I can’t just hide it by renaming it to “.Desktop”. If I did it would just be recreated.</p>

<p>With the help of the plugin <a href="https://github.com/ranger/ranger/blob/master/examples/plugin_file_filter.py">plugin_file_filter.py</a> it’s possible to visually hide files and folders you don’t want to see. If you want to temporarily view the hidden files and/or folders again you can just temporarly set the setting <code class="language-plaintext highlighter-rouge">show_hidden</code> to true.</p>

<h2 id="installation">Installation</h2>

<p>Start by creating the folder <code class="language-plaintext highlighter-rouge">~/.config/ranger/plugins/</code>:</p>

<div class="language-plaintext highlighter-rouge"><div class="highlight"><pre class="highlight"><code>$ mkdir ~/.config/ranger/plugins/
</code></pre></div></div>

<p>Save <a href="https://github.com/ranger/ranger/blob/master/examples/plugin_file_filter.py">the script</a> to the newly created folder. In the script you then have this part:</p>

<div class="language-plaintext highlighter-rouge"><div class="highlight"><pre class="highlight"><code>HIDE_FILES = ("/boot", "/sbin", "/proc", "/sys")
</code></pre></div></div>

<p>Edit that part to your liking and just restart Ranger for the changes to take effect.</p>]]></content><author><name></name></author><category term="[&quot;Tips &amp; Trix&quot;]" /><category term="Ranger" /><category term="File management" /><summary type="html"><![CDATA[Most users are probably already familiar with the common way to hide files and folders in Linux based operating systems, which is by adding a dot to the beginning of the file or the folder.]]></summary></entry><entry><title type="html">An introduction to the web feed client Newsboat</title><link href="https://hunden.linuxkompis.se/2020/07/29/an-introduction-to-the-web-feed-client-newsboat.html" rel="alternate" type="text/html" title="An introduction to the web feed client Newsboat" /><published>2020-07-29T02:01:00+02:00</published><updated>2024-02-16T19:42:13+01:00</updated><id>https://hunden.linuxkompis.se/2020/07/29/an-introduction-to-the-web-feed-client-newsboat</id><content type="html" xml:base="https://hunden.linuxkompis.se/2020/07/29/an-introduction-to-the-web-feed-client-newsboat.html"><![CDATA[<p>This article was originally included in the article “<a href="https://hunden.linuxkompis.se/2020/07/29/an-introduction-to-web-feeds.html">An introduction to web feeds</a>”, but it turned out the be a bit too long so I split them up in two parts.</p>

<p>So. I’m pretty sure that it comes to no ones surprice that Newsboat is my web feed reader client of choice. If you happen to have missed out on this client, then you’re in for a treat! Newsboat is a feature rich text-based client that makes reading news more enjoyable.</p>

<div class="grid-container">

    <!-- IMAGE #1 -->
    <div class="grid-item">
        <a href="/img/newsboat.png">
            <img src="/img/t/newsboat.png" alt="A screenshot of the web feed reader Newsboat" />
            <figcaption></figcaption>
        </a>
    </div>

    <!-- IMAGE #2 -->
    <div class="grid-item">
        <a href="/img/newsboat_article_list.png">
            <img src="/img/t/newsboat_article_list.png" alt="A screenshot of the web feed reader Newsboat" />
            <figcaption></figcaption>
        </a>
    </div>
    
    <!-- IMAGE #3 -->
    <div class="grid-item">
        <a href="/img/newsboat_article.png">
            <img src="/img/t/newsboat_article.png" alt="A screenshot of the web feed reader Newsboat" />
            <figcaption></figcaption>
        </a>
    </div>

    </div>
<!-- grid-container-->

<p>I like Newsboat for multiple reasons, some of them are because it’s a client that’s keyboard driven, highly customizable, has support for regular expression filters, macros, running multiple instances (at the same time with different settings/feeds!) and because it even let’s me execute shell scripts.</p>

<p>I have two different profiles of Newsboat with different settings and feeds to separate my regular news from my video content subscriptions, which mainly is YouTube, even though I have at least one channel from PeerTube now!</p>

<h2 id="how-to-get-started-with-newsboat">How to get started with Newsboat</h2>

<p>After you have installed Newsboat you should probably tweak a few settings and add at least one feed before you run it for the first time. If you don’t you will be greeted with this message:</p>

<blockquote>
  <p>Error: no URLs configured. Please fill the file /home/&lt;user&gt;/.newsboat/urls with RSS feed URLs or import an OPML file.</p>
</blockquote>

<p>Add your feed(s) to the file <code class="language-plaintext highlighter-rouge">$HOME/.config/newsboat/urls</code> (one feed per line):</p>

<div class="language-plaintext highlighter-rouge"><div class="highlight"><pre class="highlight"><code>http://hunden.linuxkompis.se/feed.xml
https://fosstodon.org/@hund.rss
</code></pre></div></div>

<p>It should be noted that Newsboat supports cloud based services like The Old Reader, NewsBlur, FeedHQ, Bazqux, Tiny Tiny RSS and nextCloud News. You can read more about that in the chapter “<a href="https://newsboat.org/releases/2.20.1/docs/newsboat.html#_newsboat_as_a_client_for_newsreading_services">Newsboat as a Client for Newsreading Services</a>”.</p>

<p>I also recommend changing the default browser to your browser of choice in the file <code class="language-plaintext highlighter-rouge">$HOME/.config/newsboat/config?</code>. For Firefox it would be something like:</p>

<div class="language-plaintext highlighter-rouge"><div class="highlight"><pre class="highlight"><code>browser "firefox --new-tab %u"
</code></pre></div></div>

<p>For a complete documentation about the configuration options check out <a href="https://newsboat.org/">their website</a>. My current setup looks <a href="https://notabug.org/Hund/dotfiles/src/master/newsboat/.config/newsboat">like this</a>.</p>

<h3 id="filters">Filters</h3>

<p>A basic ignore-filter that hides articles based on keywords in the title looks like this:</p>

<div class="language-plaintext highlighter-rouge"><div class="highlight"><pre class="highlight"><code>ignore-article "https://feber.se/rss" "title =~ \"&lt;keyword&gt;|&lt;another keyword&gt;\""
</code></pre></div></div>

<p>It’s also possible to filter articles based on keywords from the link, author, content, date, age and so on. It can actually get quite advanced if you would like to.</p>

<p>It’s also possible to create dynamic feeds based on certain filters. One examples would be to list all unread articles in one feed:</p>

<div class="language-plaintext highlighter-rouge"><div class="highlight"><pre class="highlight"><code>"query:&gt; \Fresh Articles:age &lt; \"1\" and title !~ \"trailers|trailer|\" and link !~ \"r\/gentoo\""
</code></pre></div></div>

<p>Another one would be to only show articles newer than <code class="language-plaintext highlighter-rouge">N</code> days. In this example it will only show articles that’s 48 hours old or newer:</p>

<div class="language-plaintext highlighter-rouge"><div class="highlight"><pre class="highlight"><code>"query:&gt; \Fresh Articles:age &lt; \"2\" and unread = \"yes\""
</code></pre></div></div>

<p>It’s also possible to combine multiple filters with each other. In this example I created a dynamic feed that only lists unread articles that has the keyword “trailer” in the title:</p>

<div class="language-plaintext highlighter-rouge"><div class="highlight"><pre class="highlight"><code>"query:&gt; \Trailers:unread =\"yes\" and title =~ \"trailer\""
</code></pre></div></div>

<p>You can read more about filters in <a href="https://newsboat.org/releases/2.12/docs/newsboat.html#_filter_language">their documentation</a>.</p>

<h3 id="macros">Macros</h3>

<p>Macros is another feature that I really like about Newsboat. Even though I might only use some basic macros myself, I find them valuable.</p>

<p>I use mainly three macros. One that lets me open the article in my readability-script:</p>

<div class="language-plaintext highlighter-rouge"><div class="highlight"><pre class="highlight"><code>macro r set browser "html2text.py %u | fold -s -w 115 | less" ; open-in-browser ; set browser "`echo $BROWSER`"
</code></pre></div></div>

<p>Another one that opens the article in Firefox via its reader view mode:</p>

<div class="language-plaintext highlighter-rouge"><div class="highlight"><pre class="highlight"><code>macro R set browser "firefox --new-tab about:reader?url=%u" ; open-in-browser ; set browser "`echo $BROWSER`"
</code></pre></div></div>

<p>And a third one that opens the articles (with videos) in my media player:</p>

<div class="language-plaintext highlighter-rouge"><div class="highlight"><pre class="highlight"><code>macro m set browser "mpv %u" ; open-in-browser ; set browser "`echo $BROWSER`"
</code></pre></div></div>

<p>You run a macro with the key <code class="language-plaintext highlighter-rouge">,</code> followed by the key you assigned the macro to. You can read more about macros <a href="https://newsboat.org/releases/2.12/docs/newsboat.html#_macro_support">here</a>.</p>

<h2 id="how-my-readability-script-works">How my readability script works</h2>

<p>With the help of my good friend <a href="https://fosstodon.org/@Ghosty">Ghosty</a>, I managed to create a Python-script that fetches the articles and presents them to me in a more readable way. I use this script when the feed only publish an excerpt and not the whole article.</p>

<p>Here’s what some articles looks like when they want to force you to their websites:</p>

<div class="grid-container">

    <!-- IMAGE #1 -->
    <div class="grid-item">
        <a href="/img/newsboat_reader-1.png">
            <img src="/img/t/newsboat_reader-1.png" alt="A screenshot of Newsboat with an example feed" />
            <figcaption></figcaption>
        </a>
    </div>

    <!-- IMAGE #2 -->
    <div class="grid-item">
        <a href="/img/newsboat_reader-2.png">
            <img src="/img/t/newsboat_reader-2.png" alt="A screenshot of Newsboat with an example feed using my readability script" />
            <figcaption></figcaption>
        </a>

    </div>

    </div>
<!-- grid-container-->

<p>It works pretty much flawlessly, except for one little detail; there’s no images. If the article includes images I have no way of knowing it.</p>

<p>A workaround to this issue for me was to involve another web browser. I happen to have Firefox installed for websites that I don’t really trust. When I come across a image heavy article I just open the article in Firefox using my previously mentioned macro:</p>

<div class="language-plaintext highlighter-rouge"><div class="highlight"><pre class="highlight"><code>macro R set browser "firefox --new-tab about:reader?url=%u" ; open-in-browser ; set browser "`echo $BROWSER`"
</code></pre></div></div>

<h3 id="setting-up-the-script">Setting up the script</h3>

<p>This is the script:</p>

<div class="language-python highlighter-rouge"><div class="highlight"><pre class="highlight"><code><span class="c1">#!/usr/bin/env python3
</span>
<span class="kn">from</span> <span class="n">newspaper</span> <span class="kn">import</span> <span class="n">Article</span>
<span class="kn">import</span> <span class="n">sys</span>

<span class="n">url</span> <span class="o">=</span> <span class="n">sys</span><span class="p">.</span><span class="n">argv</span><span class="p">[</span><span class="mi">1</span><span class="p">]</span>
<span class="n">a</span> <span class="o">=</span> <span class="nc">Article</span><span class="p">(</span><span class="n">url</span><span class="p">)</span>
<span class="n">a</span><span class="p">.</span><span class="nf">download</span><span class="p">()</span>
<span class="n">a</span><span class="p">.</span><span class="nf">parse</span><span class="p">()</span>

<span class="n">c</span> <span class="o">=</span> <span class="n">a</span><span class="p">.</span><span class="n">title</span><span class="p">.</span><span class="nf">count</span><span class="p">(</span><span class="sh">""</span><span class="p">,</span><span class="mi">1</span><span class="p">)</span>

<span class="nf">print</span><span class="p">(</span><span class="n">a</span><span class="p">.</span><span class="n">title</span><span class="p">)</span>
<span class="nf">print</span><span class="p">(</span><span class="sh">"</span><span class="s">=</span><span class="sh">"</span><span class="o">*</span><span class="n">c</span><span class="p">)</span>
<span class="nf">print</span><span class="p">(</span><span class="sh">""</span><span class="p">)</span>
<span class="nf">print</span><span class="p">(</span><span class="n">a</span><span class="p">.</span><span class="n">text</span><span class="p">)</span>
</code></pre></div></div>

<p>For the script to work you need the Python-package called <code class="language-plaintext highlighter-rouge">newspaper3k</code>. Save the script, make it executable and then use it like this:</p>

<div class="language-plaintext highlighter-rouge"><div class="highlight"><pre class="highlight"><code>$ html2text.py &lt;URL&gt;
</code></pre></div></div>

<p>If you want decent folding of words and pagination I highly recommend you piping the output via the tools <code class="language-plaintext highlighter-rouge">fold</code> and <code class="language-plaintext highlighter-rouge">less</code> like this:</p>

<div class="language-plaintext highlighter-rouge"><div class="highlight"><pre class="highlight"><code>html2text.py %u | fold -s -w 115 | less
</code></pre></div></div>

<p>That’s it for now! I hope you liked my introductory post to Newsboat enough to give it a try.</p>]]></content><author><name></name></author><category term="[&quot;Applications &amp; Tools&quot;]" /><category term="Newsboat" /><category term="Web feeds" /><summary type="html"><![CDATA[This article was originally included in the article “An introduction to web feeds”, but it turned out the be a bit too long so I split them up in two parts.]]></summary></entry><entry><title type="html">An introduction to web feeds</title><link href="https://hunden.linuxkompis.se/2020/07/29/an-introduction-to-web-feeds.html" rel="alternate" type="text/html" title="An introduction to web feeds" /><published>2020-07-29T02:00:00+02:00</published><updated>2024-02-16T19:42:13+01:00</updated><id>https://hunden.linuxkompis.se/2020/07/29/an-introduction-to-web-feeds</id><content type="html" xml:base="https://hunden.linuxkompis.se/2020/07/29/an-introduction-to-web-feeds.html"><![CDATA[<p>Web feeds is an easy way for users to stay up to date with websites and other services without even visiting them. If a website offers a web feed you can get notified whenever they publish an article (or perhaps an update of some sort) and you can then read the content in the comfort of your own client.</p>

<p>This goes for news articles, weblog posts, software releases, submissions from a subreddit on Reddit, toots from users on Mastodon, new videos from YouTube-channels and so on. Pretty much everything supports web feeds these days! You can even automatically download torrent files using web feeds via clients like <a href="https://flexget.com/">Flexget</a>, but that’s an article for another time.</p>

<p><a href="/img/firefox-web-feed.png"><img src="/img/t/firefox-web-feed.png" alt="Firefox with my own web feed visible. To get a pretty formatting like this you need the addon &quot;RSSPreview&quot;." /></a></p>

<p>You could say it kind off works like an e-mail newsletter, but in a much less broken and annoying way! With web feeds you don’t need to give out <em>any</em> information about you at all[1], you’re in 100% control and you can at any time easily end your subscription on your own terms.</p>

<ol>
  <li>Well. They will see your IP-address and what client you’re using, but if that’s an issue just hide behind a VPN-connection or a Tor-relay.</li>
</ol>

<p>I have about 50 feeds—not counting the YouTube-channels—in my client, it’s mainly news sites, weblogs, projects and feeds for software releases. It makes life so much easier to just open my client, quickly glance at what’s new, perhaps read a few articles and then go on with my life.</p>

<p>Without web feeds I would have to manually visit all those ≈50 websites and look for any new content on them. I can only image the amount of time I would have wasted doing that over the years.</p>

<p>Reading the articles via my client comes with several benefits, the largest one is the fact that I can read the content in the comfort of my own desktop and in a consistent way. I don’t have to care about navigating poorly designed websites with unreadable typefaces and colours take make my eyes bleed.</p>

<p>And let’s not forget that I don’t have to worry about malicious ads or trackers! If you didn’t know; <a href="https://www.forbes.com/sites/johnkoetsier/2020/03/11/google-is-tracking-you-on-86-of-the-top-50000-websites-on-the-planet/">Google alone is tracking you on 86% of the top 50 000 websites today</a>. And as we all know, Google is far from the only malicious company out there spying on you.</p>

<p>Another benefit with web feed readers is the ability to filter out content that you don’t want to see. I follow a lot of YouTube-channels using web feeds and some of them post daily content with various gameplay videos. If I don’t like some video game I can just add a filter that hides all the articles with those games.</p>

<p>Web feeds is not all good though. There’s one thing I don’t like with some websites though and that’s some websites do not publish the whole article in their web feed, for the simple reason that they want you to visit their website directly. They do so in an attempt to both track you and expose you to their ads. My way around this is a neat little Python-script that fetches the article and formats the content in a readable way for me. More about this later.</p>

<h2 id="how-to-subscribe-to-youtube-channels">How to subscribe to YouTube-channels</h2>

<p>A hidden gem with YouTube is the fact that there’s a web feed for every channel on YouTube. A highly appreciated feature by people like me who tend to avoid the ‘modern’ web as much as possible.</p>

<p>There’s unfortunately no magic button to find the feed, what you need to do is to visit a channel and make sure the address looks like something like this:</p>

<div class="language-plaintext highlighter-rouge"><div class="highlight"><pre class="highlight"><code>https://www.youtube.com/channel/UC_zQ777U6YTyatP3P1wi3xw
</code></pre></div></div>

<p>If the address ends with the channel name like this:</p>

<div class="language-plaintext highlighter-rouge"><div class="highlight"><pre class="highlight"><code>https://www.youtube.com/c/nevertoosmall
</code></pre></div></div>

<p>Then you need to visit one of their videos and click your way back to the channel via the channel name under the video title.</p>

<p>Step two is to copy the last part of the address that looks like this:</p>

<div class="language-plaintext highlighter-rouge"><div class="highlight"><pre class="highlight"><code>UC_zQ777U6YTyatP3P1wi3xw
</code></pre></div></div>

<p>And append it to this address:</p>

<div class="language-plaintext highlighter-rouge"><div class="highlight"><pre class="highlight"><code>https://www.youtube.com/feeds/videos.xml?channel_id=
</code></pre></div></div>

<p>So it looks like this:</p>

<div class="language-plaintext highlighter-rouge"><div class="highlight"><pre class="highlight"><code>https://www.youtube.com/feeds/videos.xml?channel_id=UC_zQ777U6YTyatP3P1wi3xw
</code></pre></div></div>

<p>This is the address that you add to your web feed reader. There’s one thing to note here though; the article is missing all the descriptive text for the video. If you really want the description you can subscribe to the channels via an Invidious-instance. Invidious also adds several other features that regular YouTube doesn’t have, like showing you an icon for every web feed and letting you subscribe to playlists.</p>

<p><a href="/img/t/invidious_channel_feed_icon.png"><img src="/img/t/invidious_channel_feed_icon.png" alt="A screenshot of Invidious showing where to find the web feed icon on the channel pages." /></a></p>

<p>If you’re paying attention to the links you might have noticed that the YouTube-links and the Invidious-links have the same ending. This makes it easy to convert the links between them if you choose to migrate to any other instance or perhaps just want to go back to the default YouTube-links.</p>

<p>Here’s an example of the Never Too Small-channel:</p>

<div class="language-plaintext highlighter-rouge"><div class="highlight"><pre class="highlight"><code>https://www.youtube.com/feeds/videos.xml?channel_id=UC_zQ777U6YTyatP3P1wi3xw
</code></pre></div></div>
<div class="language-plaintext highlighter-rouge"><div class="highlight"><pre class="highlight"><code>https://invidious.snopyta.org/feed/channel/UC_zQ777U6YTyatP3P1wi3xw
</code></pre></div></div>

<h2 id="clients">Clients</h2>

<p>I tend to favour text-based applications and tools simply for the reason that they often get the job done in the most effcient way possible. I do understand that’s not the case for everyone and if you’re someone who prefers graphical applications there’s a lot good clients for you as well.</p>

<p>To name a few popular clients:</p>

<ul>
  <li><a href="https://lzone.de/liferea/">Liferea</a></li>
  <li><a href="https://kde.org/applications/en/internet/org.kde.akregator">Akregator</a></li>
  <li><a href="https://quiterss.org/">QuiteRSS</a></li>
  <li><a href="https://jangernert.github.io/FeedReader/">FeedReader</a></li>
  <li><a href="https://f-droid.org/en/packages/com.nononsenseapps.feeder/">Feeder</a> (Android)</li>
  <li><a href="https://f-droid.org/en/packages/fr.chenry.android.freshrss/">FreshRSS</a> (Android)</li>
</ul>

<p>There’s also several cloud based web feed services that let’s you read news via the web and even syncing your data across clients on various devices. I’m not that up to date with that though. I used to self-host a server using something called Tiny Tiny RSS, but I have since then shut the whole server down in my road to depending less on the cloud.</p>

<p>I hope I managed to spark some interest for web feeds with this introductionary post. If you liked it I would highly recommend you reading <a href="https://hunden.linuxkompis.se/2020/07/29/an-introduction-to-the-web-feed-client-newsboat.html">my post about my all time favourite web feed reader client called Newsboat</a>.</p>]]></content><author><name></name></author><category term="[&quot;Tips &amp; Trix&quot;]" /><category term="Web feeds" /><summary type="html"><![CDATA[Web feeds is an easy way for users to stay up to date with websites and other services without even visiting them. If a website offers a web feed you can get notified whenever they publish an article (or perhaps an update of some sort) and you can then read the content in the comfort of your own client.]]></summary></entry><entry><title type="html">How to copy text to the clipboard in Neovim</title><link href="https://hunden.linuxkompis.se/2020/06/30/how-to-copy-text-to-clipboard-in-neovim.html" rel="alternate" type="text/html" title="How to copy text to the clipboard in Neovim" /><published>2020-06-30T00:00:00+02:00</published><updated>2024-02-16T19:42:13+01:00</updated><id>https://hunden.linuxkompis.se/2020/06/30/how-to-copy-text-to-clipboard-in-neovim</id><content type="html" xml:base="https://hunden.linuxkompis.se/2020/06/30/how-to-copy-text-to-clipboard-in-neovim.html"><![CDATA[<p>If you want to copy text to the clipboard in Neovim you can do so with xclip. The command is a bit complicated so I highly recommend you binding it to a shortcut.</p>

<p>This is what I have in my Neovim configuration to let me copy marked text using <code class="language-plaintext highlighter-rouge">Ctrl+C</code>:</p>

<div class="language-plaintext highlighter-rouge"><div class="highlight"><pre class="highlight"><code>vmap &lt;C-c&gt; y:call system("xclip -i -selection clipboard", getreg("\""))&lt;CR&gt;:call system("xclip -i", getreg("\""))&lt;CR&gt; 
</code></pre></div></div>

<p>Just make sure to install the tool <code class="language-plaintext highlighter-rouge">xclip</code> if you don’t already have it.</p>]]></content><author><name></name></author><category term="[&quot;Tips &amp; Trix&quot;]" /><category term="Neovim" /><category term="xclip" /><category term="Productivity" /><summary type="html"><![CDATA[If you want to copy text to the clipboard in Neovim you can do so with xclip. The command is a bit complicated so I highly recommend you binding it to a shortcut.]]></summary></entry><entry><title type="html">How to automatically change the current working directory in Neovim</title><link href="https://hunden.linuxkompis.se/2020/06/26/how-to-automatically-change-the-current-working-directory-in-neovim.html" rel="alternate" type="text/html" title="How to automatically change the current working directory in Neovim" /><published>2020-06-26T00:00:00+02:00</published><updated>2024-02-16T19:42:13+01:00</updated><id>https://hunden.linuxkompis.se/2020/06/26/how-to-automatically-change-the-current-working-directory-in-neovim</id><content type="html" xml:base="https://hunden.linuxkompis.se/2020/06/26/how-to-automatically-change-the-current-working-directory-in-neovim.html"><![CDATA[<p>Something that has been overly annoying ever since I switched over to Neovim from Vim is the fact that my working directory has alway been my home folder, no matter what file I’m editing.</p>

<p>I first though it was an issue with the plugin <a href="https://github.com/francoiscabrol/ranger.vim">Ranger.vim</a> and I didn’t do anything about it. I exclusively use that plugin to navigate my filesystem and open files in Neovim using Ranger (and previously in Vim) and I can’t live without it.</p>

<p>It wasn’t until I recently that I noticed that I had the same issue when using the built in command <code class="language-plaintext highlighter-rouge">:edit</code> that I did some research about it and found out about the feature <code class="language-plaintext highlighter-rouge">autochdir</code>:</p>

<div class="language-bash highlighter-rouge"><div class="highlight"><pre class="highlight"><code><span class="s1">'autochdir'</span> <span class="s1">'acd'</span>       boolean <span class="o">(</span>default off<span class="o">)</span>
                        global
        When on, Vim will change the current working directory whenever you
        open a file, switch buffers, delete a buffer or open/close a window.
        It will change to the directory containing the file which was opened
        or selected.
</code></pre></div></div>

<p>When enabled it means that when I’m working on a file in the folder <code class="language-plaintext highlighter-rouge">$HOME/example/</code> and then open a new buffer and spawn Ranger inside Neovim (or just using <code class="language-plaintext highlighter-rouge">:edit</code>) I end up in the folder <code class="language-plaintext highlighter-rouge">$HOME/example</code> and no in my home folder <code class="language-plaintext highlighter-rouge">$HOME/</code>.</p>

<p>Source: <a href="https://vim.fandom.com/wiki/Set_working_directory_to_the_current_file">https://vim.fandom.com/wiki/Set_working_directory_to_the_current_file</a>.</p>]]></content><author><name></name></author><category term="[&quot;Tips &amp; Trix&quot;]" /><category term="Neovim" /><category term="Vim" /><summary type="html"><![CDATA[Something that has been overly annoying ever since I switched over to Neovim from Vim is the fact that my working directory has alway been my home folder, no matter what file I’m editing.]]></summary></entry><entry><title type="html">Keep track of your uptime with uptimed</title><link href="https://hunden.linuxkompis.se/2020/06/24/keep-track-of-your-uptime-with-uptimed.html" rel="alternate" type="text/html" title="Keep track of your uptime with uptimed" /><published>2020-06-24T00:00:00+02:00</published><updated>2024-02-16T19:42:13+01:00</updated><id>https://hunden.linuxkompis.se/2020/06/24/keep-track-of-your-uptime-with-uptimed</id><content type="html" xml:base="https://hunden.linuxkompis.se/2020/06/24/keep-track-of-your-uptime-with-uptimed.html"><![CDATA[<p>If you’re curious about your uptime statistics there’s a tool called <a href="https://github.com/rpodgorny/uptimed">uptimed</a> that can help you keep track of your uptime records.</p>

<div class="language-bash highlighter-rouge"><div class="highlight"><pre class="highlight"><code><span class="nv">$ </span>uprecords 
     <span class="c">#               Uptime | System                                     Boot up</span>
<span class="nt">----------------------------</span>+---------------------------------------------------
-&gt;   1    29 days, 04:57:14 | Linux 5.4.38-gentoo-x86_  Tue May 26 15:23:46 2020
<span class="nt">----------------------------</span>+---------------------------------------------------
NewRec    29 days, 04:57:13 | since                     Tue May 26 15:23:46 2020
    up    29 days, 04:57:14 | since                     Tue May 26 15:23:46 2020
  down     0 days, 00:00:00 | since                     Tue May 26 15:23:46 2020
   %up              100.000 | since                     Tue May 26 15:23:46 2020
</code></pre></div></div>

<h2 id="installation">Installation</h2>

<h3 id="gentoo">Gentoo</h3>

<p>Install the package <code class="language-plaintext highlighter-rouge">app-misc/uptimed</code>:</p>

<div class="language-plaintext highlighter-rouge"><div class="highlight"><pre class="highlight"><code># emerge --ask app-misc/uptimed
</code></pre></div></div>

<p>After the installation you need to start the service:</p>

<div class="language-plaintext highlighter-rouge"><div class="highlight"><pre class="highlight"><code># service uptimed start
</code></pre></div></div>

<p>And preferable add it to the default system runlevel:</p>

<div class="language-plaintext highlighter-rouge"><div class="highlight"><pre class="highlight"><code># rc-update add uptimed default
</code></pre></div></div>

<h3 id="debian">Debian</h3>

<p>Install the package <code class="language-plaintext highlighter-rouge">uptimed</code>:</p>

<div class="language-plaintext highlighter-rouge"><div class="highlight"><pre class="highlight"><code># apt install uptimed
</code></pre></div></div>

<p>After the installation you need to start the service:</p>

<div class="language-plaintext highlighter-rouge"><div class="highlight"><pre class="highlight"><code># systemctl start uptimed
</code></pre></div></div>

<p>And preferable add it to the default system runlevel:</p>

<div class="language-plaintext highlighter-rouge"><div class="highlight"><pre class="highlight"><code># systemctl enable uptimed
</code></pre></div></div>

<h2 id="using-uptimed">Using uptimed</h2>

<p>After the installation you can simply run the command <code class="language-plaintext highlighter-rouge">uprecords</code> to display your uptime records. I also recommend you checking out the flag <code class="language-plaintext highlighter-rouge">--help</code> for more options.</p>]]></content><author><name></name></author><category term="[&quot;Applications &amp; Tools&quot;]" /><category term="Uptime" /><category term="Utils" /><category term="Command-line" /><summary type="html"><![CDATA[If you’re curious about your uptime statistics there’s a tool called uptimed that can help you keep track of your uptime records.]]></summary></entry><entry><title type="html">How to use Reddit via web feeds</title><link href="https://hunden.linuxkompis.se/2020/06/22/how-to-use-reddit-via-web-feeds.html" rel="alternate" type="text/html" title="How to use Reddit via web feeds" /><published>2020-06-22T00:00:00+02:00</published><updated>2024-02-16T19:42:13+01:00</updated><id>https://hunden.linuxkompis.se/2020/06/22/how-to-use-reddit-via-web-feeds</id><content type="html" xml:base="https://hunden.linuxkompis.se/2020/06/22/how-to-use-reddit-via-web-feeds.html"><![CDATA[<p>It is actually possible to use Reddit exclusively via web feeds, unless you want to submit or comment anything. They do not advertice it, but the support is actually pretty good.</p>

<p>Web feeds happens to be my prefered way of consuming Reddit these days. Reddit is for the most part a a higly toxic place and I try to stay away from it, but it does comes with a lot of good things that I like.</p>

<p><span class="update">June 23, 2020 - Thanks to <a href="https://pinafore.social/statuses/104389780941704385">@dredmorbius@toot.cat</a> on the fediverse for recommending me a few more feeds that I did not know about.</span></p>

<h2 id="the-default-web-feeds">The default web feeds</h2>

<p>Let us start with all the standard web feeds.</p>

<ul>
  <li>Frontpage: <a href="https://reddit.com/.rss">https://reddit.com/.rss</a></li>
  <li>New: <a href="https://reddit.com/new/.rss">https://reddit.com/new/.rss</a></li>
  <li>Hot: <a href="https://reddit.com/hot/.rss">https://reddit.com/hot/.rss</a></li>
  <li>Top: <a href="https://reddit.com/top/.rss">https://reddit.com/top/.rss</a></li>
  <li>Rising: <a href="https://reddit.com/rising/.rss">https://reddit.com/rising/.rss</a></li>
  <li>Controversial: <a href="https://reddit.com/controversial/.rss">https://reddit.com/controversial/.rss</a></li>
</ul>

<h2 id="adding-dates-to-any-feed">Adding dates to any feed</h2>

<p>If you want to you can even add dates to any feeds, here is an example showing the monthly top feed:</p>

<ul>
  <li><a href="https://reddit.com/top/?sort=top&amp;t=month/.rss">https://reddit.com/top/?sort=top&amp;t=month/.rss</a></li>
</ul>

<p>Other possible dates are <code class="language-plaintext highlighter-rouge">hour</code>, <code class="language-plaintext highlighter-rouge">day</code>, <code class="language-plaintext highlighter-rouge">week</code>, <code class="language-plaintext highlighter-rouge">year</code> and <code class="language-plaintext highlighter-rouge">all</code>.</p>

<h2 id="subreddit-web-feeds">Subreddit web feeds</h2>

<p>If you would like to follow a subreddit you can do so as well. Here is an example with the subreddit <a href="https://reddit.com/r/Gentoo/">r/Gentoo</a>:</p>

<ul>
  <li><a href="https://reddit.com/r/gentoo/.rss">https://reddit.com/r/gentoo/.rss</a></li>
</ul>

<p>You can even combine several subreddits in one feed like this:</p>

<ul>
  <li><a href="https://reddit.com/r/gentoo+alpinelinux/.rss">https://reddit.com/r/gentoo+alpinelinux/.rss</a></li>
</ul>

<h2 id="user-web-feeds">User web feeds</h2>

<p>It is also possible to follow users. Here is an example with the fictive user “reddit_user”:</p>

<ul>
  <li><a href="https://reddit.com/user/reddit_user/.rss">https://reddit.com/user/reddit_user/.rss</a></li>
</ul>

<p>If you want to you can only follow either the users submitted posts and the comments of any user:</p>

<ul>
  <li>Submitted: <a href="https://reddit.com/user/reddit_user/submitted/.rss">https://reddit.com/user/reddit_user/submitted/.rss</a></li>
  <li>Comments: <a href="https://reddit.com/user/reddit_user/comments/.rss">https://reddit.com/user/reddit_user/comments/.rss</a></li>
</ul>

<h2 id="single-posts-web-feeds">Single posts web feeds</h2>

<p>Yep. This is a thing as well:</p>

<ul>
  <li><a href="https://old.reddit.com/r/Gentoo/comments/bzyc3f/im_just_going_to_say_it_i_get_excited_when_my/.rss">https://old.reddit.com/r/Gentoo/comments/bzyc3f/im_just_going_to_say_it_i_get_excited_when_my/.rss</a></li>
</ul>

<h2 id="single-comment-web-feeds">Single comment web feeds</h2>

<p>It is also possible to follow a single comment:</p>

<ul>
  <li><a href="https://old.reddit.com/r/Gentoo/comments/bzyc3f/im_just_going_to_say_it_i_get_excited_when_my/er03wqw/.rss">https://old.reddit.com/r/Gentoo/comments/bzyc3f/im_just_going_to_say_it_i_get_excited_when_my/er03wqw/.rss</a></li>
</ul>]]></content><author><name></name></author><category term="[&quot;Tips &amp; Trix&quot;]" /><category term="Reddit" /><category term="Web feeds" /><summary type="html"><![CDATA[It is actually possible to use Reddit exclusively via web feeds, unless you want to submit or comment anything. They do not advertice it, but the support is actually pretty good.]]></summary></entry><entry><title type="html">How to make search highlights visible in Neovim when using URxvt</title><link href="https://hunden.linuxkompis.se/2020/06/08/how-to-make-search-highlights-visible-in-neovim-when-using-urxvt.html" rel="alternate" type="text/html" title="How to make search highlights visible in Neovim when using URxvt" /><published>2020-06-08T00:00:00+02:00</published><updated>2024-02-16T19:42:13+01:00</updated><id>https://hunden.linuxkompis.se/2020/06/08/how-to-make-search-highlights-visible-in-neovim-when-using-urxvt</id><content type="html" xml:base="https://hunden.linuxkompis.se/2020/06/08/how-to-make-search-highlights-visible-in-neovim-when-using-urxvt.html"><![CDATA[<p>I don’t know why, but if you use the terminal emulator URxvt, the colour scheme Solarized and Neovim (or Vim) at the same time and then search for something, jump to the highlighted word, the cursor will then blend in a bit too much.</p>

<p>Here’s an example when I have searched for the number <code class="language-plaintext highlighter-rouge">3</code> and jumped to that search hit:</p>

<p><a href="/img/neovim-search-highlight.png"><img src="/img/neovim-search-highlight.png" alt="" /></a></p>

<p>You can’t probably see it, but the colours are different! The colour on the normal text is <code class="language-plaintext highlighter-rouge">#839496</code> while the highlighted text is <code class="language-plaintext highlighter-rouge">#93a1a1</code>. I was able to fix this and here’s how it looks for me right now:</p>

<p><a href="/img/neovim-search-highlight-fixed.png"><img src="/img/neovim-search-highlight-fixed.png" alt="" /></a></p>

<p>This is the setting that fixes it:</p>

<div class="language-plaintext highlighter-rouge"><div class="highlight"><pre class="highlight"><code>hi search ctermfg=8 ctermbg=3 cterm=none
</code></pre></div></div>

<p>Adding that setting to my configuration for Neovim didn’t work though, for some reason my colour scheme changes it back, a workaround for me was to use an auto command for it:</p>

<div class="language-plaintext highlighter-rouge"><div class="highlight"><pre class="highlight"><code>autocmd colorscheme solarized highlight search ctermfg=8 ctermbg=3 cterm=none
</code></pre></div></div>

<p>A big thanks to “marcohinzgitter[” and “habamax” on the irc-channel #neovim at freenode.net for the helping me solving this long standing issue!</p>]]></content><author><name></name></author><category term="[&quot;Tips &amp; Trix&quot;]" /><category term="Neovim" /><category term="Vim" /><category term="URxvt" /><category term="Solarized" /><category term="Productivity" /><summary type="html"><![CDATA[I don’t know why, but if you use the terminal emulator URxvt, the colour scheme Solarized and Neovim (or Vim) at the same time and then search for something, jump to the highlighted word, the cursor will then blend in a bit too much.]]></summary></entry><entry><title type="html">How to use alternative settings for URxvt</title><link href="https://hunden.linuxkompis.se/2020/06/05/how-to-use-alternative-settings-for-urxvt.html" rel="alternate" type="text/html" title="How to use alternative settings for URxvt" /><published>2020-06-05T00:00:00+02:00</published><updated>2024-02-16T19:42:13+01:00</updated><id>https://hunden.linuxkompis.se/2020/06/05/how-to-use-alternative-settings-for-urxvt</id><content type="html" xml:base="https://hunden.linuxkompis.se/2020/06/05/how-to-use-alternative-settings-for-urxvt.html"><![CDATA[<p>Ever since I retired my HTPC I have been using my desktop computer as my HTPC with my TV connected to it. My HTPC consisted (and still) does of some terminal emulator running software like Newsboat and Ranger, but because I want to be able to read the text on the TV from the distance of my sofa I have up until now been lazy and used a secondary terminal emulator with alteranative settings that better suited with large text and another colourscheme.</p>

<p>I didn’t really like the approach of having two terminal emulators, so I decided to do some research to see if I could solve it by only using my main terminal emulator URxvt. Spoiler: I could.</p>

<p>It turns out that you can add alternative settings for URxvt and then optionally enable them with an argument. I found out about this in <a href="https://bbs.archlinux.org/viewtopic.php?pid=1321118#p1321118">an old thread</a> over at the Arch Linux forums.</p>

<h2 id="how-it-works">How it works</h2>

<p>You can add a custom setting with the name <code class="language-plaintext highlighter-rouge">URxvt-&lt;word&gt;</code>, like <code class="language-plaintext highlighter-rouge">URxvt-tv</code> and when you run URxvt wit the flag <code class="language-plaintext highlighter-rouge">-name URxvt-tv</code> it will use these settings.</p>

<h3 id="example">Example</h3>

<p>I added the following settings to my file <code class="language-plaintext highlighter-rouge">~/.Xresources</code>:</p>

<div class="language-plaintext highlighter-rouge"><div class="highlight"><pre class="highlight"><code>! TV settings

URxvt-tv.font: xft:Monospace:pixelsize=40
URxvt-tv.boldFont:xft:Monospace:pixelsize=40

! Tango colours 
URxvt-tv.background: #000000
URxvt-tv.foreground: #FFFFFF

! Black dark/light
URxvt-tv.color0:             #2e3436
URxvt-tv.color8:             #6e706b
! Red dark/light
URxvt-tv.color1:             #cc0000
URxvt-tv.color9:             #ef2929
! Green dark/light
URxvt-tv.color2:             #4e9a06
URxvt-tv.color10:            #8ae234
! Yellow dark/light
URxvt-tv.color3:             #edd400
URxvt-tv.color11:            #fce94f
! Blue dark/light
URxvt-tv.color4:             #3465a4
URxvt-tv.color12:            #729fcf
! Magenta dark/light
URxvt-tv.color5:             #92659a
URxvt-tv.color13:            #c19fbe
! Cyan dark/light
URxvt-tv.color6:             #07c7ca
URxvt-tv.color14:            #63e9e9
! White dark/light
URxvt-tv.color7:             #d3d7cf
URxvt-tv.color15:            #eeeeec
</code></pre></div></div>

<p>When I run the command <code class="language-plaintext highlighter-rouge">urxvt -name URxvt-tv</code> it will launch URxvt with my alternative settigns.</p>

<h2 id="extras">Extras</h2>

<p>This is not related to the title of this post but I thought I would include it anyway. I wanted to be able to instantly spawn the “TV terminal” on my TV from any monitor and workspace and have it automatically disable the decoration. I solved this by adding this keybinding to i3:</p>

<div class="language-plaintext highlighter-rouge"><div class="highlight"><pre class="highlight"><code>bindsym Mod4+Return workspace 10; exec --no-startup-id "tvterm"
</code></pre></div></div>

<p>I also added these two rules to i3::</p>

<div class="language-plaintext highlighter-rouge"><div class="highlight"><pre class="highlight"><code>for_window [title="tvterm"] border none
</code></pre></div></div>
<div class="language-plaintext highlighter-rouge"><div class="highlight"><pre class="highlight"><code>workspace 10 output HDMI-0
</code></pre></div></div>

<p>The script <code class="language-plaintext highlighter-rouge">tvterm</code> includes this snippet:</p>

<div class="language-bash highlighter-rouge"><div class="highlight"><pre class="highlight"><code><span class="c">#!/bin/bash</span>

urxvt <span class="nt">-name</span> URxvt-tv <span class="nt">-hold</span> <span class="nt">-e</span> sh <span class="nt">-c</span> <span class="s1">'printf "\33]2;%s\007" "tvterm"; zsh'</span>
</code></pre></div></div>

<p>I don’t know why, but I didn’t get it to work when I added that command direcly to the configuration file for i3. And the printf part is to trigger the rules for i3.</p>]]></content><author><name></name></author><category term="[&quot;Applications &amp; Tools&quot;]" /><category term="URxvt" /><category term="i3" /><category term="HTPC" /><summary type="html"><![CDATA[Ever since I retired my HTPC I have been using my desktop computer as my HTPC with my TV connected to it. My HTPC consisted (and still) does of some terminal emulator running software like Newsboat and Ranger, but because I want to be able to read the text on the TV from the distance of my sofa I have up until now been lazy and used a secondary terminal emulator with alteranative settings that better suited with large text and another colourscheme.]]></summary></entry><entry><title type="html">How to install rTorrent with the colour-patch in Debian</title><link href="https://hunden.linuxkompis.se/2020/06/04/how-to-install-rtorrent-with-the-colour-patch-in-debian.html" rel="alternate" type="text/html" title="How to install rTorrent with the colour-patch in Debian" /><published>2020-06-04T00:00:00+02:00</published><updated>2024-02-16T19:42:13+01:00</updated><id>https://hunden.linuxkompis.se/2020/06/04/how-to-install-rtorrent-with-the-colour-patch-in-debian</id><content type="html" xml:base="https://hunden.linuxkompis.se/2020/06/04/how-to-install-rtorrent-with-the-colour-patch-in-debian.html"><![CDATA[<p>I installed <a href="https://rakshasa.github.io/rtorrent/">rTorrent</a> from source code so I could patch it with the colour-patch on my Raspberry Pi the other day and I thought I would document it here as well.</p>

<p>As of writing this post the latest version of rTorrent is <a href="http://rtorrent.net/downloads/rtorrent-0.9.8.tar.gz">0.9.8</a> and the latest version of libtorrent is <a href="http://rtorrent.net/downloads/libtorrent-0.13.8.tar.gz">0.13.8</a>.</p>

<h2 id="downloading-the-required-files">Downloading the required files</h2>

<p>Start by downloading the source code for rTorrent and libtorrent from <a href="https://rakshasa.github.io/rtorrent/">their website</a>:</p>

<div class="language-plaintext highlighter-rouge"><div class="highlight"><pre class="highlight"><code>$ wget http://rtorrent.net/downloads/rtorrent-0.9.8.tar.gz http://rtorrent.net/downloads/libtorrent-0.13.8.tar.gz
</code></pre></div></div>

<p>We then need to download the patch that adds some lovely colours to rTorrent. I used the patch from the package <a href="https://aur.archlinux.org/packages/rtorrent-color/">rtorrent-color</a> from the Arch User Repository:</p>

<div class="language-plaintext highlighter-rouge"><div class="highlight"><pre class="highlight"><code>$ wget https://aur.archlinux.org/cgit/aur.git/snapshot/rtorrent-color.tar.gz
</code></pre></div></div>

<p>Continue to unpack the archives:</p>

<div class="language-plaintext highlighter-rouge"><div class="highlight"><pre class="highlight"><code>$ tar -xvzf rtorrent-0.9.8.tar.gz
$ tar -xvzf libtorrent-0.13.8.tar.gz 
$ tar -xvzf rtorrent-color.tar.gz
</code></pre></div></div>

<h2 id="installing-the-needed-dependencies">Installing the needed dependencies</h2>

<p>Install the required dependencies:</p>

<div class="language-plaintext highlighter-rouge"><div class="highlight"><pre class="highlight"><code># apt-get build-essential build-dep rtorrent libtorrent
</code></pre></div></div>

<h2 id="installing-libtorrent">Installing libtorrent</h2>

<p>Start by going to the folder <code class="language-plaintext highlighter-rouge">libtorrent-0.13.8</code>:</p>

<div class="language-plaintext highlighter-rouge"><div class="highlight"><pre class="highlight"><code>$ cd libtorrent-0.13.8
</code></pre></div></div>

<p>Configure and install the package:</p>

<div class="language-plaintext highlighter-rouge"><div class="highlight"><pre class="highlight"><code>$ ./autogen.sh
</code></pre></div></div>
<div class="language-plaintext highlighter-rouge"><div class="highlight"><pre class="highlight"><code>$ ./configure --disable-debug
</code></pre></div></div>
<div class="language-plaintext highlighter-rouge"><div class="highlight"><pre class="highlight"><code># make install
</code></pre></div></div>
<p>The flag <code class="language-plaintext highlighter-rouge">--disble-debug</code> is optional.</p>

<h2 id="patching-and-installing-rtorrent">Patching and installing rTorrent</h2>

<p>Go to the folder <code class="language-plaintext highlighter-rouge">../rtorrent-0.9.8</code>:</p>

<div class="language-plaintext highlighter-rouge"><div class="highlight"><pre class="highlight"><code>$ cd ../rtorrent-0.9.8
</code></pre></div></div>

<p>Apply the patch:</p>

<div class="language-plaintext highlighter-rouge"><div class="highlight"><pre class="highlight"><code>$ patch -up1 -i &lt;path to patch&gt;/rtorrent-0.9.8_color.patch
</code></pre></div></div>

<p>Configure and install the package:</p>

<div class="language-plaintext highlighter-rouge"><div class="highlight"><pre class="highlight"><code>$ ./autogen.sh
</code></pre></div></div>

<p>You now have two options; to enable or disable remote connections for rTorrent. If you don’t connect to rTorrent via a third party client like <a href="https://github.com/Novik/ruTorrent">ruTorrent</a> or <a href="https://www.transdroid.org/">Transdroid</a> I highly suggest you disable the feature.</p>

<p><strong>With support for remote connections:</strong></p>

<div class="language-plaintext highlighter-rouge"><div class="highlight"><pre class="highlight"><code>$ ./configure --disable-debug
</code></pre></div></div>
<p><strong>Without support for remote connections:</strong></p>

<div class="language-plaintext highlighter-rouge"><div class="highlight"><pre class="highlight"><code>$ ./configure --disable-debug --without-xmlrpc-c
</code></pre></div></div>
<p>Then continue to install the software:</p>

<div class="language-plaintext highlighter-rouge"><div class="highlight"><pre class="highlight"><code># make install
</code></pre></div></div>

<h2 id="configuring-rtorrent">Configuring rTorrent</h2>

<p>The configuration file for rTorrent is <code class="language-plaintext highlighter-rouge">$HOME/.rtorrent.rc</code> and this is the part of the config that adds the colours:</p>

<div class="language-bash highlighter-rouge"><div class="highlight"><pre class="highlight"><code><span class="c"># 0 = black</span>
<span class="c"># 1 = red</span>
<span class="c"># 2 = green</span>
<span class="c"># 3 = yellow</span>
<span class="c"># 4 = blue</span>
<span class="c"># 5 = purple</span>
<span class="c"># 6 = cyan</span>
<span class="c"># 7 = grey</span>
<span class="c"># 8 = dark grey 9 = dark red</span>
<span class="c">#10 = dark green</span>

color_inactive_fg <span class="o">=</span> 3
color_dead_fg <span class="o">=</span> 1
color_active_fg <span class="o">=</span> 6
color_finished_fg <span class="o">=</span> 2
</code></pre></div></div>

<p>This is my configuration file for rTorrent:</p>

<div class="language-bash highlighter-rouge"><div class="highlight"><pre class="highlight"><code><span class="c"># General settings</span>

max_peers <span class="o">=</span> 200
max_peers_seed <span class="o">=</span> 100
max_uploads <span class="o">=</span> 50
download_rate <span class="o">=</span> 0
upload_rate <span class="o">=</span> 0
session <span class="o">=</span> /home/johan/.rtorrent/session
schedule <span class="o">=</span> low_diskspace,5,60,close_low_diskspace<span class="o">=</span>100M
port_range <span class="o">=</span> 58152-58162
port_random <span class="o">=</span> no
check_hash <span class="o">=</span> no
encryption <span class="o">=</span> allow_incoming,try_outgoing,enable_retry
dht <span class="o">=</span> off
peer_exchange <span class="o">=</span> no

<span class="c"># Colors</span>

<span class="c">## 0 = black</span>
<span class="c">## 1 = red</span>
<span class="c">## 2 = green</span>
<span class="c">## 3 = yellow</span>
<span class="c">## 4 = blue</span>
<span class="c">## 5 = purple</span>
<span class="c">## 6 = cyan</span>
<span class="c">## 7 = grey</span>
<span class="c">## 8 = dark grey 9 = dark red</span>
<span class="c">## 10 = dark green</span>

color_inactive_fg <span class="o">=</span> 3
color_dead_fg <span class="o">=</span> 1
color_active_fg <span class="o">=</span> 6
color_finished_fg <span class="o">=</span> 2

<span class="c"># Notifications</span>

method.set_key <span class="o">=</span> event.download.finished,notify,<span class="s2">"execute2=/home/johan/Scripts/rtorrent_notify.sh,</span><span class="nv">$d</span><span class="s2">.name="</span>

<span class="c"># Folders</span>

schedule <span class="o">=</span> watch_directory_torrents, 5, 5, <span class="s2">"load.start=/mnt/hdd0/.torrents/*.torrent,d.directory.set=/mnt/hdd0/torrents/"</span>
</code></pre></div></div>

<h3 id="notifications">Notifications</h3>

<p>This script (as specified in the configuration file) gets executed every time rTorrent completes a torrent and sends me a message about it via XMPP using <a href="https://hunden.linuxkompis.se/2018/11/16/xmpp-via-the-command-line-with-sendxmpp.html">sendxmpp</a>:</p>

<div class="language-bash highlighter-rouge"><div class="highlight"><pre class="highlight"><code><span class="c">#!/bin/sh</span>

<span class="nb">echo</span> <span class="s2">"New torrent!</span><span class="se">\n\n</span><span class="nv">$1</span><span class="s2">"</span> | /usr/bin/sendxmpp <span class="nt">--tls-ca-path</span><span class="o">=</span><span class="s2">"/etc/ssl/certs"</span> <span class="nt">-t</span> &lt;My XMPP-account&gt;
</code></pre></div></div>

<p>If you run rTorrent locally and just want a desktop notification, you can just replace the content with this:</p>

<div class="language-bash highlighter-rouge"><div class="highlight"><pre class="highlight"><code><span class="c">#!/bin/sh</span>

notify-send <span class="s2">"New torrent!"</span> <span class="s2">"</span><span class="nv">$1</span><span class="s2">"</span>
</code></pre></div></div>]]></content><author><name></name></author><category term="[&quot;Applications &amp; Tools&quot;]" /><category term="Debian" /><category term="rTorrent" /><category term="BitTorrent" /><category term="sendxmpp" /><category term="XMPP" /><summary type="html"><![CDATA[I installed rTorrent from source code so I could patch it with the colour-patch on my Raspberry Pi the other day and I thought I would document it here as well.]]></summary></entry><entry><title type="html">How to view posts in alphabetical order by tags and title in Jekyll</title><link href="https://hunden.linuxkompis.se/2020/06/03/how-to-view-posts-in-alphabetical-order-by-tags-and-title-in-jekyll.html" rel="alternate" type="text/html" title="How to view posts in alphabetical order by tags and title in Jekyll" /><published>2020-06-03T00:00:00+02:00</published><updated>2024-02-16T19:42:13+01:00</updated><id>https://hunden.linuxkompis.se/2020/06/03/how-to-view-posts-in-alphabetical-order-by-tags-and-title-in-jekyll</id><content type="html" xml:base="https://hunden.linuxkompis.se/2020/06/03/how-to-view-posts-in-alphabetical-order-by-tags-and-title-in-jekyll.html"><![CDATA[<p>This issue was driving me nuts the other day, I could not find a solution to it and I’m not knowledeable enough to have figured it out myself. All credits goes to a user called Sheogorath on the IRC-channel #Jekyll at freenode.net for helping me with this.</p>

<p>So. I wanted to be able to list all my posts in an alphabetical order by tags and then sort each of these posts by title, not by date like it would by default.</p>

<h2 id="example">Example</h2>

<blockquote>
  <h3 id="my-desktop">My desktop</h3>

  <ul>
    <li>I went from a multi monitor setup to just a single monitor setup</li>
    <li>My Desktop - Mars 2019</li>
  </ul>

  <h3 id="my-keyboards">My keyboards</h3>

  <ul>
    <li>My keyboard - KBParadise V60</li>
    <li>My keyboard - Let’s Split</li>
    <li>My keyboard - The Black Diamond</li>
  </ul>
</blockquote>

<h2 id="the-code">The code</h2>

<p>And this is how it can be done:</p>

<div class="language-html highlighter-rouge"><div class="highlight"><pre class="highlight"><code>{% assign tags_sorted = site.tags | sort %}
{% assign posts_sorted = site.posts | sort: 'title' %}
{% for tagitem in tags_sorted %}
<span class="c">&lt;!-- for each tag, create an anchor by using the tag name as an id --&gt;</span>
<span class="nt">&lt;div</span> <span class="na">id=</span><span class="s">"{{ tagitem[0] }}"</span><span class="nt">&gt;</span>
  <span class="nt">&lt;h3&gt;</span> {{ tagitem[0] }} <span class="nt">&lt;/h3&gt;</span>  <span class="c">&lt;!-- for create a heading --&gt;</span>

  <span class="nt">&lt;ul&gt;</span> <span class="c">&lt;!-- create the list of posts --&gt;</span>
    <span class="c">&lt;!-- iterate through all the posts on the site sorted by alphabet--&gt;</span>
    {% for post in posts_sorted %}
      <span class="c">&lt;!-- list only those which contain the current tag --&gt;</span>
      {% if post.tags contains tagitem[0] %}
          <span class="nt">&lt;li&gt;</span>
            <span class="nt">&lt;a</span> <span class="na">href=</span><span class="s">"{{ post.url | prepend: site.baseurl }}"</span><span class="nt">&gt;</span>{{ post.title }}<span class="nt">&lt;/a&gt;</span>
          <span class="nt">&lt;/li&gt;</span>
      {% endif %}
    {% endfor %}
  <span class="nt">&lt;/ul&gt;</span>
<span class="nt">&lt;/div&gt;</span>
{% endfor %}
</code></pre></div></div>]]></content><author><name></name></author><category term="[&quot;Tips &amp; Trix&quot;]" /><category term="Jekyll" /><category term="Web" /><summary type="html"><![CDATA[This issue was driving me nuts the other day, I could not find a solution to it and I’m not knowledeable enough to have figured it out myself. All credits goes to a user called Sheogorath on the IRC-channel #Jekyll at freenode.net for helping me with this.]]></summary></entry><entry><title type="html">How to check how long it took to install a package in Gentoo</title><link href="https://hunden.linuxkompis.se/2020/06/02/how-to-check-how-long-it-took-to-install-a-package-in-gentoo.html" rel="alternate" type="text/html" title="How to check how long it took to install a package in Gentoo" /><published>2020-06-02T00:00:00+02:00</published><updated>2024-02-16T19:42:13+01:00</updated><id>https://hunden.linuxkompis.se/2020/06/02/how-to-check-how-long-it-took-to-install-a-package-in-gentoo</id><content type="html" xml:base="https://hunden.linuxkompis.se/2020/06/02/how-to-check-how-long-it-took-to-install-a-package-in-gentoo.html"><![CDATA[<p>With the help of the tool <code class="language-plaintext highlighter-rouge">qlop</code> from the collection of utilities called <a href="https://wiki.gentoo.org/wiki/Q_applets">q applets</a> you can check how long it took to install a package in Gentoo. qlop reads from your log <code class="language-plaintext highlighter-rouge">$EMERGE_LOG_DIR/emerge.log</code> and extracts relevant information.</p>

<div class="language-plaintext highlighter-rouge"><div class="highlight"><pre class="highlight"><code># qlop -Ht qtwebengine

[...]
2020-02-19T16:58:02 &gt;&gt;&gt; dev-qt/qtwebengine: 2 hours, 14 minutes, 17 seconds
2020-03-31T01:27:45 &gt;&gt;&gt; dev-qt/qtwebengine: 2 hours, 12 minutes, 43 seconds
2020-05-28T10:24:16 &gt;&gt;&gt; dev-qt/qtwebengine: 2 hours, 22 minutes, 6 seconds
</code></pre></div></div>

<p>The flag <code class="language-plaintext highlighter-rouge">-t</code> lists all installations and the flag <code class="language-plaintext highlighter-rouge">-H</code> prints the time in a human readable format.
If you would like to see the average time it has taken to install a certain package you can do so with the flag <code class="language-plaintext highlighter-rouge">-a</code>:</p>

<div class="language-plaintext highlighter-rouge"><div class="highlight"><pre class="highlight"><code># qlop -Ha qtwebengine

dev-qt/qtwebengine: 2 hours, 6 minutes, 24 seconds average for 19 merges
dev-qt/qtwebengine: 2 seconds average for 1 unmerge
</code></pre></div></div>

<p>Don’t forget to check out all the available features with the flag <code class="language-plaintext highlighter-rouge">--help</code>.</p>

<h2 id="installation">Installation</h2>

<p>The tool is available in the package <code class="language-plaintext highlighter-rouge">app-portage/portage-utils</code>:</p>

<div class="language-plaintext highlighter-rouge"><div class="highlight"><pre class="highlight"><code># emerge --ask app-portage/portage-utils
</code></pre></div></div>]]></content><author><name></name></author><category term="[&quot;Tips &amp; Trix&quot;]" /><category term="Gentoo" /><category term="qlop" /><category term="q applets" /><category term="Command-line" /><summary type="html"><![CDATA[With the help of the tool qlop from the collection of utilities called q applets you can check how long it took to install a package in Gentoo. qlop reads from your log $EMERGE_LOG_DIR/emerge.log and extracts relevant information.]]></summary></entry><entry><title type="html">How to automatically run a resume script with pm-utils as a regular user</title><link href="https://hunden.linuxkompis.se/2020/06/01/how-to-automatically-run-a-resume-script-with-pm-utils-as-a-regular-user.html" rel="alternate" type="text/html" title="How to automatically run a resume script with pm-utils as a regular user" /><published>2020-06-01T00:00:00+02:00</published><updated>2024-02-16T19:42:13+01:00</updated><id>https://hunden.linuxkompis.se/2020/06/01/how-to-automatically-run-a-resume-script-with-pm-utils-as-a-regular-user</id><content type="html" xml:base="https://hunden.linuxkompis.se/2020/06/01/how-to-automatically-run-a-resume-script-with-pm-utils-as-a-regular-user.html"><![CDATA[<p>I’m using Gentoo with OpenRC and I use the tool <a href="https://pm-utils.freedesktop.org/">pm-utils</a> to suspend my computer. The only issue I have with their way of automatically running a command when you resume your computer is the fact that it’s executed as root.</p>

<h2 id="the-command">The command</h2>

<p>If you want to run a command as any user you easily do that by using <code class="language-plaintext highlighter-rouge">sudo</code>:</p>

<div class="language-bash highlighter-rouge"><div class="highlight"><pre class="highlight"><code><span class="nv">$ </span><span class="nb">sudo</span> <span class="nt">-H</span> <span class="nt">-u</span> &lt;user&gt; sh <span class="nt">-c</span> <span class="s2">"&lt;command&gt;"</span>
</code></pre></div></div>

<p>Here’s an explanation of the flags I’m using:</p>

<table>
  <tbody>
    <tr>
      <td><code class="language-plaintext highlighter-rouge">-H, --set-home</code></td>
      <td>Request that the security policy set the HOME environment variable to the home directory specified by the target user’s password database entry.  Depending on the policy, this may be the default behavior.</td>
    </tr>
    <tr>
      <td><code class="language-plaintext highlighter-rouge">-U user, --other-user=user</code></td>
      <td>Used in conjunction with the -l option to list the privileges for user instead of for the invoking user.  The security policy may restrict listing other users’ privileges.  The sudoers policy only allows root or a user with the ALL privilege on the current host to use this option.</td>
    </tr>
  </tbody>
</table>

<h2 id="the-script">The script</h2>

<p>Here’s an example script, it’s one of my scripts called <code class="language-plaintext highlighter-rouge">00refresh</code>:</p>

<div class="language-bash highlighter-rouge"><div class="highlight"><pre class="highlight"><code><span class="c">#!/bin/bash</span>
<span class="k">case</span> <span class="nv">$1</span> <span class="k">in
    </span><span class="nb">suspend</span><span class="p">|</span>hibernate<span class="p">)</span>
    <span class="p">;;</span>
    resume|thaw<span class="p">)</span>
        <span class="nb">sudo</span> <span class="nt">-H</span> <span class="nt">-u</span> johan sh <span class="nt">-c</span> <span class="s2">"DISPLAY=:0.0 /home/johan/Scripts/pm-resume.sh"</span>
    <span class="p">;;</span>
    <span class="k">*</span><span class="p">)</span>  <span class="nb">exit</span> <span class="nv">$NA</span>
    <span class="p">;;</span>
<span class="k">esac</span>
</code></pre></div></div>

<p>The script is placed in the folder <code class="language-plaintext highlighter-rouge">/etc/pm/sleep.d/</code> and made executable. The number <code class="language-plaintext highlighter-rouge">00</code> in the beginning of the filename defines the sleep hook ordering convention. When you set it to something between 00 and 49 it assumes the usual services and userspace infrastructure is still running, you can read more about that in the manual.</p>]]></content><author><name></name></author><category term="[&quot;Applications &amp; Tools&quot;]" /><category term="pm-utils" /><category term="Productivity" /><summary type="html"><![CDATA[I’m using Gentoo with OpenRC and I use the tool pm-utils to suspend my computer. The only issue I have with their way of automatically running a command when you resume your computer is the fact that it’s executed as root.]]></summary></entry><entry><title type="html">How to save disk space by changing the reserved blocks for Ext-filesystems</title><link href="https://hunden.linuxkompis.se/2020/05/28/how-to-save-disk-space-by-changing-the-reserverd-blocks-for-ext-filesystems.html" rel="alternate" type="text/html" title="How to save disk space by changing the reserved blocks for Ext-filesystems" /><published>2020-05-28T00:00:00+02:00</published><updated>2024-02-16T19:42:13+01:00</updated><id>https://hunden.linuxkompis.se/2020/05/28/how-to-save-disk-space-by-changing-the-reserverd-blocks-for-ext-filesystems</id><content type="html" xml:base="https://hunden.linuxkompis.se/2020/05/28/how-to-save-disk-space-by-changing-the-reserverd-blocks-for-ext-filesystems.html"><![CDATA[<p>By default the Extended-filesystem, more known as Ext2/4, reserves 5% of the filesystem blocks on the filesystem for privileged processes. It’s done to avoid filesystem fragmentation and to allow system daemons to continue to function correctly after non-privileged processes are prevented from writing to the filesystem due to a full filesystem.</p>

<p>It’s a great feature for system critical filesystems, but if you have a storage disk you usually don’t need that feature at all. And if you have a large system disk you could probably lower the value a bit, but that’s for you to decide.</p>

<h2 id="an-example-with-my-storage-disk">An example with my storage disk</h2>

<p>I have turned off the reserved blocks on my storage disk and as you can see below it does make a noticeable difference on a larger filesystem.</p>

<h3 id="before">Before</h3>

<div class="language-bash highlighter-rouge"><div class="highlight"><pre class="highlight"><code><span class="nv">$ </span><span class="nb">df</span> <span class="nt">-h</span>

Filesystem      Size  Used Avail Use% Mounted on
<span class="o">[</span>...]
/dev/sdb1       3.6T  1.9T  1.6T  55% /mnt/hdd0
</code></pre></div></div>
<h3 id="after">After</h3>

<div class="language-bash highlighter-rouge"><div class="highlight"><pre class="highlight"><code><span class="nv">$ </span><span class="nb">df</span> <span class="nt">-h</span>

Filesystem      Size  Used Avail Use% Mounted on
<span class="o">[</span>...]
/dev/sdb1       3.6T  1.9T  1.8T  52% /mnt/hdd0
</code></pre></div></div>

<h2 id="instructions">Instructions</h2>

<p>Start by checking the amount of reserved block count you have on the disk:</p>

<div class="language-plaintext highlighter-rouge"><div class="highlight"><pre class="highlight"><code># tune2fs -l /dev/sdb1  | grep 'reserved block count'

Reserved block count:     48837696
</code></pre></div></div>

<p>If you don’t know what your device names is you can list them with the command <code class="language-plaintext highlighter-rouge">fdisk -l</code> as a privileged user. In my case the device name was <code class="language-plaintext highlighter-rouge">sdb1</code>.</p>

<p>To change the value we are going to use the tool <code class="language-plaintext highlighter-rouge">tune2fs</code>. In this example I changed the value to <code class="language-plaintext highlighter-rouge">0</code> (zero)  with the flag <code class="language-plaintext highlighter-rouge">-m0</code>:</p>

<div class="language-plaintext highlighter-rouge"><div class="highlight"><pre class="highlight"><code># tune2fs -m0  /dev/sdb1

tune2fs 1.45.5 (07-Jan-2020
Setting reserved blocks percentage to 0% (0 blocks)
</code></pre></div></div>

<p>You can then double check to see if it worked:</p>

<div class="language-plaintext highlighter-rouge"><div class="highlight"><pre class="highlight"><code># tune2fs -l /dev/sdb1  | grep 'reserved block count'

Reserved block count:     0
</code></pre></div></div>]]></content><author><name></name></author><category term="[&quot;Tips &amp; Trix&quot;]" /><category term="Ext-filesystem" /><category term="Filesystem" /><category term="File management" /><summary type="html"><![CDATA[By default the Extended-filesystem, more known as Ext2/4, reserves 5% of the filesystem blocks on the filesystem for privileged processes. It’s done to avoid filesystem fragmentation and to allow system daemons to continue to function correctly after non-privileged processes are prevented from writing to the filesystem due to a full filesystem.]]></summary></entry><entry><title type="html">How to prevent NeoMutt from making line breaks in Neovim when you compose a message</title><link href="https://hunden.linuxkompis.se/2020/05/26/how-to-prevent-neomutt-from-making-line-breaks-in-neovim-when-you-compose-a-message.html" rel="alternate" type="text/html" title="How to prevent NeoMutt from making line breaks in Neovim when you compose a message" /><published>2020-05-26T00:00:00+02:00</published><updated>2024-02-16T19:42:13+01:00</updated><id>https://hunden.linuxkompis.se/2020/05/26/how-to-prevent-neomutt-from-making-line-breaks-in-neovim-when-you-compose-a-message</id><content type="html" xml:base="https://hunden.linuxkompis.se/2020/05/26/how-to-prevent-neomutt-from-making-line-breaks-in-neovim-when-you-compose-a-message.html"><![CDATA[<p>When I compose a message in my e-mail client NeoMutt my editor Neovim inserts automatic line breaks after about 73 characters. I don’t like it at all.</p>

<p>Thankfully you can easily fix this by adding a few parameters to the <code class="language-plaintext highlighter-rouge">$EDITOR</code> for your NeoMutt configuration file:</p>

<div class="language-bash highlighter-rouge"><div class="highlight"><pre class="highlight"><code><span class="nb">set </span><span class="nv">editor</span><span class="o">=</span><span class="s2">"vim +':set textwidth=0' +':set wrapmargin=0' +':set wrap'"</span>
</code></pre></div></div>

<p>This should work fine with Mutt and Vim as well.</p>]]></content><author><name></name></author><category term="[&quot;Tips &amp; Trix&quot;]" /><category term="Neovim" /><category term="Vim" /><category term="NeoMutt" /><category term="Mutt" /><summary type="html"><![CDATA[When I compose a message in my e-mail client NeoMutt my editor Neovim inserts automatic line breaks after about 73 characters. I don’t like it at all.]]></summary></entry><entry><title type="html">Why I like Gentoo</title><link href="https://hunden.linuxkompis.se/2020/05/25/why-i-like-gentoo.html" rel="alternate" type="text/html" title="Why I like Gentoo" /><published>2020-05-25T00:00:00+02:00</published><updated>2024-02-16T19:42:13+01:00</updated><id>https://hunden.linuxkompis.se/2020/05/25/why-i-like-gentoo</id><content type="html" xml:base="https://hunden.linuxkompis.se/2020/05/25/why-i-like-gentoo.html"><![CDATA[<hr />

<p><strong>Post updated:</strong></p>

<ul>
  <li>2021-02-15 — I added the section with the distribution kernel.</li>
  <li>2021-05-23 — Hopefully less worse use of the English language.</li>
</ul>

<hr />

<p>One of the many reasons why I like Gentoo, is the fact that it makes my computer fun to use again. It’s partly because Gentoo provide the tools to build an operating system that’s tailored for just me. Unlike most other mainstream Linux based operating systems, you’re not limited to what they see fit for you.</p>

<p>I also like the friendly and helpful community surrounding Gentoo. Even though Gentoo is considered to be one of the more advanced operating systems, the community (including those who work with Gentoo) is still friendly and helpful towards everyone, including newcomers who might not even be that experienced with any Linux based operating system to begin with.</p>

<p>There’s no elitism at all in the land of Gentoo, and you don’t get any “Internet karma” by the community for using some weird piece of software by some obscure project. Perhaps most importantly, you won’t get bashed on for choosing to install the ‘wrong’ init-system or any ‘mainstream’ or ‘uncool’ piece of software that’s ‘too easy’ to use. As a long time user of other Linux based operating systems this was a fresh breath of air for me.</p>

<p>If you want to  read about Gentoo’s philosophy in their own words, I can highly recommend reading the article “<a href="https://www.gentoo.org/get-started/philosophy/">the philosophy of Gentoo</a>” by the creator Daniel Robbins.</p>

<h2 id="rolling-release-yet-stable">Rolling release yet stable</h2>

<p>With Gentoo, you get what I call a semi-rolling release model. When it comes to the default kernel, they always use the long-term support (LTS) kernel, and when it comes to other software they’re in no hurry to rush out any bleeding edge software to the stable repository.</p>

<p>Unlike most other Linux based operating systems and their binary package managers (pun intended), there’s not just two modes; “stable” and “YOLO”. With Gentoo you can of course unmask every single testing package, if you would like to ‘yolo it’, but perhaps a bit more safe approach would be to unmask a single package. If you would like to try a new testing version of your favourite text editor, you can do so by unmasking just that single package.</p>

<p>Gentoo doesn’t rely on various repositories to separate stable and untested packages from each other, they instead use something called <a href="https://devmanual.gentoo.org/keywording/index.html">keywords</a>. There’s two keywords for every architecture:</p>

<table>
  <tbody>
    <tr>
      <td><code class="language-plaintext highlighter-rouge">arch</code> (Example: <code class="language-plaintext highlighter-rouge">amd64</code>, <code class="language-plaintext highlighter-rouge">x86</code>, <code class="language-plaintext highlighter-rouge">ppc-macos</code>)</td>
      <td>Both the package version and the ebuild are widely tested, known to work and not have any serious issues on the indicated platform.</td>
    </tr>
    <tr>
      <td><code class="language-plaintext highlighter-rouge">~arch</code> (Example: <code class="language-plaintext highlighter-rouge">~amd64</code>, <code class="language-plaintext highlighter-rouge">~x86</code>, <code class="language-plaintext highlighter-rouge">~ppc-macos</code>)</td>
      <td>The package version and the ebuild are believed to work and do not have any known serious bugs, but more testing is required before the package version is considered suitable for arch.</td>
    </tr>
  </tbody>
</table>

<p>You can add keywords for a specific package (or a whole category), a specific versions of a package and all versions of a package up to or after a specific version. And yes, Gentoo categories every package into different <a href="https://packages.gentoo.org/categories">categories</a>. This makes it easier to find packages and it also means that packages can have the same name without it being confusing.</p>

<h2 id="the-package-management-system">The package management system</h2>

<p>Compiling your packages from source with settings and optimizations specifically tuned for your hardware can sometimes give you a significant performance boost, but with today’s hardware that is for most not something noticeable. The real benefit with compiling your own software is that you gain a greater control over the software you use. It means that you can customize both the compiler itself and the target-application options to better fit you and your system. If you don’t want and/or use a feature with a certain piece of software, why should you then have to include it with the package in the first place?</p>

<p>Modifying your packages isn’t as literal as with <a href="https://crux.nu">CRUX</a>. Gentoo uses something called <a href="https://devmanual.gentoo.org/general-concepts/use-flags/index.html">USE-flags</a>, which let’s you easily enable and disable specific features for software, both on a global and on a per-package level.</p>

<p>An example would be the USE-flag <code class="language-plaintext highlighter-rouge">perl</code>, which adds support for the programming language Perl for certain packages. My favourite terminal emulator called URxvt, comes with support for plugins via Perl, and If I want support for Perl in URxvt, I can simply install the package <code class="language-plaintext highlighter-rouge">x11-terms/rxvt-unicode</code> with the USE-flag <code class="language-plaintext highlighter-rouge">perl</code> enabled, but I don’t want to use Perl I can simply add the flag <code class="language-plaintext highlighter-rouge">-perl</code> to completely disable support for Perl, and avoid any unnecessary features in the software itself and the installation of any extra packages.</p>

<p>Another thing that I like with Gentoo is the fact that it’s easy to both set up <a href="https://wiki.gentoo.org/wiki/Custom_ebuild_repository">your own local repository</a> and <a href="https://wiki.gentoo.org/wiki/Basic_guide_to_write_Gentoo_Ebuilds">create your own ebuilds</a>. An ebuild is a text file with Bash syntax that instructs the package manager on how to compile any piece of software. This means that I’m not reliant on the package maintainers to include and keep any package up to date. I can simply do it myself, without much effort.</p>

<h3 id="distribution-kernel">Distribution kernel</h3>

<p>The <a href="https://wiki.gentoo.org/wiki/Project:Distribution_Kernel">Distribution Kernel project</a> aims to maintain <code class="language-plaintext highlighter-rouge">sys-kernel/*-kernel</code> packages. These kernel packages have three goals:</p>

<ol>
  <li>Covering kernel maintenance wholly within packages (install via emerge, upgrade as part of @world upgrade), without requiring additional actions from the user or resorting to non-portable hacks.</li>
  <li>Providing a default configuration that works for most of diverse systems, for users who are not interested in configuring their own kernel from scratch.</li>
  <li>Supporting different bootloaders and /boot layouts (LILO, GRUB, systemd-boot, EFI stub…) with minimal effort, including deploying self-built kernel binary packages over a fleet of heterogeneous systems.</li>
</ol>

<p>The modern versions of Distribution Kernels support two mechanisms for changing the kernel configuration: <code class="language-plaintext highlighter-rouge">savedconfig</code> and <code class="language-plaintext highlighter-rouge">/etc/kernel/config.d directory</code>. Savedconfig replaces the entire default config with an administrator-supplied config file, so it is probably a better choice for those desiring to build an entirely custom kernel. When using <code class="language-plaintext highlighter-rouge">/etc/kernel/config.d</code>, the configuration files are merged on top of the default configuration file, so it is more convenient for use-cases that change some specific options.</p>

<h3 id="a-small-note-about-installing-packages-in-gentoo">A small note about installing packages in Gentoo</h3>

<p>I let a friend read this draft before publishing it, and it turns out that he had totally misunderstood how you install packages in Gentoo. He thought it was rather complicated, that you needed to use <code class="language-plaintext highlighter-rouge">make</code>, that you needed to know where to install files and all that, but it’s actually just as easy as installing any package in any other Linux based operating system:</p>

<div class="language-plaintext highlighter-rouge"><div class="highlight"><pre class="highlight"><code># emerge &lt;package&gt;
</code></pre></div></div>

<p>That’s it.</p>

<p>And no, installing packages doesn’t require a weekend in the freezer. Most packages doesn’t take that long at all, I would say that most packages takes about 1-5 minutes for me on my <em>decade old</em> computer running an Intel i5-2500k CPU.</p>

<p>Here’s a few examples of some of the common packages that I have (sorted in order by time):</p>

<table>
  <thead>
    <tr>
      <th>Package</th>
      <th>Average compile time</th>
    </tr>
  </thead>
  <tbody>
    <tr>
      <td>media-gfx/inkscape</td>
      <td>13 m 48 s</td>
    </tr>
    <tr>
      <td>sys-kernel/gentoo-kernel</td>
      <td>11 m</td>
    </tr>
    <tr>
      <td>media-gfx/gimp</td>
      <td>7 m 11 s</td>
    </tr>
    <tr>
      <td>x11-libs/gtk+</td>
      <td>3 m 31 s</td>
    </tr>
    <tr>
      <td>x11-terms/rxvt-unicode</td>
      <td>34 s</td>
    </tr>
    <tr>
      <td>mail-client/neomutt</td>
      <td>25 s</td>
    </tr>
  </tbody>
</table>

<p>There is some exceptions here though, like <code class="language-plaintext highlighter-rouge">dev-qt/qtwebengine</code> and <code class="language-plaintext highlighter-rouge">app-office/libreoffice</code>. For me, QtWebEngine takes about 4 hours (!) to install.</p>

<h2 id="a-better-init">A better init</h2>

<p>When the previous operating system I was using switched over to systemd, I experienced a noticeable downgrade in terms of stability, as well as a slight downgrade in usability. The two things that annoyed me the most wasn’t the stability issues, it was the binary logs and the fact that when I booted and shut down the operating system, I would always have to wait 90 seconds (!) for some issues with a service that was not working as intended.</p>

<p>I used systemd for several years—I really tried to like it for what it was—but I eventually gave up it. There was always some issue with it, and it did kill the fun in using computers for a while. It also didn’t help that they had (and still have) a weird approach to software design, it’s what I would call an anti-UNIX philosophy. They also notorious for making somewhat controversial moves, but let’s not get too deep into the whole systemd controversy.</p>

<p>Gentoo supports multiple init-systems like OpenRC, Runit, s6 + s6-rc, sysvinit and even systemd. The default init is OpenRC, but there’s nothing stopping you from choosing any other alternative. And unlike most other Linux based operating systems, that perhaps ‘technically’ supports one alternative init, they won’t punish you for choosing a path that doesn’t align with their narrow views.</p>

<p>I myself uses OpenRC, as it’s what I’m used to as a pre-systemd user. I’ve been using Gentoo for years now, and I have so far never had any real issues with OpenRC. It’s robust, familiar and easy to use, just the way I prefer it to be.</p>

<h2 id="the-documentation">The documentation</h2>

<p>The documentation for Gentoo is superb! The Gentoo wiki is regarded as one of the best documented wiki. The first time I tried Gentoo was back in 2010. At that time, I had only been using Linux based operating systems for about 4 years, and I was still a beginner at it, but I still managed to install Gentoo all by myself, thanks to the documentation on the Gentoo wiki.</p>

<h2 id="the-downsides">The downsides</h2>

<p>The downsides with Gentoo can be the fact that you have to compile pretty much all software by yourself[1]. If you have a really slow computer, it can take some time to compile some packages, but as long as you do some planning you’ll be fine. And by planning, we’re talking about installing LibreOffice from source on a laptop computer the day before class, and not five minutes before class.</p>

<ol>
  <li>Gentoo does provide some binary packages for some of the heavier packages like <code class="language-plaintext highlighter-rouge">app-officelibreoffice-bin</code> and <code class="language-plaintext highlighter-rouge">dev-lang/rust-bin</code>.</li>
</ol>

<p>Well. That’s all! I hope you liked reading my thoughts about Gentoo and that it perhaps even got you interested in trying it out for yourself.</p>]]></content><author><name></name></author><category term="[&quot;Personal&quot;]" /><category term="Gentoo" /><category term="Linux" /><category term="Highlights" /><summary type="html"><![CDATA[]]></summary></entry><entry><title type="html">I made a Gentoo decal for my computer case</title><link href="https://hunden.linuxkompis.se/2020/03/27/i-made-a-gentoo-decal-for-my-computer-case.html" rel="alternate" type="text/html" title="I made a Gentoo decal for my computer case" /><published>2020-03-27T00:00:00+01:00</published><updated>2024-02-16T19:42:13+01:00</updated><id>https://hunden.linuxkompis.se/2020/03/27/i-made-a-gentoo-decal-for-my-computer-case</id><content type="html" xml:base="https://hunden.linuxkompis.se/2020/03/27/i-made-a-gentoo-decal-for-my-computer-case.html"><![CDATA[<p>I made this Gentoo vinyl decal at work the this week. It’s about 17x13 cm in size and it’s about as small as I dared to make it considering the thin line in the logo.</p>

<p><a href="/img/gentoo-computer-decal.jpg"><img src="/img/t/gentoo-computer-decal.jpg" alt="" /></a></p>]]></content><author><name></name></author><category term="[&quot;Personal&quot;]" /><category term="Gentoo" /><category term="DIY" /><category term="Hund" /><category term="Hardware" /><summary type="html"><![CDATA[I made this Gentoo vinyl decal at work the this week. It’s about 17x13 cm in size and it’s about as small as I dared to make it considering the thin line in the logo.]]></summary></entry><entry><title type="html">My Gentoo Linux wallpaper</title><link href="https://hunden.linuxkompis.se/2020/02/27/gentoo-linux-wallpaper.html" rel="alternate" type="text/html" title="My Gentoo Linux wallpaper" /><published>2020-02-27T00:00:00+01:00</published><updated>2024-02-16T19:42:13+01:00</updated><id>https://hunden.linuxkompis.se/2020/02/27/gentoo-linux-wallpaper</id><content type="html" xml:base="https://hunden.linuxkompis.se/2020/02/27/gentoo-linux-wallpaper.html"><![CDATA[<p>I had troubles with finding a high resolution and clean wallpaper with Gentoo, so I decided to try to make my own wallpaper.</p>

<p><a href="https://cloud.operationtulip.com/s/CkFWs2LCCr8aAcd"><img src="/img/t/gentoo_linux_wallpaper.jpg" alt="" /></a></p>

<p>The wallpaper is available in the following three sizes:</p>

<ul>
  <li>1920 x 1080 px</li>
  <li>3840 x 2160 px</li>
  <li>7680 x 4320 px</li>
</ul>

<p>The pictures are available on Nextcloud here: <a href="https://cloud.operationtulip.com/s/Z7FmBzFdnaQWC8e">https://cloud.operationtulip.com/s/Z7FmBzFdnaQWC8e</a>.</p>

<p>If you want it in any other size, the sources along with instructions is available there as well. If you need any help or just want me to make it for you, just ask.</p>]]></content><author><name></name></author><category term="[&quot;Artwork &amp; Themeing&quot;]" /><category term="Gentoo" /><category term="Linux" /><category term="Wallpapers" /><category term="Hund" /><summary type="html"><![CDATA[I had troubles with finding a high resolution and clean wallpaper with Gentoo, so I decided to try to make my own wallpaper.]]></summary></entry><entry><title type="html">My blog has a new home and a new address</title><link href="https://hunden.linuxkompis.se/2020/01/29/my-blog-have-a-new-home-and-a-new-address.html" rel="alternate" type="text/html" title="My blog has a new home and a new address" /><published>2020-01-29T00:00:00+01:00</published><updated>2024-02-16T19:42:13+01:00</updated><id>https://hunden.linuxkompis.se/2020/01/29/my-blog-have-a-new-home-and-a-new-address</id><content type="html" xml:base="https://hunden.linuxkompis.se/2020/01/29/my-blog-have-a-new-home-and-a-new-address.html"><![CDATA[<p>Hello and welcome to my new home! You’re probably wondering about the new domain hunden.linuxkompis<strong>.se</strong>? Well. Just keep calm—nothing is happening to my little blog—there’s not going to be any Swedish content here. I do have a Swedish blog though, but that’s over at <a href="https://hund.linuxkompis.se">hund.linuxkompis.se</a>.</p>

<p>What is <a href="https://linuxkompis.se/">Linuxkompis</a> anyway? It’s a Swedish project that me and a few friends are working on. If you happen to speak Swedish, like Linux and open source software I would highly recommend you checking it out!</p>

<p>Since I’m now hosting this website myself I also needed a proper domain for it. I thought about buying a new domain, but all the good ones are already taken and I wasn’t super thrilled about spending money on another domain. So.. Why not make use of one that I already have?</p>

<p>The name “hunden” is a Swedish word and it translates to “the dog”. “Hund” means dog in Swedish (and Norwegian, Danish and Germany). The name “Hunden” is also a bad pun of the two words “Hund” and “En[glish]”.</p>

<p>Why not just <a href="https://hund.linuxkompis.se/">hund.linuxkompis.se</a>? Because that’s where I have my Swedish blog. It looks just like this website, but it’s in Swedish and a lot older than this blog.</p>]]></content><author><name></name></author><category term="[&quot;Personal&quot;]" /><summary type="html"><![CDATA[Hello and welcome to my new home! You’re probably wondering about the new domain hunden.linuxkompis.se? Well. Just keep calm—nothing is happening to my little blog—there’s not going to be any Swedish content here. I do have a Swedish blog though, but that’s over at hund.linuxkompis.se.]]></summary></entry><entry><title type="html">My simple plain text journal</title><link href="https://hunden.linuxkompis.se/2019/12/19/my-simple-plain-text-journal.html" rel="alternate" type="text/html" title="My simple plain text journal" /><published>2019-12-19T00:00:00+01:00</published><updated>2024-02-16T19:42:13+01:00</updated><id>https://hunden.linuxkompis.se/2019/12/19/my-simple-plain-text-journal</id><content type="html" xml:base="https://hunden.linuxkompis.se/2019/12/19/my-simple-plain-text-journal.html"><![CDATA[<p>I like keeping a personal journal of what I do in life, it can be anything from every day stuff that I want future me to remember to various thoughts about anything.</p>

<p>The idea with my journal is that I want it to be quick and simple, even though I initially thought about other options like Jekyll and flat file-databases with one entry per file and so on. In the end I decided I don’t want to overdo it—I want to keep it as simple as possible—otherwise I would have probably not bothered with keeping a journal if it would take too much time doing it.</p>

<p>I decided that the best way was to use a single plain text file with Markdown formatting and then using my editor to input the text. As for the formatting, I tried a few different ways of formatting my entries before I settled with this style:</p>

<div class="language-plaintext highlighter-rouge"><div class="highlight"><pre class="highlight"><code># 2019

## December

### 18 - Wednesday
Example entry.

### 19 - Thursday
Example entry.
</code></pre></div></div>

<p>If I for some reason ever want to convert it to something else, like HTML code or a PDF-document it would then look like this:</p>

<blockquote>
  <h1 id="2019">2019</h1>

  <h2 id="december">December</h2>

  <h3 id="18---wednesday">18 - Wednesday</h3>
  <p>Example entry.</p>

  <h3 id="19---thursday">19 - Thursday</h3>
  <p>Example entry.</p>
</blockquote>

<p>I also <a href="https://hund0b1.gitlab.io/2019/04/15/getting-started-with-folding-in-vim.html">fold</a> every month in Vim to keep it visually compact. Do you keep a journal of some sort? What applications are you using and how are you doing it? It would be fun hearing how other people are doing it. :)</p>]]></content><author><name></name></author><category term="[&quot;Productivity&quot;]" /><category term="Journaling" /><category term="Markdown" /><category term="Plaintext" /><category term="Hund" /><category term="Producitivy" /><category term="Minimalism" /><summary type="html"><![CDATA[I like keeping a personal journal of what I do in life, it can be anything from every day stuff that I want future me to remember to various thoughts about anything.]]></summary></entry><entry><title type="html">How to fix the TrueType font rendering</title><link href="https://hunden.linuxkompis.se/2019/12/18/how-to-fix-the-truetype-font-rendering.html" rel="alternate" type="text/html" title="How to fix the TrueType font rendering" /><published>2019-12-18T00:00:00+01:00</published><updated>2024-02-16T19:42:13+01:00</updated><id>https://hunden.linuxkompis.se/2019/12/18/how-to-fix-the-truetype-font-rendering</id><content type="html" xml:base="https://hunden.linuxkompis.se/2019/12/18/how-to-fix-the-truetype-font-rendering.html"><![CDATA[<p>I was cleaning up my configuration for ZSH the other day—which is probably a story for another time—it lead me to ‘break’ the font rendering by reverting it back to the defaults, which is if you ask me broken and hideous.</p>

<div class="grid-container">
    <!-- IMAGE #1 -->
    <div class="grid-item">
        <a href="/img/font-rendering-gentoo.png">
            <img src="/img/t/font-rendering-gentoo.png" alt="" />
            <figcaption>Bad versus good font rendering</figcaption>
        </a>
    </div>
</div>
<!-- grid-container-->

<p>The mistake I did was to remove this line from my <code class="language-plaintext highlighter-rouge">~/.zshrc</code>:</p>

<div class="language-bash highlighter-rouge"><div class="highlight"><pre class="highlight"><code><span class="nb">export </span><span class="nv">FREETYPE_PROPERTIES</span><span class="o">=</span><span class="s2">"truetype:interpreter-version=35"</span>
</code></pre></div></div>

<p>It’s an option that I added years ago and I didn’t even remember what it did. When I cleaned my configuration for ZSH I decided to uncomment everything that I wasn’t sure if I needed or not. I thought that if it’s something important I will notice it eventually. Which I did, but not in the way I intended.. It took me a couple of days before figuring out what broke the font rendering and this was it.</p>

<h2 id="what-does-it-even-do">What does it even do?</h2>

<p>A couple of years ago, FreeType <a href="https://www.freetype.org/freetype2/docs/subpixel-hinting.html">decided to change the default rendering</a> for the fonts, to something way more ugly if you ask me. They call it the “v40 TrueType” and I don’t like it at all. I prefer the older v35 method and the export enables this by default.</p>]]></content><author><name></name></author><category term="[&quot;Tips &amp; Trix&quot;]" /><category term="Gentoo" /><category term="TrueType" /><category term="Fonts" /><summary type="html"><![CDATA[I was cleaning up my configuration for ZSH the other day—which is probably a story for another time—it lead me to ‘break’ the font rendering by reverting it back to the defaults, which is if you ask me broken and hideous.]]></summary></entry><entry><title type="html">How to use colordiff with etc-update in Gentoo</title><link href="https://hunden.linuxkompis.se/2019/12/02/how-to-use-colordiff-with-etc-update-in-gentoo.html" rel="alternate" type="text/html" title="How to use colordiff with etc-update in Gentoo" /><published>2019-12-02T00:00:00+01:00</published><updated>2024-02-16T19:42:13+01:00</updated><id>https://hunden.linuxkompis.se/2019/12/02/how-to-use-colordiff-with-etc-update-in-gentoo</id><content type="html" xml:base="https://hunden.linuxkompis.se/2019/12/02/how-to-use-colordiff-with-etc-update-in-gentoo.html"><![CDATA[<p>If you’re using Gentoo you’re probably annoyed with how hard it is to find the relevant part of the <code class="language-plaintext highlighter-rouge">diff</code>-output from <code class="language-plaintext highlighter-rouge">etc-update</code>.</p>

<p>This is how the default output looks like:</p>

<p><a href="/img/etc-update-diff.png"><img src="/img/etc-update-diff.png" alt="/img/etc-update-diff.png" /></a></p>

<p>And this is what it can look like if you replace <code class="language-plaintext highlighter-rouge">diff</code> with <code class="language-plaintext highlighter-rouge">colordiff</code>:</p>

<p><a href="/img/etc-update-colordiff.png"><img src="/img/etc-update-colordiff.png" alt="/img/etc-update-colordiff.png" /></a></p>

<p>First make sure that you have the package <code class="language-plaintext highlighter-rouge">app-misc/colordiff</code> installed and then replace the following line in the file <code class="language-plaintext highlighter-rouge">/etc/etc-update.conf</code>:</p>

<div class="language-plaintext highlighter-rouge"><div class="highlight"><pre class="highlight"><code>diff_command="diff -uN %file1 %file2"
</code></pre></div></div>

<p>With this line:</p>

<div class="language-plaintext highlighter-rouge"><div class="highlight"><pre class="highlight"><code>diff_command="colordiff -uN %file1 %file2"
</code></pre></div></div>

<p>And you’re done.</p>]]></content><author><name></name></author><category term="[&quot;Tips &amp; Trix&quot;]" /><category term="Gentoo" /><category term="diff" /><category term="colordiff" /><summary type="html"><![CDATA[If you’re using Gentoo you’re probably annoyed with how hard it is to find the relevant part of the diff-output from etc-update.]]></summary></entry><entry><title type="html">How I got started with WireGuard in Gentoo</title><link href="https://hunden.linuxkompis.se/2019/11/20/how-i-got-started-with-wireguard-in-gentoo-linux.html" rel="alternate" type="text/html" title="How I got started with WireGuard in Gentoo" /><published>2019-11-20T00:00:00+01:00</published><updated>2024-02-16T19:42:13+01:00</updated><id>https://hunden.linuxkompis.se/2019/11/20/how-i-got-started-with-wireguard-in-gentoo-linux</id><content type="html" xml:base="https://hunden.linuxkompis.se/2019/11/20/how-i-got-started-with-wireguard-in-gentoo-linux.html"><![CDATA[<p>My VPN-provider Integrity VPN recently <a href="https://integrity.st/2019/11/15/wireguard-for-alla-bahnhofkunder/">rolled out their support</a> for <a href="https://www.wireguard.com/">WireGuard</a>. If you don’t know what it is, I highly recommend you checking out their website.</p>

<blockquote>
  <p>WireGuard® is an extremely simple yet fast and modern VPN that utilizes state-of-the-art cryptography. It aims to be faster, simpler, leaner, and more useful than IPsec, while avoiding the massive headache. It intends to be considerably more performant than OpenVPN. WireGuard is designed as a general purpose VPN for running on embedded interfaces and super computers alike, fit for many different circumstances.</p>
</blockquote>

<p>For me this was happy news! I have been using OpenVPN for years now and while it’s okay, it’s far from perfect. I have spent countless of hours trying to get it to work the way I want it to and sometimes just to make it work at all. And let’s not get into the performance issues.. Pushing my 100 Mbit Internet connection through OpenVPN uses a lot of processing power.</p>

<p><strong>I haven’t used Wireguard for that long, but so far I’m pleased with how easy it was to set up and how well it has performed</strong>. I’m currently running it on both my desktop computer and my 4 year old Android phone, the trusty Nexus 5X. When I used OpenVPN on my phone it used so much battery that I instead avoided using the phone on networks that I didn’t trust rather than using OpenVPN due to how much battery it required.</p>

<p><strong>With Wireguard the battery impact is rather small on my phone</strong>. Even though I’m running the application in the userspace rather than the kernel module that’s not available for my version of Lineage OS.</p>

<p>Another thing that impressed we is that I no longer need my custom script for <code class="language-plaintext highlighter-rouge">pm-utils</code> to restart the VPN-connection every time I wake up my computer, with WireGuard it just works.</p>

<h2 id="installing-wireguard">Installing WireGuard</h2>

<p>The package for WireGuard is still marked as unstable and I needed to whitelist it it by adding the following line to the file <code class="language-plaintext highlighter-rouge">/etc/portage/package.accept_keywords</code>:</p>

<div class="language-plaintext highlighter-rouge"><div class="highlight"><pre class="highlight"><code>net-vpn/wireguard ~amd64
</code></pre></div></div>

<p>I then installed the package:</p>

<div class="language-plaintext highlighter-rouge"><div class="highlight"><pre class="highlight"><code># emerge -av net-vpn/wireguard
</code></pre></div></div>

<p>WireGuard isn’t in the kernel sources yet, so I then had to rebuilt the module myself:</p>

<div class="language-plaintext highlighter-rouge"><div class="highlight"><pre class="highlight"><code># emerge -av @module-rebuild
</code></pre></div></div>

<p>I also want the module to load when my system starts, so I added the following line in the file <code class="language-plaintext highlighter-rouge">/etc/conf.d/modules</code>:</p>

<div class="language-plaintext highlighter-rouge"><div class="highlight"><pre class="highlight"><code>modules="wireguard"
</code></pre></div></div>

<p>I then needed to make sure that the modules-service is set to run in the boot runlevel:</p>

<div class="language-plaintext highlighter-rouge"><div class="highlight"><pre class="highlight"><code># rc-update add modules boot
</code></pre></div></div>

<h2 id="configuring-wireguard">Configuring WireGuard</h2>

<p>All I had to do was to download a premade configuration file from my VPN-provider. It was named <code class="language-plaintext highlighter-rouge">integrity_vpn.conf</code> and it looked like this:</p>

<div class="language-plaintext highlighter-rouge"><div class="highlight"><pre class="highlight"><code>[Interface]
PrivateKey = &lt;Key&gt;

Address = &lt;IPv6 and IPv4 adresses&gt;
DNS = &lt;IPv6 and IPv4 adresses&gt;

[Peer]
PublicKey = &lt;Key&gt;
Endpoint = &lt;Adress&gt;
AllowedIPs = 0.0.0.0/0, ::/0
</code></pre></div></div>

<p>I copied the file to the folder <code class="language-plaintext highlighter-rouge">/etc/wireguard</code>:</p>

<div class="language-plaintext highlighter-rouge"><div class="highlight"><pre class="highlight"><code># cp integrity_vpn.conf /etc/wireguard
</code></pre></div></div>

<p>And I also made sure to set strict permission for it:</p>

<div class="language-plaintext highlighter-rouge"><div class="highlight"><pre class="highlight"><code># chmod 600 /etc/wireguard/integrity_vpn.conf
</code></pre></div></div>

<p>And that’s it!</p>

<h2 id="using-wireguard">Using WireGuard</h2>

<p>I could now connect to my VPN-provider with the command:</p>

<div class="language-plaintext highlighter-rouge"><div class="highlight"><pre class="highlight"><code># wg-quick up integrity_vpn
</code></pre></div></div>

<p>And to disconnect:</p>

<div class="language-plaintext highlighter-rouge"><div class="highlight"><pre class="highlight"><code># wg-quick down integrity_vpn
</code></pre></div></div>

<p>To make it connect to my VPN-provider automatically at start I added the previous start command to the file <code class="language-plaintext highlighter-rouge">/etc/conf.d/local.start</code>.</p>]]></content><author><name></name></author><category term="[&quot;Applications &amp; Tools&quot;]" /><category term="Gentoo" /><category term="WireGuard" /><category term="VPN" /><category term="Networking" /><summary type="html"><![CDATA[My VPN-provider Integrity VPN recently rolled out their support for WireGuard. If you don’t know what it is, I highly recommend you checking out their website.]]></summary></entry><entry><title type="html">How to visually highlight long lines in Vim</title><link href="https://hunden.linuxkompis.se/2019/10/01/how-to-visually-highlight-long-lines-in-vim.html" rel="alternate" type="text/html" title="How to visually highlight long lines in Vim" /><published>2019-10-01T00:00:00+02:00</published><updated>2024-02-16T19:42:13+01:00</updated><id>https://hunden.linuxkompis.se/2019/10/01/how-to-visually-highlight-long-lines-in-vim</id><content type="html" xml:base="https://hunden.linuxkompis.se/2019/10/01/how-to-visually-highlight-long-lines-in-vim.html"><![CDATA[<p>I couldn’t find this documented somewhere and I had to do some reading before figuring it out myself, so I might as well document it here. What I’m talking about is the feature in Vim that let’s you visually highlight long lines.</p>

<p><a href="/img/vim_colorcolumn.png"><img src="/img/t/vim_colorcolumn.png" alt="" /></a></p>

<p>You can manually enable it with the command <code class="language-plaintext highlighter-rouge">:set colorcolumn=&lt;Value&gt;</code> and it will work for that session. But manually enabling it or statically enabling it wasn’t any options either, I only wanted to enable it for Bash- and Python-files and after some reading I figured it out:</p>

<div class="language-vim highlighter-rouge"><div class="highlight"><pre class="highlight"><code><span class="k">au</span> <span class="nb">BufWinEnter</span> *<span class="p">.</span><span class="k">sh</span><span class="p">,</span>*<span class="p">.</span><span class="k">py</span> <span class="k">set</span> <span class="nb">colorcolumn</span><span class="p">=</span><span class="m">80</span>
</code></pre></div></div>]]></content><author><name></name></author><category term="[&quot;Tips &amp; Trix&quot;]" /><category term="Vim" /><summary type="html"><![CDATA[I couldn’t find this documented somewhere and I had to do some reading before figuring it out myself, so I might as well document it here. What I’m talking about is the feature in Vim that let’s you visually highlight long lines.]]></summary></entry><entry><title type="html">How to select the right soundcard using ALSA</title><link href="https://hunden.linuxkompis.se/2019/09/30/how-to-select-the-right-soundcard-using-alsa.html" rel="alternate" type="text/html" title="How to select the right soundcard using ALSA" /><published>2019-09-30T00:00:00+02:00</published><updated>2024-02-16T19:42:13+01:00</updated><id>https://hunden.linuxkompis.se/2019/09/30/how-to-select-the-right-soundcard-using-alsa</id><content type="html" xml:base="https://hunden.linuxkompis.se/2019/09/30/how-to-select-the-right-soundcard-using-alsa.html"><![CDATA[<p>I installed Gentoo on my old media computer a few weeks ago. I use the computer with an internal soundcard called <a href=",https://www.asus.com/Sound-Cards/Xonar_DX/">Asus Xonar DX</a> a card that has always worked well and out of the box with Linux.</p>

<p>The only issue I ever encountered in regards to using an internal sound card was with ALSA getting confused and not knowing which card to use. For some reason it always chooses the PC-speaker.</p>

<p>To work around that issue with Arch Linux (which was what I used before Gentoo) I just blacklisted the kernel module <code class="language-plaintext highlighter-rouge">pcspkr</code> with the command <code class="language-plaintext highlighter-rouge"># rmmod pcspkr</code> and then made it permanent:</p>

<div class="language-plaintext highlighter-rouge"><div class="highlight"><pre class="highlight"><code># echo "blacklist pcspkr" &gt; /etc/modprobe.d/nobeep.conf
</code></pre></div></div>

<p>With Gentoo that didn’t work[1], so I had to tell ALSA which card I wanted it to use. To do so I needed to figure out the name of my card, which you can do with the command <code class="language-plaintext highlighter-rouge">aplay -L</code>:</p>

<div class="language-bash highlighter-rouge"><div class="highlight"><pre class="highlight"><code><span class="nv">$ </span>aplay <span class="nt">-L</span>
null
    Discard all samples <span class="o">(</span>playback<span class="o">)</span> or generate zero samples <span class="o">(</span>capture<span class="o">)</span>
default:CARD<span class="o">=</span>DX
    Xonar DX, Multichannel
    Default Audio Device
<span class="o">[</span>...]
front:CARD<span class="o">=</span>DX,DEV<span class="o">=</span>0
    Xonar DX, Multichannel
    Front speakers
<span class="o">[</span>...]
front:CARD<span class="o">=</span>pcsp,DEV<span class="o">=</span>0
    pcsp, pcsp
    Front speakers
</code></pre></div></div>

<ol>
  <li>I later learned that there’s a second module for the PC-speaker called <code class="language-plaintext highlighter-rouge">snd_pcsp</code>. It could have worked to just disabled that as well.</li>
</ol>

<p>As you can see, my soundcard is called <code class="language-plaintext highlighter-rouge">DX</code> and the device number is <code class="language-plaintext highlighter-rouge">0</code>:</p>

<div class="language-plaintext highlighter-rouge"><div class="highlight"><pre class="highlight"><code>front:CARD=DX,DEV=0
</code></pre></div></div>

<p>With that I then created the file <code class="language-plaintext highlighter-rouge">~/.asoundrc</code> and added this content to it:</p>

<div class="language-plaintext highlighter-rouge"><div class="highlight"><pre class="highlight"><code>defaults.pcm.!card DX
defaults.pcm.!device 0
defaults.pcm.!ctl DX
</code></pre></div></div>
<p>I then continued to reboot my computer and it all worked just fine after that.</p>

<p>If you want to make these changes for all users on your computer, just add the content to the file <code class="language-plaintext highlighter-rouge">/etc/asound.conf</code> instead.</p>

<p><span class="right">Source: <a href="https://wiki.gentoo.org/wiki/ALSA#Configuration">ALSA - Gentoo Wiki</a></span></p>]]></content><author><name></name></author><category term="[&quot;Tips &amp; Trix&quot;]" /><category term="ALSA" /><category term="Audio" /><summary type="html"><![CDATA[I installed Gentoo on my old media computer a few weeks ago. I use the computer with an internal soundcard called Asus Xonar DX a card that has always worked well and out of the box with Linux.]]></summary></entry><entry><title type="html">Copy files with rsync for a better overview</title><link href="https://hunden.linuxkompis.se/2019/09/28/copy-files-with-rsync-for-a-better-overview.html" rel="alternate" type="text/html" title="Copy files with rsync for a better overview" /><published>2019-09-28T00:00:00+02:00</published><updated>2024-02-16T19:42:13+01:00</updated><id>https://hunden.linuxkompis.se/2019/09/28/copy-files-with-rsync-for-a-better-overview</id><content type="html" xml:base="https://hunden.linuxkompis.se/2019/09/28/copy-files-with-rsync-for-a-better-overview.html"><![CDATA[<p>Copying larger files and/or larger amounts of files with the shell command <code class="language-plaintext highlighter-rouge">cp</code> can sometimes be a bit lacking. It doesn’t give you any feedback whatsoever, which is almost never an issue for your average small file, but when you copy perhaps several gigabytes of files you want to know if it’s going to take 10 minutes or 10 hours.</p>

<p>A way around this is to use rsync, the tool most people probably associate with making backups, but with the right flags it’s actually a really good verbose tool for simply copying files. Here’s an example when I copied a folder for a virtual machine:</p>

<div class="language-bash highlighter-rouge"><div class="highlight"><pre class="highlight"><code><span class="nv">$ </span>rsync <span class="nt">-ah</span> <span class="nt">--progress</span> VirtualBox/vhost-cloud-new /media/HDD0/
sending incremental file list
vhost-cloud-new/
vhost-cloud-new/vhost-cloud-new.vbox
          3.29K 100%    0.00kB/s    0:00:00 <span class="o">(</span>xfr#1, to-chk<span class="o">=</span>7/9<span class="o">)</span>
vhost-cloud-new/vhost-cloud-new.vbox-prev
          3.29K 100%    3.14MB/s    0:00:00 <span class="o">(</span>xfr#2, to-chk<span class="o">=</span>6/9<span class="o">)</span>
vhost-cloud-new/vhost-cloud.vdi
          3.43G  19%  111.59MB/s    0:02:00
</code></pre></div></div>

<p>As you can see rsync will show you the size of the file, the current progress, the current speed and the estimated time left for the file it’s currently copying:</p>

<div class="language-plaintext highlighter-rouge"><div class="highlight"><pre class="highlight"><code>3.43G  19%  111.59MB/s    0:02:00
</code></pre></div></div>

<h2 id="something-to-know-about-rsync-and-folders">Something to know about rsync and folders</h2>

<p>When you copy folders with rsync you need to make sure that you end the folder name with a forward slash (<code class="language-plaintext highlighter-rouge">folder/</code>) when you want to copy the content of the folder, and don’t end it with a forward slash (<code class="language-plaintext highlighter-rouge">folder</code>) when you want to copy the folder itself.</p>

<h3 id="example">Example</h3>

<p>This command will <strong>copy the folder</strong> to the destination:</p>

<div class="language-bash highlighter-rouge"><div class="highlight"><pre class="highlight"><code><span class="nv">$ </span>rsync <span class="nt">-ah</span> <span class="nt">--progress</span> VirtualBox/vhost-cloud-new /media/HDD0/
</code></pre></div></div>

<p>This command will <strong>copy the content</strong> of the folder to the destination:</p>

<div class="language-bash highlighter-rouge"><div class="highlight"><pre class="highlight"><code><span class="nv">$ </span>rsync <span class="nt">-ah</span> <span class="nt">--progress</span> VirtualBox/vhost-cloud-new/ /media/HDD0/
</code></pre></div></div>

<h2 id="explanation-of-the-flags">Explanation of the flags</h2>

<table>
  <tbody>
    <tr>
      <td>-a, –archive</td>
      <td>Archive mode; equals -rlptgoD (no -H,-A,-X).</td>
    </tr>
    <tr>
      <td>-r, –recursive</td>
      <td>Recurse into directories.</td>
    </tr>
    <tr>
      <td>-l, –links</td>
      <td>Copy symlinks as symlinks.</td>
    </tr>
    <tr>
      <td>-p, –perms</td>
      <td>Preserve permissions.</td>
    </tr>
    <tr>
      <td>-t, –times</td>
      <td>Preserve modification times.</td>
    </tr>
    <tr>
      <td>-g, –group</td>
      <td>Preserve group.</td>
    </tr>
    <tr>
      <td>-o, –owner</td>
      <td>Preserve owner (super-user only).</td>
    </tr>
    <tr>
      <td>-D</td>
      <td>same as --devices --specials;</td>
    </tr>
    <tr>
      <td>--devices</td>
      <td>Preserve device files (super-user only).</td>
    </tr>
    <tr>
      <td>--specials</td>
      <td>Preserve special files.</td>
    </tr>
  </tbody>
</table>

<h2 id="makings-things-easier-with-an-alias">Makings things easier with an alias</h2>

<p>It’s not that convenient to type <code class="language-plaintext highlighter-rouge">rsync -ah --progress &lt;source&gt; &lt;destination&gt;</code> every time, so I highly suggest you creating an alias for it. I made one that I named <code class="language-plaintext highlighter-rouge">cpr</code>.</p>

<p>Just add the snippet <code class="language-plaintext highlighter-rouge">alias cpr='rsync -ah --progress'</code> to either your <code class="language-plaintext highlighter-rouge">~/.bashrc</code> or what your configuration file might be, and then reload the configuration with the command <code class="language-plaintext highlighter-rouge">source ~/.bashrc</code>.</p>]]></content><author><name></name></author><category term="[&quot;Applications &amp; Tools&quot;]" /><category term="rsync" /><category term="File management" /><category term="Command-line" /><category term="Productivity" /><summary type="html"><![CDATA[Copying larger files and/or larger amounts of files with the shell command cp can sometimes be a bit lacking. It doesn’t give you any feedback whatsoever, which is almost never an issue for your average small file, but when you copy perhaps several gigabytes of files you want to know if it’s going to take 10 minutes or 10 hours.]]></summary></entry><entry><title type="html">This is my custom keyboard layout</title><link href="https://hunden.linuxkompis.se/2019/06/23/this-is-my-custom-keyboard-layout.html" rel="alternate" type="text/html" title="This is my custom keyboard layout" /><published>2019-06-23T00:00:00+02:00</published><updated>2024-02-16T19:42:13+01:00</updated><id>https://hunden.linuxkompis.se/2019/06/23/this-is-my-custom-keyboard-layout</id><content type="html" xml:base="https://hunden.linuxkompis.se/2019/06/23/this-is-my-custom-keyboard-layout.html"><![CDATA[<p>I have been meaning to make this post for some time now. A big reason for why I like custom built keyboards is being able to use the open source <a href="https://qmk.fm/">QMK firware</a>. It’s a firmware written in C and it let’s me customize the layout just the way I want it.</p>

<h2 id="layer-1---the-default-layer">Layer 1 - The default layer</h2>

<p>This is the default layer where I have all the keys you expect to find on a keyboard. I have blanked out the layout and only included the changes I have made to it.</p>

<p><a href="/img/kb_layer_1.png"><img src="/img/t/kb_layer_1.png" alt="" /></a></p>

<p>The orange button where you normally find <code class="language-plaintext highlighter-rouge">Caps Lock</code> is where I have a primary layer tap key. This means that when I tap that key it will functions as the <code class="language-plaintext highlighter-rouge">Escape</code>-key and when I tap and hold it will act as my <code class="language-plaintext highlighter-rouge">FN1</code>-key and activating my secondary layer.</p>

<p>The left pink key is a modifier key that works as <code class="language-plaintext highlighter-rouge">Backspace</code> when tapped and then function as <code class="language-plaintext highlighter-rouge">Right Shift</code> when tapped and held.</p>

<p>The green keys a set of modifier keys as well. They work as a extra set of navigation keys when tapped and then as the regular keys when tapped and held.</p>

<h2 id="layer-2---the-secondary-layer">Layer 2 - The secondary layer</h2>

<p>This is my secondary layer. I can probably seem a bit overwhelming with all the colours, but it’s actually pretty simple and it’s at least logic to me.</p>

<p><a href="/img/kb_layer_2.png"><img src="/img/t/kb_layer_2.png" alt="" /></a></p>

<p>The purple keys are what’s called chained keys. This means that when I use the key kombination <code class="language-plaintext highlighter-rouge">FN+C</code> it will act as <code class="language-plaintext highlighter-rouge">Ctrl+Alt+C</code>. This eliminates pretty much all my use of my regular <code class="language-plaintext highlighter-rouge">Left Ctrl</code>-key and most of my hand movement.</p>

<h2 id="layer-3---the-numpad-layer">Layer 3 - The numpad layer</h2>

<p>This is my third layer where I have my numpad keys.</p>

<p><a href="/img/kb_layer_3.png"><img src="/img/t/kb_layer_3.png" alt="" /></a></p>

<p>I have an external numpad, but I lent that to my mom who had greater use of it than me. With both a regular keyboard who has a numpad cluster and with an external numpad there’s a lot of hand movement. I don’t like that.  With this layer I can access the numpad whenever I want to input a lot of number without moving my hand at all.</p>

<p>If this looks interesting I suggest you checking out the <a href="https://docs.qmk.fm">documentation</a>.</p>]]></content><author><name></name></author><category term="[&quot;My Keyboards&quot;]" /><category term="Keyboards" /><category term="QMK" /><summary type="html"><![CDATA[I have been meaning to make this post for some time now. A big reason for why I like custom built keyboards is being able to use the open source QMK firware. It’s a firmware written in C and it let’s me customize the layout just the way I want it.]]></summary></entry><entry><title type="html">How to get a near real-time picture of Earth as your desktop wallpaper</title><link href="https://hunden.linuxkompis.se/2019/06/03/how-to-get-a-near-realtime-picture-of-earth-as-your-desktop-wallpaper.html" rel="alternate" type="text/html" title="How to get a near real-time picture of Earth as your desktop wallpaper" /><published>2019-06-03T00:00:00+02:00</published><updated>2024-02-16T19:42:13+01:00</updated><id>https://hunden.linuxkompis.se/2019/06/03/how-to-get-a-near-realtime-picture-of-earth-as-your-desktop-wallpaper</id><content type="html" xml:base="https://hunden.linuxkompis.se/2019/06/03/how-to-get-a-near-realtime-picture-of-earth-as-your-desktop-wallpaper.html"><![CDATA[<p>If you like me, enjoy photos of the Earth, you may also appreciate the ability to set a near real-time photo of it as your desktop wallpaper. It’s actually only delayed for up to 10 minutes!</p>

<figure>
  <a href="/img/himawaripy.jpg">
    <img src="/img/t/himawaripy.jpg" alt="A screenshot of my desktop with a picture of the Earth as the wallpaper" />
  </a>
  <figcaption>The screenshot is compressed, the actuall picture of earth is in high quality.</figcaption>
</figure>

<p>This is made possible with a Python 3 script called <a href="https://github.com/boramalper/himawaripy">himawaripy</a>. It’s a script that downloads a fresh picture of the Earth that’s taken with the Japanese weather satellite <a href="https://en.wikipedia.org/wiki/Himawari_8">Himawari 8</a>.</p>

<p>You can choose between different resolutions which are referred to as quality. You can choose between quality <code class="language-plaintext highlighter-rouge">4</code>, <code class="language-plaintext highlighter-rouge">8</code>, <code class="language-plaintext highlighter-rouge">16</code> and <code class="language-plaintext highlighter-rouge">20</code>. The application doesn’t come with a manual and the flag <code class="language-plaintext highlighter-rouge">--help</code> doesn’t say anything about the quality options.</p>

<p>I tried them all and this is what I ended up with when about 90% of the Earth was visible:</p>

<table>
  <thead>
    <tr>
      <th>Quality</th>
      <th>Resolution (pixels)</th>
      <th>File size</th>
    </tr>
  </thead>
  <tbody>
    <tr>
      <td>4</td>
      <td>2200 x 2200</td>
      <td>5.83 MB</td>
    </tr>
    <tr>
      <td>8</td>
      <td>4400 x 4400</td>
      <td>21.8 MB</td>
    </tr>
    <tr>
      <td>16</td>
      <td>8800 x 8800</td>
      <td>79 MB</td>
    </tr>
    <tr>
      <td>20</td>
      <td>11000 x 11000</td>
      <td>126 MB</td>
    </tr>
  </tbody>
</table>

<p>Be aware that the quality <code class="language-plaintext highlighter-rouge">20</code> eats a lot of memory when it processes the image! It used about 650 MiB of RAM for me. With quality <code class="language-plaintext highlighter-rouge">4</code> it only used about 40 MiB of RAM.</p>

<h2 id="installation">Installation</h2>

<p>The recommended (or at least the easiest) way of installing it is via the Python package manager called <code class="language-plaintext highlighter-rouge">pip</code>:</p>

<div class="language-bash highlighter-rouge"><div class="highlight"><pre class="highlight"><code><span class="nv">$ </span>pip <span class="nb">install</span> <span class="nt">--user</span> himawaripy
</code></pre></div></div>

<p>If you don’t have <code class="language-plaintext highlighter-rouge">pip</code> you need to install it. On systems like Gentoo and Arch Linux the package is called <code class="language-plaintext highlighter-rouge">python-pip</code>, while on Debian and Debian based systems it’s called <code class="language-plaintext highlighter-rouge">python3-pip</code>.</p>

<h2 id="usage">Usage</h2>

<p>The default usage is:</p>

<div class="language-bash highlighter-rouge"><div class="highlight"><pre class="highlight"><code><span class="nv">$ </span>himawaripy <span class="nt">-l</span> &lt;quality&gt; <span class="nt">--auto-offset</span>
</code></pre></div></div>

<p>The flag <code class="language-plaintext highlighter-rouge">--auto-offset</code> determines the timezone automatically. You can manually specify the UTC offset in hours yourself with the flag <code class="language-plaintext highlighter-rouge">-o, --offfset &lt;-12 to +10&gt;</code>.</p>

<p>They only specify some common desktop environments as compatible, but it just fell back to <code class="language-plaintext highlighter-rouge">feh</code> for me who doesn’t use a desktop environment.</p>

<p>If you only want to download the image and not set is as a wallpaper you can add the flag <code class="language-plaintext highlighter-rouge">--dont-change</code>:</p>

<div class="language-bash highlighter-rouge"><div class="highlight"><pre class="highlight"><code><span class="nv">$ </span>himawaripy <span class="nt">-l</span> &lt;quality&gt; <span class="nt">--dont-change</span>
</code></pre></div></div>

<p>This is handy if you want to use the image for something else or just want to set it as a wallpaper yourself like I do.</p>

<h2 id="how-i-use-it">How I use it</h2>

<p>By default some of the Earth was hidden behind my panel. I didn’t liked it so I wrote a little script that adds a black border to the image and then sets that image as the wallpaper.</p>

<div class="language-bash highlighter-rouge"><div class="highlight"><pre class="highlight"><code><span class="c">#!/bin/bash</span>

<span class="nb">dir</span><span class="o">=</span><span class="s2">"</span><span class="nv">$HOME</span><span class="s2">/.cache/himawaripy"</span>

himawaripy <span class="nt">-l</span> 4 <span class="nt">--auto-offset</span> <span class="nt">--dont-change</span>
convert <span class="nt">-border</span> 64x64 <span class="nt">-bordercolor</span> black <span class="nv">$dir</span>/himawari<span class="k">*</span>.png <span class="nv">$dir</span>/output.png
feh <span class="nt">--bg-max</span> <span class="nv">$dir</span>/output.png
</code></pre></div></div>

<p>I then added a cronjob that runs every 60 minutes to refresh the image:</p>

<div class="language-bash highlighter-rouge"><div class="highlight"><pre class="highlight"><code><span class="k">*</span>/60 <span class="k">*</span> <span class="k">*</span> <span class="k">*</span> <span class="k">*</span> <span class="nv">$HOME</span>/Scripts/space_wallpaper.sh
</code></pre></div></div>]]></content><author><name></name></author><category term="[&quot;Applications &amp; Tools&quot;, &quot;Artwork &amp; Themeing&quot;]" /><category term="Wallpapers" /><category term="Desktop" /><category term="Scripts" /><category term="Command-line" /><summary type="html"><![CDATA[If you like me, enjoy photos of the Earth, you may also appreciate the ability to set a near real-time photo of it as your desktop wallpaper. It’s actually only delayed for up to 10 minutes!]]></summary></entry><entry><title type="html">Wrap each input line to fit in specified width with fold</title><link href="https://hunden.linuxkompis.se/2019/05/13/wrap-each-input-line-to-fit-in-specified-width-with-fold.html" rel="alternate" type="text/html" title="Wrap each input line to fit in specified width with fold" /><published>2019-05-13T00:00:00+02:00</published><updated>2024-02-16T19:42:13+01:00</updated><id>https://hunden.linuxkompis.se/2019/05/13/wrap-each-input-line-to-fit-in-specified-width-with-fold</id><content type="html" xml:base="https://hunden.linuxkompis.se/2019/05/13/wrap-each-input-line-to-fit-in-specified-width-with-fold.html"><![CDATA[<p>Are you tired of using tools like <code class="language-plaintext highlighter-rouge">less</code> and reading text like this?</p>

<div class="language-plaintext highlighter-rouge"><div class="highlight"><pre class="highlight"><code>Reducing the environmental impact of a smartphone is one o
f our key business goals. For us, that starts by extending
 the lifespan of our phone at the first stage of its lifec
ycle. For example, we use modular design to make repairs a
nd upgrades easy for the first user.
</code></pre></div></div>

<p>With <code class="language-plaintext highlighter-rouge">fold</code> you could be reading it like this:</p>

<div class="language-plaintext highlighter-rouge"><div class="highlight"><pre class="highlight"><code>Reducing the environmental impact of a smartphone is 
one of our key business goals. For us, that starts by 
extending the lifespan of our phone at the first stage 
of its lifecycle. For example, we use modular design 
to make repairs and upgrades easy for the first user.
</code></pre></div></div>

<p>The two examples above are part of the output from this command (with only <code class="language-plaintext highlighter-rouge">less</code> and then with <code class="language-plaintext highlighter-rouge">less</code> and <code class="language-plaintext highlighter-rouge">fold</code>):</p>

<div class="language-plaintext highlighter-rouge"><div class="highlight"><pre class="highlight"><code>$ html2text.py https://www.fairphone.com/en/2019/04/16/refurbished-phones-give-valuable-resources-a-new-life/ | fold -s -w 55 | less
</code></pre></div></div>

<h2 id="installation">Installation</h2>

<p>The tool <code class="language-plaintext highlighter-rouge">fold</code> comes with the <a href="https://www.gnu.org/software/coreutils/">GNU core utillities</a> so it’s actually a tool that most should have by default. If you for some reason don’t have it installed, the package should be named <code class="language-plaintext highlighter-rouge">coreutils</code> in all major distros.</p>

<h2 id="usage">Usage</h2>

<p>Using it is simple, you can use it by itself:</p>

<div class="language-bash highlighter-rouge"><div class="highlight"><pre class="highlight"><code><span class="nv">$ </span><span class="nb">fold</span> &lt;file&gt;
</code></pre></div></div>

<p>Or use it in combination with other tools like I did:</p>

<div class="language-bash highlighter-rouge"><div class="highlight"><pre class="highlight"><code><span class="nv">$ </span><span class="nb">cat</span> &lt;file&gt; | <span class="nb">fold</span>
</code></pre></div></div>

<h3 id="flags">Flags</h3>

<p>It only comes with three flags:</p>

<table>
  <tbody>
    <tr>
      <td><code class="language-plaintext highlighter-rouge">-b</code>, <code class="language-plaintext highlighter-rouge">--bytes</code></td>
      <td>Count bytes rather than columns.</td>
    </tr>
    <tr>
      <td><code class="language-plaintext highlighter-rouge">-s</code>, <code class="language-plaintext highlighter-rouge">--spaces</code></td>
      <td>Break at spaces.</td>
    </tr>
    <tr>
      <td><code class="language-plaintext highlighter-rouge">-w</code>, <code class="language-plaintext highlighter-rouge">--width=&lt;WIDTH&gt;</code></td>
      <td>Use <WIDTH> columns instead of 80.</WIDTH></td>
    </tr>
  </tbody>
</table>]]></content><author><name></name></author><category term="[&quot;Applications &amp; Tools&quot;]" /><category term="fold" /><category term="less" /><category term="Command-line" /><summary type="html"><![CDATA[Are you tired of using tools like less and reading text like this?]]></summary></entry><entry><title type="html">How to suspend and hibernate as a regular user</title><link href="https://hunden.linuxkompis.se/2019/05/12/how-to-suspend-and-hibernate-as-a-regular-user.html" rel="alternate" type="text/html" title="How to suspend and hibernate as a regular user" /><published>2019-05-12T00:00:00+02:00</published><updated>2024-02-16T19:42:13+01:00</updated><id>https://hunden.linuxkompis.se/2019/05/12/how-to-suspend-and-hibernate-as-a-regular-user</id><content type="html" xml:base="https://hunden.linuxkompis.se/2019/05/12/how-to-suspend-and-hibernate-as-a-regular-user.html"><![CDATA[<p>If you use a Linux distribution that uses an init system other than systemd with the suspend and/or hibernate feature, chances are that you use <code class="language-plaintext highlighter-rouge">pm-utils</code> for it.</p>

<p>You then also know that you need to use <code class="language-plaintext highlighter-rouge">sudo</code> for it to work. This is a bit of an issue if you want to bind either command to a keyboard shortcut. A way around this is to add an exception for <code class="language-plaintext highlighter-rouge">pm-suspend</code> and <code class="language-plaintext highlighter-rouge">pm-hibernate</code> in the your <code class="language-plaintext highlighter-rouge">/etc/sudoers</code> file, so you don’t have to enter your password for them anymore.</p>

<p>Just open your configuration for <code class="language-plaintext highlighter-rouge">sudo</code> with the command <code class="language-plaintext highlighter-rouge">visudo</code> and add this:</p>

<div class="language-plaintext highlighter-rouge"><div class="highlight"><pre class="highlight"><code>&lt;USER&gt; ALL = NOPASSWD: /usr/sbin/pm-hibernate
&lt;USER&gt; ALL = NOPASSWD: /usr/sbin/pm-suspend
</code></pre></div></div>

<p>You still need to use <code class="language-plaintext highlighter-rouge">sudo pm-suspend</code> and <code class="language-plaintext highlighter-rouge">sudo pm-hibernate</code>, but it will no longer ask you for your password.</p>]]></content><author><name></name></author><category term="[&quot;Applications &amp; Tools&quot;]" /><category term="pm-utils" /><category term="Suspend" /><category term="Hibernate" /><summary type="html"><![CDATA[If you use a Linux distribution that uses an init system other than systemd with the suspend and/or hibernate feature, chances are that you use pm-utils for it.]]></summary></entry><entry><title type="html">How to download YouTube-videos with subtitles using youtube-dl</title><link href="https://hunden.linuxkompis.se/2019/05/10/how-to-download-youtube-videos-with-subtitles-using-youtube-dl.html" rel="alternate" type="text/html" title="How to download YouTube-videos with subtitles using youtube-dl" /><published>2019-05-10T00:00:00+02:00</published><updated>2024-02-16T19:42:13+01:00</updated><id>https://hunden.linuxkompis.se/2019/05/10/how-to-download-youtube-videos-with-subtitles-using-youtube-dl</id><content type="html" xml:base="https://hunden.linuxkompis.se/2019/05/10/how-to-download-youtube-videos-with-subtitles-using-youtube-dl.html"><![CDATA[<p>It wasn’t obvious how this feature with <a href="http://ytdl-org.github.io/youtube-dl/">youtube-dl</a> worked, so I thought I would document it here. If you want to download a video from YouTube with embedded subtitles into the video, you can use this command:</p>

<div class="language-bash highlighter-rouge"><div class="highlight"><pre class="highlight"><code><span class="nv">$ </span>youtube-dl <span class="nt">--write-auto-sub</span> &lt;URL&gt;
</code></pre></div></div>

<p>It will default to English, but you can specify another language with the flag <code class="language-plaintext highlighter-rouge">--sub-lang</code>:</p>

<div class="language-bash highlighter-rouge"><div class="highlight"><pre class="highlight"><code><span class="nv">$ </span>youtube-dl <span class="nt">--sub-lang</span> sv <span class="nt">--write-auto-sub</span> &lt;URL&gt;
</code></pre></div></div>

<p>You can list all available subtitles with:</p>

<div class="language-bash highlighter-rouge"><div class="highlight"><pre class="highlight"><code><span class="nv">$ </span>youtube-dl <span class="nt">--list-subs</span> &lt;URL&gt;
</code></pre></div></div>

<p>It’s also possible to skip the video and only download the subtitle if you add the flag <code class="language-plaintext highlighter-rouge">--skip-download</code>:</p>

<div class="language-bash highlighter-rouge"><div class="highlight"><pre class="highlight"><code><span class="nv">$ </span>youtube-dl <span class="nt">--sub-lang</span> sv <span class="nt">--write-auto-sub</span> <span class="nt">--skip-download</span> &lt;URL&gt;
</code></pre></div></div>

<p>For more information consult the manual: <code class="language-plaintext highlighter-rouge">man youtube-dl</code>.</p>]]></content><author><name></name></author><category term="[&quot;Applications &amp; Tools&quot;]" /><category term="youtube-dl" /><category term="YouTube" /><category term="Subtitles" /><category term="Video" /><category term="Command-line" /><summary type="html"><![CDATA[It wasn’t obvious how this feature with youtube-dl worked, so I thought I would document it here. If you want to download a video from YouTube with embedded subtitles into the video, you can use this command:]]></summary></entry><entry><title type="html">My Keyboard - May 2019</title><link href="https://hunden.linuxkompis.se/2019/05/05/2019-05-05-my-keyboard.md.html" rel="alternate" type="text/html" title="My Keyboard - May 2019" /><published>2019-05-05T00:00:00+02:00</published><updated>2024-02-16T19:42:13+01:00</updated><id>https://hunden.linuxkompis.se/2019/05/05/2019-05-05-my-keyboard.md</id><content type="html" xml:base="https://hunden.linuxkompis.se/2019/05/05/2019-05-05-my-keyboard.md.html"><![CDATA[<p>It’s been almost one and a half year since <a href="https://hunden.linuxkompis.se/2018/01/19/my-keyboard-the-black_diamond.html">my last post with this keyboard</a>. A few things has happened since then, so I thought it was time for a new post about the changes.</p>

<p><a href="/img/keyboards/2019-05-05.jpg"><img src="/img/keyboards/thumbnails/2019-05-05.jpg" alt="" /></a></p>

<h2 id="specifications">Specifications</h2>

<table>
  <tbody>
    <tr>
      <td>Keyboard:</td>
      <td>Custom</td>
    </tr>
    <tr>
      <td>Size:</td>
      <td>60%</td>
    </tr>
    <tr>
      <td>Case:</td>
      <td><a href="https://kbdfans.myshopify.com/collections/case/products/pre-orderkbdfans-5-60-case">Diamond</a> by KBDfans</td>
    </tr>
    <tr>
      <td>Circuit board:</td>
      <td><a href="https://sentraq.com/collections/parts-1/products/60-rgb-underglow-pcb">S60-X</a> by Sentraq</td>
    </tr>
    <tr>
      <td>Switches:</td>
      <td><a href="https://deskthority.net/wiki/Gateron_KS-3_Brown">KS-8 (Red)</a> by Gateron</td>
    </tr>
    <tr>
      <td>Stabilisers:</td>
      <td><a href="https://mechboards.co.uk/shop/all/gmk-stabilisers/">GMK Screw-in stabilisers</a> by GMK Electronic Design</td>
    </tr>
    <tr>
      <td>Keycaps:</td>
      <td><a href="https://www.massdrop.com/buy/blank-pbt-keycaps?utm_source=linkshare&amp;referer=CPRCE7">Cherry-profiled PBT Blanks</a> by NPKC</td>
    </tr>
  </tbody>
</table>

<h2 id="changes">Changes</h2>

<p>I had issues with my Tealio switches becoming unnaturally scratchy. I tried solving it with lube—which helped a bit—unfortunately it didn’t solve the issue. I wanted to try a new layout and replace the old horrible “genuine” stabilisers from Cherry anyway, so I decided to start fresh!</p>

<p>I don’t own any good desoldering equipment, but a friendly stranger from the Swedish keyboard community offered to help me with it for free. I did offer him money, but he didn’t want any. :)</p>

<h3 id="new-switches">New switches</h3>

<p>I used to have “end game” Tealio switches with custom gold plated 60 grams springs from SPRiT, lubed with <a href="https://mykeyboard.eu/catalogue/tribosys-3203-switch-lubricant-5ml_917/">Tribosys 3204</a>. They ended up being a bit more expensive than I had planned, but this was my first attempt at my “end game” keyboard and I kept telling myself it was okay.</p>

<p>Lubricating switches was the most boring thing I have ever done in my life. I’m normally a patient person, but this was too much even for me. Swapping the springs took some time as well, but at least it didn’t require much effort.</p>

<p>When it was time to pick new switches I decided to go with regular stock Gateron Red switches. They’re good enough, cheap and comes with light springs that I’m okay with.</p>

<p>Fun fact: I actually paid more for the old custom springs alone than what I paid for the Gateron switches. :|</p>

<h3 id="new-stabilisers">New stabilisers</h3>

<p>I bought the first stabilisers from an American vendor a long time ago, who claimed that they where “genuine” and not some cheap knockoffs from China (poor knockoffs is a common issue). I’m not sure what to believe, but I had major issues with them being rattly and popping off every time I removed a keycap. And it was a pure hell getting them back once they where loose.</p>

<p>This time I bought GMK screw-in stabilisers from a trusted guy via Reddit. What’s different about these is that you screw them to the PCB! They’re really not going anyway this time!</p>

<p>I also applied some thick lube from Super Lube on the parts where metal parts meats the plastic. The result is night and day  in comparison from my old Cherry stabilisers. I’m really happy with the result!</p>

<h3 id="i-removed-the-plate">I removed the plate</h3>

<p>I also decided to skip the commonly used <a href="https://mechboards.co.uk/shop/parts/60/universal-alu-plate/">switch plate</a>. Aluminum is fairly soft, but I always felt that it was still a bit too harsh to type on for my fragile fingers. :)</p>

<p>I’m really happy with how it turned out. The change is subtle, but it’s noticeable and I like it!</p>

<h3 id="new-layout-almost">New layout (almost)</h3>

<p>I was also curious about trying a new layout. I wanted to split both the <code class="language-plaintext highlighter-rouge">Backspace</code>-key and the right <code class="language-plaintext highlighter-rouge">Shift</code>-key, as well as changing the bottom row to a classic UNIX bottom row and trying an ANSI <code class="language-plaintext highlighter-rouge">Enter</code>-key.</p>

<p>All  mentioned changes are marked in blue here:</p>

<p><a href="/img/keyboards/2019-05-05_layout_1.png"><img src="/img/keyboards/thumbnails/2019-05-05_layout_1.jpg" alt="" /></a></p>

<p>And for reference, this is the default 60% ISO-layout:</p>

<p><a href="/img/keyboards/2019-05-05_layout_0.png"><img src="/img/keyboards/thumbnails/2019-05-05_layout_0.jpg" alt="" /></a></p>

<p>I didn’t like it <strong>at all</strong>. The longer spacebar threw me off completely and I also had issues reaching the <code class="language-plaintext highlighter-rouge">AltGr</code>-key—a key that I didn’t knew I was using as much as I did. The split <code class="language-plaintext highlighter-rouge">Backspace</code>-key was a nightmare to use as well. I grabbed my soldering equipment and changed the layout to this:</p>

<p><a href="/img/keyboards/2019-05-05_layout_2.png"><img src="/img/keyboards/thumbnails/2019-05-05_layout_2.jpg" alt="" /></a></p>

<p>After about a month of using the ANSI <code class="language-plaintext highlighter-rouge">Enter</code>-key I decided that it wasn’t something for me after all. Sure, it might be closer to my pinky finger, but it’s still awkward to reach. I had to bend my wrist at a way more sharper angle which made it hurt after a while.</p>

<p><a href="/img/keyboards/2019-05-05_layout_3.png"><img src="/img/keyboards/thumbnails/2019-05-05_layout_3.jpg" alt="" /></a></p>

<p>After one final adjustment to the layout and I’m now back to a pretty much standard ISO-layout. I kept the split right <code class="language-plaintext highlighter-rouge">Shift</code>-key to avoid one extra stabiliser. I haven’t really found a good use for the extra key yet. It currently functions as an extra <code class="language-plaintext highlighter-rouge">Delete</code>-key, but I rarely ever user it.</p>]]></content><author><name></name></author><category term="[&quot;My Keyboards&quot;]" /><category term="Keyboards" /><summary type="html"><![CDATA[It’s been almost one and a half year since my last post with this keyboard. A few things has happened since then, so I thought it was time for a new post about the changes.]]></summary></entry><entry><title type="html">Installing dictionaries in GNU IceCat</title><link href="https://hunden.linuxkompis.se/2019/04/24/installing-dictionaries-in-gnu-icecat.html" rel="alternate" type="text/html" title="Installing dictionaries in GNU IceCat" /><published>2019-04-24T00:00:00+02:00</published><updated>2024-02-16T19:42:13+01:00</updated><id>https://hunden.linuxkompis.se/2019/04/24/installing-dictionaries-in-gnu-icecat</id><content type="html" xml:base="https://hunden.linuxkompis.se/2019/04/24/installing-dictionaries-in-gnu-icecat.html"><![CDATA[<p>If you’re using the web browser GNU IceCat you might have noticed that you can’t just click on any dictionary to install it.</p>

<figure>
    <img src="/img/icecat_dictionary.png" alt="The message you're greeted with when trying to one-click install a dictionary in GNU IceCat" />
  <figcaption>The message you're greeted with when trying to one-click install a dictionary in GNU IceCat</figcaption>
</figure>

<p>It took me a while to figure it out, but thankfully the solution is fairly easy. All I had to was to manually download the dictionary, extract it and then copy two files to the correct folder.</p>

<h2 id="instructions">Instructions</h2>

<ol>
  <li>Start by downloading the dictionary from the website <a href="http://dictionaries.mozdev.org/installation.html">http://dictionaries.mozdev.org/installation.html</a> or whichever source you may use.</li>
</ol>

<p>I had issues with just right-clicking and saving. I had to copy the link and then use <code class="language-plaintext highlighter-rouge">wget</code> to be able to download the file.</p>

<ol>
  <li>
    <p>Unpack the archive using <code class="language-plaintext highlighter-rouge">unzip</code> (or any other archiving tool of choice):</p>

    <div class="language-bash highlighter-rouge"><div class="highlight"><pre class="highlight"><code> <span class="nv">$ </span>unzip &lt;file&gt;.xpi
</code></pre></div>    </div>

    <p><code class="language-plaintext highlighter-rouge">unzip</code> will unpack the files from the archive all over the folder that you’re currently standing in. I highly suggest you putting the archive in a temorary folder for easier management.</p>
  </li>
  <li>
    <p>Copy the two files <code class="language-plaintext highlighter-rouge">&lt;lang&gt;.aff</code> and <code class="language-plaintext highlighter-rouge">&lt;lang&gt;.dic</code> to the folder <code class="language-plaintext highlighter-rouge">dictionaries</code> that’s located in your IceCat folder.</p>

    <p>Where that folder is located might depend on how you installed GNU IceCat. I manually installed it at <code class="language-plaintext highlighter-rouge">~/.local/bin/icecat</code>, so I moved the files to <code class="language-plaintext highlighter-rouge">~/.local/bin/icecat/dictionaries/</code>.</p>
  </li>
  <li>
    <p>You then have to restart GNU IceCat for it to notice the new dictionary.</p>
  </li>
</ol>]]></content><author><name></name></author><category term="[&quot;Tips &amp; Trix&quot;]" /><category term="GNU IceCat" /><category term="Web browsers" /><summary type="html"><![CDATA[If you’re using the web browser GNU IceCat you might have noticed that you can’t just click on any dictionary to install it.]]></summary></entry><entry><title type="html">How to more quickly jump around in Vim using marks</title><link href="https://hunden.linuxkompis.se/2019/04/17/how-to-more-quickly-jump-around-in-Vim-using-marks.html" rel="alternate" type="text/html" title="How to more quickly jump around in Vim using marks" /><published>2019-04-17T00:00:00+02:00</published><updated>2024-02-16T19:42:13+01:00</updated><id>https://hunden.linuxkompis.se/2019/04/17/how-to-more-quickly-jump-around-in-Vim-using-marks</id><content type="html" xml:base="https://hunden.linuxkompis.se/2019/04/17/how-to-more-quickly-jump-around-in-Vim-using-marks.html"><![CDATA[<p>There is endless ways of both jumping and navigating in Vim. One of those ways is using something called marks. You can think of it like precise bookmarks that you can quickly set and then jump between.</p>

<h2 id="setting-a-mark">Setting a mark</h2>

<p>You set a mark (at the location of the cursor) with the key <code class="language-plaintext highlighter-rouge">m</code> followed by a letter (<code class="language-plaintext highlighter-rouge">a-z</code> or <code class="language-plaintext highlighter-rouge">A-Z</code>). Do note that you get no visual indication that you have set a mark there <em>and</em> that the uppercase marks (<code class="language-plaintext highlighter-rouge">A-Z</code>) works <em>across</em> your buffers.</p>

<p>If you set a mark using a uppercase letter it will <strong>open</strong> that document in the <strong>same</strong> buffer that you’re currently in, it will not spawn a new buffer.</p>

<h2 id="jumping-to-a-mark">Jumping to a mark</h2>

<p>You can now jump to that exact position from anywhere in the document with the key <code class="highlighter-rouge">`a</code>. Or if you use <code class="language-plaintext highlighter-rouge">'a</code> it will then jump to the beginning of the line where the mark <code class="language-plaintext highlighter-rouge">a</code> was set.</p>

<h2 id="delete-change-and-yank-text-using-marks">Delete, change and yank text using marks</h2>

<p>You can use marks to change, delete and yank text as well.</p>

<p><strong>Delete:</strong></p>

<table>
  <tbody>
    <tr>
      <td><code class="language-plaintext highlighter-rouge">d'a</code></td>
      <td>Delete all the lines from the current line to the line with the mark <code class="language-plaintext highlighter-rouge">a</code>.</td>
    </tr>
    <tr>
      <td><code class="highlighter-rouge">d`a</code></td>
      <td>Delete all the text from the current cursor position to the position of mark <code class="language-plaintext highlighter-rouge">a</code></td>
    </tr>
  </tbody>
</table>

<p><strong>Change:</strong></p>

<table>
  <tbody>
    <tr>
      <td><code class="language-plaintext highlighter-rouge">c'a</code></td>
      <td>Change all the text from the current line to the line of mark <code class="language-plaintext highlighter-rouge">a</code></td>
    </tr>
    <tr>
      <td><code class="highlighter-rouge">c`a</code></td>
      <td>Change all the text from the current cursor position to the position of mark <code class="language-plaintext highlighter-rouge">a</code></td>
    </tr>
  </tbody>
</table>

<p><strong>Yank:</strong></p>

<table>
  <tbody>
    <tr>
      <td><code class="language-plaintext highlighter-rouge">y'a</code></td>
      <td>Yank all the lines from current line to the line with the mark <code class="language-plaintext highlighter-rouge">a</code></td>
    </tr>
    <tr>
      <td><code class="highlighter-rouge">y`a</code></td>
      <td>Yank all the text from the current cursor position to the position of mark <code class="language-plaintext highlighter-rouge">a</code></td>
    </tr>
  </tbody>
</table>

<h2 id="listing-all-the-marks">Listing all the marks</h2>

<p>You can list all marks using the command <code class="language-plaintext highlighter-rouge">:marks</code> (or a specific mark with <code class="language-plaintext highlighter-rouge">:marks a</code> or <code class="language-plaintext highlighter-rouge">:marks abC</code>):</p>

<div class="language-plaintext highlighter-rouge"><div class="highlight"><pre class="highlight"><code>mark line  col file/text
 a     36   45 Yank all the lines from current line to the line with the 
</code></pre></div></div>

<h2 id="scrolling-through-all-the-marks">Scrolling through all the marks</h2>

<p>It’s also possible to scroll/jump between all the marks as well.</p>

<table>
  <tbody>
    <tr>
      <td><code class="language-plaintext highlighter-rouge">]'</code></td>
      <td>Jump to the next line with a lowercase mark</td>
    </tr>
    <tr>
      <td><code class="language-plaintext highlighter-rouge">['</code></td>
      <td>Jump to the previous line with a lowercase mark</td>
    </tr>
    <tr>
      <td><code class="highlighter-rouge">]`</code></td>
      <td>Jump to the next lowercase mark</td>
    </tr>
    <tr>
      <td><code class="highlighter-rouge">[`</code></td>
      <td>Jump to the previous lowercase mark</td>
    </tr>
  </tbody>
</table>

<h2 id="i-switched-place-with--and-">I switched place with “`” and “’”</h2>

<p>On my Swedish keyboard the character <code class="language-plaintext highlighter-rouge">'</code> is a lot easier to access than the character <code class="highlighter-rouge">`</code>. Because of that and the fact that I use the “`” feature a lot more, I deicided to switch place with them by adding this to my configuration file:</p>

<div class="language-vim highlighter-rouge"><div class="highlight"><pre class="highlight"><code>nnoremap ' `
nnoremap ` '
</code></pre></div></div>

<p><span class="right">Source (and even more information): <a href="https://vim.fandom.com/wiki/Using_marks">https://vim.fandom.com/wiki/Using_marks</a></span></p>]]></content><author><name></name></author><category term="[&quot;Tips &amp; Trix&quot;]" /><category term="Vim" /><category term="Productivity" /><summary type="html"><![CDATA[There is endless ways of both jumping and navigating in Vim. One of those ways is using something called marks. You can think of it like precise bookmarks that you can quickly set and then jump between.]]></summary></entry><entry><title type="html">Getting started with folding in Vim</title><link href="https://hunden.linuxkompis.se/2019/04/15/getting-started-with-folding-in-vim.html" rel="alternate" type="text/html" title="Getting started with folding in Vim" /><published>2019-04-15T00:00:00+02:00</published><updated>2024-02-16T19:42:13+01:00</updated><id>https://hunden.linuxkompis.se/2019/04/15/getting-started-with-folding-in-vim</id><content type="html" xml:base="https://hunden.linuxkompis.se/2019/04/15/getting-started-with-folding-in-vim.html"><![CDATA[<p>Folding in Vim means that you visually (and locally) fold parts of the document. Just the way you (hopefully) fold a towel before putting it in the closet to save space.</p>

<p>Visually hiding parts of the documents makes it easier to manage the documents, especially if they’re large.</p>

<figure>
    <a href="/img/vim_folding.png">
        <img src="/img/vim_folding.png" alt="A screenshot of the Vim editor demoing the folding feature" />
    </a>
    <figcaption>Here's an example of two identical lines with the second line folded.</figcaption>
</figure>

<p>As the title suggests, this is only to get you started. There’s a lot more to this subject than what this post will cover. I will only cover the basics to get you sold on one of the greatest features in Vim. :)</p>

<h2 id="configuration">Configuration</h2>

<p>By default Vim doesn’t save your folds. Getting this part to work required a bit of trial and error with various settings, but I eventually got it to work in a sane way thanks to the <a href="https://vi.stackexchange.com/a/13874">help of the web</a>.</p>

<p>Add this part to you configuration file <code class="language-plaintext highlighter-rouge">~/.vimrc</code> and Vim will automatically save and restore your folds just the way you left them:</p>

<div class="language-vim highlighter-rouge"><div class="highlight"><pre class="highlight"><code>augroup AutoSaveFolds
  autocmd<span class="p">!</span>
  autocmd <span class="nb">BufWinLeave</span><span class="p">,</span><span class="nb">BufLeave</span><span class="p">,</span><span class="nb">BufWritePost</span> ?* nested <span class="k">silent</span><span class="p">!</span> <span class="k">mkview</span><span class="p">!</span>
  autocmd <span class="nb">BufWinEnter</span> ?* <span class="k">silent</span><span class="p">!</span> <span class="k">loadview</span>
augroup end
</code></pre></div></div>

<p>Save and source the settings with <code class="language-plaintext highlighter-rouge">source ~/.vimrc</code> (or just restart Vim) for the changes to apply.</p>

<h2 id="the-keybindings">The keybindings</h2>

<p>Folding is easy, just remember that you need to be in visual mode to be able to create folds.</p>

<table>
  <tbody>
    <tr>
      <td><code class="language-plaintext highlighter-rouge">zf</code></td>
      <td>Create fold</td>
    </tr>
    <tr>
      <td><code class="language-plaintext highlighter-rouge">zd</code></td>
      <td>Delete fold</td>
    </tr>
    <tr>
      <td><code class="language-plaintext highlighter-rouge">zo</code></td>
      <td>Open fold</td>
    </tr>
    <tr>
      <td><code class="language-plaintext highlighter-rouge">zc</code></td>
      <td>Close fold</td>
    </tr>
    <tr>
      <td><code class="language-plaintext highlighter-rouge">zR</code></td>
      <td>Open all folds</td>
    </tr>
    <tr>
      <td><code class="language-plaintext highlighter-rouge">zM</code></td>
      <td>Close all folds</td>
    </tr>
    <tr>
      <td><code class="language-plaintext highlighter-rouge">zE</code></td>
      <td>Delete all folds</td>
    </tr>
  </tbody>
</table>

<p>That’s all for this post. If you want to read more about folding, different folding methods and what not, I then suggest you reading the help topic about it in Vim with <code class="language-plaintext highlighter-rouge">:help folding</code>.</p>]]></content><author><name></name></author><category term="[&quot;Tips &amp; Trix&quot;]" /><category term="Vim" /><category term="Productivity" /><summary type="html"><![CDATA[Folding in Vim means that you visually (and locally) fold parts of the document. Just the way you (hopefully) fold a towel before putting it in the closet to save space.]]></summary></entry><entry><title type="html">Display the time it took to run a command in zsh</title><link href="https://hunden.linuxkompis.se/2019/04/09/display-the-time-it-took-to-run-a-command-in-zsh.html" rel="alternate" type="text/html" title="Display the time it took to run a command in zsh" /><published>2019-04-09T00:00:00+02:00</published><updated>2024-02-16T19:42:13+01:00</updated><id>https://hunden.linuxkompis.se/2019/04/09/display-the-time-it-took-to-run-a-command-in-zsh</id><content type="html" xml:base="https://hunden.linuxkompis.se/2019/04/09/display-the-time-it-took-to-run-a-command-in-zsh.html"><![CDATA[<p><a href="https://github.com/popstas/zsh-command-time">zsh-command-time</a> is a neat little plugin for zsh that displays the time it took to run a command.</p>

<p>Here’s a demo:</p>

<div class="language-plaintext highlighter-rouge"><div class="highlight"><pre class="highlight"><code>$ sleep 5 ; echo "Every 60 seconds a minute passes in Africa."
Every 60 seconds a minute passes in Africa.

[ Time: 5s ]
</code></pre></div></div>

<h2 id="installation">Installation</h2>

<p>Download the plugin via <code class="language-plaintext highlighter-rouge">git</code> to your preferable folder of choice:</p>

<div class="language-bash highlighter-rouge"><div class="highlight"><pre class="highlight"><code><span class="nv">$ </span>git clone https://github.com/popstas/zsh-command-time
</code></pre></div></div>

<p>Add this line to your <code class="language-plaintext highlighter-rouge">~/.zshrc</code> configuration file (and make sure that the path points to your file):</p>

<div class="language-plaintext highlighter-rouge"><div class="highlight"><pre class="highlight"><code>source "$HOME/.zsh/plugins/zsh-command-time/command-time.plugin.zsh"
</code></pre></div></div>

<p>This part is also going into your <code class="language-plaintext highlighter-rouge">~/.zshrc</code> configuration file:</p>

<div class="language-zsh highlighter-rouge"><div class="highlight"><pre class="highlight"><code><span class="c"># Different output for zsh-command-time</span>
zsh_command_time<span class="o">()</span> <span class="o">{</span>
    <span class="k">if</span> <span class="o">[</span> <span class="nt">-n</span> <span class="s2">"</span><span class="nv">$ZSH_COMMAND_TIME</span><span class="s2">"</span> <span class="o">]</span><span class="p">;</span> <span class="k">then
        </span><span class="nv">hours</span><span class="o">=</span><span class="k">$((</span><span class="nv">$ZSH_COMMAND_TIME</span><span class="o">/</span><span class="m">3600</span><span class="k">))</span>
        <span class="nv">min</span><span class="o">=</span><span class="k">$((</span><span class="nv">$ZSH_COMMAND_TIME</span><span class="o">/</span><span class="m">60</span><span class="k">))</span>
        <span class="nv">sec</span><span class="o">=</span><span class="k">$((</span><span class="nv">$ZSH_COMMAND_TIME</span><span class="o">%</span><span class="m">60</span><span class="k">))</span>
        <span class="k">if</span> <span class="o">[</span> <span class="s2">"</span><span class="nv">$ZSH_COMMAND_TIME</span><span class="s2">"</span> <span class="nt">-le</span> 60 <span class="o">]</span><span class="p">;</span> <span class="k">then
            </span><span class="nv">timer_show</span><span class="o">=</span><span class="s2">"</span><span class="nv">$fg</span><span class="s2">[green]</span><span class="k">${</span><span class="nv">ZSH_COMMAND_TIME</span><span class="k">}</span><span class="s2">s </span><span class="nv">$fg</span><span class="s2">[default]"</span>
        <span class="k">elif</span> <span class="o">[</span> <span class="s2">"</span><span class="nv">$ZSH_COMMAND_TIME</span><span class="s2">"</span> <span class="nt">-gt</span> 60 <span class="o">]</span> <span class="o">&amp;&amp;</span> <span class="o">[</span> <span class="s2">"</span><span class="nv">$ZSH_COMMAND_TIME</span><span class="s2">"</span> <span class="nt">-le</span> 180 <span class="o">]</span><span class="p">;</span> <span class="k">then
            </span><span class="nv">timer_show</span><span class="o">=</span><span class="s2">"</span><span class="nv">$fg</span><span class="s2">[yellow]</span><span class="k">${</span><span class="nv">min</span><span class="k">}</span><span class="s2">m </span><span class="k">${</span><span class="nv">sec</span><span class="k">}</span><span class="s2">s </span><span class="nv">$fg</span><span class="s2">[default]"</span>
        <span class="k">else
            if</span> <span class="o">[</span> <span class="s2">"</span><span class="nv">$hours</span><span class="s2">"</span> <span class="nt">-gt</span> 0 <span class="o">]</span><span class="p">;</span> <span class="k">then
                </span><span class="nv">min</span><span class="o">=</span><span class="k">$((</span><span class="nv">$min</span><span class="o">%</span><span class="m">60</span><span class="k">))</span>
                <span class="nv">timer_show</span><span class="o">=</span><span class="s2">"</span><span class="nv">$fg</span><span class="s2">[red]</span><span class="k">${</span><span class="nv">hours</span><span class="k">}</span><span class="s2">h </span><span class="k">${</span><span class="nv">min</span><span class="k">}</span><span class="s2">m </span><span class="k">${</span><span class="nv">sec</span><span class="k">}</span><span class="s2">s </span><span class="nv">$fg</span><span class="s2">[default]"</span>
            <span class="k">else
                </span><span class="nv">timer_show</span><span class="o">=</span><span class="s2">"</span><span class="nv">$fg</span><span class="s2">[red]</span><span class="k">${</span><span class="nv">min</span><span class="k">}</span><span class="s2">m </span><span class="k">${</span><span class="nv">sec</span><span class="k">}</span><span class="s2">s"</span>
            <span class="k">fi
        fi
        </span><span class="nb">printf</span> <span class="s2">"</span><span class="se">\n</span><span class="s2">[ </span><span class="k">${</span><span class="nv">ZSH_COMMAND_TIME_MSG</span><span class="k">}</span><span class="se">\n</span><span class="s2">"</span> <span class="s2">"</span><span class="nv">$timer_show</span><span class="s2">]"</span>
    <span class="k">fi</span>
<span class="o">}</span>
</code></pre></div></div>

<p>To prevent too much clutter in the main configuration file I added the above part to a file called <code class="language-plaintext highlighter-rouge">~/.zsh/functions.zsh</code>. If you wish to do the same thing, don’t forget to source the file in your <code class="language-plaintext highlighter-rouge">~/.zshrc</code> configuration file as well:</p>

<div class="language-plaintext highlighter-rouge"><div class="highlight"><pre class="highlight"><code>source "$HOME/.zsh/functions.zsh"
</code></pre></div></div>

<p>Source your configuration with <code class="language-plaintext highlighter-rouge">$ source ~/.zshrc</code> (or just restart the terminal emulator) when you’re done for the changes to take effect.</p>]]></content><author><name></name></author><category term="[&quot;Tips &amp; Trix&quot;]" /><category term="Zsh" /><category term="Shell" /><category term="Utils" /><summary type="html"><![CDATA[zsh-command-time is a neat little plugin for zsh that displays the time it took to run a command.]]></summary></entry><entry><title type="html">How to upload files to NextCloud using only a shell script</title><link href="https://hunden.linuxkompis.se/2019/03/26/how-to-upload-files-to-nextcloud-using-only-a-shell-script.html" rel="alternate" type="text/html" title="How to upload files to NextCloud using only a shell script" /><published>2019-03-26T00:00:00+01:00</published><updated>2024-02-16T19:42:13+01:00</updated><id>https://hunden.linuxkompis.se/2019/03/26/how-to-upload-files-to-nextcloud-using-only-a-shell-script</id><content type="html" xml:base="https://hunden.linuxkompis.se/2019/03/26/how-to-upload-files-to-nextcloud-using-only-a-shell-script.html"><![CDATA[<p>The script <a href="https://github.com/schiessle/shareLinkCreator">Share Link Creator</a> is a handy shell script written in Bash that lets you upload files to you NextCloud-server using the shell.</p>

<p>And yes, I said files as in plural. It allows you to upload multiple files in one go. It will then create a folder named something like <code class="language-plaintext highlighter-rouge">1553524745</code> (in your predefined upload-folder), upload the files to that folder and then share the public link to the clipboard.</p>

<h2 id="requirements">Requirements</h2>

<p>It relies on <code class="language-plaintext highlighter-rouge">curl</code>, <code class="language-plaintext highlighter-rouge">xclip</code> and optionally <code class="language-plaintext highlighter-rouge">zenity</code> for graphical notifications with interactive inputs.</p>

<h2 id="installation">Installation</h2>

<p>It’s a script, there’s not much to do other than downloading the script and making it executable:</p>

<div class="language-bash highlighter-rouge"><div class="highlight"><pre class="highlight"><code><span class="nv">$ </span>git clone https://github.com/schiessle/shareLinkCreator
</code></pre></div></div>
<div class="language-bash highlighter-rouge"><div class="highlight"><pre class="highlight"><code><span class="nv">$ </span><span class="nb">cd </span>shareLinkCreator

</code></pre></div></div>
<div class="language-bash highlighter-rouge"><div class="highlight"><pre class="highlight"><code><span class="nv">$ </span><span class="nb">chmod</span> +x shareLinkCreator
</code></pre></div></div>

<h2 id="configuration">Configuration</h2>

<p>Start by copying the file <code class="language-plaintext highlighter-rouge">config.example</code> to a more permanent place like <code class="language-plaintext highlighter-rouge">~/.config/shareLinkCreator/config</code>.</p>

<p>You only need to change the values <code class="language-plaintext highlighter-rouge">baseURL</code>, <code class="language-plaintext highlighter-rouge">username</code> and <code class="language-plaintext highlighter-rouge">password</code> in the configuration file. The value <code class="language-plaintext highlighter-rouge">uploadTarget</code> is optional and it’s where you want the files to be uploaded.</p>

<p>I have a folder called <code class="language-plaintext highlighter-rouge">tmp</code> and a Cronjob that once a day at midnight deletes files in that folder that’s older than 1 days. The Cronjob looks like this:</p>

<div class="language-bash highlighter-rouge"><div class="highlight"><pre class="highlight"><code>00 00 <span class="k">*</span> <span class="k">*</span> <span class="k">*</span> find <span class="nv">$HOME</span>/Nextcloud/tmp/<span class="k">*</span> <span class="nt">-mtime</span> +1 <span class="nt">-delete</span>
</code></pre></div></div>

<p>You then need to place the script itself somewhere safe and change this line in the script:</p>

<div class="language-plaintext highlighter-rouge"><div class="highlight"><pre class="highlight"><code>. "$(dirname $0)/config" 
</code></pre></div></div>

<p>You want to point it to the configuration file like this:</p>

<div class="language-plaintext highlighter-rouge"><div class="highlight"><pre class="highlight"><code>. "$HOME/.config/shareLinkCreator.rc"
</code></pre></div></div>

<h2 id="usage">Usage</h2>

<p>It’s dead simple:</p>

<div class="language-bash highlighter-rouge"><div class="highlight"><pre class="highlight"><code><span class="nv">$ </span>./shareLinkCreator &lt;file&gt;
</code></pre></div></div>

<p>And for multiple files:</p>

<div class="language-bash highlighter-rouge"><div class="highlight"><pre class="highlight"><code><span class="nv">$ </span>./shareLinkCreator &lt;file&gt; &lt;file&gt;
</code></pre></div></div>

<p>When the file is uploaded it will copy the link to you clipboard and give you a notification about it.</p>

<p>I highly recommend setting a $PATH for your shell with all your scripts. You can then call the scripts by their names without the absolute path to the specific directory. <a href="/2019/03/26/running-scripts-in-your-shell-without-specifying-the-absolute-path.html">Read more about it here</a>.</p>]]></content><author><name></name></author><category term="[&quot;Applications &amp; Tools&quot;]" /><category term="Nextcloud" /><category term="Scripts" /><category term="Bash" /><category term="Command-line" /><summary type="html"><![CDATA[The script Share Link Creator is a handy shell script written in Bash that lets you upload files to you NextCloud-server using the shell.]]></summary></entry><entry><title type="html">Running scripts in your shell without specifying the absolute path</title><link href="https://hunden.linuxkompis.se/2019/03/26/running-scripts-in-your-shell-without-specifying-the-absolute-path.html" rel="alternate" type="text/html" title="Running scripts in your shell without specifying the absolute path" /><published>2019-03-26T00:00:00+01:00</published><updated>2024-02-16T19:42:13+01:00</updated><id>https://hunden.linuxkompis.se/2019/03/26/running-scripts-in-your-shell-without-specifying-the-absolute-path</id><content type="html" xml:base="https://hunden.linuxkompis.se/2019/03/26/running-scripts-in-your-shell-without-specifying-the-absolute-path.html"><![CDATA[<p>If you want to run a script (or any executable file) in your shell you have to specify the absolute path to it. This might not always be a desired way of doing it, especially if you often use the script or if you want to call it from a launcher like Rofi or dmenu.</p>

<p>To make things simpler you can add a <code class="language-plaintext highlighter-rouge">$PATH</code> to your shell. You can then call the script just by it’s name without the path to it. Like <code class="language-plaintext highlighter-rouge">example.sh</code> instead of <code class="language-plaintext highlighter-rouge">~/Scripts/example.sh</code>.</p>

<h2 id="instructions">Instructions</h2>

<p>Add this to your configuration file (<code class="language-plaintext highlighter-rouge">~/.zshrc</code> for zsh and <code class="language-plaintext highlighter-rouge">~/.bashrc</code> for Bash):</p>

<div class="language-bash highlighter-rouge"><div class="highlight"><pre class="highlight"><code><span class="nb">export </span><span class="nv">PATH</span><span class="o">=</span><span class="s2">"&lt;your path&gt;:</span><span class="nv">$PATH</span><span class="s2">"</span>
</code></pre></div></div>
<p>You can use any folder. I prefer having my scripts in the folder <code class="language-plaintext highlighter-rouge">~/Scripts</code>:</p>

<div class="language-bash highlighter-rouge"><div class="highlight"><pre class="highlight"><code><span class="nb">export </span><span class="nv">PATH</span><span class="o">=</span><span class="s2">"</span><span class="nv">$HOME</span><span class="s2">/Scripts:</span><span class="nv">$PATH</span><span class="s2">"</span>
</code></pre></div></div>

<p>Resource your configuration file (or just restart the terminal emulator):</p>

<h4 id="bash">Bash</h4>

<div class="language-bash highlighter-rouge"><div class="highlight"><pre class="highlight"><code><span class="nv">$ </span><span class="nb">source</span> ~/.bashrc
</code></pre></div></div>

<h4 id="zsh">Zsh</h4>

<div class="language-bash highlighter-rouge"><div class="highlight"><pre class="highlight"><code><span class="nv">$ </span><span class="nb">source</span> ~/.zshrc
</code></pre></div></div>

<p>You can now call your script only by its name if it’s stored in <code class="language-plaintext highlighter-rouge">~/Scripts</code> or whatever folder you specified.</p>]]></content><author><name></name></author><category term="[&quot;Tips &amp; Trix&quot;]" /><category term="Bash" /><category term="Zsh" /><category term="Shell" /><category term="Command-line" /><category term="Productivity" /><summary type="html"><![CDATA[If you want to run a script (or any executable file) in your shell you have to specify the absolute path to it. This might not always be a desired way of doing it, especially if you often use the script or if you want to call it from a launcher like Rofi or dmenu.]]></summary></entry><entry><title type="html">How to fake a dual monitor setup using xrandr</title><link href="https://hunden.linuxkompis.se/2019/03/25/how-to-fake-a-dual-monitor-setup-using-xrandr.html" rel="alternate" type="text/html" title="How to fake a dual monitor setup using xrandr" /><published>2019-03-25T00:00:00+01:00</published><updated>2024-02-16T19:42:13+01:00</updated><id>https://hunden.linuxkompis.se/2019/03/25/how-to-fake-a-dual-monitor-setup-using-xrandr</id><content type="html" xml:base="https://hunden.linuxkompis.se/2019/03/25/how-to-fake-a-dual-monitor-setup-using-xrandr.html"><![CDATA[<p>A friendly stranger, named Elodin on the IRC-channel #i3 on the <a href="https://freenode.net">freenode network</a> wrote a Python script for me. It’s a script that lets you fake an dual monitor setup on a single monitor setup. And it has been working really good for me so far!</p>

<p>It uses xrandr for the magic, the official configuration utility to the RandR. It’s a CLI-tool that can be used to set things like the size, orientation or the reflection of the outputs for a monitor.</p>

<figure>
  <a href="/img/fake_dualscreen_setup.png">
    <img src="/img/t/fake_dualscreen_setup.png" alt="A screenshot showing my fake dual monitor setup using xrandr" />
  </a>
  <figcaption>A screenshot showing my fake dual monitor setup using xrandr</figcaption>
</figure>

<p>If you’re thinking “Why?”, I suggest you reading my previous post: “<a href="/2019/03/17/i-went-from-a-multi-monitor-setup-to-just-a-single-monitor-setup.html">I went from a multi monitor setup to just a single monitor setup</a>”.</p>

<p>This is only tested with the i3 window manager, but it should (in theory) work with other window managers. If you try it with something else let me know how it went. :)</p>

<h2 id="the-script">The script</h2>

<p>The script is a little more than 150 lines of code so I uploaded it <a href="/files/mon.py">here</a>. Download it and make it executable with <code class="language-plaintext highlighter-rouge">$ chmod +x mon.py</code>.</p>

<h2 id="usage">Usage</h2>

<h3 id="splitting-the-monitor">Splitting the monitor</h3>

<p>To split your monitor with the same ratio as seen in the screenshot:</p>

<div class="language-plaintext highlighter-rouge"><div class="highlight"><pre class="highlight"><code>$ ./mon.py split -r 70x30
</code></pre></div></div>

<p>If you don’t specify a value it should default to <code class="language-plaintext highlighter-rouge">50x50</code>.</p>

<h4 id="available-flags">Available flags</h4>

<table>
  <tbody>
    <tr>
      <td><code class="language-plaintext highlighter-rouge">-h, --help</code></td>
      <td>Show the help message</td>
    </tr>
    <tr>
      <td><code class="language-plaintext highlighter-rouge">--i3ipc</code></td>
      <td>If you wish to put the focus back on the workspace where you where when you ran the script. This requires the Python-package <code class="language-plaintext highlighter-rouge">i3ipc</code> which is available via <code class="language-plaintext highlighter-rouge">pip</code>: <code class="language-plaintext highlighter-rouge">pip install --user i3ipc</code>.</td>
    </tr>
    <tr>
      <td><code class="language-plaintext highlighter-rouge">--i3</code></td>
      <td>Use this flag if you use i3 in order to reload the panels after splitting the monitor.</td>
    </tr>
    <tr>
      <td><code class="language-plaintext highlighter-rouge">--reload</code></td>
      <td>It’s also possible to pass your own commands like <code class="language-plaintext highlighter-rouge">--reload i3-msg reload</code>.</td>
    </tr>
  </tbody>
</table>

<h3 id="reverting-back-to-one-monitor">Reverting back to one monitor</h3>

<p>To revert back to a single monitor setup:</p>

<div class="language-plaintext highlighter-rouge"><div class="highlight"><pre class="highlight"><code>$ ./mon.py undo
</code></pre></div></div>]]></content><author><name></name></author><category term="[&quot;Tips &amp; Trix&quot;]" /><category term="RandR" /><category term="xrandr" /><category term="Scripts" /><category term="Utils" /><category term="Command-line" /><summary type="html"><![CDATA[A friendly stranger, named Elodin on the IRC-channel #i3 on the freenode network wrote a Python script for me. It’s a script that lets you fake an dual monitor setup on a single monitor setup. And it has been working really good for me so far!]]></summary></entry><entry><title type="html">I went from a multi monitor setup to just a single monitor setup</title><link href="https://hunden.linuxkompis.se/2019/03/17/i-went-from-a-multi-monitor-setup-to-just-a-single-monitor-setup.html" rel="alternate" type="text/html" title="I went from a multi monitor setup to just a single monitor setup" /><published>2019-03-17T00:00:00+01:00</published><updated>2024-02-16T19:42:13+01:00</updated><id>https://hunden.linuxkompis.se/2019/03/17/i-went-from-a-multi-monitor-setup-to-just-a-single-monitor-setup</id><content type="html" xml:base="https://hunden.linuxkompis.se/2019/03/17/i-went-from-a-multi-monitor-setup-to-just-a-single-monitor-setup.html"><![CDATA[<p>After more than 5 years with my three 24” 1080p monitors I have decided to go back to just one single monitor. While a multi monitor setup is cool and all, I’m not so sure about what value it truly adds for me anymore.</p>

<p>I might go as far as saying that it’s even worse. Which would funnily enough confirm my love for the philosophy <a href="https://en.wikipedia.org/wiki/Worse_is_better">worse is better</a>.</p>

<figure>
  <a href="/img/my_desktop_mars_2019.jpg">
    <img src="/img/t/my_desktop_mars_2019.jpg" alt="My latest triple monitor setup from Mars 2019" />
  </a>
  <figcaption>My latest triple monitor setup from Mars 2019</figcaption>
</figure>

<p>I got my triple monitor setup as a treat for myself when I quit with a Swedish tobacco called <a href="https://en.wikipedia.org/wiki/Snus">snus</a> more than 5 years ago. I didn’t really <em>need</em> them, I just wanted to treat myself with something extra nice for quitting snus. Something that’s a lot more addicting than cigarettes.</p>

<p>I have been enjoying my setup for a long time now, but for the past months or so, I have been thinking about what value they truly add for me.</p>

<p>So. I thought I would give it a try to do a more ranty post, which hopefully won’t be too rambly or boring. I hope that my post might even be of some kind of value for someone as well.</p>

<h2 id="table-of-contents">Table of contents</h2>

<!-- vim-markdown-toc GFM -->

<ul>
  <li><a href="#the-pros-with-a-multi-monitor-setup">The pros with a multi monitor setup</a>
    <ul>
      <li><a href="#the-physical-space">The physical space</a></li>
      <li><a href="#separate-workspaces-that-work-independent-of-each-other">Separate workspaces that work independent of each other</a></li>
    </ul>
  </li>
  <li><a href="#the-cons-with-a-multi-monitor-setup">The cons with a multi monitor setup</a>
    <ul>
      <li><a href="#the-physical-space-1">The physical space</a></li>
      <li><a href="#more-distractions">More distractions</a></li>
      <li><a href="#more-clutter">More clutter</a></li>
      <li><a href="#forget-wallpapers">Forget wallpapers</a></li>
    </ul>
  </li>
  <li><a href="#my-workflow-with-a-single-monitor-setup">My workflow with a single monitor setup</a></li>
  <li><a href="#final-words">Final words</a></li>
</ul>

<!-- vim-markdown-toc -->

<h2 id="the-pros-with-a-multi-monitor-setup">The pros with a multi monitor setup</h2>

<h3 id="the-physical-space">The physical space</h3>

<p>The biggest and probably the most obvious advantage of a multi monitor setup is the physical space. You get more space to display a lot more content at the same time. Which might be more or less valuable depending on what you do at your computer. For me it was mostly about luxury rather than anything productive.</p>

<h3 id="separate-workspaces-that-work-independent-of-each-other">Separate workspaces that work independent of each other</h3>

<p>You get quickly spoiled with having two or more simultaneous workspaces that work independent of each other. You can fullscreen a video, or arrange some clients on a secondary monitor while working on the primary monitor, and they won’t ever interfere with each other in any way.</p>

<p>It’s possible to emulate a similar behaviour with another tiling window manager called <a href="http://herbstluftwm.org/">Herbstluftwm</a>. It can let you close the clients but not the containers and it also lets you partition your monitor(s) in any way you want. You can use a single monitor as two “physical” monitors.<br /><br />Herbstluftwm is a good alternative that I’ve used in the past, but its hack-isch approach always leaves me trying to script everything to infinity rather than letting me get any actual work done. :)</p>

<h2 id="the-cons-with-a-multi-monitor-setup">The cons with a multi monitor setup</h2>

<h3 id="the-physical-space-1">The physical space</h3>

<p>Yep. More desktop space also requires a larger desk. I have a 140 centimeter wide desk that’s barley large enough to fit the monitors alone. There’s really no room for anything else. And it would require a pretty ridiculously large desk for my battlestation to feel anything close to light and roomy.</p>

<p>From a minimalist point of view the unnecessary required space has always bothered me. I live in a small apartment (by choice) and I don’t want my desk to be the dominant part of my living room. And while my current desk size is okay (for one monitor) I would prefer going smaller when I replace it (soon™).</p>

<figure>
  <a href="/img/my_battlestation_january_2018.jpg">
    <img src="/img/t/my_battlestation_january_2018.jpg" alt="My battlestation from 2018" />
  </a>
  <figcaption>My battlestation from 2018</figcaption>
</figure>

<p>Well. I guess that my priorities have shifted a bit over the years. Maybe I’m adult enough now where I value the benefits of minimalism, simplicity and aesthetics more than what multi monitor setup can give me. :)</p>

<h3 id="more-distractions">More distractions</h3>

<p>Part of my interest for minimalism is based on my love for the minimalist aesthetics, but also my issues with overstimulation. It’s something I have battled with my whole life, yet it took me a long time to realize exactly how much of a distraction a multi monitor setup was for me.</p>

<p>Just writing this post on a single monitor setup with Vim in fullscreen using the plugin <a href="https://github.com/junegunn/goyo.vim">goyo.vim</a> have boosted my productivity with like 9999%.</p>

<p><strong>OT:</strong> Why have I yet not made a post about goyo.vim? I’m adding it to my todo-list as soon as possible! :)</p>

<h3 id="more-clutter">More clutter</h3>

<p>More monitors equals more clutter. More clutter equals more things to keep clean. More things to keep clean equals more effort and less time to spend on things that matters in life.</p>

<p>This happens to be one of the many things I feel so strongly about a minimalist lifestyle. It’s not only about aesthetics and karma on Reddit. It’s mainly about the practical benefits that makes an impact on my real life outside this computer screen.</p>

<h3 id="forget-wallpapers">Forget wallpapers</h3>

<p>Finding a crisp <em>and</em> a high resolution picture in a 16:3 aspect ratio is nearly impossible. It’s not really a dealbreaker in any way. It’s more like a minor party pooper, I really don’t see my wallpaper that much anyway, but it happens! And when I do it’s nice to see a picture that makes me happy. :)</p>

<h2 id="my-workflow-with-a-single-monitor-setup">My workflow with a single monitor setup</h2>

<p>After all these years with a multi monitor setup I had to really rethink my whole workflow in a way more inventive way than ever before. When you have more space than you need you don’t really tend to make the most of it. That all changed now and it was quite the challenge the first few days adapting to 1/3 of the space I was used to.</p>

<p>It’s been about a week now and I have slowly been finding my way back to just one monitor and I must say that <strong>I actually prefer a single monitor setup over a multi monitor setup now</strong>. Multiple monitors actually only have one big advantage for me, while a single monitor have several small advantages that together outnumber that one advantage with a multi monitor setup.</p>

<figure>
  <a href="/img/my_desktop-mars_2019_single_monitor_2.png">
    <img src="/img/t/my_desktop-mars_2019_single_monitor_2.png" alt="My desktop with the launcher Rofi and the window mode" />
  </a>
  <figcaption>My desktop with the launcher Rofi and the window mode</figcaption>
</figure>

<p>The picture above displays my desktop in action. It’s pretty bare bones in terms of the visuals when I don’t have any visible clients. I try to maximize the usable space as much as I can and that’s why the panel is only visible when a workspace is marked as urgent or when I press the Super-key. The panel might be informative, but it’s also rather distracting for me when I try to focus on other things.</p>

<p>The wallpaper is a real photo of our moon. It’s actually close to 50 000 photos merged into one large 81 megapixels photo. You can read more about it on Reddit <a href="https://old.reddit.com/r/space/comments/arer0k/i_took_nearly_50000__of_the_night_sky_to/">here</a>.</p>

<figure>
  <a href="/img/my_desktop-mars_2019_single_monitor_1.png">
    <img src="/img/t/my_desktop-mars_2019_single_monitor_1.png" alt="My desktop with qutebrowser, mpv and WeeChat" />
  </a>
  <figcaption>qutebrowser, mpv and WeeChat</figcaption>
</figure>

<p>This is my desktop in action and it’s a pretty typical setup. I like watching content from Twitch and YouTube when I’m at my computer and not working on anything that requires hyper focus. The small video isn’t as immersive as a fullscreen video on a 24” monitor but I still think it’s large enough to not bother me.</p>

<p>In the bottom right I have WeeChat. I usually keep it on a secondary workspace, but it’s sometimes nice being able to keep an eye out on a conversation on XMPP or IRC without switching between workspaces all the time. I have hidden the nicklist and buffer in WeeChat to make it more compact. I can toggle them by tapping the key <code class="language-plaintext highlighter-rouge">Esc</code> and then followed by <code class="language-plaintext highlighter-rouge">b</code> for the buffers list and <code class="language-plaintext highlighter-rouge">n</code> for the nicklist.</p>

<p>The large master container to the left is usually in a tabbed mode where I keep several clients. This means that I can open, close and switch focus between larger clients without interfering with the container to the left where I keep the video and WeeChat.</p>

<figure>
  <a href="/img/my_desktop-mars_2019_single_monitor_3.png">
    <img src="/img/t/my_desktop-mars_2019_single_monitor_3.png" alt="My desktop with qutebrowser, mpv and WeeChat" />
  </a>
  <figcaption>Minecraft with a floating container running mpv</figcaption>
</figure>

<p>I play pretty much only one game and that’s Minecraft. When I play and do more monotone things like mining it’s nice to watch a video that keeps me company. :)</p>

<p>I have solved this with a little script that floats the client and puts it in the corner as seen in the screenshot.</p>

<div class="language-bash highlighter-rouge"><div class="highlight"><pre class="highlight"><code><span class="c">#!/bin/bash</span>

<span class="k">if</span> <span class="o">[</span> <span class="si">$(</span>i3-msg <span class="nt">-t</span> get_tree | jq <span class="nb">.</span> | <span class="nb">grep</span> <span class="s1">'["]focused": true'</span> <span class="nt">-A50</span> | <span class="nb">grep</span> <span class="s1">'"floating":'</span> | <span class="nb">awk</span> <span class="o">{</span><span class="s1">'print $2'</span><span class="o">}</span> | <span class="nb">sed</span> <span class="s1">'s/"user_/img/;s/",/img/;s/"auto_/img/'</span><span class="si">)</span> <span class="o">=</span> off <span class="o">]</span>
<span class="k">then
    </span>i3-msg floating <span class="nb">enable</span><span class="p">;</span>
    i3-msg sticky <span class="nb">enable
    </span>i3-msg border none<span class="p">;</span>
    i3-msg resize <span class="nb">set </span>640 360<span class="p">;</span>
    i3-msg move to position 1280 0<span class="p">;</span>
    i3-msg focus tiling
<span class="k">else
    </span>i3-msg floating disable
    i3-msg border pixel 3
    i3-msg sticky disable
<span class="k">fi</span>
</code></pre></div></div>

<h2 id="final-words">Final words</h2>

<p>Going from a multi monitor setup to just one monitor when you don’t need to felt a bit weird at first to be honest. I’m glad I did it though, as I now feel that it actually adds more value and makes me more productive than before.</p>

<p>What surprised me the most was that I was considering upgrading to a new large monitor that would ease the ‘pain’ of having just one monitor. Now I feel that a 24” 1080p works just fine. At least when you have a good window manager and a thought out workflow.</p>]]></content><author><name></name></author><category term="[&quot;Hund&quot;]" /><category term="Minimalism" /><category term="Productivity" /><category term="Hardware" /><summary type="html"><![CDATA[After more than 5 years with my three 24” 1080p monitors I have decided to go back to just one single monitor. While a multi monitor setup is cool and all, I’m not so sure about what value it truly adds for me anymore.]]></summary></entry><entry><title type="html">tty-clock - A clock widget for the console</title><link href="https://hunden.linuxkompis.se/2019/03/15/tty-clock-a-clock-widget-for-the-console.html" rel="alternate" type="text/html" title="tty-clock - A clock widget for the console" /><published>2019-03-15T00:00:00+01:00</published><updated>2024-02-16T19:42:13+01:00</updated><id>https://hunden.linuxkompis.se/2019/03/15/tty-clock-a-clock-widget-for-the-console</id><content type="html" xml:base="https://hunden.linuxkompis.se/2019/03/15/tty-clock-a-clock-widget-for-the-console.html"><![CDATA[<p>As much as I like my panels with Conky and all the neat information it shows [<a href="/2019/03/13/my-desktop-mars-2019.html">Example</a>], I prefer keeping the panels hidden to not distract me. This means I have no way of telling the time.</p>

<p>Keeping track of the time can be a good thing though—duh—that’s why I use a neat console based widget called <a href="https://github.com/xorg62/tty-clock">tty-clock</a>. I’m not sure if it technically qualifies as a widget, but that’s what I call it anyway. :)</p>

<p><img src="/img/tty-clock.png" alt="A picture of tty-clock. A clock widget for the console" /></p>

<p>To get a clock like in the example above I use this command:</p>

<div class="language-plaintext highlighter-rouge"><div class="highlight"><pre class="highlight"><code>$ tty-clock -c -C 7 -r -f "%A, %B %d"
</code></pre></div></div>

<p>Here’s a breakdown of the flags:</p>

<table>
  <tbody>
    <tr>
      <td><code class="language-plaintext highlighter-rouge">-c</code></td>
      <td>Sets the clock at the center of the terminal.</td>
    </tr>
    <tr>
      <td><code class="language-plaintext highlighter-rouge">-C 7</code></td>
      <td>Sets the clock color to what you see in the preview.</td>
    </tr>
    <tr>
      <td><code class="language-plaintext highlighter-rouge">-r</code></td>
      <td>Rebounds the clock.</td>
    </tr>
    <tr>
      <td><code class="language-plaintext highlighter-rouge">-f "%A, %B %d"</code></td>
      <td>Sets the date format as described in <code class="language-plaintext highlighter-rouge">man date</code>.</td>
    </tr>
  </tbody>
</table>

<p>Check the <code class="language-plaintext highlighter-rouge">man tty-clock</code> for more options.</p>

<h2 id="installation">Installation</h2>

<h3 id="arch-linux">Arch Linux</h3>

<p>Two packages are available in the AUR:</p>

<ul>
  <li><a href="https://aur.archlinux.org/packages/tty-clock/">tty-clock</a></li>
  <li><a href="https://aur.archlinux.org/packages/tty-clock-git/">tty-clock-git</a></li>
</ul>

<h3 id="debian-family">Debian family</h3>

<p>It’s available in the repositories as <code class="language-plaintext highlighter-rouge">tty-clock</code>.</p>

<h3 id="gentoo-linux">Gentoo Linux</h3>

<p>It’s probably just easier to compile it yourself, but if you prefer ebuilds I wrote this super simple ebuild:</p>

<div class="language-bash highlighter-rouge"><div class="highlight"><pre class="highlight"><code><span class="nv">$ </span><span class="nb">cat </span>app-misc/tty-clock-2.3.ebuild

<span class="nv">EAPI</span><span class="o">=</span>6

<span class="nv">DESCRIPTION</span><span class="o">=</span><span class="s2">"Clock using lib ncurses"</span>
<span class="nv">HOMEPAGE</span><span class="o">=</span><span class="s2">"https://github.com/xorg62/tty-clock"</span>
<span class="nv">SRC_URI</span><span class="o">=</span><span class="s2">"https://github.com/xorg62/</span><span class="k">${</span><span class="nv">PN</span><span class="k">}</span><span class="s2">/archive/v</span><span class="k">${</span><span class="nv">PV</span><span class="k">}</span><span class="s2">.tar.gz"</span>

<span class="nv">LICENSE</span><span class="o">=</span><span class="s2">"BSD-3-Clause"</span>
<span class="nv">SLOT</span><span class="o">=</span><span class="s2">"0"</span>
<span class="nv">KEYWORDS</span><span class="o">=</span><span class="s2">"amd64 x86"</span>
<span class="nv">IUSE</span><span class="o">=</span><span class="s2">""</span>

<span class="nv">DEPEND</span><span class="o">=</span><span class="s2">""</span>
<span class="nv">RDEPEND</span><span class="o">=</span><span class="s2">"</span><span class="k">${</span><span class="nv">DEPEND</span><span class="k">}</span><span class="s2">"</span>
</code></pre></div></div>

<h3 id="the-manual-way">The manual way</h3>

<p>Download the <a href="https://github.com/xorg62/tty-clock/releases">latest point release</a> or the latest and greatest code via git:</p>

<div class="language-plaintext highlighter-rouge"><div class="highlight"><pre class="highlight"><code>$ git clone https://github.com/xorg62/tty-clock
</code></pre></div></div>
<p>Then compile and install the files:</p>

<div class="language-plaintext highlighter-rouge"><div class="highlight"><pre class="highlight"><code>$ make
</code></pre></div></div>
<div class="language-plaintext highlighter-rouge"><div class="highlight"><pre class="highlight"><code>$ sudo make install
</code></pre></div></div>]]></content><author><name></name></author><category term="[&quot;Applications &amp; Tools&quot;]" /><category term="tty-clock" /><category term="Time" /><category term="Command-line" /><summary type="html"><![CDATA[As much as I like my panels with Conky and all the neat information it shows [Example], I prefer keeping the panels hidden to not distract me. This means I have no way of telling the time.]]></summary></entry><entry><title type="html">Disable highlights based on specific strings in WeeChat with per channel rules</title><link href="https://hunden.linuxkompis.se/2019/03/14/disable_highlights_based_on_specific_strings_in_weechat_with_per_channel_rules.html" rel="alternate" type="text/html" title="Disable highlights based on specific strings in WeeChat with per channel rules" /><published>2019-03-14T00:00:00+01:00</published><updated>2024-02-16T19:42:13+01:00</updated><id>https://hunden.linuxkompis.se/2019/03/14/disable_highlights_based_on_specific_strings_in_weechat_with_per_channel_rules</id><content type="html" xml:base="https://hunden.linuxkompis.se/2019/03/14/disable_highlights_based_on_specific_strings_in_weechat_with_per_channel_rules.html"><![CDATA[<p>One of the IRC channels I’m on is a bridge to a public Minecraft server. Every time I write something in the game on that server the IRC channel shows me this:</p>

<div class="language-plaintext highlighter-rouge"><div class="highlight"><pre class="highlight"><code>Hemligastugan | **Admin** Hund » Example message.
</code></pre></div></div>

<p>WeeChat then thinks that the user “Hemligastugan” (which is a bot) mentioned me and then highlights the message for me. This got annoying pretty fast since it was me who wrote the message in Minecraft. :)</p>

<p>Thankfully this was easy to solve with the help of two plugins. One for the magic and another one to make it persistent:</p>

<ul>
  <li><a href="https://github.com/weechat/scripts/blob/master/python/unhighlight.py">unhighlight.py</a> - Allows per-buffer specification of a regex that prevents highlights.</li>
  <li><a href="https://github.com/weechat/scripts/blob/master/python/buffer_autoset.py">buffer_autoset.py</a> - Auto-set buffer properties when a buffer is opened.</li>
</ul>

<h2 id="installation">Installation</h2>

<p>Install the two scripts in WeeChat:</p>

<div class="language-plaintext highlighter-rouge"><div class="highlight"><pre class="highlight"><code>/script install unhighlight.py buffer_autoset.py
</code></pre></div></div>

<h2 id="configuration">Configuration</h2>

<p>I created a rule (using regex) that disables highlights for all messages containing the text <code class="language-plaintext highlighter-rouge">**Admin** Hund</code> in the channel <code class="language-plaintext highlighter-rouge">#Hemligastugan</code> on the server <code class="language-plaintext highlighter-rouge">im</code> (Bitlbee) like this:</p>

<div class="language-plaintext highlighter-rouge"><div class="highlight"><pre class="highlight"><code>/buffer_autoset add irc.im.#Hemligastugan localvar_set_unhighlight_regex \*\*Admin\*\* Hund
</code></pre></div></div>

<p>If you want to add another rule just use the separator <code class="language-plaintext highlighter-rouge">|</code>. And don’t forget to save everything with the command <code class="language-plaintext highlighter-rouge">/save</code> when you’re done.</p>]]></content><author><name></name></author><category term="[&quot;Tips &amp; Trix&quot;]" /><category term="WeeChat" /><category term="IRC" /><summary type="html"><![CDATA[One of the IRC channels I’m on is a bridge to a public Minecraft server. Every time I write something in the game on that server the IRC channel shows me this:]]></summary></entry><entry><title type="html">My Desktop - Mars 2019</title><link href="https://hunden.linuxkompis.se/2019/03/13/my-desktop-mars-2019.html" rel="alternate" type="text/html" title="My Desktop - Mars 2019" /><published>2019-03-13T00:00:00+01:00</published><updated>2024-02-16T19:42:13+01:00</updated><id>https://hunden.linuxkompis.se/2019/03/13/my-desktop-mars-2019</id><content type="html" xml:base="https://hunden.linuxkompis.se/2019/03/13/my-desktop-mars-2019.html"><![CDATA[<p>It has been a long time since I last put up my desktop for display. To be fair it doesn’t really see much changes these days anyway.</p>

<p><a href="/img/my_desktop_mars_2019.jpg"><img src="/img/t/my_desktop_mars_2019.jpg" alt="" /></a></p>

<p>I’ve been using both the Solarized colourscheme and the i3 window manager for about five years now. You can’t do much changes to a desktop as minimal as this, which is for the most of the time a good thing as it lets me focus on getting things done. :)</p>

<p>Here is some information for anyone interested:</p>

<table>
  <tbody>
    <tr>
      <td>Operating system:</td>
      <td><a href="https://www.gentoo.org/">Gentoo Linux</a></td>
    </tr>
    <tr>
      <td>Window manager:</td>
      <td><a href="https://i3wm.org/">i3</a></td>
    </tr>
    <tr>
      <td>Panel/bar:</td>
      <td><a href="https://i3wm.org/">i3bar</a> with <a href="https://github.com/brndnmtthws/conky">Conky</a></td>
    </tr>
    <tr>
      <td>Terminal emulator:</td>
      <td><a href="http://software.schmorp.de/pkg/rxvt-unicode.html">URxvt</a></td>
    </tr>
    <tr>
      <td>Applications shown:</td>
      <td><a href="/2019/02/15/my-bash-script-for-printing-online-channels-using-twitchy.html">TwitchyBash</a>, Twitch Bash client</td>
    </tr>
    <tr>
      <td> </td>
      <td><a href="https://weechat.org/">WeeChat</a>, IRC client</td>
    </tr>
    <tr>
      <td> </td>
      <td><a href="https://newsboat.org/">Newsboat</a>, news reader</td>
    </tr>
    <tr>
      <td> </td>
      <td><a href="https://ranger.github.io/">Ranger</a>, file manager</td>
    </tr>
    <tr>
      <td> </td>
      <td><a href="https://github.com/dylanaraps/neofetch">Neofetch</a>, system information</td>
    </tr>
    <tr>
      <td>Wallpaper:</td>
      <td><a href="https://alpha.wallhaven.cc/wallpaper/667497">Wallhaven.cc</a> (8256x5504px)</td>
    </tr>
  </tbody>
</table>]]></content><author><name></name></author><category term="[&quot;My Desktop&quot;]" /><summary type="html"><![CDATA[It has been a long time since I last put up my desktop for display. To be fair it doesn’t really see much changes these days anyway.]]></summary></entry><entry><title type="html">How to automatically reconnect to lost SSH connections using autossh</title><link href="https://hunden.linuxkompis.se/2019/03/10/automatically-reconnect-to-lost-ssh-connection.html" rel="alternate" type="text/html" title="How to automatically reconnect to lost SSH connections using autossh" /><published>2019-03-10T00:00:00+01:00</published><updated>2024-02-16T19:42:13+01:00</updated><id>https://hunden.linuxkompis.se/2019/03/10/automatically-reconnect-to-lost-ssh-connection</id><content type="html" xml:base="https://hunden.linuxkompis.se/2019/03/10/automatically-reconnect-to-lost-ssh-connection.html"><![CDATA[<p>I’m a heavy user of SSH and one thing that used to bother me was the fact that when I suspended my computer I would (logically) loose the connection to all things connected via SSH. Manually reconnecting the same things several times a day gets old fairly quickly.</p>

<p>With the help of <a href="https://www.harding.motd.ca/autossh/">autossh</a> you can automatically reconnect to lost connections. This is the basics and also how I use it:</p>

<div class="language-plaintext highlighter-rouge"><div class="highlight"><pre class="highlight"><code>$ autossh -M 0 -o "ServerAliveInterval 45" -o "ServerAliveCountMax 2" &lt;user&gt;@&lt;host&gt; -t "&lt;command&gt;"
</code></pre></div></div>

<p>The options <code class="language-plaintext highlighter-rouge">ServerAliveInterval</code> and <code class="language-plaintext highlighter-rouge">ServerAliveCountMax</code> will make the SSH client exit if it finds itself no longer connected to the server. And don’t forget to check out <code class="language-plaintext highlighter-rouge">man autossh</code> for a lot more information.</p>]]></content><author><name></name></author><category term="[&quot;Applications &amp; Tools&quot;]" /><category term="SSH" /><category term="Servers" /><category term="Command-line" /><category term="Productivity" /><summary type="html"><![CDATA[I’m a heavy user of SSH and one thing that used to bother me was the fact that when I suspended my computer I would (logically) loose the connection to all things connected via SSH. Manually reconnecting the same things several times a day gets old fairly quickly.]]></summary></entry><entry><title type="html">Basics with GNU Screen</title><link href="https://hunden.linuxkompis.se/2019/03/08/basics-with-gnu-screen.html" rel="alternate" type="text/html" title="Basics with GNU Screen" /><published>2019-03-08T00:00:00+01:00</published><updated>2024-02-16T19:42:13+01:00</updated><id>https://hunden.linuxkompis.se/2019/03/08/basics-with-gnu-screen</id><content type="html" xml:base="https://hunden.linuxkompis.se/2019/03/08/basics-with-gnu-screen.html"><![CDATA[<p>I’m aware of the fact that most people prefer <a href="https://tmux.github.io">Tmux</a> today. I’m not one of those. :) It’s not because it’s bad or anything. I have always been using Screen—long before Tmux was a thing—it’s what I’m used to.</p>

<p>And yes. Tmux have more features than Screen, but worse is better as they say. I just want the absolute basics and not any additional complexity or anything like that. I also consider Screen to be a lot easier and straight forward to use.</p>

<h2 id="introduction">Introduction</h2>

<p>Screen and Tmux are two programs that let you create sessions in the terminal that you can detach and then attach to from any terminal emulator and/or machine. This is handy when you want to run anything via the console and don’t want to be forced to always keep that window open.</p>

<p>Let’s say you work on a remote computer where you want to continue running a service or application that can’t be run as a service. If you close the terminal it will also close the application. If you were to run it via a screen you could then detach that session and it will continue to run in the background.</p>

<p>It’s always a good idea to run things in a screen over a remote connection anyway. If anything happens to your connection and you get disconnected, you might loose important work and/or time.</p>

<h2 id="getting-started">Getting started</h2>

<h3 id="table-of-contents">Table of Contents</h3>

<!-- vim-markdown-toc GFM -->

<div class="language-plaintext highlighter-rouge"><div class="highlight"><pre class="highlight"><code>* [Create a new session](#create-a-new-session)
* [Create a new session and automatically run a command](#create-a-new-session-and-automatically-run-a-command)
* [Create a new session without attaching to it](#create-a-new-session-without-attaching-to-it)
* [Detaching a session](#detaching-a-session)
* [List all sessions](#list-all-sessions)
* [Resume a session](#resume-a-session)
* [Create or resume a session in one command](#create-or-resume-a-session-in-one-command) * [Better titles](#better-titles)
</code></pre></div></div>

<!-- vim-markdown-toc -->

<h3 id="create-a-new-session">Create a new session</h3>

<p>Creating a new session is easy as:</p>

<div class="language-plaintext highlighter-rouge"><div class="highlight"><pre class="highlight"><code>$ screen -S &lt;session name&gt;
</code></pre></div></div>

<h3 id="create-a-new-session-and-automatically-run-a-command">Create a new session and automatically run a command</h3>

<p>You can also run a command directly when creating a new session:</p>

<div class="language-plaintext highlighter-rouge"><div class="highlight"><pre class="highlight"><code>$ screen -S &lt;session name&gt; "&lt;command&gt;"
</code></pre></div></div>

<p>This also works and might be useful for some scenarios:</p>

<div class="language-plaintext highlighter-rouge"><div class="highlight"><pre class="highlight"><code>$ screen -S &lt;session name&gt; sh -c "&lt;command&gt;"
</code></pre></div></div>

<h3 id="create-a-new-session-without-attaching-to-it">Create a new session without attaching to it</h3>

<p>Sometimes you might want to create a new session without automatically attaching to it. This is possible with the combination of the flags <code class="language-plaintext highlighter-rouge">-d -m</code>:</p>

<div class="language-plaintext highlighter-rouge"><div class="highlight"><pre class="highlight"><code>$ screen -S &lt;session name&gt; -d -m "&lt;command&gt;"
</code></pre></div></div>

<h3 id="detaching-a-session">Detaching a session</h3>

<p>To detach a session tap and hold the key <code class="language-plaintext highlighter-rouge">Ctrl</code> while tapping the keys <code class="language-plaintext highlighter-rouge">A</code> and <code class="language-plaintext highlighter-rouge">D</code>.</p>

<h3 id="list-all-sessions">List all sessions</h3>

<p>You can list all sessions with the flag <code class="language-plaintext highlighter-rouge">-ls</code>:</p>

<div class="language-plaintext highlighter-rouge"><div class="highlight"><pre class="highlight"><code>$ screen -ls
There are screens on:
	28049.keepassc	(Detached)
	3816.news	(Attached)
2 Sockets in /tmp/screen/S-johan.
</code></pre></div></div>

<h3 id="resume-a-session">Resume a session</h3>

<p>To resume a session:</p>

<div class="language-plaintext highlighter-rouge"><div class="highlight"><pre class="highlight"><code>$ screen -r &lt;session name or PID&gt;
</code></pre></div></div>
<p>Using the PID might be useful if you somehow ends up with two or more sessions with the same name.</p>

<h3 id="create-or-resume-a-session-in-one-command">Create or resume a session in one command</h3>

<p>I run several things in various screens. One of those things is my password manager <a href="http://k3research.outerhaven.de/keepassc/">KeePassC</a>. If I were to use the commands I just mentioned, it would require a lot of effort to create, resume and keeping track of any running session. Thankfully there’s two flags that solves that for us.</p>

<p>If we check the manual we will find the combined flags <code class="language-plaintext highlighter-rouge">-D -RR</code> with the descriptive text:</p>

<blockquote>
  <p>-D -RR  Attach here and now.</p>
</blockquote>

<p>It might sound dramatic, but it just means that it will do what you told it to do, no questions asked.</p>

<p>This is how the command looks for me with KeePassC:</p>

<div class="language-plaintext highlighter-rouge"><div class="highlight"><pre class="highlight"><code>$ screen -D -RR -S keepassc -t KeePassC sh -c "keepassc"'
</code></pre></div></div>

<p>This means that I can always run this <em>one</em> command and it will always do the same thing; if there’s already a session created it will then detach that session (if attached anywhere) and then attach the session to the terminal I ran the command from.</p>

<h2 id="better-titles">Better titles</h2>

<p>The default title for a new screen looks like this:</p>

<div class="language-plaintext highlighter-rouge"><div class="highlight"><pre class="highlight"><code>New screen...
</code></pre></div></div>

<p>With a few tweaks you can get it to look like this:</p>

<div class="language-plaintext highlighter-rouge"><div class="highlight"><pre class="highlight"><code>KeePassC [Screen 0 at Atlas]
</code></pre></div></div>

<p>If you want equally fancy titles, then add the following two lines to <code class="language-plaintext highlighter-rouge">~/.screenrc</code>:</p>

<div class="language-plaintext highlighter-rouge"><div class="highlight"><pre class="highlight"><code>hardstatus off
hardstatus string "%t [Screen %n at %H]"
</code></pre></div></div>

<p>You can then choose your own title with the flag <code class="language-plaintext highlighter-rouge">-t &lt;your title&gt;</code> as seen in the example above in the previous part.</p>]]></content><author><name></name></author><category term="[&quot;Applications &amp; Tools&quot;]" /><category term="GNU Screen" /><category term="Screen" /><category term="Command-line" /><category term="Productivity" /><summary type="html"><![CDATA[I’m aware of the fact that most people prefer Tmux today. I’m not one of those. :) It’s not because it’s bad or anything. I have always been using Screen—long before Tmux was a thing—it’s what I’m used to.]]></summary></entry><entry><title type="html">Adding drop shadows to with ImageMagick</title><link href="https://hunden.linuxkompis.se/2019/03/04/adding-drop-shadows-to-images-with-imagemagick.html" rel="alternate" type="text/html" title="Adding drop shadows to with ImageMagick" /><published>2019-03-04T00:00:00+01:00</published><updated>2024-02-16T19:42:13+01:00</updated><id>https://hunden.linuxkompis.se/2019/03/04/adding-drop-shadows-to-images-with-imagemagick</id><content type="html" xml:base="https://hunden.linuxkompis.se/2019/03/04/adding-drop-shadows-to-images-with-imagemagick.html"><![CDATA[<p>Here’s a quick little tip on how to add drop shadows to  via the command-line tool ImageMagick.</p>

<p><span class="noborder">
<a href="/img/imagemagick_dropshadow.png"><img src="/img/t/imagemagick_dropshadow.png" alt="" /></a>
</span></p>

<p>The command I used for this image was:</p>

<div class="language-plaintext highlighter-rouge"><div class="highlight"><pre class="highlight"><code>$ convert &lt;input file&gt; \( +clone -background black -shadow 50x8+0+5 \) +swap -background none -layers merge +repage &lt;output file&gt;
</code></pre></div></div>

<p>The part <code class="language-plaintext highlighter-rouge">50x8+0+5</code> controls the appearance of the shadow. The first value controls the opacity, the second one controls the radius and the two last ones controls the left/right and up/down alignment of the shadow.</p>

<p>Source: <a href="https://gist.github.com/chrisn/8157735">https://gist.github.com/chrisn/8157735</a></p>]]></content><author><name></name></author><category term="[&quot;Tips &amp; Trix&quot;]" /><category term="ImageMagick" /><category term="Command-line" /><summary type="html"><![CDATA[Here’s a quick little tip on how to add drop shadows to via the command-line tool ImageMagick.]]></summary></entry><entry><title type="html">Nick completer in WeeChat 2.4 no longer add spaces by default</title><link href="https://hunden.linuxkompis.se/2019/02/28/nick-completer-in-weechat-2.4-no-longer-add-spaces-by-default.html" rel="alternate" type="text/html" title="Nick completer in WeeChat 2.4 no longer add spaces by default" /><published>2019-02-28T00:00:00+01:00</published><updated>2024-02-16T19:42:13+01:00</updated><id>https://hunden.linuxkompis.se/2019/02/28/nick-completer-in-weechat-2.4-no-longer-add-spaces-by-default</id><content type="html" xml:base="https://hunden.linuxkompis.se/2019/02/28/nick-completer-in-weechat-2.4-no-longer-add-spaces-by-default.html"><![CDATA[<p>With the beginning of WeeChat 2.4 (released 2019-02-17) a space is no longer automatically added when you complete a nick at the beginning of command line.</p>

<p>This leaves you with <code class="language-plaintext highlighter-rouge">Hund:_</code> and not <code class="language-plaintext highlighter-rouge">Hund: _</code>. If you want the old behaviour back like me, the solution is simple. You just need to change one simple setting:</p>

<div class="language-plaintext highlighter-rouge"><div class="highlight"><pre class="highlight"><code>/set weechat.completion.nick_completer ": "
</code></pre></div></div>

<p>Don’t forge to save the changes with <code class="language-plaintext highlighter-rouge">/save</code>.</p>

<p>Source: <a href="https://weechat.org/files/releasenotes/ReleaseNotes-devel.html#v2.4_nick_completer">https://weechat.org/files/releasenotes/ReleaseNotes-devel.html#v2.4_nick_completer</a>.</p>]]></content><author><name></name></author><category term="[&quot;Tips &amp; Trix&quot;]" /><category term="WeeChat" /><category term="IRC" /><summary type="html"><![CDATA[With the beginning of WeeChat 2.4 (released 2019-02-17) a space is no longer automatically added when you complete a nick at the beginning of command line.]]></summary></entry><entry><title type="html">I moved my numpad to my alpha keys and it’s actually usable</title><link href="https://hunden.linuxkompis.se/2019/02/26/i-moved-my-numpad-to-my-alpha-keys-and-its-actually-usable.html" rel="alternate" type="text/html" title="I moved my numpad to my alpha keys and it’s actually usable" /><published>2019-02-26T00:00:00+01:00</published><updated>2024-02-16T19:42:13+01:00</updated><id>https://hunden.linuxkompis.se/2019/02/26/i-moved-my-numpad-to-my-alpha-keys-and-its-actually-usable</id><content type="html" xml:base="https://hunden.linuxkompis.se/2019/02/26/i-moved-my-numpad-to-my-alpha-keys-and-its-actually-usable.html"><![CDATA[<p>I used to have half of my <a href="/2017/07/29/my-keyboard-lets-split.html">Let’s Split keyboard</a> as my numpad, but I didn’t feel right wasting a semi-expensive custom keyboard on number inputs only. It also had too much keys and it took up way too much space on the desk anyway.</p>

<p>I use <a href="/2018/01/19/my-keyboard-the-black_diamond.html">blank keys on my keyboard</a> and using the number row works just fine for simple things like switching workspaces and short numbers. For serious number inputs I highly prefer using something numpad-y though.</p>

<p><a href="/img/my_qmk_numpad.png"><img src="/img/t/my_qmk_numpad.png" alt="" /></a></p>

<p>So. A few months ago I decided to try adding the number keys from the numpad to my alpha keys, but on a secondary layer that I access via the key that I coloured purple.</p>

<p>This is all made possible due to the ATMega32U4 microcontroller on my custom keyboard, which supports the open source firmware <a href="https://qmk.fm/">QMK</a>. I’m planning on making a post about that some day if you’re curious about it. :)</p>

<p>I have been using this new “numpad” for a few months now. At first it was really awkward and I had to think before typing any number, but after a few months I have to say I have gotten really used to it. I don’t think a need a separate numpad anymore.</p>

<p>If your keyboard is programmable I would highly recommend you trying this out. :)</p>]]></content><author><name></name></author><category term="[&quot;Personal&quot;]" /><category term="Keyboards" /><category term="QMK" /><category term="Hund" /><category term="Productivity" /><summary type="html"><![CDATA[I used to have half of my Let’s Split keyboard as my numpad, but I didn’t feel right wasting a semi-expensive custom keyboard on number inputs only. It also had too much keys and it took up way too much space on the desk anyway.]]></summary></entry><entry><title type="html">Gweled - A fun puzzle game with gems</title><link href="https://hunden.linuxkompis.se/2019/02/21/gweled-a-fun-puzzle-game-with-gems.html" rel="alternate" type="text/html" title="Gweled - A fun puzzle game with gems" /><published>2019-02-21T00:00:00+01:00</published><updated>2024-02-16T19:42:13+01:00</updated><id>https://hunden.linuxkompis.se/2019/02/21/gweled-a-fun-puzzle-game-with-gems</id><content type="html" xml:base="https://hunden.linuxkompis.se/2019/02/21/gweled-a-fun-puzzle-game-with-gems.html"><![CDATA[<p>If you’re a fan of Bejeweled and similar puzzle games you will most likely enjoy this game a lot. It’s called <a href="https:/img/gweled.org/">Gweled</a> and you could probably figured out what it’s all about just by looking at the picture below.</p>

<p>You play the game by aligning three or more gems vertically or horizontally by swapping adjacent gems. The game ends when there are no possible moves left. Its simplicity is what makes it so brilliant.</p>

<p><a href="/img/gweled.png"><img src="/img/t/gweled.png" alt="A picture of the puzzle game Gweled" /></a></p>

<p>I haven’t played any similar games for a long time, so I can’t compare it to other popular alternatives. I like this version a lot though. It’s buttery smooth, simple and starting a new game is instant. It’s perfect for the times when you want to kill a few minutes here and there.</p>

<p>And unlike most (if not all?) other alternatives, this is a open source game released under the license <a href="https:/img/www.gnu.org/licenses/old-licenses/gpl-2.0.en.html">GPLv2</a>.</p>

<h2 id="installation">Installation</h2>

<p>Installation instructions can be found on <a href="https:/img/gweled.org/download.html">their website here</a>. They currently provide options for Ubuntu, Fedora, openSUSE, Debian and Arch Linux. You’re always free to compile it from source yourself as well.</p>

<p>I installed it on Gentoo Linux using my own simple ebuild called <code class="language-plaintext highlighter-rouge">gweled-0.9.1.ebuild</code> which I put in the category <code class="language-plaintext highlighter-rouge">games-puzzle</code>:</p>

<div class="language-bash highlighter-rouge"><div class="highlight"><pre class="highlight"><code><span class="nv">EAPI</span><span class="o">=</span>6

inherit autotools

<span class="nv">DESCRIPTION</span><span class="o">=</span><span class="s2">"Gweled is a free version of a popular game called Bejeweled or Diamond Mine for GNU/Linux."</span>
<span class="nv">HOMEPAGE</span><span class="o">=</span><span class="s2">"https:/img/gweled.org"</span>
<span class="nv">SRC_URI</span><span class="o">=</span><span class="s2">"http:/img/launchpad.net/</span><span class="k">${</span><span class="nv">PN</span><span class="k">}</span><span class="s2">/trunk/</span><span class="k">${</span><span class="nv">PV</span><span class="k">}</span><span class="s2">/+download/</span><span class="k">${</span><span class="nv">PN</span><span class="k">}</span><span class="s2">-</span><span class="k">${</span><span class="nv">PV</span><span class="k">}</span><span class="s2">.tar.gz"</span>

<span class="nv">LICENSE</span><span class="o">=</span><span class="s2">"GPLv2+"</span>
<span class="nv">SLOT</span><span class="o">=</span><span class="s2">"0"</span>
<span class="nv">KEYWORDS</span><span class="o">=</span><span class="s2">"amd64"</span>

<span class="nv">DEPEND</span><span class="o">=</span><span class="s2">"media-libs/libmikmod"</span>
<span class="nv">RDEPEND</span><span class="o">=</span><span class="s2">"</span><span class="k">${</span><span class="nv">DEPEND</span><span class="k">}</span><span class="s2">"</span>
</code></pre></div></div>

<h2 id="credits">Credits</h2>

<p>Thanks to <a href="https:/img/fosstodon.org/@skunksarebetter/101621622820884761">@skunksarebetter@fosstodon.org</a> on Mastodon for making me aware of this game! :)</p>]]></content><author><name></name></author><category term="[&quot;Games&quot;]" /><category term="Games" /><category term="Puzzle games" /><summary type="html"><![CDATA[If you’re a fan of Bejeweled and similar puzzle games you will most likely enjoy this game a lot. It’s called Gweled and you could probably figured out what it’s all about just by looking at the picture below.]]></summary></entry><entry><title type="html">My Bash-script for printing online channels using Twitchy</title><link href="https://hunden.linuxkompis.se/2019/02/15/my-bash-script-for-printing-online-channels-using-twitchy.html" rel="alternate" type="text/html" title="My Bash-script for printing online channels using Twitchy" /><published>2019-02-15T00:00:00+01:00</published><updated>2024-02-16T19:42:13+01:00</updated><id>https://hunden.linuxkompis.se/2019/02/15/my-bash-script-for-printing-online-channels-using-twitchy</id><content type="html" xml:base="https://hunden.linuxkompis.se/2019/02/15/my-bash-script-for-printing-online-channels-using-twitchy.html"><![CDATA[<p>I couldn’t find an actively maintained TUI or interactive CLI-client. And I didn’t want to manually check who’s online on Twitch. I then decided to make a Bash-script that prints who’s online every <code class="language-plaintext highlighter-rouge">N</code> minutes with some fancy colours to make it look good. This is the result:</p>

<p><img src="/img/twitchybash.png" alt="" /></p>

<h2 id="the-script">The script</h2>

<p>This is my second version of it. I’m not a programmer in any way, but I like tinkering with Bash. I tried to make it easy to change the colours yourself by adding variables. I also made it so it will cut the title and end with the character <code class="language-plaintext highlighter-rouge">…</code> if it’s longer than the width of the terminal.</p>

<p>If you want to change the order of what it prints out, it shouldn’t be that difficult to change that either.</p>

<div class="language-bash highlighter-rouge"><div class="highlight"><pre class="highlight"><code><span class="c">#!/bin/bash</span>
<span class="c"># This requires Twitchy to work:</span>
<span class="c"># https://github.com/BasioMeusPuga/twitchy</span>

<span class="nv">online</span><span class="o">=</span><span class="nv">$HOME</span>/.cache/twitchy.txt
<span class="nv">width</span><span class="o">=</span><span class="si">$(</span><span class="nb">expr</span> <span class="si">$(</span>tput cols<span class="si">)</span> - 13<span class="si">)</span>
twitchy <span class="nt">--non-interactive</span> | <span class="nb">sort</span> <span class="o">&gt;</span> <span class="nv">$online</span>

<span class="c">#------------------------------#</span>
<span class="c"># Colours</span>
<span class="c">#------------------------------#</span>

<span class="nv">default</span><span class="o">=</span><span class="s2">"</span><span class="se">\e</span><span class="s2">[39m"</span>
<span class="nv">black</span><span class="o">=</span><span class="s2">"</span><span class="se">\e</span><span class="s2">[30m"</span>
<span class="nv">red</span><span class="o">=</span><span class="s2">"</span><span class="se">\e</span><span class="s2">[32m"</span>
<span class="nv">yellow</span><span class="o">=</span><span class="s2">"</span><span class="se">\e</span><span class="s2">[33m"</span>
<span class="nv">blue</span><span class="o">=</span><span class="s2">"</span><span class="se">\e</span><span class="s2">[34m"</span>
<span class="nv">magenta</span><span class="o">=</span><span class="s2">"</span><span class="se">\e</span><span class="s2">[35m"</span>
<span class="nv">cyan</span><span class="o">=</span><span class="s2">"</span><span class="se">\e</span><span class="s2">[36m"</span>
<span class="nv">lightGray</span><span class="o">=</span><span class="s2">"</span><span class="se">\e</span><span class="s2">[37m"</span>
<span class="nv">darkGray</span><span class="o">=</span><span class="s2">"</span><span class="se">\e</span><span class="s2">[90m"</span>
<span class="nv">lightRed</span><span class="o">=</span><span class="s2">"</span><span class="se">\e</span><span class="s2">[91m"</span>
<span class="nv">lightGreen</span><span class="o">=</span><span class="s2">"</span><span class="se">\e</span><span class="s2">[92m"</span>
<span class="nv">lightYellow</span><span class="o">=</span><span class="s2">"</span><span class="se">\e</span><span class="s2">[93m"</span>
<span class="nv">lightBlue</span><span class="o">=</span><span class="s2">"</span><span class="se">\e</span><span class="s2">[94m"</span>
<span class="nv">lightMagenta</span><span class="o">=</span><span class="s2">"</span><span class="se">\e</span><span class="s2">[95m"</span>
<span class="nv">lightCyan</span><span class="o">=</span><span class="s2">"</span><span class="se">\e</span><span class="s2">[96m"</span>
<span class="nv">white</span><span class="o">=</span><span class="s2">"</span><span class="se">\e</span><span class="s2">[97m"</span>

<span class="nv">cName</span><span class="o">=</span><span class="nv">$yellow</span>
<span class="nv">cTitle</span><span class="o">=</span><span class="nv">$magenta</span>
<span class="nv">cGame</span><span class="o">=</span><span class="nv">$blue</span>
<span class="nv">cUptime</span><span class="o">=</span><span class="nv">$default</span>
<span class="nv">cDash</span><span class="o">=</span><span class="nv">$default</span>
<span class="nv">cTwitchLogo</span><span class="o">=</span><span class="nv">$magenta</span>
<span class="nv">cTwitchText</span><span class="o">=</span><span class="nv">$default</span>

<span class="c">#------------------------------#</span>

<span class="k">if</span> <span class="o">[[</span> <span class="nt">-z</span> <span class="nv">$online</span> <span class="o">]]</span><span class="p">;</span> <span class="k">then
	</span><span class="nb">echo</span> <span class="nt">-e</span> <span class="s2">"</span><span class="se">\n</span><span class="nv">$cTwitchLogo</span><span class="s2">  _______       _ _       _
 |__   __|     (_) |     | |    
    | |_      ___| |_ ___| |__  
    | </span><span class="se">\ \ </span><span class="s2">/</span><span class="se">\ </span><span class="s2">/ / | __/ __| '_ </span><span class="se">\ </span><span class="s2">
    | |</span><span class="se">\ </span><span class="s2">V  V /| | || (__| | | |
    |_| </span><span class="se">\_</span><span class="s2">/</span><span class="se">\_</span><span class="s2">/ |_|</span><span class="se">\_</span><span class="s2">_</span><span class="se">\_</span><span class="s2">__|_| |_|

	</span><span class="nv">$cTwitchText</span><span class="s2"> one is online. :("</span>
<span class="k">else
    while </span><span class="nb">read </span>line
    <span class="k">do
        </span><span class="nv">name</span><span class="o">=</span><span class="si">$(</span><span class="nb">echo</span> <span class="s2">"</span><span class="nv">$line</span><span class="s2">"</span> | <span class="nb">cut</span> <span class="nt">-d</span> <span class="s2">","</span> <span class="nt">-f1</span><span class="si">)</span>
        <span class="nv">title</span><span class="o">=</span><span class="si">$(</span><span class="nb">echo</span> <span class="s2">"</span><span class="nv">$line</span><span class="s2">"</span> | <span class="nb">cut</span> <span class="nt">-d</span> <span class="s2">","</span> <span class="nt">-f3-</span> | rev | <span class="nb">cut</span> <span class="nt">-d</span> <span class="s2">","</span> <span class="nt">-f2-</span> | rev<span class="si">)</span>
        <span class="nv">titleLenght</span><span class="o">=</span><span class="si">$(</span><span class="nb">echo</span> <span class="s2">"</span><span class="nv">$title</span><span class="s2">"</span> | <span class="nb">wc</span> <span class="nt">-c</span><span class="si">)</span>
        <span class="k">if</span> <span class="o">[[</span> <span class="nv">$titleLenght</span> <span class="nt">-lt</span> <span class="s2">"</span><span class="nv">$width</span><span class="s2">"</span> <span class="o">]]</span><span class="p">;</span> <span class="k">then
            </span><span class="nv">title</span><span class="o">=</span><span class="si">$(</span><span class="nb">echo</span> <span class="s2">"</span><span class="nv">$line</span><span class="s2">"</span> | <span class="nb">cut</span> <span class="nt">-d</span> <span class="s2">","</span> <span class="nt">-f3-</span> | rev | <span class="nb">cut</span> <span class="nt">-d</span> <span class="s2">","</span> <span class="nt">-f2-</span> | rev<span class="si">)</span>
        <span class="k">else
            </span><span class="nv">title</span><span class="o">=</span><span class="si">$(</span><span class="nb">echo</span> <span class="s2">"</span><span class="nv">$line</span><span class="s2">"</span> | <span class="nb">cut</span> <span class="nt">-d</span> <span class="s2">","</span> <span class="nt">-f3-</span> | rev | <span class="nb">cut</span> <span class="nt">-d</span> <span class="s2">","</span> <span class="nt">-f2-</span> | rev | <span class="nb">cut</span> <span class="nt">-c1-</span><span class="nv">$width</span> | <span class="nb">sed</span> <span class="s1">'0,/ /s/.$/img/'</span> | <span class="nb">sed</span> <span class="s1">'${s/$/\…/}'</span><span class="si">)</span>
        <span class="k">fi
        </span><span class="nv">game</span><span class="o">=</span><span class="si">$(</span><span class="nb">echo</span> <span class="s2">"</span><span class="nv">$line</span><span class="s2">"</span> | <span class="nb">cut</span> <span class="nt">-d</span> <span class="s2">","</span> <span class="nt">-f2</span><span class="si">)</span>
        <span class="nb">uptime</span><span class="o">=</span><span class="si">$(</span><span class="nb">echo</span> <span class="s2">"</span><span class="nv">$line</span><span class="s2">"</span> | <span class="nb">cut</span> <span class="nt">-d</span> <span class="s2">","</span> <span class="nt">-f3-</span> | rev | <span class="nb">cut</span> <span class="nt">-d</span> <span class="s2">","</span> <span class="nt">-f1</span> | rev<span class="si">)</span>
    
        <span class="nb">echo</span> <span class="nt">-e</span> <span class="s2">"</span><span class="se">\n</span><span class="s2"> </span><span class="nv">$cName$name</span><span class="s2"> </span><span class="nv">$cDash</span><span class="s2">- </span><span class="nv">$cTitle$title</span><span class="se">\n</span><span class="s2"> </span><span class="nv">$cGame$game</span><span class="s2"> </span><span class="nv">$cUptime</span><span class="s2">(</span><span class="nv">$uptime</span><span class="s2">)"</span>
    <span class="k">done</span> &lt; <span class="s2">"</span><span class="nv">$online</span><span class="s2">"</span>
<span class="k">fi</span> 
</code></pre></div></div>

<h2 id="usage">Usage</h2>

<p>I use the script with the tool <code class="language-plaintext highlighter-rouge">watch</code> so I can make it automatically update every 5 minutes:</p>
<div class="language-bash highlighter-rouge"><div class="highlight"><pre class="highlight"><code><span class="nv">$ </span>watch <span class="nt">-c</span> <span class="nt">-t</span> <span class="nt">-n</span> 300 twitchyBash.sh
</code></pre></div></div>
<p>The flags used is:</p>

<div class="language-bash highlighter-rouge"><div class="highlight"><pre class="highlight"><code><span class="nt">-c</span> <span class="nt">--color</span>
<span class="nt">-t</span> <span class="nt">--no-title</span>
<span class="nt">-n</span> <span class="nt">--interval</span>
</code></pre></div></div>

<p>And to get a fancy title for the terminal:</p>
<div class="language-bash highlighter-rouge"><div class="highlight"><pre class="highlight"><code><span class="nv">$ </span><span class="nb">printf</span> <span class="s2">"</span><span class="se">\3</span><span class="s2">3]2;%s</span><span class="se">\0</span><span class="s2">07"</span> <span class="s2">"twitchyBash"</span> <span class="o">&amp;&amp;</span> watch <span class="nt">-c</span> <span class="nt">-t</span> <span class="nt">-n</span> 300 twitchyBash.sh
</code></pre></div></div>

<h3 id="example-alias">Example alias</h3>

<p>To make life easier I added an alias called <code class="language-plaintext highlighter-rouge">live</code> for it:</p>

<div class="language-bash highlighter-rouge"><div class="highlight"><pre class="highlight"><code><span class="nb">alias </span><span class="nv">live</span><span class="o">=</span><span class="s1">'printf "\33]2;%s\007" "twitchyBash" &amp;&amp; watch -c -t -n 300 twitchyBash.sh'</span>
</code></pre></div></div>]]></content><author><name></name></author><category term="[&quot;Applications &amp; Tools&quot;]" /><category term="Twitch" /><category term="twitchy" /><category term="Bash" /><category term="Scripts" /><category term="Command-line" /><summary type="html"><![CDATA[I couldn’t find an actively maintained TUI or interactive CLI-client. And I didn’t want to manually check who’s online on Twitch. I then decided to make a Bash-script that prints who’s online every N minutes with some fancy colours to make it look good. This is the result:]]></summary></entry><entry><title type="html">Zathura - A lightweight Vi-like document reader</title><link href="https://hunden.linuxkompis.se/2019/02/14/zathura-a-lightweight-vi-like-document-reader.html" rel="alternate" type="text/html" title="Zathura - A lightweight Vi-like document reader" /><published>2019-02-14T00:00:00+01:00</published><updated>2024-02-16T19:42:13+01:00</updated><id>https://hunden.linuxkompis.se/2019/02/14/zathura-a-lightweight-vi-like-document-reader</id><content type="html" xml:base="https://hunden.linuxkompis.se/2019/02/14/zathura-a-lightweight-vi-like-document-reader.html"><![CDATA[<p><a href="https://pwmt.org/projects/zathura/">Zathura</a> is a lightweight Vi-like document reader with a minimal user interface. It supports different file formats via plugins. Support is currently available for PDF (via poppler and MuPDF), PostScript, DjVu and EPUB.</p>

<p><a href="/img/zathura.png"><img src="/img/t/zathura.png" alt="" /></a></p>

<p>It supports most features you expect from a document reader like fitting documents to the width (<code class="language-plaintext highlighter-rouge">s</code>) and height (<code class="language-plaintext highlighter-rouge">a</code>), searching (<code class="language-plaintext highlighter-rouge">/</code>), hinting links (<code class="language-plaintext highlighter-rouge">f</code>), inverting colours aka “recolor” (<code class="language-plaintext highlighter-rouge">Ctrl+r</code>), view pages side-by-side (<code class="language-plaintext highlighter-rouge">d</code>) and more.</p>

<p>And as you might expect, since it’s a Vi-like application you use keys like <code class="language-plaintext highlighter-rouge">j</code>, <code class="language-plaintext highlighter-rouge">k</code>, <code class="language-plaintext highlighter-rouge">Ctrl+f</code>, <code class="language-plaintext highlighter-rouge">Ctrl+b</code>, and <code class="language-plaintext highlighter-rouge">G</code> for navigation and <code class="language-plaintext highlighter-rouge">+</code> and <code class="language-plaintext highlighter-rouge">-</code> for zooming in and out, and so on.</p>

<p>There’s a fair amount of features and settings for it. I suggest you look it up using the manual pages; <code class="language-plaintext highlighter-rouge">$ man zathura</code>.</p>

<p>And this is my fairly light config with a few changes:</p>

<div class="language-bash highlighter-rouge"><div class="highlight"><pre class="highlight"><code><span class="nv">$ </span><span class="nb">cat</span> ~/.config/zathura/zathurarc

<span class="c"># Font</span>
<span class="nb">set </span>font <span class="s2">"xos4terminus 22"</span>

<span class="c"># Automatically adjust the document to full width</span>
<span class="nb">set </span>adjust-open width

<span class="c"># Set the title to the filename</span>
<span class="nb">set </span>window-title-basename <span class="nb">true</span>

<span class="c"># Larger scoll steps with j/k</span>
<span class="nb">set </span>scroll-step 50

<span class="c"># Adjusting the document</span>
map <span class="o">[</span>normal] E adjust_window best-fit
map <span class="o">[</span>fullscreen] E adjust_window best-fit
map <span class="o">[</span>normal] e adjust_window width
map <span class="o">[</span>fullscreen] e adjust_window width

<span class="c"># Toggling the inverted colours</span>
map &lt;C-i&gt; recolor
</code></pre></div></div>

<p>I’m not sure why, but I have to use the font size <code class="language-plaintext highlighter-rouge">22</code> to get the size <code class="language-plaintext highlighter-rouge">12</code> in the bar. Unfortunately I get the actual font size <code class="language-plaintext highlighter-rouge">22</code> in a few other places like when I’m using hints. :/ Please let me know if you know how to solve it!</p>

<h2 id="installation">Installation</h2>

<p>Zathura and the plugins should be available in most official repositories. They’re at least available for Gentoo Linux, Arch Linux and Debian[1] with the same names:</p>

<table>
  <tbody>
    <tr>
      <td><code class="language-plaintext highlighter-rouge">zathura</code></td>
      <td> </td>
    </tr>
    <tr>
      <td><code class="language-plaintext highlighter-rouge">zathura-cb</code></td>
      <td>Comicbook support</td>
    </tr>
    <tr>
      <td><code class="language-plaintext highlighter-rouge">zathura-djvu</code></td>
      <td>DjVu support</td>
    </tr>
    <tr>
      <td><code class="language-plaintext highlighter-rouge">zathura-pdf-mupdf</code></td>
      <td>EPUB, PDF and XPS support based on MuPDF[1]</td>
    </tr>
    <tr>
      <td><code class="language-plaintext highlighter-rouge">zathura-pdf-poppler</code></td>
      <td>PDF support based on Poppler</td>
    </tr>
    <tr>
      <td><code class="language-plaintext highlighter-rouge">zathura-ps</code></td>
      <td>PostScript support</td>
    </tr>
  </tbody>
</table>

<ol>
  <li>It looks like Debian is not interested (?) in supporting the plugin for MuPDF. There’s a <a href="https://bugs.debian.org/cgi-bin/bugreport.cgi?bug=731447">ticket here</a> from 2013 if you want to check it out.</li>
</ol>]]></content><author><name></name></author><category term="[&quot;Applications &amp; Tools&quot;]" /><category term="Zathura" /><category term="Documents" /><category term="Document readers" /><category term="PDF" /><category term="PostScript" /><category term="EPUB" /><category term="Vi" /><summary type="html"><![CDATA[Zathura is a lightweight Vi-like document reader with a minimal user interface. It supports different file formats via plugins. Support is currently available for PDF (via poppler and MuPDF), PostScript, DjVu and EPUB.]]></summary></entry><entry><title type="html">A collection of handy ways of manipulating text in Bash</title><link href="https://hunden.linuxkompis.se/2019/02/11/a-collection-of-handy-ways-of-manipulating-text-in-bash.html" rel="alternate" type="text/html" title="A collection of handy ways of manipulating text in Bash" /><published>2019-02-11T00:00:00+01:00</published><updated>2024-02-16T19:42:13+01:00</updated><id>https://hunden.linuxkompis.se/2019/02/11/a-collection-of-handy-ways-of-manipulating-text-in-bash</id><content type="html" xml:base="https://hunden.linuxkompis.se/2019/02/11/a-collection-of-handy-ways-of-manipulating-text-in-bash.html"><![CDATA[<p>Here’s my collection with handy ways of manipulating text in Bash. I have tested all of these commands with GNU Bash 4.4.23 (or newer). If you have any feedback or suggestions feel free to send them to me via any of the listed ways in the footer or by creating a <a href="https://gitlab.com/Hund0b1/hund0b1.gitlab.io/issues">issue</a> on GitLab.</p>

<p>I have also added a <a href="#version-history">version history</a> to make it easier to keep track of the changes to this post.</p>

<!-- vim-markdown-toc GFM -->

<ul>
  <li><a href="#adding-words">Adding words</a>
    <ul>
      <li><a href="#add-a-word-to-the-beginning-of-a-string">Add a word to the beginning of a string</a></li>
      <li><a href="#add-a-word-to-the-end-of-a-string">Add a word to the end of a string</a></li>
      <li><a href="#add-a-word-on-a-new-line-after-a-match">Add a word on a new line after a match</a></li>
      <li><a href="#add-a-word-on-a-new-line-before-a-match">Add a word on a new line before a match</a></li>
      <li><a href="#add-a-word-to-a-specific-line">Add a word to a specific line</a></li>
    </ul>
  </li>
  <li><a href="#printing-content">Printing content</a>
    <ul>
      <li><a href="#print-the-third-word-in-a-string">Print the third word in a string</a></li>
      <li><a href="#print-the-first-and-third-word-in-a-string">Print the first and third word in a string</a></li>
      <li><a href="#print-a-specific-line">Print a specific line</a></li>
      <li><a href="#print-lines-10-to-20">Print lines 10 to 20</a></li>
      <li><a href="#print-the-first-10-lines">Print the first 10 lines</a></li>
      <li><a href="#print-the-last-10-lines">Print the last 10 lines</a></li>
      <li><a href="#print-lines-containing-a-specific-word">Print lines containing a specific word</a></li>
      <li><a href="#print-lines-starting-with-specific-word">Print lines starting with specific word</a></li>
      <li><a href="#print-lines-ending-with-specific-word">Print lines ending with specific word</a></li>
      <li><a href="#print-string-up-until-specific-character">Print string up until specific character</a></li>
      <li><a href="#print-string-beginning-from-specific-a-character">Print string beginning from specific a character</a></li>
      <li><a href="#print-a-line-of-characters-with-the-width-of-the-client">Print a line of characters with the width of the client</a></li>
      <li><a href="#print-the-content-between-two-matching-words">Print the content between two matching words.</a></li>
      <li><a href="#print-a-word-backwards">Print a word backwards</a></li>
      <li><a href="#print-the-first-3-characters-in-a-string">Print the first 3 characters in a string</a></li>
      <li><a href="#print-the-last-3-characters-in-a-string">Print the last 3 characters in a string</a></li>
    </ul>
  </li>
  <li><a href="#removing-words">Removing words</a>
    <ul>
      <li><a href="#remove-the-first-character-of-the-first-line">Remove the first character of the first line</a></li>
      <li><a href="#remove-the-last-character-of-the-first-line">Remove the last character of the first line</a></li>
      <li><a href="#remove-the-first-character-of-every-line">Remove the first character of every line</a></li>
      <li><a href="#remove-the-last-character-of-every-line">Remove the last character of every line</a></li>
      <li><a href="#remove-trailing-spaces-from-all-the-lines-in-a-file">Remove trailing spaces from all the lines in a file</a></li>
      <li><a href="#remove-all-commented-lines">Remove all commented lines</a></li>
      <li><a href="#remove-all-empty-lines">Remove all empty lines</a></li>
      <li><a href="#remove-a-line-by-matching-word">Remove a line by matching word</a></li>
      <li><a href="#remove-n-number-of-lines-in-the-beginning-or-the-end">Remove <code class="language-plaintext highlighter-rouge">N</code> number of lines in the beginning or the end.</a></li>
    </ul>
  </li>
  <li><a href="#replacing-words">Replacing words</a>
    <ul>
      <li><a href="#replace-the-first-occurrence-of-a-word">Replace the first occurrence of a word</a></li>
      <li><a href="#replace-the-second-occurrence-of-a-word">Replace the second occurrence of a word</a></li>
      <li><a href="#replace-all-occurrences-of-a-word">Replace all occurrences of a word</a></li>
      <li><a href="#replace-a-word-on-line-3">Replace a word on line 3</a></li>
      <li><a href="#replace-all-occurrences-of-a-word-on-lines-3-10">Replace all occurrences of a word on lines 3-10</a></li>
      <li><a href="#replace-whole-line-with-matched-pattern">Replace whole line with matched pattern</a></li>
      <li><a href="#replace-all-tabulator-spaces-with-4-regular-spaces-in-a-file">Replace all tabulator spaces with 4 regular spaces in a file</a></li>
    </ul>
  </li>
  <li><a href="#changing-lowercase--uppercase-words">Changing lowercase &amp; uppercase words</a>
    <ul>
      <li><a href="#change-all-words-to-lowercase">Change all words to lowercase</a></li>
      <li><a href="#change-all-words-to-uppercase">Change all words to uppercase</a></li>
      <li><a href="#change-the-first-letter-to-lowercase">Change the first letter to lowercase</a></li>
      <li><a href="#change-the-first-letter-to-uppercase">Change the first letter to uppercase</a></li>
      <li><a href="#change-the-last-letter-to-lowercase">Change the last letter to lowercase</a></li>
      <li><a href="#change-the-last-letter-to-uppercase">Change the last letter to uppercase</a></li>
    </ul>
  </li>
  <li><a href="#counting">Counting</a>
    <ul>
      <li><a href="#count-the-number-of-lines">Count the number of lines</a></li>
      <li><a href="#count-the-number-of-words">Count the number of words</a></li>
      <li><a href="#count-the-number-of-characters">Count the number of characters</a></li>
    </ul>
  </li>
</ul>

<!-- vim-markdown-toc -->

<h2 id="adding-words">Adding words</h2>

<h3 id="add-a-word-to-the-beginning-of-a-string">Add a word to the beginning of a string</h3>
<div class="language-bash highlighter-rouge"><div class="highlight"><pre class="highlight"><code><span class="nv">$ </span><span class="nb">echo</span> <span class="s2">"is an example"</span> | <span class="nb">sed</span> <span class="s1">'s/^/this /'</span>
this is an example
</code></pre></div></div>

<h3 id="add-a-word-to-the-end-of-a-string">Add a word to the end of a string</h3>
<div class="language-bash highlighter-rouge"><div class="highlight"><pre class="highlight"><code><span class="nv">$ </span><span class="nb">echo</span> <span class="s2">"this is an"</span> | <span class="nb">sed</span> <span class="s1">'s/$/ example/'</span>
this is an example
</code></pre></div></div>
<h3 id="add-a-word-on-a-new-line-after-a-match">Add a word on a new line after a match</h3>
<div class="language-bash highlighter-rouge"><div class="highlight"><pre class="highlight"><code><span class="nv">$ </span><span class="nb">echo</span> <span class="nt">-e</span> <span class="s2">"1</span><span class="se">\n</span><span class="s2">3"</span> | <span class="nb">sed</span> <span class="s1">'/1/a 2'</span>
1
2
3
</code></pre></div></div>
<h3 id="add-a-word-on-a-new-line-before-a-match">Add a word on a new line before a match</h3>
<div class="language-bash highlighter-rouge"><div class="highlight"><pre class="highlight"><code><span class="nv">$ </span><span class="nb">echo</span> <span class="nt">-e</span> <span class="s2">"1</span><span class="se">\n</span><span class="s2">3"</span> | <span class="nb">sed</span> <span class="s1">'/3/i 2'</span>
1
2
3
</code></pre></div></div>

<h3 id="add-a-word-to-a-specific-line">Add a word to a specific line</h3>

<p>Add the words <code class="language-plaintext highlighter-rouge">Example word</code> to the third line in a file:</p>

<div class="language-bash highlighter-rouge"><div class="highlight"><pre class="highlight"><code><span class="nv">$ </span><span class="nb">sed</span> <span class="nt">-i</span> <span class="s1">'3iExample word'</span> &lt;file&gt;
</code></pre></div></div>

<h2 id="printing-content">Printing content</h2>

<h3 id="print-the-third-word-in-a-string">Print the third word in a string</h3>
<div class="language-bash highlighter-rouge"><div class="highlight"><pre class="highlight"><code><span class="nv">$ </span><span class="nb">echo</span> <span class="s2">"one two three"</span> | <span class="nb">awk</span> <span class="s1">'{print $3}'</span>
three
</code></pre></div></div>
<h3 id="print-the-first-and-third-word-in-a-string">Print the first and third word in a string</h3>
<div class="language-bash highlighter-rouge"><div class="highlight"><pre class="highlight"><code><span class="nv">$ </span><span class="nb">echo</span> <span class="s2">"one two three"</span> | <span class="nb">awk</span> <span class="s1">'{print $1$3}'</span>
one three
</code></pre></div></div>
<p>You can add some spacing between the words like this:</p>
<div class="language-bash highlighter-rouge"><div class="highlight"><pre class="highlight"><code><span class="nv">$ </span><span class="nb">echo</span> <span class="s2">"one two three"</span> | <span class="nb">awk</span> <span class="s1">'{print $1" "$3}'</span>
one three
</code></pre></div></div>
<h3 id="print-a-specific-line">Print a specific line</h3>
<div class="language-bash highlighter-rouge"><div class="highlight"><pre class="highlight"><code><span class="nv">$ </span><span class="nb">echo</span> <span class="nt">-e</span> <span class="s2">"one</span><span class="se">\n</span><span class="s2">two</span><span class="se">\n</span><span class="s2">three"</span> | <span class="nb">sed</span> <span class="nt">-n</span> 1p
one
</code></pre></div></div>
<h3 id="print-lines-10-to-20">Print lines 10 to 20</h3>

<div class="language-bash highlighter-rouge"><div class="highlight"><pre class="highlight"><code><span class="nv">$ </span><span class="nb">sed</span> <span class="nt">-n</span> 10,20p &lt;file&gt;
</code></pre></div></div>
<p>Or pipe it with a command:</p>

<div class="language-bash highlighter-rouge"><div class="highlight"><pre class="highlight"><code><span class="nv">$ </span><span class="nb">cat</span> &lt;file&gt; | <span class="nb">sed</span> <span class="nt">-n</span> 10,20p
</code></pre></div></div>
<p>If you want to print all lines but lines 10 to 20 replace <code class="language-plaintext highlighter-rouge">p</code> with <code class="language-plaintext highlighter-rouge">d</code>.</p>

<h3 id="print-the-first-10-lines">Print the first 10 lines</h3>

<p>From an output:</p>

<div class="language-bash highlighter-rouge"><div class="highlight"><pre class="highlight"><code><span class="nv">$ </span><span class="nb">echo</span> <span class="nt">-e</span> <span class="s2">"one</span><span class="se">\n</span><span class="s2">two</span><span class="se">\n</span><span class="s2">three"</span> | <span class="nb">head</span> <span class="nt">-10</span>
</code></pre></div></div>
<p>From a file:</p>

<div class="language-bash highlighter-rouge"><div class="highlight"><pre class="highlight"><code><span class="nv">$ </span><span class="nb">head</span> <span class="nt">-10</span> &lt;file&gt;
</code></pre></div></div>
<h3 id="print-the-last-10-lines">Print the last 10 lines</h3>

<p>From an output:</p>

<div class="language-bash highlighter-rouge"><div class="highlight"><pre class="highlight"><code><span class="nv">$ </span><span class="nb">echo</span> <span class="nt">-e</span> <span class="s2">"one</span><span class="se">\n</span><span class="s2">two</span><span class="se">\n</span><span class="s2">three"</span> | <span class="nb">tail</span> <span class="nt">-10</span>
</code></pre></div></div>
<p>From a file:</p>

<div class="language-bash highlighter-rouge"><div class="highlight"><pre class="highlight"><code><span class="nv">$ </span><span class="nb">tail</span> <span class="nt">-10</span> &lt;file&gt;
</code></pre></div></div>
<h3 id="print-lines-containing-a-specific-word">Print lines containing a specific word</h3>

<p>To reverse this replace <code class="language-plaintext highlighter-rouge">p</code> with <code class="language-plaintext highlighter-rouge">!p</code>.</p>

<div class="language-bash highlighter-rouge"><div class="highlight"><pre class="highlight"><code><span class="nv">$ </span><span class="nb">echo</span> <span class="nt">-e</span> <span class="s2">"one</span><span class="se">\n</span><span class="s2">two</span><span class="se">\n</span><span class="s2">three"</span> | <span class="nb">sed</span> <span class="nt">-n</span> <span class="s1">'/two/p'</span>
two
</code></pre></div></div>

<h3 id="print-lines-starting-with-specific-word">Print lines starting with specific word</h3>

<div class="language-bash highlighter-rouge"><div class="highlight"><pre class="highlight"><code><span class="nv">$ </span><span class="nb">echo</span> <span class="nt">-e</span> <span class="s2">"one</span><span class="se">\n</span><span class="s2">two</span><span class="se">\n</span><span class="s2">three"</span> | <span class="nb">sed</span> <span class="nt">-n</span> <span class="s1">'/^one/p'</span>
one
</code></pre></div></div>
<p>Same thing but with several words:</p>

<div class="language-bash highlighter-rouge"><div class="highlight"><pre class="highlight"><code><span class="nv">$ </span><span class="nb">echo</span> <span class="nt">-e</span> <span class="s2">"one</span><span class="se">\n</span><span class="s2">two</span><span class="se">\n</span><span class="s2">three"</span> | <span class="nb">sed</span> <span class="nt">-n</span> <span class="s1">'/^one\|^three/p'</span>
one
three
</code></pre></div></div>

<h3 id="print-lines-ending-with-specific-word">Print lines ending with specific word</h3>

<p>To reverse this replace <code class="language-plaintext highlighter-rouge">p</code> with <code class="language-plaintext highlighter-rouge">!p</code>.</p>
<div class="language-bash highlighter-rouge"><div class="highlight"><pre class="highlight"><code><span class="nv">$ </span><span class="nb">echo</span> <span class="nt">-e</span> <span class="s2">"one</span><span class="se">\n</span><span class="s2">two</span><span class="se">\n</span><span class="s2">three"</span> | <span class="nb">sed</span> <span class="nt">-n</span> <span class="s1">'/one$/p'</span>
one
three
</code></pre></div></div>
<p>Same thing but with several words:</p>
<div class="language-bash highlighter-rouge"><div class="highlight"><pre class="highlight"><code><span class="nv">$ </span><span class="nb">echo</span> <span class="nt">-e</span> <span class="s2">"one</span><span class="se">\n</span><span class="s2">two</span><span class="se">\n</span><span class="s2">three"</span> | <span class="nb">sed</span> <span class="nt">-n</span> <span class="s1">'/one$\|three/p'</span>
one
three
</code></pre></div></div>
<h3 id="print-string-up-until-specific-character">Print string up until specific character</h3>
<div class="language-bash highlighter-rouge"><div class="highlight"><pre class="highlight"><code><span class="nv">$ </span><span class="nb">echo</span> <span class="s2">"this is an example,string"</span> | <span class="nb">cut</span> <span class="nt">-d</span> <span class="s2">","</span> <span class="nt">-f1</span>
this is an example
</code></pre></div></div>
<h3 id="print-string-beginning-from-specific-a-character">Print string beginning from specific a character</h3>
<div class="language-bash highlighter-rouge"><div class="highlight"><pre class="highlight"><code><span class="nv">$ </span><span class="nb">echo</span> <span class="s2">"this is an example,string"</span> | rev | <span class="nb">cut</span> <span class="nt">-d</span> <span class="s2">","</span> <span class="nt">-f1</span> | rev
string
</code></pre></div></div>
<h3 id="print-a-line-of-characters-with-the-width-of-the-client">Print a line of characters with the width of the client</h3>
<p>The line will be the same width as your terminal.</p>
<div class="language-bash highlighter-rouge"><div class="highlight"><pre class="highlight"><code><span class="nb">printf</span> <span class="s2">"%</span><span class="sb">`</span>tput cols<span class="sb">`</span><span class="s2">s"</span>|tr <span class="s1">' '</span> <span class="s1">'-'</span><span class="o">)</span>
<span class="nt">---------------------------------------</span><span class="o">[</span>...]
</code></pre></div></div>

<h3 id="print-the-content-between-two-matching-words">Print the content between two matching words.</h3>

<div class="language-bash highlighter-rouge"><div class="highlight"><pre class="highlight"><code><span class="nv">$ </span><span class="nb">cat</span> <span class="nv">$FILE</span> | <span class="nb">sed</span> <span class="nt">-n</span> <span class="s1">'/EXAMPLE_WORD_1/,/EXAMPLE_WORD_2/p'</span>
</code></pre></div></div>

<h3 id="print-a-word-backwards">Print a word backwards</h3>

<div class="language-bash highlighter-rouge"><div class="highlight"><pre class="highlight"><code><span class="nv">$ </span><span class="nb">echo</span> <span class="s2">"Example"</span> | rev
elpmaxE
</code></pre></div></div>

<h3 id="print-the-first-3-characters-in-a-string">Print the first 3 characters in a string</h3>
<div class="language-bash highlighter-rouge"><div class="highlight"><pre class="highlight"><code><span class="nb">echo</span> <span class="nt">-n</span> <span class="s2">"Example"</span> | <span class="nb">head</span> <span class="nt">-c</span> 3
Exa
</code></pre></div></div>

<h3 id="print-the-last-3-characters-in-a-string">Print the last 3 characters in a string</h3>
<div class="language-bash highlighter-rouge"><div class="highlight"><pre class="highlight"><code><span class="nb">echo</span> <span class="nt">-n</span> <span class="s2">"Example"</span> | <span class="nb">tail</span> <span class="nt">-c</span> 3
ple
</code></pre></div></div>

<p>The flag <code class="language-plaintext highlighter-rouge">-n</code> is to make sure that Bash doesn’t add a <code class="language-plaintext highlighter-rouge">newline</code> at the end.</p>

<h2 id="removing-words">Removing words</h2>

<h3 id="remove-the-first-character-of-the-first-line">Remove the first character of the first line</h3>
<div class="language-bash highlighter-rouge"><div class="highlight"><pre class="highlight"><code><span class="nv">$ </span><span class="nb">echo</span> <span class="nt">-e</span> <span class="s2">"example</span><span class="se">\n</span><span class="s2">words"</span> | <span class="nb">sed</span> <span class="s1">'0,/./s/./img/'</span>
xample
words
</code></pre></div></div>
<h3 id="remove-the-last-character-of-the-first-line">Remove the last character of the first line</h3>
<div class="language-bash highlighter-rouge"><div class="highlight"><pre class="highlight"><code><span class="nv">$ </span><span class="nb">echo</span> <span class="nt">-e</span> <span class="s2">"example</span><span class="se">\n</span><span class="s2">words"</span> | <span class="nb">sed</span> <span class="s1">'0,/./s/.$/img/'</span>
exampl
words
</code></pre></div></div>
<h3 id="remove-the-first-character-of-every-line">Remove the first character of every line</h3>
<div class="language-bash highlighter-rouge"><div class="highlight"><pre class="highlight"><code><span class="nv">$ </span><span class="nb">echo</span> <span class="nt">-e</span> <span class="s2">"example</span><span class="se">\n</span><span class="s2">words"</span> | <span class="nb">sed</span> <span class="s1">'s/./img/'</span>
xample
ords
</code></pre></div></div>
<h3 id="remove-the-last-character-of-every-line">Remove the last character of every line</h3>
<div class="language-bash highlighter-rouge"><div class="highlight"><pre class="highlight"><code><span class="nv">$ </span><span class="nb">echo</span> <span class="nt">-e</span> <span class="s2">"example</span><span class="se">\n</span><span class="s2">words"</span> | <span class="nb">sed</span> <span class="s1">'s/.$/img/'</span>
exampl
word
</code></pre></div></div>
<h3 id="remove-trailing-spaces-from-all-the-lines-in-a-file">Remove trailing spaces from all the lines in a file</h3>
<div class="language-bash highlighter-rouge"><div class="highlight"><pre class="highlight"><code><span class="nv">$ </span><span class="nb">sed</span> <span class="nt">-i</span> <span class="s1">'s/^[ \t]*/img/;s/[ \t]*$/img/'</span> &lt;file&gt;
</code></pre></div></div>
<h3 id="remove-all-commented-lines">Remove all commented lines</h3>
<div class="language-bash highlighter-rouge"><div class="highlight"><pre class="highlight"><code><span class="nv">$ </span><span class="nb">sed</span> <span class="nt">-i</span> <span class="s1">'s/#.*/img/'</span> &lt;file&gt;
</code></pre></div></div>
<h3 id="remove-all-empty-lines">Remove all empty lines</h3>
<div class="language-bash highlighter-rouge"><div class="highlight"><pre class="highlight"><code><span class="nv">$ </span><span class="nb">sed</span> <span class="nt">-i</span> <span class="s1">'/^$/d'</span> &lt;file&gt;
</code></pre></div></div>

<h3 id="remove-a-line-by-matching-word">Remove a line by matching word</h3>

<p>In a file:</p>

<div class="language-bash highlighter-rouge"><div class="highlight"><pre class="highlight"><code><span class="nv">$ </span><span class="nb">sed</span> <span class="s1">'/EXAMPLE_WORD/d'</span> ./file.txt
</code></pre></div></div>
<p>In a output:</p>

<div class="language-bash highlighter-rouge"><div class="highlight"><pre class="highlight"><code><span class="nv">$ </span><span class="nb">cat </span>file.txt | <span class="nb">sed</span> <span class="s1">'/EXAMPLE_WORD/d'</span>
</code></pre></div></div>

<h3 id="remove-n-number-of-lines-in-the-beginning-or-the-end">Remove <code class="language-plaintext highlighter-rouge">N</code> number of lines in the beginning or the end.</h3>

<p>Remove the last line at the end:</p>

<div class="language-bash highlighter-rouge"><div class="highlight"><pre class="highlight"><code><span class="nv">$ </span><span class="nb">cat </span>file.txt | <span class="nb">head</span> <span class="nt">-n</span> <span class="nt">-1</span>
</code></pre></div></div>

<p>Remove the first line at the top:</p>

<div class="language-bash highlighter-rouge"><div class="highlight"><pre class="highlight"><code><span class="nv">$ </span><span class="nb">cat </span>file.txt | <span class="nb">tail</span> <span class="nt">-n</span> +2
</code></pre></div></div>

<h2 id="replacing-words">Replacing words</h2>

<h3 id="replace-the-first-occurrence-of-a-word">Replace the first occurrence of a word</h3>
<div class="language-bash highlighter-rouge"><div class="highlight"><pre class="highlight"><code><span class="nv">$ </span><span class="nb">echo</span> <span class="nt">-e</span> <span class="s2">"one two four"</span> | <span class="nb">sed</span> <span class="s1">'s/four/three/'</span>
one two three
</code></pre></div></div>
<h3 id="replace-the-second-occurrence-of-a-word">Replace the second occurrence of a word</h3>
<div class="language-bash highlighter-rouge"><div class="highlight"><pre class="highlight"><code><span class="nv">$ </span><span class="nb">echo</span> <span class="nt">-e</span> <span class="s2">"one two three three"</span> | <span class="nb">sed</span> <span class="s1">'s/three/four/2'</span>
one two three four
</code></pre></div></div>
<h3 id="replace-all-occurrences-of-a-word">Replace all occurrences of a word</h3>
<div class="language-bash highlighter-rouge"><div class="highlight"><pre class="highlight"><code><span class="nv">$ </span><span class="nb">echo</span> <span class="nt">-e</span> <span class="s2">"dog cat cat"</span> | <span class="nb">sed</span> <span class="s1">'s/cat/dog/g'</span>
dog dog dog
</code></pre></div></div>
<h3 id="replace-a-word-on-line-3">Replace a word on line 3</h3>
<div class="language-bash highlighter-rouge"><div class="highlight"><pre class="highlight"><code><span class="nv">$ </span><span class="nb">sed</span> <span class="nt">-i</span> <span class="s1">'3 s/cat/dog/'</span> &lt;file&gt;
</code></pre></div></div>
<h3 id="replace-all-occurrences-of-a-word-on-lines-3-10">Replace all occurrences of a word on lines 3-10</h3>
<div class="language-bash highlighter-rouge"><div class="highlight"><pre class="highlight"><code><span class="nv">$ </span><span class="nb">sed</span> <span class="nt">-i</span> <span class="s1">'3-10 s/cat/dog/g'</span> &lt;file&gt;
</code></pre></div></div>
<h3 id="replace-whole-line-with-matched-pattern">Replace whole line with matched pattern</h3>
<div class="language-bash highlighter-rouge"><div class="highlight"><pre class="highlight"><code><span class="nb">echo</span> <span class="nt">-e</span> <span class="s2">"1</span><span class="se">\n</span><span class="s2">4</span><span class="se">\n</span><span class="s2">3"</span> | <span class="nb">sed</span> <span class="s1">'/4/c 2'</span>
1
2
3
</code></pre></div></div>
<h3 id="replace-all-tabulator-spaces-with-4-regular-spaces-in-a-file">Replace all tabulator spaces with 4 regular spaces in a file</h3>
<div class="language-bash highlighter-rouge"><div class="highlight"><pre class="highlight"><code><span class="nv">$ </span><span class="nb">sed</span> <span class="nt">-i</span> <span class="s1">'s/\t/    /g'</span> &lt;file&gt;
</code></pre></div></div>

<h2 id="changing-lowercase--uppercase-words">Changing lowercase &amp; uppercase words</h2>

<h3 id="change-all-words-to-lowercase">Change all words to lowercase</h3>
<div class="language-bash highlighter-rouge"><div class="highlight"><pre class="highlight"><code><span class="nv">$ </span><span class="nb">echo</span> <span class="s2">"EXAMPLE Text"</span> | <span class="nb">awk</span> <span class="s1">'{print tolower($0)}'</span>
example text
</code></pre></div></div>
<h3 id="change-all-words-to-uppercase">Change all words to uppercase</h3>
<div class="language-bash highlighter-rouge"><div class="highlight"><pre class="highlight"><code><span class="nv">$ </span><span class="nb">echo</span> <span class="s2">"Example text"</span> | <span class="nb">awk</span> <span class="s1">'{print toupper($0)}'</span>
EXAMPLE TEXT
</code></pre></div></div>
<h3 id="change-the-first-letter-to-lowercase">Change the first letter to lowercase</h3>
<div class="language-bash highlighter-rouge"><div class="highlight"><pre class="highlight"><code><span class="nv">$ </span><span class="nb">echo</span> <span class="s2">"example"</span> | <span class="nb">sed</span> <span class="s1">'s/.*/\l&amp;/'</span>
Example
</code></pre></div></div>
<h3 id="change-the-first-letter-to-uppercase">Change the first letter to uppercase</h3>
<div class="language-bash highlighter-rouge"><div class="highlight"><pre class="highlight"><code><span class="nv">$ </span><span class="nb">echo</span> <span class="s2">"example"</span> | <span class="nb">sed</span> <span class="s1">'s/.*/\u&amp;/'</span>
Example
</code></pre></div></div>
<h3 id="change-the-last-letter-to-lowercase">Change the last letter to lowercase</h3>
<div class="language-bash highlighter-rouge"><div class="highlight"><pre class="highlight"><code><span class="nv">$ </span><span class="nb">echo</span> <span class="s2">"ExamplE"</span> | <span class="nb">sed</span> <span class="s1">'s/.$/\l&amp;/'</span>
Example
</code></pre></div></div>
<h3 id="change-the-last-letter-to-uppercase">Change the last letter to uppercase</h3>
<div class="language-bash highlighter-rouge"><div class="highlight"><pre class="highlight"><code><span class="nv">$ </span><span class="nb">echo</span> <span class="s2">"EXAMPLe"</span> | <span class="nb">sed</span> <span class="s1">'s/.$/\u&amp;/'</span>
Example
</code></pre></div></div>

<h2 id="counting">Counting</h2>

<h3 id="count-the-number-of-lines">Count the number of lines</h3>

<div class="language-bash highlighter-rouge"><div class="highlight"><pre class="highlight"><code><span class="nv">$ </span><span class="nb">cat </span>file.txt | <span class="nb">wc</span> <span class="nt">-l</span>
</code></pre></div></div>

<h3 id="count-the-number-of-words">Count the number of words</h3>

<div class="language-bash highlighter-rouge"><div class="highlight"><pre class="highlight"><code><span class="nv">$ </span><span class="nb">cat </span>file.txt | <span class="nb">wc</span> <span class="nt">-w</span>
</code></pre></div></div>

<h3 id="count-the-number-of-characters">Count the number of characters</h3>

<div class="language-bash highlighter-rouge"><div class="highlight"><pre class="highlight"><code><span class="nv">$ </span><span class="nb">cat </span>file.txt | <span class="nb">wc</span> <span class="nt">-m</span>
</code></pre></div></div>]]></content><author><name></name></author><category term="[&quot;Applications &amp; Tools&quot;]" /><category term="Bash" /><category term="Command-line" /><category term="Productivity" /><summary type="html"><![CDATA[Here’s my collection with handy ways of manipulating text in Bash. I have tested all of these commands with GNU Bash 4.4.23 (or newer). If you have any feedback or suggestions feel free to send them to me via any of the listed ways in the footer or by creating a issue on GitLab.]]></summary></entry><entry><title type="html">How to disable the hotkey that toggles the menu bar in Firefox</title><link href="https://hunden.linuxkompis.se/2019/02/10/how-to-disable-the-hotkey-that-toggles-the-menu-bar-in-firefox.html" rel="alternate" type="text/html" title="How to disable the hotkey that toggles the menu bar in Firefox" /><published>2019-02-10T00:00:00+01:00</published><updated>2024-02-16T19:42:13+01:00</updated><id>https://hunden.linuxkompis.se/2019/02/10/how-to-disable-the-hotkey-that-toggles-the-menu-bar-in-firefox</id><content type="html" xml:base="https://hunden.linuxkompis.se/2019/02/10/how-to-disable-the-hotkey-that-toggles-the-menu-bar-in-firefox.html"><![CDATA[<p>I use Firefox as my secondary browser and something that has been bothering me for some time now, is the fact that the <code class="language-plaintext highlighter-rouge">Alt</code>-key toggles the menu bar.</p>

<p>This is an issue for me because I use the <code class="language-plaintext highlighter-rouge">Alt</code>-key as my modifier-key for my window manager i3. Which means that I constantly toggle the menu bar by mistake. And while the menu bar is visible the keybindings for <a href="https://addons.mozilla.org/en-US/firefox/addon/vim-vixen/">Vim Vixen</a> doesn’t work.</p>

<h2 id="the-solution">The solution</h2>

<p>The solution to the issue is actually rather easy. I found the solution on r/firefox on Reddit <a href="https://old.reddit.com/r/firefox/comments/6451y1/can_i_disable_the_altkey_menu_bar_showing_behavior/dfztxqc/">here</a>. What you neede to do is to simply toggle a value in Firefox.</p>

<p>Copy and paste this link into your adress bar in Firefox:</p>

<div class="language-plaintext highlighter-rouge"><div class="highlight"><pre class="highlight"><code>about:config?filter=ui.key.menuAccessKeyFocuses
</code></pre></div></div>

<p>Then set the value to <code class="language-plaintext highlighter-rouge">false</code> by double-clicking on the string and you’re done.</p>]]></content><author><name></name></author><category term="[&quot;Tips &amp; Trix&quot;]" /><category term="Firefox" /><summary type="html"><![CDATA[I use Firefox as my secondary browser and something that has been bothering me for some time now, is the fact that the Alt-key toggles the menu bar.]]></summary></entry><entry><title type="html">How to copy, move and delete files in your shell the safe way</title><link href="https://hunden.linuxkompis.se/2019/02/09/how-to-copy-move-and-delete-files-in-your-shell-the-safe-way.html" rel="alternate" type="text/html" title="How to copy, move and delete files in your shell the safe way" /><published>2019-02-09T00:00:00+01:00</published><updated>2024-02-16T19:42:13+01:00</updated><id>https://hunden.linuxkompis.se/2019/02/09/how-to-copy-move-and-delete-files-in-your-shell-the-safe-way</id><content type="html" xml:base="https://hunden.linuxkompis.se/2019/02/09/how-to-copy-move-and-delete-files-in-your-shell-the-safe-way.html"><![CDATA[<p>If you copy, move or remove files in the shell using <code class="language-plaintext highlighter-rouge">cp</code>, <code class="language-plaintext highlighter-rouge">mv</code> and <code class="language-plaintext highlighter-rouge">rm</code> you don’t get a confirmation for your action. This can be a awfully bad thing if you happen to make a mistake like slipping on a key and accidentally deleting the wrong file. No ones want that.</p>

<p>There’s a pretty simple way to prevent an accident like that, and that’s using the flag <code class="language-plaintext highlighter-rouge">-i, --interactive</code> with those commands. It will then ask for your confirmation every time you’re about to overwrite or delete files:</p>

<h3 id="move">Move:</h3>

<div class="language-bash highlighter-rouge"><div class="highlight"><pre class="highlight"><code><span class="nv">$ </span><span class="nb">mv</span> <span class="nt">-i</span> dog.txt cat.txt
<span class="nb">mv</span>: overwrite <span class="s1">'cat.txt'</span>?
</code></pre></div></div>
<h3 id="copy">Copy:</h3>

<div class="language-bash highlighter-rouge"><div class="highlight"><pre class="highlight"><code><span class="nv">$ </span><span class="nb">cp</span> <span class="nt">-i</span> cat.txt dog.txt
<span class="nb">cp</span>: overwrite <span class="s1">'dog.txt'</span>?
</code></pre></div></div>
<h3 id="delete">Delete:</h3>

<div class="language-bash highlighter-rouge"><div class="highlight"><pre class="highlight"><code><span class="nv">$ </span><span class="nb">rm</span> <span class="nt">-i</span> <span class="k">*</span>
zsh: sure you want to delete all 2 files <span class="k">in</span> /home/johan/test <span class="o">[</span>yn]?
</code></pre></div></div>

<p>This flag has actually saved me a few times. I highly recommend adding aliases for them so you never forget to use the flags:</p>

<div class="language-bash highlighter-rouge"><div class="highlight"><pre class="highlight"><code><span class="nb">alias cp</span><span class="o">=</span><span class="s1">'cp -i'</span>
<span class="nb">alias mv</span><span class="o">=</span><span class="s1">'mv -i'</span>
<span class="nb">alias rm</span><span class="o">=</span><span class="s1">'mv -i'</span>
</code></pre></div></div>

<p>By default, <code class="language-plaintext highlighter-rouge">rm</code> will ask for confirmation for every single file, if you batch delete files and only want to confirm once, you can change the flag to a capital “i” like this: <code class="language-plaintext highlighter-rouge">-I</code>. It will then only ask you when you remove three files or more and when you’re removing files and folders recursively.</p>]]></content><author><name></name></author><category term="[&quot;Tips &amp; Trix&quot;]" /><category term="Shell" /><category term="Safety" /><category term="File management" /><category term="Command-line" /><category term="Productivity" /><summary type="html"><![CDATA[If you copy, move or remove files in the shell using cp, mv and rm you don’t get a confirmation for your action. This can be a awfully bad thing if you happen to make a mistake like slipping on a key and accidentally deleting the wrong file. No ones want that.]]></summary></entry><entry><title type="html">How to stay updated about security vulnerabilities on Gentoo</title><link href="https://hunden.linuxkompis.se/2019/02/06/how-to-stay-updated-about-security-vulnerabilities-on-gentoo-linux.html" rel="alternate" type="text/html" title="How to stay updated about security vulnerabilities on Gentoo" /><published>2019-02-06T00:00:00+01:00</published><updated>2024-02-16T19:42:13+01:00</updated><id>https://hunden.linuxkompis.se/2019/02/06/how-to-stay-updated-about-security-vulnerabilities-on-gentoo-linux</id><content type="html" xml:base="https://hunden.linuxkompis.se/2019/02/06/how-to-stay-updated-about-security-vulnerabilities-on-gentoo-linux.html"><![CDATA[<p>One of the most basic and probably one of the most important thing you can do to keep your system less insecure, is to simply keep it updated. But—for obvious reasons—installing every single update might not always be the most desirable for thing for some users running Gentoo Linux.</p>

<p>Keeping yourself updated on all the possible security vulnerabilities for your packages isn’t an easy or fun task though. Thanks to the website <a href="https://security.gentoo.org/glsa/">Gentoo Linux Security Advisories (GLSA)</a> that’s not an issue! All the security vulnerabilities and its solutions for Gentoo Linux gets published there for easy access.</p>

<p>And besides visiting the website itself, there’s also 3 optional and handy ways of easily staying informed about the news there; via a handy command-line tool, via e-mail and via two news feeds.</p>

<p>All the information mentioned below can be found on their website here: <a href="https://www.gentoo.org/support/security/stay-informed.html">Stay informed – Gentoo Linux</a>.</p>

<h2 id="the-command-line-tool">The command-line tool</h2>

<p>The tool <code class="language-plaintext highlighter-rouge">glsa-check</code> comes bundled with the package <a href="https://packages.gentoo.org/packages/app-portage/gentoolkit">app-portage/gentoolkit</a> and it can check if any of your installed packages is affected:</p>

<div class="language-bash highlighter-rouge"><div class="highlight"><pre class="highlight"><code><span class="nv">$ </span>glsa-check <span class="nt">-t</span> affected
This system is not affected by any of the listed GLSAs
</code></pre></div></div>

<p>It can do a few other things as well. To list all the available options just run <code class="language-plaintext highlighter-rouge">glsa-check</code> without any arguments.</p>

<h2 id="e-mail">E-mail</h2>

<p>All advisories are posted to the <a href="https://www.gentoo.org/get-involved/mailing-lists/all-lists.html">gentoo-announce mailing list</a>. You can subscribe by sending an emtpy e-mail to <a href="mailto:gentoo-announce+subscribe@lists.gentoo.org">gentoo-announce+subscribe@lists.gentoo.org</a>. A confirmation e-mail will be sent back to you and you need to reply to the message to complete the subscription.</p>

<h2 id="news-feeds">News feeds</h2>

<p>They also offer two news feeds that you can subscribe to:</p>

<ul>
  <li>RSS 2.0: <a href="https://security.gentoo.org/glsa/feed.rss">https://security.gentoo.org/glsa/feed.rss</a></li>
  <li>Atom 1.4.3: <a href="https://security.gentoo.org/glsa/feed.atom">https://security.gentoo.org/glsa/feed.atom</a></li>
</ul>]]></content><author><name></name></author><category term="[&quot;Applications &amp; Tools&quot;, &quot;Gentoo&quot;]" /><category term="Gentoo" /><category term="Security" /><category term="Command-line" /><summary type="html"><![CDATA[One of the most basic and probably one of the most important thing you can do to keep your system less insecure, is to simply keep it updated. But—for obvious reasons—installing every single update might not always be the most desirable for thing for some users running Gentoo Linux.]]></summary></entry><entry><title type="html">Automatically close private buffers in WeeChat with buffer_autoclose.py</title><link href="https://hunden.linuxkompis.se/2019/02/05/automatically-close-private-buffers-in-weechat-with-buffer_autoclose.py.html" rel="alternate" type="text/html" title="Automatically close private buffers in WeeChat with buffer_autoclose.py" /><published>2019-02-05T00:00:00+01:00</published><updated>2024-02-16T19:42:13+01:00</updated><id>https://hunden.linuxkompis.se/2019/02/05/automatically-close-private-buffers-in-weechat-with-buffer_autoclose.py</id><content type="html" xml:base="https://hunden.linuxkompis.se/2019/02/05/automatically-close-private-buffers-in-weechat-with-buffer_autoclose.py.html"><![CDATA[<p>I use WeeChat for both IRC and XMPP (via Bitlbee) and it’s not uncommon for me to end up with tons of buffers with private conversations. And I don’t find it that much fun to manually close the inactive conversations all the time.</p>

<p>That’s why I looked for a plugin that could do this for me and after some looking arond I found <a href="https://weechat.org/scripts/source/buffer_autoclose.py.html/">buffer_autoclose.py</a>.</p>

<h2 id="usage">Usage</h2>

<p>It’s simple to use, you just install it and you’re done. But you migh want to change the default settings. By default it’s set to run every 60 seconds and to look for conversations that has been inactive for 30 minutes and close them.</p>

<p>To change the age on inactive buffers (I changed it to 1440 minutes which is 24 hours):</p>

<div class="language-plaintext highlighter-rouge"><div class="highlight"><pre class="highlight"><code>/set plugins.var.python.buffer_autoclose.age_limit &lt;minutes&gt;
</code></pre></div></div>

<p>This is how often it should check for old private buffers (I changed it to 60 minutes):</p>
<div class="language-plaintext highlighter-rouge"><div class="highlight"><pre class="highlight"><code>/set plugins.var.python.buffer_autoclose.interval &lt;minutes&gt;
</code></pre></div></div>

<p>And this is if you never want to close the buffers with someone special:</p>

<div class="language-plaintext highlighter-rouge"><div class="highlight"><pre class="highlight"><code>/set plugins.var.python.buffer_autoclose.ignore "Hund"
</code></pre></div></div>

<h2 id="installation">Installation</h2>

<p>You install the script in WeeChat with the command:</p>

<div class="language-plaintext highlighter-rouge"><div class="highlight"><pre class="highlight"><code>/script install buffer_autoclose.py
</code></pre></div></div>

<p>Once installed WeeChat should automatically load it.</p>]]></content><author><name></name></author><category term="[&quot;Tips &amp; Trix&quot;]" /><category term="WeeChat" /><category term="Plugins" /><category term="IRC" /><summary type="html"><![CDATA[I use WeeChat for both IRC and XMPP (via Bitlbee) and it’s not uncommon for me to end up with tons of buffers with private conversations. And I don’t find it that much fun to manually close the inactive conversations all the time.]]></summary></entry><entry><title type="html">My colourful plaintext to-do list</title><link href="https://hunden.linuxkompis.se/2019/02/01/my-colourful-plaintext-to-do-list.html" rel="alternate" type="text/html" title="My colourful plaintext to-do list" /><published>2019-02-01T00:00:00+01:00</published><updated>2024-02-16T19:42:13+01:00</updated><id>https://hunden.linuxkompis.se/2019/02/01/my-colourful-plaintext-to-do-list</id><content type="html" xml:base="https://hunden.linuxkompis.se/2019/02/01/my-colourful-plaintext-to-do-list.html"><![CDATA[<p>I have probably tried more alternatives for to-do lists than anything. And while there’s a lot of good options out there, I really don’t need all the bells and whistles that most comes with.</p>

<p>Then there’s the syncing issue as well. I haven’t really found an application that I both like and that supports syncing with my phone in some easy and sane way.</p>

<p>So, one day I decided to try out the plaintext route. Plaintext is after all one of my favourite things in this world! After a little bit of tinkering I settled on the workflow of simply using my editor Vim and then <a href="http://supercat.nosredna.net/">Supercat</a>, which works like <code class="language-plaintext highlighter-rouge">cat</code> but supports colourised output via regular expression.</p>

<p><a href="/img/todo-plaintext.png"><img src="/img/t/todo-plaintext.png" alt="A screenshot of my colourful plaintext to-do list" /></a></p>

<p>The command I use to view the document is <code class="language-plaintext highlighter-rouge">$ spc -c &lt;config&gt; &lt;document&gt;</code> and I have put it in a small script for easy access:</p>

<div class="language-bash highlighter-rouge"><div class="highlight"><pre class="highlight"><code><span class="c">#!/bin/bash</span>

<span class="nv">file</span><span class="o">=</span><span class="s2">"</span><span class="nv">$HOME</span><span class="s2">/Documents/todo.md"</span>
<span class="nv">spc</span><span class="o">=</span><span class="s2">"spc -c </span><span class="nv">$HOME</span><span class="s2">/.config/supercat/markdown"</span>

<span class="k">case</span> <span class="nv">$1</span> <span class="k">in
    </span><span class="nb">ls</span><span class="p">)</span>
        <span class="nb">echo</span> <span class="s2">""</span>
        <span class="nv">$spc</span> <span class="nv">$file</span>
        <span class="nb">echo</span> <span class="s2">""</span>
        <span class="p">;;</span>
    edit<span class="p">)</span>
        vim <span class="nv">$file</span>
        <span class="p">;;</span>
<span class="k">esac</span>
</code></pre></div></div>

<p>My configuration for Supercat looks like this:</p>

<div class="language-plaintext highlighter-rouge"><div class="highlight"><pre class="highlight"><code># spc configuration file
#
# col - color (blk, red, grn, yel, blu, mag, cya, whi)
#
#   a - color attribute (console_code)
#         ' ':normal          (0)
#         '-':normal          (0)
#         'b':bold            (1)
#         'u':underline       (4)
#         'r':reverse-video   (7)
#         'k':blink           (5)
#
#   n - number of matches,  (' ':1, '1'-'9':1-9, '0':all)
#
#   t - pattern type
#         'c':chars     (strchr)
#         's':string    (strstr)
#         't':regexp    (regcomp) (convert 10-digit unix time to MMDDHHMMSS)
#         'r':regexp    (regcomp)
#         ' ':regexp    (regcomp)
#
#                    col a n t pattern
#################### ### # # # ########################################
H1                   yel   1   (^#\s.*$)
H2                   mag   1   (^##\s.*$)
Prio High            red   1   ##(\sHigh)
Prio Medium          yel   1   ##(\sMedium)
Prio Low             grn   1   ##(\sLow)
Numbered list item   blu   1   ([0-9]\.)
List item            blu   1   (^-)
List item            blu   1   (^\*)
Highligt             cya       \*(.*?)\*
</code></pre></div></div>

<p>I then use <a href="https://syncthing.net/">Syncthing</a> to sync the document with my phone and on my phone I use an application called <a href="https://github.com/billthefarmer/editor">Editor</a> (which is available on F-droid <a href="https://f-droid.org/en/packages/org.billthefarmer.editor/">here</a>) to view and edit the document.</p>

<p>I have also added a shortcut on my home screen that opens the file directly in Editor for quick and easy access.</p>

<p>I understand that this might not be a good solution for all, but me personally like the simplicity of it. :)</p>]]></content><author><name></name></author><category term="[&quot;Productivity&quot;]" /><category term="Todo" /><category term="Productivity" /><category term="Plaintext" /><category term="Applications &amp; Tools" /><category term="Hund" /><category term="Minimalism" /><summary type="html"><![CDATA[I have probably tried more alternatives for to-do lists than anything. And while there’s a lot of good options out there, I really don’t need all the bells and whistles that most comes with.]]></summary></entry><entry><title type="html">Managing plugins in Vim with Vundle</title><link href="https://hunden.linuxkompis.se/2019/01/28/manaing-plugins-in-vim-with-vundle.html" rel="alternate" type="text/html" title="Managing plugins in Vim with Vundle" /><published>2019-01-28T00:00:00+01:00</published><updated>2024-02-16T19:42:13+01:00</updated><id>https://hunden.linuxkompis.se/2019/01/28/manaing-plugins-in-vim-with-vundle</id><content type="html" xml:base="https://hunden.linuxkompis.se/2019/01/28/manaing-plugins-in-vim-with-vundle.html"><![CDATA[<p>Manually managing your plugins in Vim can be a tedious task, especially keeping them updated. But there’s several plugin managers to make life easier for you. I haven’t really tried a lot of them, but one that stood out for me personally was <a href="https://github.com/VundleVim/Vundle.vim">Vundle</a>.</p>

<p>It’s a fairly simple and straight forward plugin manager that lets you install, uninstall, update and even search for plugins. Which is really all I can ask for.</p>

<h2 id="table-of-content">Table of content</h2>

<!-- vim-markdown-toc GFM -->

<ul>
  <li><a href="#usage">Usage</a>
    <ul>
      <li><a href="#installing-plugins">Installing plugins</a></li>
      <li><a href="#uninstalling-plugins">Uninstalling plugins</a></li>
      <li><a href="#updating-plugins">Updating plugins</a></li>
      <li><a href="#searching-for-plugins">Searching for plugins</a></li>
    </ul>
  </li>
  <li><a href="#installation">Installation</a></li>
</ul>

<!-- vim-markdown-toc -->

<h2 id="usage">Usage</h2>

<h3 id="installing-plugins">Installing plugins</h3>

<p>You install a plugins by first adding a line (sometimes two or more) into your <code class="language-plaintext highlighter-rouge">~/.vimrc</code> file. Let’s say you want to install the plugin <a href="https://github.com/junegunn/goyo.vim">goyo.vim</a> plugin. You then add this line to your configuration:</p>

<div class="language-plaintext highlighter-rouge"><div class="highlight"><pre class="highlight"><code>Plugin 'junegunn/goyo.vim'
</code></pre></div></div>

<p>You then either restart Vim or resource your configuration with <code class="language-plaintext highlighter-rouge">:resource ~/.vimrc</code> and then execute the command:</p>

<div class="language-plaintext highlighter-rouge"><div class="highlight"><pre class="highlight"><code>:PluginInstall
</code></pre></div></div>

<p>And you’re done! Do note that some plugins might require a second plugin or so, make sure to always read the installation instructions for the plugin you’re trying to install.</p>

<h3 id="uninstalling-plugins">Uninstalling plugins</h3>

<p>If you deicide you don’t want the plugin, you then just delete or comment out the line you just added to your configuration and then run the command:</p>

<div class="language-plaintext highlighter-rouge"><div class="highlight"><pre class="highlight"><code>:PluginClean
</code></pre></div></div>

<h3 id="updating-plugins">Updating plugins</h3>

<p>Updating your plugins is just as easy as everything else, you just runt this command:</p>

<div class="language-plaintext highlighter-rouge"><div class="highlight"><pre class="highlight"><code>:PluginUpdate
</code></pre></div></div>

<h3 id="searching-for-plugins">Searching for plugins</h3>

<p>You can also search for plugins with the command:</p>

<div class="language-plaintext highlighter-rouge"><div class="highlight"><pre class="highlight"><code>:PluginSearch &lt;keyword&gt;
</code></pre></div></div>

<p>Unfortunately you can’t see any information about the plugins from the search results. I never use the search feature myself, I just jump straight onto my search engine of choice to find what I’m looking for.</p>

<p>Spoiler: my search engine of choice is <a href="https://en.wikipedia.org/wiki/Searx">Searx</a>.</p>

<h2 id="installation">Installation</h2>

<p>Start by cloning the <code class="language-plaintext highlighter-rouge">Vundle.vim</code> plugin to your Vim-folder:</p>

<div class="language-plaintext highlighter-rouge"><div class="highlight"><pre class="highlight"><code>$ git clone https://github.com/VundleVim/Vundle.vim.git ~/.vim/bundle/Vundle.vim
</code></pre></div></div>

<p>Then add this to your <code class="language-plaintext highlighter-rouge">~/.vimrc</code> file:</p>

<div class="language-plaintext highlighter-rouge"><div class="highlight"><pre class="highlight"><code>set nocompatible              " be iMproved, required
filetype off                  " required

" set the runtime path to include Vundle and initialize
set rtp+=~/.vim/bundle/Vundle.vim
call vundle#begin()
" alternatively, pass a path where Vundle should install plugins
"call vundle#begin('~/some/path/here')

" let Vundle manage Vundle, required
Plugin 'VundleVim/Vundle.vim'

&lt;Add your future content regarding Vundle here&gt;

" All of your Plugins must be added before the following line
call vundle#end()            " required
filetype plugin indent on    " required
</code></pre></div></div>

<p>Re-open or resource your configuration with <code class="language-plaintext highlighter-rouge">:source ~/.vimrc</code> to apply the changes.</p>]]></content><author><name></name></author><category term="[&quot;Applications &amp; Tools&quot;]" /><category term="Vim" /><category term="Vundle" /><category term="Plugins" /><summary type="html"><![CDATA[Manually managing your plugins in Vim can be a tedious task, especially keeping them updated. But there’s several plugin managers to make life easier for you. I haven’t really tried a lot of them, but one that stood out for me personally was Vundle.]]></summary></entry><entry><title type="html">Calc - A command-line calculator</title><link href="https://hunden.linuxkompis.se/2019/01/12/calc-a-command-line-calculator.html" rel="alternate" type="text/html" title="Calc - A command-line calculator" /><published>2019-01-12T00:00:00+01:00</published><updated>2024-02-16T19:42:13+01:00</updated><id>https://hunden.linuxkompis.se/2019/01/12/calc-a-command-line-calculator</id><content type="html" xml:base="https://hunden.linuxkompis.se/2019/01/12/calc-a-command-line-calculator.html"><![CDATA[<p>Calc is an interactive calculator which provides for easy large numeric calculations, but which also can be easily programmed for difficult or long calculations.</p>

<p>I don’t do advanced math myself, but if you like command-line tools and need to do math (advanced or not) this application should be something for you.</p>

<p>It features both a CLI and a simple TUI. The TUI looks like this:</p>

<div class="language-plaintext highlighter-rouge"><div class="highlight"><pre class="highlight"><code>$ calc
C-style arbitrary precision calculator (version 2.12.5.4)
Calc is open software. For license details type:  help copyright
[Type "exit" to exit, or "help" for help.]

; 3 * (4 + 1)
	15
; 3 * 19^43 - 1
	29075426613099201338473141505176993450849249622191102976
; . % (2^127-1)
	47385033654019111249345128555354223304
; 
</code></pre></div></div>

<p>And the CLI looks about the same:</p>

<div class="language-bash highlighter-rouge"><div class="highlight"><pre class="highlight"><code><span class="nv">$ </span>calc <span class="s1">'3 * (4 + 1)'</span>
	15
</code></pre></div></div>

<p>Since I’m not into math I’m not going to talk about all the features, but you can read more about them on their webpage ‘<a href="http://www.isthe.com/chongo/tech/comp/calc/calc-whatis.html">What is Calc?</a>’.</p>

<h2 id="installation">Installation</h2>

<p>The package seems to be named <code class="language-plaintext highlighter-rouge">calc</code> in most distributions, except for the Debian family where it’s named <code class="language-plaintext highlighter-rouge">apcalc</code>.</p>]]></content><author><name></name></author><category term="[&quot;Applications &amp; Tools&quot;]" /><category term="Calc" /><category term="Calculator" /><category term="Command-line" /><category term="Productivity" /><summary type="html"><![CDATA[Calc is an interactive calculator which provides for easy large numeric calculations, but which also can be easily programmed for difficult or long calculations.]]></summary></entry><entry><title type="html">Using i3lock with systemd-suspend</title><link href="https://hunden.linuxkompis.se/2019/01/08/using-i3lock-with-systemd-suspend.html" rel="alternate" type="text/html" title="Using i3lock with systemd-suspend" /><published>2019-01-08T00:00:00+01:00</published><updated>2024-02-16T19:42:13+01:00</updated><id>https://hunden.linuxkompis.se/2019/01/08/using-i3lock-with-systemd-suspend</id><content type="html" xml:base="https://hunden.linuxkompis.se/2019/01/08/using-i3lock-with-systemd-suspend.html"><![CDATA[<p>It took me a few tries before figuring this one out. But I eventually found the [the easy] solution in an old thread on the Arch Linux forums [<a href="https://bbs.archlinux.org/viewtopic.php?pid=1170536#p1170536">Link</a>].</p>

<p>I started out by creating the file <code class="language-plaintext highlighter-rouge">/etc/systemd/system/i3lock.service</code> with the following content:</p>

<div class="language-plaintext highlighter-rouge"><div class="highlight"><pre class="highlight"><code>[Unit]
Description=Lock screen before suspend
Before=sleep.target

[Service]
User=johan
Type=forking
Environment=DISPLAY=:0
ExecStart=/home/johan/Scripts/i3lock.sh

[Install]
WantedBy=sleep.target
</code></pre></div></div>

<p>I then enabled the service with the command:</p>

<div class="language-plaintext highlighter-rouge"><div class="highlight"><pre class="highlight"><code># systemctl enable i3lock.service
</code></pre></div></div>

<p>That’s it! And for those curious, this is what my <code class="language-plaintext highlighter-rouge">i3lock.sh</code> looks like:</p>

<div class="language-bash highlighter-rouge"><div class="highlight"><pre class="highlight"><code><span class="c">#!/bin/bash</span>

<span class="nv">icon</span><span class="o">=</span><span class="s2">"</span><span class="nv">$HOME</span><span class="s2">/.config/i3/lock.png"</span>
<span class="nv">img</span><span class="o">=</span><span class="s2">"</span><span class="nv">$HOME</span><span class="s2">/.cache/i3lock.png"</span>

<span class="c"># Take a screenshot for our background</span>
scrot <span class="nv">$img</span>
<span class="c"># Pixelate the background</span>
convert <span class="nv">$img</span> <span class="nt">-scale</span> 10% <span class="nt">-scale</span> 1000% <span class="nv">$img</span>
<span class="c"># Add the lock-icon</span>
convert <span class="nv">$img</span> <span class="nv">$icon</span> <span class="nt">-gravity</span> center <span class="nt">-composite</span> <span class="nv">$img</span>
<span class="c"># Finally run i3lock itself</span>
i3lock <span class="nt">-u</span> <span class="nt">-i</span> <span class="nv">$img</span>
</code></pre></div></div>

<p>It will now lock my screen before it goes to sleep, so it’s locked when it wakes up again.</p>]]></content><author><name></name></author><category term="[&quot;Tips &amp; Trix&quot;]" /><category term="i3" /><category term="i3lock" /><category term="Systemd" /><category term="Suspend" /><summary type="html"><![CDATA[It took me a few tries before figuring this one out. But I eventually found the [the easy] solution in an old thread on the Arch Linux forums [Link].]]></summary></entry><entry><title type="html">My new mouse - Logitech G305</title><link href="https://hunden.linuxkompis.se/2018/12/15/my-new-mouse-logitech-g305.html" rel="alternate" type="text/html" title="My new mouse - Logitech G305" /><published>2018-12-15T00:00:00+01:00</published><updated>2024-02-16T19:42:13+01:00</updated><id>https://hunden.linuxkompis.se/2018/12/15/my-new-mouse-logitech-g305</id><content type="html" xml:base="https://hunden.linuxkompis.se/2018/12/15/my-new-mouse-logitech-g305.html"><![CDATA[<p>I don’t really do reviews, this is just my 5 cents about it after owning it for more than a month. If you want an actual review from someone who actually knows computer mouses, check out Rocket Jump Ninja on YouTube. <a href="https://www.youtube.com/watch?v=20ZXAEiiKMU">His review about this mouse</a> is both informative and good. :)</p>

<p><a href="/img/logitech_g305.jpg"><img src="/img/t/logitech_g305.jpg" alt="" /></a></p>

<p>After more than 6 years of service, my Steelseries Xai has now finally been retired. It has been slowly giving up on me for probably a year or so, with random disconnects and single clicks registering as double clicks getting more and more common.</p>

<p>Since I don’t use the mouse that much (basically only GIMP and Minecraft), cheap me had a hard time opening up the wallet for a new one. But after several months of research and a lot of hesitation caused by said cheapness, I finally bought the decently priced <a href="https://www.logitechg.com/en-gb/products/gaming-mice/g305-lightspeed-wireless-gaming-mouse.html">Logitech G305</a>.</p>

<p>It’s as you can see a wireless mouse with a small footprint. It features the popular Hero sensor that’s supposedly perform good in games, but more importantly (at least for me) supposed to be energy efficient and they say that the battery will last for 9 month if you use the endurance mode instead of the gaming mode. With the gaming mode the battery should last about 250 hours, which is still good.</p>

<p>Even though I have large hands, I still prefer small and light mouses. This is both small (but not too small) and decently light with its 97 grams.</p>

<p>Speaking of weight, a positive thing with this mouse (and the only reason I even considered it in the first place) is that it supports regular sized <a href="https://en.wikipedia.org/wiki/AA_battery">AA-batteries</a>, which is both easy and cheap to replace. I refuse to buy a mouse with a proprietary sized rechargeable battery that will go bad in a few years.</p>

<p>And if 97 grams is too heavy, you can make it about 7-8 grams lighter by buying a slightly more expensive lithium battery, which is also more durable.</p>

<p>The mouse buttons feels way more tactile than on my old Xai, but they’re also a bit louder. At first I found it annoying, but after just a few days of usage I stopped noticing it. The side buttons is a bit mushy though. I didn’t like them at all in the beginning, but now I’m used to them and it doesn’t bother me at all.</p>

<p>Overall I’m really happy with it and if you’re looking for a new mouse I would highly looking into this mouse. :)</p>]]></content><author><name></name></author><category term="[&quot;Hardware&quot;]" /><category term="Pointing devices" /><category term="Logitech" /><category term="Hund" /><summary type="html"><![CDATA[I don’t really do reviews, this is just my 5 cents about it after owning it for more than a month. If you want an actual review from someone who actually knows computer mouses, check out Rocket Jump Ninja on YouTube. His review about this mouse is both informative and good. :)]]></summary></entry><entry><title type="html">How to use newlines and quotes with toot</title><link href="https://hunden.linuxkompis.se/2018/11/30/how-to-use-newlines-and-quotes-with-toot.html" rel="alternate" type="text/html" title="How to use newlines and quotes with toot" /><published>2018-11-30T00:00:00+01:00</published><updated>2024-02-16T19:42:13+01:00</updated><id>https://hunden.linuxkompis.se/2018/11/30/how-to-use-newlines-and-quotes-with-toot</id><content type="html" xml:base="https://hunden.linuxkompis.se/2018/11/30/how-to-use-newlines-and-quotes-with-toot.html"><![CDATA[<p>I post a lot of updates to Mastodon using the CLI-client <a href="https://hund0b1.gitlab.io/2018/06/17/toot-a-cli-mastodon-client.html">toot</a>. And one thing that can be tricky to figure out is how to post content with newlines and quotes.</p>

<p>For a regular post you just use toot like this:</p>

<div class="language-bash highlighter-rouge"><div class="highlight"><pre class="highlight"><code>toot post <span class="s2">"Example content."</span>
</code></pre></div></div>

<p>But if you want to use newlines and quotes, you need echo the content with the flag <code class="language-plaintext highlighter-rouge">-e</code>, which enables interpretation of backslash escapes.</p>

<p>You can then add a newline using <code class="language-plaintext highlighter-rouge">\n</code> like this:</p>

<div class="language-bash highlighter-rouge"><div class="highlight"><pre class="highlight"><code><span class="nb">echo</span> <span class="nt">-e</span> <span class="s2">"First line</span><span class="se">\n</span><span class="s2">Second line"</span> | toot post
</code></pre></div></div>

<p>And if you want to use a quotes, you just need to escape the characters like this:</p>

<div class="language-bash highlighter-rouge"><div class="highlight"><pre class="highlight"><code><span class="nb">echo</span> <span class="nt">-e</span> <span class="s2">"</span><span class="se">\"</span><span class="s2">Example quote.</span><span class="se">\"</span><span class="s2">"</span> | toot post
</code></pre></div></div>]]></content><author><name></name></author><category term="[&quot;Tips &amp; Trix&quot;]" /><category term="toot" /><category term="Mastodon" /><category term="Command-line" /><summary type="html"><![CDATA[I post a lot of updates to Mastodon using the CLI-client toot. And one thing that can be tricky to figure out is how to post content with newlines and quotes.]]></summary></entry><entry><title type="html">XMPP via the command-line with sendxmpp</title><link href="https://hunden.linuxkompis.se/2018/11/16/xmpp-via-the-command-line-with-sendxmpp.html" rel="alternate" type="text/html" title="XMPP via the command-line with sendxmpp" /><published>2018-11-16T00:00:00+01:00</published><updated>2024-02-16T19:42:13+01:00</updated><id>https://hunden.linuxkompis.se/2018/11/16/xmpp-via-the-command-line-with-sendxmpp</id><content type="html" xml:base="https://hunden.linuxkompis.se/2018/11/16/xmpp-via-the-command-line-with-sendxmpp.html"><![CDATA[<p><a href="https://sendxmpp.hostname.sk/">sendxmpp</a> is a XMPP client for the command-line. It’s basically a Perl-script and it’s intended to be an alternative to <a href="https://en.wikipedia.org/wiki/Sendmail">sendmail</a>.</p>

<p>I use it for my servers to notify me about various events that you would normally use something like sendmail for. Two examples is that rTorrent sends me message when it has finished downloading a new torrent, which is handy since it automatically downloads torrents from a local folder that I share via the network and I don’t always have the session with rTorrent open to check its progress.</p>

<p>The other example is that it send the regular reports from <a href="https://wiki.archlinux.org/index.php/Logwatch">Logwatch</a> via XMPP, which is something I used to do via sendmail.</p>

<p>And here’s how it works:</p>

<h3 id="arch-linux">Arch Linux:</h3>

<div class="language-bash highlighter-rouge"><div class="highlight"><pre class="highlight"><code><span class="nv">$ </span><span class="nb">echo</span> <span class="s2">"Hello world"</span> | /usr/bin/site_perl/sendxmpp <span class="nt">--tls-ca-path</span><span class="o">=</span><span class="s2">"/etc/ssl/certs"</span> <span class="nt">-t</span> hund@example.tld
</code></pre></div></div>

<h3 id="debian">Debian:</h3>

<div class="language-bash highlighter-rouge"><div class="highlight"><pre class="highlight"><code><span class="nv">$ </span><span class="nb">echo</span> <span class="s2">"Hello world"</span> | /usr/bin/sendxmpp <span class="nt">--tls-ca-path</span><span class="o">=</span><span class="s2">"/etc/ssl/certs"</span> <span class="nt">-t</span> hund@example.tld
</code></pre></div></div>
<p>I had issues with some Bash script when I didn’t specify the static path to be binary on both my Arch Linux and Debian machines, which is why I use the full path. I also had to use the flag <code class="language-plaintext highlighter-rouge">--tls-ca-path="/etc/ssl/certs"</code> for it to work with TLS.</p>

<h2 id="the-rtorrent-script">The rTorrent script</h2>

<p>The script for rTorrent looks like this:</p>

<div class="language-bash highlighter-rouge"><div class="highlight"><pre class="highlight"><code><span class="c">#!/bin/bash</span>
<span class="nb">echo</span> <span class="nt">-e</span> <span class="s2">"New torrent!</span><span class="se">\n\n</span><span class="nv">$1</span><span class="s2">"</span> | /usr/bin/sendxmpp <span class="nt">--tls-ca-path</span><span class="o">=</span><span class="s2">"/etc/ssl/certs"</span> <span class="nt">-t</span> hund@example.tld
</code></pre></div></div>

<p>And in my <code class="language-plaintext highlighter-rouge">$HOME/.rtorrent.rc</code> I added this:</p>

<div class="language-plaintext highlighter-rouge"><div class="highlight"><pre class="highlight"><code>method.set_key = event.download.finished,notify_xmpp,"execute2=/home/johan/Scripts/rtorrent-xmpp.sh,$d.name="
</code></pre></div></div>

<h2 id="installation">Installation</h2>

<p>It’s available in the official repositories for Debian and Gentoo Linux as <code class="language-plaintext highlighter-rouge">sendxmpp</code> and <code class="language-plaintext highlighter-rouge">net-im/sendxmpp</code>. If you’re running Arch Linux you need to turn to the AUR; <a href="https://aur.archlinux.org/packages/sendxmpp/">sendxmpp</a> and <a href="https://aur.archlinux.org/packages/sendxmpp-git/">sendxmpp-git</a>.</p>

<h2 id="configuration">Configuration</h2>

<p>The configuration file is <code class="language-plaintext highlighter-rouge">$HOME/.sendxmpprc</code> and my configurations looks like this:</p>

<div class="language-plaintext highlighter-rouge"><div class="highlight"><pre class="highlight"><code>username: hund
jserver: example.tld:5222
component: example.tld
password: ***
</code></pre></div></div>

<p>And don’t forget to set some stricter permissions for the configuration:</p>

<div class="language-plaintext highlighter-rouge"><div class="highlight"><pre class="highlight"><code>$ chmod 600 ~/.sendxmpprc
</code></pre></div></div>

<p>That should be all. :)</p>

<h2 id="credits">Credits</h2>

<p>A big thanks to <a href="https://vanad.is">vanad.is</a> and the blog post “<a href="https://vanad.is/send-system-cronjob-output-via-xmpp.html">Send system cronjob output via XMPP</a>”. It’s where I found out about this neat client.</p>]]></content><author><name></name></author><category term="[&quot;Applications &amp; Tools&quot;]" /><category term="XMPP" /><category term="sendxmpp" /><category term="sendmail" /><category term="Command-line" /><summary type="html"><![CDATA[sendxmpp is a XMPP client for the command-line. It’s basically a Perl-script and it’s intended to be an alternative to sendmail.]]></summary></entry><entry><title type="html">Automatically setting the relevant title for YouTube videos in mpv</title><link href="https://hunden.linuxkompis.se/2018/10/20/automatically-setting-the-relevant-title-for-youtube-videos-in-mpv.html" rel="alternate" type="text/html" title="Automatically setting the relevant title for YouTube videos in mpv" /><published>2018-10-20T00:00:00+02:00</published><updated>2024-02-16T19:42:13+01:00</updated><id>https://hunden.linuxkompis.se/2018/10/20/automatically-setting-the-relevant-title-for-youtube-videos-in-mpv</id><content type="html" xml:base="https://hunden.linuxkompis.se/2018/10/20/automatically-setting-the-relevant-title-for-youtube-videos-in-mpv.html"><![CDATA[<p>I was annoyed with the static title “mpv” when I watch YouTube videos via mpv, so I made this little script that automatically sets the relevant title in mpv for me.</p>

<div class="language-bash highlighter-rouge"><div class="highlight"><pre class="highlight"><code><span class="c">#!/bin/bash</span>

<span class="nv">title</span><span class="o">=</span><span class="si">$(</span>curl <span class="nt">-Ss</span> <span class="nv">$1</span> | <span class="nb">grep</span> <span class="nt">-oE</span> <span class="s2">"&lt;title&gt;.*&lt;/title&gt;"</span> | <span class="nb">sed</span> <span class="s1">'s/&lt;title&gt;/img/;s/- YouTube&lt;\/title&gt;/img/'</span><span class="si">)</span>
mpv <span class="nv">$1</span> <span class="nt">--ytdl</span> <span class="nt">--title</span> <span class="s2">"mpv -- </span><span class="nv">$title</span><span class="s2">"</span>
</code></pre></div></div>

<p>I named it <code class="language-plaintext highlighter-rouge">p.sh</code> and you call it with <code class="language-plaintext highlighter-rouge">p.sh &lt;url&gt;</code>.</p>]]></content><author><name></name></author><category term="[&quot;Tips &amp; Trix&quot;]" /><category term="mpv" /><category term="YouTube" /><summary type="html"><![CDATA[I was annoyed with the static title “mpv” when I watch YouTube videos via mpv, so I made this little script that automatically sets the relevant title in mpv for me.]]></summary></entry><entry><title type="html">Launching MultiMC instances via Rofi</title><link href="https://hunden.linuxkompis.se/2018/10/18/launching-multimc-instances-via-rofi.html" rel="alternate" type="text/html" title="Launching MultiMC instances via Rofi" /><published>2018-10-18T00:00:00+02:00</published><updated>2024-02-16T19:42:13+01:00</updated><id>https://hunden.linuxkompis.se/2018/10/18/launching-multimc-instances-via-rofi</id><content type="html" xml:base="https://hunden.linuxkompis.se/2018/10/18/launching-multimc-instances-via-rofi.html"><![CDATA[<p>I play a lot of Minecraft, both vanilla and with mods, which is partly why I use the third party and open source launcher <a href="https://multimc.org">MultiMC</a>. It’s a great launcher that lets you create various instances of Minecraft completely separated from each other in sandboxes.</p>

<p>And since they allow you to launch an instances via the commandline, why not make it work with Rofi so I don’t have to launch the launcher itself and then choose which instance I want to play. :)</p>

<p><img src="/img/rofi-multimc.png" alt="A demo of the Rofi script that lets you launch MultiMC instances" /></p>

<p>This script is a modified version of my script for VirtualBox, which I’m not the author of, I’m not sure where I found it either.</p>

<div class="language-bash highlighter-rouge"><div class="highlight"><pre class="highlight"><code><span class="c">#!/bin/bash</span>

<span class="nv">path</span><span class="o">=</span><span class="s2">"/home/</span><span class="si">$(</span> <span class="nb">whoami</span> <span class="si">)</span><span class="s2">/.multimc"</span>

handle_selection<span class="o">()</span> <span class="o">{</span>
<span class="k">if</span> <span class="o">[[</span> <span class="nv">$1</span> <span class="o">]]</span><span class="p">;</span> <span class="k">then
	if</span> <span class="o">[[</span> <span class="nt">-d</span> <span class="s2">"</span><span class="nv">$path</span><span class="s2">/instances/</span><span class="nv">$1</span><span class="s2">"</span> <span class="o">]]</span><span class="p">;</span> <span class="k">then
		</span><span class="nb">touch</span> <span class="s2">"</span><span class="nv">$path</span><span class="s2">/instances/</span><span class="nv">$1</span><span class="s2">"</span>
		notify-send <span class="s2">"MultiMC"</span> <span class="s2">"Launching instance </span><span class="nv">$1</span><span class="s2">."</span>
		sh <span class="nv">$path</span>/MultiMC <span class="nt">-l</span> <span class="s2">"</span><span class="nv">$1</span><span class="s2">"</span> &amp;
    <span class="k">else
		 </span>notify-send <span class="s2">"MultiMC"</span> <span class="s2">"No instance called </span><span class="nv">$1</span><span class="s2">."</span>
    <span class="k">fi
  fi</span>
<span class="o">}</span>

handle_selection <span class="s2">"</span><span class="si">$(</span> <span class="nb">cd</span> <span class="s2">"</span><span class="nv">$path</span><span class="s2">/instances"</span><span class="p">;</span> <span class="nb">ls</span> <span class="nt">-t</span> <span class="nt">-d</span> <span class="k">*</span> | <span class="nb">sed</span> <span class="s1">'/_MMC_TEMP/d;/instgroups.json/d'</span> | rofi <span class="nt">-font</span> <span class="s2">"xos4terminus 12"</span> <span class="nt">-m</span> <span class="nt">-0</span> <span class="nt">-dmenu</span> <span class="nt">-i</span> <span class="nt">-p</span> <span class="s1">'MultiMC'</span> <span class="nt">-hlbg</span> <span class="s1">'#5FA5D7'</span> <span class="nt">-bc</span> <span class="s1">'#5FA5D7'</span> <span class="si">)</span><span class="s2">"</span>
</code></pre></div></div>

<p>I have the script in the folder <code class="language-plaintext highlighter-rouge">$HOME/Scripts/rofi</code> and I launch the Rofi menu with all the scripts by calling this script using my window manager:</p>

<div class="language-bash highlighter-rouge"><div class="highlight"><pre class="highlight"><code><span class="c">#!/bin/bash</span>
<span class="nb">cd</span> <span class="nv">$HOME</span>/Scripts/rofi<span class="p">;</span> <span class="nv">menu</span><span class="o">=</span><span class="si">$(</span>find <span class="nt">-L</span> <span class="nb">.</span> <span class="nt">-printf</span> <span class="s1">'%P\n'</span> | <span class="nb">sort</span> | <span class="nb">tail</span> <span class="nt">-n</span> +2 | rofi <span class="nt">-font</span> <span class="s2">"xos4terminus 12"</span> <span class="nt">-m</span> <span class="nt">-0</span> <span class="nt">-bw</span> 3 <span class="nt">-dmenu</span> <span class="nt">-i</span> <span class="nt">-p</span> <span class="s2">"Rofi Scripts: "</span><span class="si">)</span><span class="p">;</span> ./<span class="s2">"</span><span class="k">${</span><span class="nv">menu</span><span class="k">}</span><span class="s2">"</span>
</code></pre></div></div>]]></content><author><name></name></author><category term="[&quot;Applications &amp; Tools&quot;]" /><category term="Rofi" /><category term="MultiMC" /><category term="Minecraft" /><category term="Gaming" /><summary type="html"><![CDATA[I play a lot of Minecraft, both vanilla and with mods, which is partly why I use the third party and open source launcher MultiMC. It’s a great launcher that lets you create various instances of Minecraft completely separated from each other in sandboxes.]]></summary></entry><entry><title type="html">Making a bootable USB with Windows using Linux and WoeUSB</title><link href="https://hunden.linuxkompis.se/2018/10/17/making-a-bootable-usb-with-windows-in-linux.html" rel="alternate" type="text/html" title="Making a bootable USB with Windows using Linux and WoeUSB" /><published>2018-10-17T00:00:00+02:00</published><updated>2024-02-16T19:42:13+01:00</updated><id>https://hunden.linuxkompis.se/2018/10/17/making-a-bootable-usb-with-windows-in-linux</id><content type="html" xml:base="https://hunden.linuxkompis.se/2018/10/17/making-a-bootable-usb-with-windows-in-linux.html"><![CDATA[<p><a href="https://github.com/slacka/WoeUSB">WoeUSB</a> is a tool that makes it easy to create a bootable USB with Windows in Linux. It works with only one command, so there’s not much to write about.</p>

<div class="language-plaintext highlighter-rouge"><div class="highlight"><pre class="highlight"><code># woeusb --target-filesystem NTFS --device windows.iso /dev/sdX
</code></pre></div></div>

<p>There’s also a graphical application for it available via the command <code class="language-plaintext highlighter-rouge">woeusbgui</code> if you prefer using that.</p>

<h2 id="installation">Installation</h2>

<h3 id="arch-linux">Arch Linux</h3>

<p>It’s available via AUR as <a href="https://aur.archlinux.org/packages/woeusb/">woeusb</a> and <a href="https://aur.archlinux.org/packages/woeusb-git/">woeusb-git</a>.</p>

<h3 id="ubuntu">Ubuntu</h3>

<p>It’s available via <a href="https://launchpad.net/~nilarimogard/+archive/ubuntu/webupd8">WebUpd8’s PPA</a>.</p>]]></content><author><name></name></author><category term="[&quot;Applications &amp; Tools&quot;]" /><category term="Windows" /><category term="WoeUSB" /><category term="Command-line" /><summary type="html"><![CDATA[WoeUSB is a tool that makes it easy to create a bootable USB with Windows in Linux. It works with only one command, so there’s not much to write about.]]></summary></entry><entry><title type="html">Converting FLAC audio to OGG Vorbis</title><link href="https://hunden.linuxkompis.se/2018/10/16/converting-flac-audio-to-ogg-vorbis.html" rel="alternate" type="text/html" title="Converting FLAC audio to OGG Vorbis" /><published>2018-10-16T00:00:00+02:00</published><updated>2024-02-16T19:42:13+01:00</updated><id>https://hunden.linuxkompis.se/2018/10/16/converting-flac-audio-to-ogg-vorbis</id><content type="html" xml:base="https://hunden.linuxkompis.se/2018/10/16/converting-flac-audio-to-ogg-vorbis.html"><![CDATA[<p>I almost always buy my music from <a href="https://bandcamp.com">Bandcamp</a> these days (no affiliation—just a happy customer), it’s a DRM-free service that let’s you download the music in various formats, like <a href="https://en.wikipedia.org/wiki/FLAC">FLAC</a> and <a href="https://en.wikipedia.org/wiki/Vorbis">OGG Vorbis</a>.</p>

<p>I always download the FLAC version and then converts it to OGG Vorbis myself since I like to keep the quality a bit higher than what’s really needed. And this is the reason for this post. :)</p>

<p>To convert FLAC music to the OGG Vorbis format you need the tool <code class="language-plaintext highlighter-rouge">oggenc</code>, which is provided with the package <code class="language-plaintext highlighter-rouge">vorbis-tools</code>. You can then convert any track with the command:</p>

<div class="language-plaintext highlighter-rouge"><div class="highlight"><pre class="highlight"><code>$ oggenc -q &lt;N&gt;
</code></pre></div></div>

<p>Where <code class="language-plaintext highlighter-rouge">&lt;N&gt;</code> is the quality you want. If you want to convert a whole folder you can then combine it with <code class="language-plaintext highlighter-rouge">find</code> like this:</p>

<div class="language-plaintext highlighter-rouge"><div class="highlight"><pre class="highlight"><code>$ find . -name "*flac" -exec oggenc -q 7 {} \;
</code></pre></div></div>

<p><strong>The quality ranges in a scale from 1 to 10.</strong> It doesn’t use explicit bit rates in its quality settings like other common formats. Partly because they don’t think that you should only stare at the bit rate when measuring audio quality. And another reason for this is that OGG Vorbis uses a form of variable bit rate, where extra bits are used when the audio is harder to encode and less when the audio is simpler.</p>

<p><strong>To put the scale into perspective.</strong> Quality <code class="language-plaintext highlighter-rouge">5</code> is near CD quality and quality <code class="language-plaintext highlighter-rouge">6</code> is enough for it to be perceived as lossless quality—unless you have an extraordinary audio setup. But if you’re that deep into the rabbit hole you’re probably not using anything less than CD’s or FLAC anyway. :)</p>]]></content><author><name></name></author><category term="[&quot;Applications &amp; Tools&quot;]" /><category term="FLAC" /><category term="OGG Vorbis" /><category term="oggenc" /><category term="Audio" /><category term="Command-line" /><category term="File Management" /><summary type="html"><![CDATA[I almost always buy my music from Bandcamp these days (no affiliation—just a happy customer), it’s a DRM-free service that let’s you download the music in various formats, like FLAC and OGG Vorbis.]]></summary></entry><entry><title type="html">Grouping and sorting regular and symlinked folders before files with ls in zsh</title><link href="https://hunden.linuxkompis.se/2018/10/13/grouping-and-sorting-regular-and-symlinked-folders-before-files-with-ls-in-zsh.html" rel="alternate" type="text/html" title="Grouping and sorting regular and symlinked folders before files with ls in zsh" /><published>2018-10-13T00:00:00+02:00</published><updated>2024-02-16T19:42:13+01:00</updated><id>https://hunden.linuxkompis.se/2018/10/13/grouping-and-sorting-regular-and-symlinked-folders-before-files-with-ls-in-zsh</id><content type="html" xml:base="https://hunden.linuxkompis.se/2018/10/13/grouping-and-sorting-regular-and-symlinked-folders-before-files-with-ls-in-zsh.html"><![CDATA[<p>By default <code class="language-plaintext highlighter-rouge">ls</code> sorts all folders, symlinked folders and files by name and not by type and then by name, which I find quite annoying and sometimes even confusing.</p>

<p>Thankfully you can change this behavior pretty easy, you just need to add one small function to your zsh configuration:</p>

<div class="language-zsh highlighter-rouge"><div class="highlight"><pre class="highlight"><code>dir1st<span class="o">()</span> <span class="o">{</span> <span class="o">[[</span> <span class="nt">-d</span> <span class="nv">$REPLY</span> <span class="o">]]</span> <span class="o">&amp;&amp;</span> <span class="nv">REPLY</span><span class="o">=</span>1-<span class="nv">$REPLY</span> <span class="o">||</span> <span class="nv">REPLY</span><span class="o">=</span>2-<span class="nv">$REPLY</span><span class="p">;</span><span class="o">}</span>
</code></pre></div></div>

<p>Then call it like this:</p>

<div class="language-zsh highlighter-rouge"><div class="highlight"><pre class="highlight"><code><span class="nb">ls</span> <span class="nt">-ldU</span> <span class="nt">--</span> <span class="k">*</span><span class="o">(</span>o+dir1st<span class="o">)</span>
</code></pre></div></div>
<p>And here’s an example image:</p>

<p><img src="/img/lsorder.png" alt="" /></p>

<p>If you’re a Bash user and knows how to make this work there, let me know! I’m pretty sure there’s a lot of Bash users out there who would want this as well.</p>]]></content><author><name></name></author><category term="[&quot;Tips &amp; Trix&quot;]" /><category term="zsh" /><summary type="html"><![CDATA[By default ls sorts all folders, symlinked folders and files by name and not by type and then by name, which I find quite annoying and sometimes even confusing.]]></summary></entry><entry><title type="html">Cleaning up filenames with detox</title><link href="https://hunden.linuxkompis.se/2018/10/10/clean-up-filenames-with-detox.html" rel="alternate" type="text/html" title="Cleaning up filenames with detox" /><published>2018-10-10T00:00:00+02:00</published><updated>2024-02-16T19:42:13+01:00</updated><id>https://hunden.linuxkompis.se/2018/10/10/clean-up-filenames-with-detox</id><content type="html" xml:base="https://hunden.linuxkompis.se/2018/10/10/clean-up-filenames-with-detox.html"><![CDATA[<p><a href="http://detox.sourceforge.net">Detox</a> is a neat little command-line tool that helps you clean up filenames. It will either remove or replace weird character, like <code class="language-plaintext highlighter-rouge">Á</code> will be replaced with <code class="language-plaintext highlighter-rouge">A</code>, an empty space with <code class="language-plaintext highlighter-rouge">_</code> and it’s even smart enough to replace CGI escaped ASCII characters like <code class="language-plaintext highlighter-rouge">%20</code> with <code class="language-plaintext highlighter-rouge">_</code>.</p>

<p>Here’s a small example:</p>

<div class="language-bash highlighter-rouge"><div class="highlight"><pre class="highlight"><code><span class="nv">$ </span><span class="nb">cd </span>Pictues/Wallpapers/Space
<span class="nv">$ </span>detox <span class="nt">--dry-run</span> <span class="k">*</span>
atlantis_nebula__7_by_starkiteckt-1080p.jpg -&gt; atlantis_nebula_7_by_starkiteckt-1080p.jpg
cold_embrace___high_resolution___by_starkiteckt-db385qy.png -&gt; cold_embrace_high_resolution_by_starkiteckt-db385qy.png
Hyper Cradle 1920x1080 HD.png -&gt; Hyper_Cradle_1920x1080_HD.png
</code></pre></div></div>

<p>The defaults should be good enough for most, but there’s a lot of configuration options available and you can read all about them via the manual pages.</p>]]></content><author><name></name></author><category term="[&quot;Applications &amp; Tools&quot;]" /><category term="detox" /><category term="File management" /><category term="Command-line" /><category term="Productivity" /><summary type="html"><![CDATA[Detox is a neat little command-line tool that helps you clean up filenames. It will either remove or replace weird character, like Á will be replaced with A, an empty space with _ and it’s even smart enough to replace CGI escaped ASCII characters like %20 with _.]]></summary></entry><entry><title type="html">Manage Pulseaudio with the Ncurses mixer ncpamixer</title><link href="https://hunden.linuxkompis.se/2018/09/29/manage-pulseaudio-with-the-ncurses-mixer-ncpamixer.html" rel="alternate" type="text/html" title="Manage Pulseaudio with the Ncurses mixer ncpamixer" /><published>2018-09-29T00:00:00+02:00</published><updated>2024-02-16T19:42:13+01:00</updated><id>https://hunden.linuxkompis.se/2018/09/29/manage-pulseaudio-with-the-ncurses-mixer-ncpamixer</id><content type="html" xml:base="https://hunden.linuxkompis.se/2018/09/29/manage-pulseaudio-with-the-ncurses-mixer-ncpamixer.html"><![CDATA[<p>I wanted to record some audio the other day, but for some reason ALSA didn’t want to play nice with me. It sounded like I used a tin can as a microphone across a soccer field.</p>

<p>After a couple of days of debugging I ended up installing Pulseaudio to see how that worked. It actually solved my issue pretty easily, even if it took some time to rebuild some of the packages in Gentoo. I went with the application <a href="https://github.com/fulhax/ncpamixer">ncpamixer</a> to manage Pulseaudio, it’s a fairly simple mixer with a Ncurses user-interface.</p>

<p>And as bonus with Pulseaudio, I can now also control the sound per application. Which is something I never missed, but once I tried it it’s something I can’t live without anymore.</p>

<p><a href="/img/ncpamixer-1.png"><img src="/img/t/ncpamixer-1.png" alt="A screenshot of ncpamixer with the default theme" /></a></p>

<p class="image-caption"><em>Default theme</em></p>

<p><a href="/img/ncpamixer-2.png"><img src="/img/t/ncpamixer-2.png" alt="A screenshot of ncpamixer with my Solarized theme" /></a></p>

<p class="image-caption"><em>My theme</em></p>

<p>The default theme didn’t really look that good with my Solarized colour scheme, so I copied c0r73x’s theme and made my own version that looks a lot better.</p>

<div class="language-plaintext highlighter-rouge"><div class="highlight"><pre class="highlight"><code># solarized theme {
   "theme.solarized.default_indicator"      = "■ "
   "theme.solarized.bar_style.bg"           = "■"
   "theme.solarized.bar_style.fg"           = "■"
   "theme.solarized.bar_style.indicator"    = "■"
   "theme.solarized.bar_style.top"          = ""
   "theme.solarized.bar_style.bottom"       = ""
   "theme.solarized.bar_low.front"          = 0
   "theme.solarized.bar_low.back"           = -1
   "theme.solarized.bar_mid.front"          = 0
   "theme.solarized.bar_mid.back"           = -1
   "theme.solarized.bar_high.front"         = 0
   "theme.solarized.bar_high.back"          = -1
   "theme.solarized.volume_low"             = 2
   "theme.solarized.volume_mid"             = 3
   "theme.solarized.volume_high"            = 1
   "theme.solarized.volume_peak"            = 1
   "theme.solarized.volume_indicator"       = -1
   "theme.solarized.selected"               = 3
   "theme.solarized.default"                = -1
   "theme.solarized.border"                 = -1
   "theme.solarized.dropdown.selected_text" = 0
   "theme.solarized.dropdown.selected"      = 6
   "theme.solarized.dropdown.unselected"    = -1
# }
</code></pre></div></div>

<h2 id="configuration">Configuration</h2>

<p>You configuration gets automatically generated and populated when you first run it and you find the file here:</p>

<div class="language-plaintext highlighter-rouge"><div class="highlight"><pre class="highlight"><code>$HOME/.config/ncpamixer.conf
</code></pre></div></div>

<p>One thing to note though; by default you can quickly change the volume in larger steps with the number keys <code class="language-plaintext highlighter-rouge">1-9</code> (<code class="language-plaintext highlighter-rouge">3</code> sets the volume to 30% et cetera), but only up to 90%, which is something I found a bit weird. The key after <code class="language-plaintext highlighter-rouge">9</code> on the number row is obviously <code class="language-plaintext highlighter-rouge">0</code>, which by default mutes the volume!?</p>

<p>And yes, the key <code class="language-plaintext highlighter-rouge">m</code> also mutes the volume. So why do we need the <code class="language-plaintext highlighter-rouge">0</code> key to mute the volume as well? And why wouldn’t anyone want to quickly be able to set the volume to 100%? So, the first thing I did was to change the key <code class="language-plaintext highlighter-rouge">0</code> to set the volume to 100% instead:</p>

<div class="language-plaintext highlighter-rouge"><div class="highlight"><pre class="highlight"><code>"keycode.48"   = "set_volume_100"    # 0
</code></pre></div></div>

<h2 id="installation">Installation</h2>

<h3 id="arch-linux">Arch Linux</h3>

<p>It’s available in the AUR: <a href="https://aur.archlinux.org/packages/ncpamixer-git">https://aur.archlinux.org/packages/ncpamixer-git</a>.</p>

<h3 id="gentoo-linux">Gentoo Linux</h3>

<p>Official ebuilds is available here: <a href="https://github.com/fulhax/fulhax-overlay/tree/master/media-sound/ncpamixer">https://github.com/fulhax/fulhax-overlay/tree/master/media-sound/ncpamixer</a>.</p>]]></content><author><name></name></author><category term="[&quot;Applications &amp; Tools&quot;]" /><category term="Pulseaudio" /><category term="ncpamixer" /><category term="TUI" /><category term="Audio" /><summary type="html"><![CDATA[I wanted to record some audio the other day, but for some reason ALSA didn’t want to play nice with me. It sounded like I used a tin can as a microphone across a soccer field.]]></summary></entry><entry><title type="html">How to launch Twitch streams via Rofi using Twitchy</title><link href="https://hunden.linuxkompis.se/2018/09/23/launch-twitch-streams-via-rofi-using-twitchy.html" rel="alternate" type="text/html" title="How to launch Twitch streams via Rofi using Twitchy" /><published>2018-09-23T00:00:00+02:00</published><updated>2024-02-16T19:42:13+01:00</updated><id>https://hunden.linuxkompis.se/2018/09/23/launch-twitch-streams-via-rofi-using-twitchy</id><content type="html" xml:base="https://hunden.linuxkompis.se/2018/09/23/launch-twitch-streams-via-rofi-using-twitchy.html"><![CDATA[<p>I wrote this little script for Rofi that lets me launch Twitch streams using Twitchy. It requires <a href="https://github.com/DaveDavenport/rofi">Rofi</a>, <a href="https://github.com/BasioMeusPuga/twitchy">Twitchy</a> and <a href="https://github.com/streamlink/streamlink">Streamlink</a> to work.</p>

<p><img src="/img/rofi-twitchy.png" alt="My script for Rofi that lets me launch Twitch streams using Twitchy" /></p>

<div class="language-bash highlighter-rouge"><div class="highlight"><pre class="highlight"><code><span class="c">#!/bin/bash</span>

handle_selection<span class="o">()</span> <span class="o">{</span>
	<span class="k">if</span> <span class="o">[[</span> <span class="nv">$1</span> <span class="o">]]</span><span class="p">;</span> <span class="k">then
		</span><span class="nv">name</span><span class="o">=</span><span class="si">$(</span><span class="nb">echo</span> <span class="nv">$1</span> | <span class="nb">awk</span> <span class="o">{</span><span class="s1">'print $1'</span><span class="o">}</span><span class="si">)</span>
		notify-send <span class="s2">"Twitchy"</span> <span class="s2">"Launching the livestream with </span><span class="nv">$name</span><span class="s2">"</span>
		streamlink https://twitch.tv/<span class="nv">$name</span> <span class="nt">--title</span> <span class="s2">"</span><span class="nv">$name</span><span class="s2"> - Twitch"</span>
	<span class="k">else
        </span><span class="nb">exit </span>1
	<span class="k">fi</span>
<span class="o">}</span>

handle_selection <span class="s2">"</span><span class="si">$(</span> twitchy <span class="nt">--non-interactive</span> | <span class="nb">sort</span> | <span class="nb">awk</span> <span class="nt">-F</span>, <span class="s1">'{print $1 " - " $(NF-1) " [" $(NF-2) "] (" $(NF-0) ")"}'</span> | rofi <span class="nt">-font</span> <span class="s2">"xos4terminus 12"</span> <span class="nt">-m</span> 0 <span class="nt">-bw</span> 3 <span class="nt">-dmenu</span> <span class="nt">-i</span> <span class="nt">-p</span> <span class="s1">'Twitchy'</span> <span class="nt">-hlbg</span> <span class="s1">'#5FA5D7'</span> <span class="nt">-bc</span> <span class="s1">'#5FA5D7'</span> <span class="si">)</span><span class="s2">"</span>
</code></pre></div></div>

<p>I use this script to list my Rofi scripts in Rofi:</p>

<div class="language-plaintext highlighter-rouge"><div class="highlight"><pre class="highlight"><code>#!/bin/bash
cd $HOME/Scripts/rofi; menu=$(find -L . -printf '%P\n' | sort | tail -n +2 | rofi -font "xos4terminus 12" -m -0 -bw 3 -dmenu -i -p "Rofi Scripts: "); ./"${menu}"
</code></pre></div></div>

<p>And I have bound it to <code class="language-plaintext highlighter-rouge">Alt</code>+<code class="language-plaintext highlighter-rouge">Shift</code>+<code class="language-plaintext highlighter-rouge">p</code> in i3:</p>

<div class="language-plaintext highlighter-rouge"><div class="highlight"><pre class="highlight"><code>bindsym $mod+shift+p exec "sh $HOME/Scripts/rofi-scripts.sh"
</code></pre></div></div>

<h2 id="post-updated">Post updated</h2>

<ul>
  <li><strong>September 28, 2019</strong> - I updated the script to fix an issue with some stream titles causing the stream uptime to not work properly.</li>
</ul>]]></content><author><name></name></author><category term="[&quot;Applications &amp; Tools&quot;]" /><category term="Rofi" /><category term="Twitchy" /><category term="Twitch" /><category term="Launchers" /><category term="Gaming" /><summary type="html"><![CDATA[I wrote this little script for Rofi that lets me launch Twitch streams using Twitchy. It requires Rofi, Twitchy and Streamlink to work.]]></summary></entry><entry><title type="html">Adding a pause indicator to mpv media player</title><link href="https://hunden.linuxkompis.se/2018/09/13/adding-a-pause-indicator-to-mpv-media-player.html" rel="alternate" type="text/html" title="Adding a pause indicator to mpv media player" /><published>2018-09-13T00:00:00+02:00</published><updated>2024-02-16T19:42:13+01:00</updated><id>https://hunden.linuxkompis.se/2018/09/13/adding-a-pause-indicator-to-mpv-media-player</id><content type="html" xml:base="https://hunden.linuxkompis.se/2018/09/13/adding-a-pause-indicator-to-mpv-media-player.html"><![CDATA[<p>Depending on what you’re watching, it’s not always that obvious when you pause a video in mpv. I also often tend to pause the video by mistake and confuse myself even further, so I looked it up and found a script called <a href="https://gist.github.com/torque/9dbc69543118347d2e5f43239a7e609a">pause-indicator.lua</a> that adds just that.</p>

<p><a href="/img/mpv-pause-indicator.jpg"><img src="/img/t/mpv-pause-indicator.jpg" alt="A screenshot of mpv with the pause indicator visible" /></a></p>

<p class="image-caption"><em>It flashes a pause icon when paused and a play icon when resumed</em></p>

<h2 id="installation">Installation</h2>

<p>Create the folder <code class="language-plaintext highlighter-rouge">~/.config/mpv/scripts/</code> if you don’t already have it:</p>

<div class="language-plaintext highlighter-rouge"><div class="highlight"><pre class="highlight"><code>$ mkdir ~/.config/mpv/scripts/
</code></pre></div></div>

<p>Then download the script to that folder:</p>

<div class="language-plaintext highlighter-rouge"><div class="highlight"><pre class="highlight"><code>$ wget https://gist.githubusercontent.com/torque/9dbc69543118347d2e5f43239a7e609a/raw/bd9fcfe68a4f13b655c686e5790cbd2ee9489475/pause-indicator.lua -P ~/.config/mpv/scripts/
</code></pre></div></div>

<p>And that’s it. :)</p>

<h2 id="configuration">Configuration</h2>

<p>I didn’t like the default colours, the size of the icon and the animation duration was a bit too quick for me so I changed it. There’s no configuration file, but changing the values is easy as long as you know which values it is.</p>

<p><strong>Foreground colour</strong></p>

<p>I changed the default value from <code class="language-plaintext highlighter-rouge">FC799E</code> to <code class="language-plaintext highlighter-rouge">E6E6E6</code>.</p>

<div class="language-plaintext highlighter-rouge"><div class="highlight"><pre class="highlight"><code>settings['pause-indicator-foreground-style'] = [[\c&amp;HFC799E&amp;]]
</code></pre></div></div>

<p><strong>Background colour</strong></p>

<p>I changed the default value from <code class="language-plaintext highlighter-rouge">2D2D2D</code> to <code class="language-plaintext highlighter-rouge">1111111</code>.</p>

<div class="language-plaintext highlighter-rouge"><div class="highlight"><pre class="highlight"><code>settings['pause-indicator-background-style'] = [[\c&amp;H2D2D2D&amp;]]
</code></pre></div></div>
<p><strong>Animation duration</strong></p>

<p>I changed the default value from <code class="language-plaintext highlighter-rouge">0.25</code> to <code class="language-plaintext highlighter-rouge">0.50</code>.</p>

<div class="language-plaintext highlighter-rouge"><div class="highlight"><pre class="highlight"><code>settings['animation-duration'] = 0.25
</code></pre></div></div>

<p><strong>Icon size</strong></p>

<p>I changed the default value from <code class="language-plaintext highlighter-rouge">1</code> to <code class="language-plaintext highlighter-rouge">2</code>.</p>

<div class="language-plaintext highlighter-rouge"><div class="highlight"><pre class="highlight"><code>settings['display-scale-factor'] = 1
</code></pre></div></div>

<p>And the result is what you can see in the image above.</p>]]></content><author><name></name></author><category term="[&quot;Tips &amp; Trix&quot;]" /><category term="mpv" /><summary type="html"><![CDATA[Depending on what you’re watching, it’s not always that obvious when you pause a video in mpv. I also often tend to pause the video by mistake and confuse myself even further, so I looked it up and found a script called pause-indicator.lua that adds just that.]]></summary></entry><entry><title type="html">Use a pixelated version of your desktop as your lockscreen with i3lock</title><link href="https://hunden.linuxkompis.se/2018/09/04/use-a-pixelated-version-of-your-desktop-as-your-lockscreen-with-i3lock.html" rel="alternate" type="text/html" title="Use a pixelated version of your desktop as your lockscreen with i3lock" /><published>2018-09-04T00:00:00+02:00</published><updated>2024-02-16T19:42:13+01:00</updated><id>https://hunden.linuxkompis.se/2018/09/04/use-a-pixelated-version-of-your-desktop-as-your-lockscreen-with-i3lock</id><content type="html" xml:base="https://hunden.linuxkompis.se/2018/09/04/use-a-pixelated-version-of-your-desktop-as-your-lockscreen-with-i3lock.html"><![CDATA[<p>I decided it was time to spice up my lockscreen, I’ve been using the same old static picture for what feels like years now.</p>

<p>I’ve seen a lot of people use blurred and pixelated screenshots of their desktop and they do look pretty cool, so I decided to do the same thing myself. :)</p>

<p><a href="/img/i3lockScrot.png"><img src="/img/t/i3lockScrot.png" alt="My lockscreen using i3lock and a pixelated screenshot of my desktop" /></a></p>

<p>I wrote a Bash script that uses <code class="language-plaintext highlighter-rouge">scrot</code> and <code class="language-plaintext highlighter-rouge">imagemagick</code> to take a screenshot of my desktop, pixelate the image, add the lock icon to it and lastly lock the screen using the newly created image.</p>

<div class="language-bash highlighter-rouge"><div class="highlight"><pre class="highlight"><code><span class="c">#!/bin/bash</span>

<span class="nv">icon</span><span class="o">=</span><span class="s2">"</span><span class="nv">$HOME</span><span class="s2">/.config/i3/lock.png"</span>
<span class="nv">img</span><span class="o">=</span><span class="s2">"</span><span class="nv">$HOME</span><span class="s2">/.cache/i3lock.png"</span>

scrot <span class="nv">$img</span>
<span class="c"># Pixelate image</span>
convert <span class="nv">$img</span> <span class="nt">-scale</span> 10% <span class="nt">-scale</span> 1000% <span class="nv">$img</span>
<span class="c"># Blur image</span>
<span class="c">#convert $img -blur 0x4 500% $img</span>
convert <span class="nv">$img</span> <span class="nv">$icon</span> <span class="nt">-gravity</span> center <span class="nt">-composite</span> <span class="nv">$img</span>
i3lock <span class="nt">-u</span> <span class="nt">-i</span> <span class="nv">$img</span>
</code></pre></div></div>

<p>The lock icon I use can be found on the website Iconfinder.com <a href="https://www.iconfinder.com/icons/1891028/lock_red_icon">here</a> and I used the 256px version myself.</p>

<p>I also included the option to blur the image, which does look cool as well, but that operation is noticeably slower than pixelating the image.</p>]]></content><author><name></name></author><category term="[&quot;Tips &amp; Trix&quot;, &quot;Artwork &amp; Themeing&quot;]" /><category term="i3lock" /><category term="i3" /><category term="Scrot" /><category term="ImageMagick" /><summary type="html"><![CDATA[I decided it was time to spice up my lockscreen, I’ve been using the same old static picture for what feels like years now.]]></summary></entry><entry><title type="html">Tab completion for i3 commands in Bash and zsh</title><link href="https://hunden.linuxkompis.se/2018/09/03/tab-completion-for-i3-commands-in-bash-and-zsh.html" rel="alternate" type="text/html" title="Tab completion for i3 commands in Bash and zsh" /><published>2018-09-03T00:00:00+02:00</published><updated>2024-02-16T19:42:13+01:00</updated><id>https://hunden.linuxkompis.se/2018/09/03/tab-completion-for-i3-commands-in-bash-and-zsh</id><content type="html" xml:base="https://hunden.linuxkompis.se/2018/09/03/tab-completion-for-i3-commands-in-bash-and-zsh.html"><![CDATA[<p>Something I miss from other window managers like <a href="http://herbstluftwm.org">Herbstluftwm</a> is tab completion in the shell for the commands and features it supports. Partly because I’m lazy and partly because it’s not that easy to remember every feature when you rarely use them.</p>

<p>With tab completion you can list all the available commands which makes it pretty easy to figure out how to do things and what’s available to you. And fortunately a tab completion script for both Bash and zsh do exist, it’s called <a href="https://github.com/cornerman/i3-completion">i3-completion</a> and it looks something like this:</p>

<div class="language-plaintext highlighter-rouge"><div class="highlight"><pre class="highlight"><code>$ i3-msg &lt;Tab&gt;
[              exec           kill           nop            restart        swap
append_layout  exit           layout         open           scratchpad     title_format
bar            floating       mark           reload         shmlog         unmark
border         focus          mode           rename         split          workspace
debuglog       fullscreen     move           resize         sticky
</code></pre></div></div>

<h2 id="installation">Installation</h2>

<p>Clone the latest code from their git repository:</p>

<div class="language-plaintext highlighter-rouge"><div class="highlight"><pre class="highlight"><code>$ git clone https://github.com/cornerman/i3-completion
</code></pre></div></div>

<p>To add the script to either Bash or zsh you need to source it in you configuration (<code class="language-plaintext highlighter-rouge">~/.bashrc</code> or <code class="language-plaintext highlighter-rouge">~/zshrc</code>):</p>

<div class="language-plaintext highlighter-rouge"><div class="highlight"><pre class="highlight"><code>source "&lt;path to file&gt;/i3_completion.sh"
</code></pre></div></div>

<p>And if you use zsh you also need to make sure to enable the usage of Bash scripts in zsh by adding this line before sourcing the script:</p>

<div class="language-plaintext highlighter-rouge"><div class="highlight"><pre class="highlight"><code>autoload bashcompinit &amp;&amp; bashcompinit
</code></pre></div></div>

<p>Lastly save and reload your configuration:</p>

<p><strong>Bash:</strong></p>
<div class="language-plaintext highlighter-rouge"><div class="highlight"><pre class="highlight"><code>source ~/.bashrc
</code></pre></div></div>

<p><strong>zsh:</strong></p>
<div class="language-plaintext highlighter-rouge"><div class="highlight"><pre class="highlight"><code>source ~/.zshrc
</code></pre></div></div>

<p>And now you should have fancy tab completions for your i3 commands. :)</p>]]></content><author><name></name></author><category term="[&quot;Tips &amp; Trix&quot;]" /><category term="i3" /><category term="zsh" /><category term="Bash" /><summary type="html"><![CDATA[Something I miss from other window managers like Herbstluftwm is tab completion in the shell for the commands and features it supports. Partly because I’m lazy and partly because it’s not that easy to remember every feature when you rarely use them.]]></summary></entry><entry><title type="html">ytp - A super light command-line client for YouTube</title><link href="https://hunden.linuxkompis.se/2018/09/01/ytp-a-super-light-command-line-client-for-youtube.html" rel="alternate" type="text/html" title="ytp - A super light command-line client for YouTube" /><published>2018-09-01T00:00:00+02:00</published><updated>2024-02-16T19:42:13+01:00</updated><id>https://hunden.linuxkompis.se/2018/09/01/ytp-a-super-light-command-line-client-for-youtube</id><content type="html" xml:base="https://hunden.linuxkompis.se/2018/09/01/ytp-a-super-light-command-line-client-for-youtube.html"><![CDATA[<p>I’ve been using <a href="https://github.com/trizen/youtube-viewer">youtube-viewer</a> for a long time now and it’s a great command-line client for YouTube. It’s packed with features that allow you to use pretty much every feature possible on YouTube, but it comes at a price; the footprint.</p>

<p>On Gentoo Linux I needed to emerge a total of 42 packages for youtube-viewer, most are small, but still.. 42 packages. And I don’t even use 99% of the features anyway, I just want to be able to search and play videos without having to use YouTube’s hideously bloated and malicious website which tracks my every move.</p>

<p>Just recently, I found out about a super light and basic client called <a href="https://gitlab.com/uoou/ytp">ytp</a> via <a href="https://linuxrocks.online/@HexDSL/100613936255793565">HexDSL on Mastodon</a>. It’s written in Bash and the only dependency it needs is <a href="https://stedolan.github.io/jq/">jq</a>, which is a lightweight command-line JSON processor.</p>

<p><img src="/img/ytp.png" alt="A screenshot of ytp in action - A super light command-line client for YouTube" /></p>

<h2 id="installation">Installation</h2>

<p>The only dependency you need to install is <code class="language-plaintext highlighter-rouge">jq</code> and after that you can clone the repository with git, make the script executable and run it:</p>

<div class="language-plaintext highlighter-rouge"><div class="highlight"><pre class="highlight"><code>$ git clone https://gitlab.com/uoou/ytp
</code></pre></div></div>
<div class="language-plaintext highlighter-rouge"><div class="highlight"><pre class="highlight"><code>$ cd ytp &amp;&amp; chmox +x ytp
</code></pre></div></div>
<div class="language-plaintext highlighter-rouge"><div class="highlight"><pre class="highlight"><code>$ ./ytp "&lt;search word&gt;"
</code></pre></div></div>

<p>And as always, I advise you to put the script in your <code class="language-plaintext highlighter-rouge">$PATH</code> for easy access.</p>]]></content><author><name></name></author><category term="[&quot;Applications &amp; Tools&quot;]" /><category term="ytp" /><category term="YouTube" /><category term="Command-line" /><category term="Bash" /><summary type="html"><![CDATA[I’ve been using youtube-viewer for a long time now and it’s a great command-line client for YouTube. It’s packed with features that allow you to use pretty much every feature possible on YouTube, but it comes at a price; the footprint.]]></summary></entry><entry><title type="html">Adding line numbers to a list in Vim with awk</title><link href="https://hunden.linuxkompis.se/2018/08/27/adding-line-numbers-to-a-list-in-vim-with-awk.html" rel="alternate" type="text/html" title="Adding line numbers to a list in Vim with awk" /><published>2018-08-27T00:00:00+02:00</published><updated>2024-02-16T19:42:13+01:00</updated><id>https://hunden.linuxkompis.se/2018/08/27/adding-line-numbers-to-a-list-in-vim-with-awk</id><content type="html" xml:base="https://hunden.linuxkompis.se/2018/08/27/adding-line-numbers-to-a-list-in-vim-with-awk.html"><![CDATA[<p>I have finally found a good way of adding line numbers to a list in Vim. Most tips I’ve found so far has been overly complicated and with various success, this option uses <code class="language-plaintext highlighter-rouge">awk</code> and it’s in return a bit simpler.</p>

<div class="language-plaintext highlighter-rouge"><div class="highlight"><pre class="highlight"><code>:'&lt;,'&gt;%!awk '{print NR".",$0}'
</code></pre></div></div>

<p>It works by you selecting the lines with <code class="language-plaintext highlighter-rouge">Ctrl+v</code> and then execute the command, it will then transform your list from this:</p>

<div class="language-plaintext highlighter-rouge"><div class="highlight"><pre class="highlight"><code>One
Two
Three
</code></pre></div></div>

<p>To this</p>

<div class="language-plaintext highlighter-rouge"><div class="highlight"><pre class="highlight"><code>1. One
2. Two
3. Three
</code></pre></div></div>

<p>And because I don’t want to manually type it every time, I decided to map it to <code class="language-plaintext highlighter-rouge">\n</code>:</p>

<div class="language-plaintext highlighter-rouge"><div class="highlight"><pre class="highlight"><code>map \n :'&lt;,'&gt;%!awk '{print NR".",$0}'&lt;CR&gt;
</code></pre></div></div>

<p style="text-align:right">
	Source: <a href="https://stackoverflow.com/a/252774">Stackoverflow</a>
</p>]]></content><author><name></name></author><category term="[&quot;Tips &amp; Trix&quot;]" /><category term="Vim" /><category term="awk" /><summary type="html"><![CDATA[I have finally found a good way of adding line numbers to a list in Vim. Most tips I’ve found so far has been overly complicated and with various success, this option uses awk and it’s in return a bit simpler.]]></summary></entry><entry><title type="html">Automatically converting emojis to plain text in WeeChat</title><link href="https://hunden.linuxkompis.se/2018/08/25/automatically-converting-emojis-to-plain-text-in-weechat.html" rel="alternate" type="text/html" title="Automatically converting emojis to plain text in WeeChat" /><published>2018-08-25T00:00:00+02:00</published><updated>2024-02-16T19:42:13+01:00</updated><id>https://hunden.linuxkompis.se/2018/08/25/automatically-converting-emojis-to-plain-text-in-weechat</id><content type="html" xml:base="https://hunden.linuxkompis.se/2018/08/25/automatically-converting-emojis-to-plain-text-in-weechat.html"><![CDATA[<p>Something I’m not a huge fan of is <a href="https://en.wikipedia.org/wiki/Emoji">emojis</a>, I have always preferred using the classic emoticons like <code class="language-plaintext highlighter-rouge">:)</code>. And it’s not that emojis are all bad, it’s just that they’re not consistent across devices, sometimes not even across applications on the same device and some applications don’t even support emojis to begin with.</p>

<p>My terminal emulator (URxvt) supports most emojis, but they’re tiny and it can be /really/ difficult trying to figure out what they’re supposed to look like. Today when I was discussing emojis with a friend we got the brilliant idea that there has to be a script for WeeChat that converts emojis to plain text. And it sure does!</p>

<p>It’s called <a href="https://weechat.org/scripts/source/emoji2alias.py.html/">emoji2alias.py</a> and it converts emojis to plain text snippets like <code class="language-plaintext highlighter-rouge">:stuck_out_tongue:</code>. It’s based on the script <a href="https://weechat.org/scripts/source/emoji_aliases.py.html/">emoji_aliases.py</a> which lets you send emojis with aliases like <code class="language-plaintext highlighter-rouge">:stuck_out_tongue:</code>.</p>

<h2 id="installation">Installation</h2>

<p>You install the script in WeeChat with the command:</p>

<div class="language-plaintext highlighter-rouge"><div class="highlight"><pre class="highlight"><code>/script install emoji2alias.py
</code></pre></div></div>

<p>And if you like me don’t like getting messages with text like <code class="language-plaintext highlighter-rouge">:stuck_out_tounge:</code>, then you can edit the script yourself and replace the text with <code class="language-plaintext highlighter-rouge">:P</code> or whatever you prefer. Do note that any changes will be overwritten if you update the script, so I highly recommend that you make a copy of the script, give it a unique name and use that script instead.</p>]]></content><author><name></name></author><category term="[&quot;Tips &amp; Trix&quot;]" /><category term="WeeChat" /><category term="IRC" /><category term="Emojis" /><summary type="html"><![CDATA[Something I’m not a huge fan of is emojis, I have always preferred using the classic emoticons like :). And it’s not that emojis are all bad, it’s just that they’re not consistent across devices, sometimes not even across applications on the same device and some applications don’t even support emojis to begin with.]]></summary></entry><entry><title type="html">Automatically disable syntax highlighting in Vim when editing the zsh buffer</title><link href="https://hunden.linuxkompis.se/2018/08/20/automatically-disable-syntax-highlighting-in-vim-when-editing-commands-in-zsh.html" rel="alternate" type="text/html" title="Automatically disable syntax highlighting in Vim when editing the zsh buffer" /><published>2018-08-20T00:00:00+02:00</published><updated>2024-02-16T19:42:13+01:00</updated><id>https://hunden.linuxkompis.se/2018/08/20/automatically-disable-syntax-highlighting-in-vim-when-editing-commands-in-zsh</id><content type="html" xml:base="https://hunden.linuxkompis.se/2018/08/20/automatically-disable-syntax-highlighting-in-vim-when-editing-commands-in-zsh.html"><![CDATA[<p>I often <a href="https://hunden.linuxkompis.se/2018/08/19/edit-your-zsh-buffer-with-your-editor-of-choice.html">edit my zsh buffer in Vim</a> and one of the reasons for it is to have access to spell check (using <a href="http://aspell.net">GNU Aspell</a>).</p>

<p>Spell check is a nice feature to have when I do things like posting an update to Mastodon via the command-line client <a href="https://github.com/ihabunek/toot">toot</a>. But one annoying thing with it is that the syntax highlighting feature in Vim overrides the misspelled words, making it impossible to spot potentially misspelled words.</p>

<p><img src="/img/vim-zsh-syntax-highlighting.png" alt="Vim with syntax highlighting enable and disabled for the zsh buffer" />
<em>
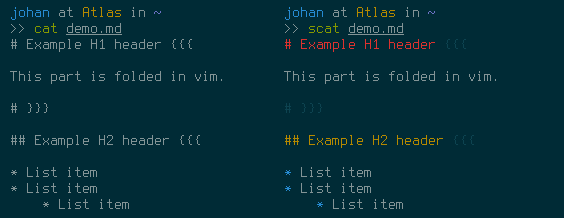
Vim with syntax highlighting enabled and disabled for the zsh buffer.</em></p>

<p>Thankfully there’s an easy way of automatically disabling the syntax highlighting feature in Vim when editing the zsh buffer, you just add one tiny line to your Vim configuration:</p>

<div class="language-plaintext highlighter-rouge"><div class="highlight"><pre class="highlight"><code>autocmd FileType zsh set syntax=off
</code></pre></div></div>

<p>Save and reload your configuration and you’re set.</p>]]></content><author><name></name></author><category term="[&quot;Tips &amp; Trix&quot;]" /><category term="zsh" /><category term="Vim" /><category term="Syntax highlighting" /><summary type="html"><![CDATA[I often edit my zsh buffer in Vim and one of the reasons for it is to have access to spell check (using GNU Aspell).]]></summary></entry><entry><title type="html">Edit the zsh buffer with your $EDITOR of choice</title><link href="https://hunden.linuxkompis.se/2018/08/19/edit-your-zsh-buffer-with-your-editor-of-choice.html" rel="alternate" type="text/html" title="Edit the zsh buffer with your $EDITOR of choice" /><published>2018-08-19T00:00:00+02:00</published><updated>2024-02-16T19:42:13+01:00</updated><id>https://hunden.linuxkompis.se/2018/08/19/edit-your-zsh-buffer-with-your-editor-of-choice</id><content type="html" xml:base="https://hunden.linuxkompis.se/2018/08/19/edit-your-zsh-buffer-with-your-editor-of-choice.html"><![CDATA[<p>If you spend a lot of time in the shell you also probably edit a lot of commands, which at times can be tedious when they’re getting a bit to long and complex. Being able to easily fire up your <code class="language-plaintext highlighter-rouge">$EDITOR</code> of choice when needed can therefore be a real blessing.</p>

<p>To make it work you need to add these lines to your configuration file <code class="language-plaintext highlighter-rouge">~/.zshrc</code>:</p>

<div class="language-plaintext highlighter-rouge"><div class="highlight"><pre class="highlight"><code>autoload -U edit-command-line
zle -N edit-command-line
bindkey '^I' edit-command-line
</code></pre></div></div>

<p>And don’t forget to set the <code class="language-plaintext highlighter-rouge">$EDITOR</code> variable as well:</p>

<div class="language-plaintext highlighter-rouge"><div class="highlight"><pre class="highlight"><code>export EDITOR="vim"
</code></pre></div></div>

<p>I have it bound to <code class="language-plaintext highlighter-rouge">Ctrl+I</code> to be consistent with how I open the <code class="language-plaintext highlighter-rouge">$EDITOR</code> in qutebrowser, but you’re free to bind it to what makes sense for you. And if you use the Vi-mode in zsh like me it’s probably a good idea to bind a key for it in the <code class="language-plaintext highlighter-rouge">normal</code> mode as well:</p>

<div class="language-plaintext highlighter-rouge"><div class="highlight"><pre class="highlight"><code>bindkey -M vicmd '^I' edit-command-line
</code></pre></div></div>

<p>Save your changes and source your configuration with the command <code class="language-plaintext highlighter-rouge">source ~/.zshrc</code> or just restart the shell for it to take effect.</p>]]></content><author><name></name></author><category term="[&quot;Tips &amp; Trix&quot;]" /><category term="zsh" /><category term="Vim" /><summary type="html"><![CDATA[If you spend a lot of time in the shell you also probably edit a lot of commands, which at times can be tedious when they’re getting a bit to long and complex. Being able to easily fire up your $EDITOR of choice when needed can therefore be a real blessing.]]></summary></entry><entry><title type="html">Hiding specific nicklists in WeeChat with toggle_nicklist.py</title><link href="https://hunden.linuxkompis.se/2018/08/15/hiding-specific-nicklists-in-weechat-with-toggle_nicklist.py.html" rel="alternate" type="text/html" title="Hiding specific nicklists in WeeChat with toggle_nicklist.py" /><published>2018-08-15T00:00:00+02:00</published><updated>2024-02-16T19:42:13+01:00</updated><id>https://hunden.linuxkompis.se/2018/08/15/hiding-specific-nicklists-in-weechat-with-toggle_nicklist.py</id><content type="html" xml:base="https://hunden.linuxkompis.se/2018/08/15/hiding-specific-nicklists-in-weechat-with-toggle_nicklist.py.html"><![CDATA[<p>I use Mastodon via WeeChat and Bitlbee, this means that I also get a nicklist with a lot of users from Mastodon, which is not useful and it only takes up a lot of valuable screen space.</p>

<p>Thankfully it’s easy to disable the nicklist for specific buffers via the script <a href="https://weechat.org/scripts/source/toggle_nicklist.py.html/">toggle_nicklist.py</a>.</p>

<h2 id="installation">Installation</h2>

<p>Installing a script is easy in WeeChat:</p>

<div class="language-plaintext highlighter-rouge"><div class="highlight"><pre class="highlight"><code>/script install toggle_nicklist.py
</code></pre></div></div>

<h2 id="usage">Usage</h2>

<p>You use the plugin with the command <code class="language-plaintext highlighter-rouge">/toggle_nicklist &lt;option&gt;</code>. The options you have available is <code class="language-plaintext highlighter-rouge">show</code>, <code class="language-plaintext highlighter-rouge">hide</code>, <code class="language-plaintext highlighter-rouge">toggle</code>, <code class="language-plaintext highlighter-rouge">add</code> and <code class="language-plaintext highlighter-rouge">remove</code>.</p>

<p>And to hide a nicklist for a certain buffer you just jump to the buffer and then run the command <code class="language-plaintext highlighter-rouge">/toggle_nicklist add</code>. And don’t forget to save any changes with <code class="language-plaintext highlighter-rouge">/save</code> when you’re done.</p>]]></content><author><name></name></author><category term="[&quot;Tips &amp; Trix&quot;]" /><category term="WeeChat" /><category term="IRC" /><summary type="html"><![CDATA[I use Mastodon via WeeChat and Bitlbee, this means that I also get a nicklist with a lot of users from Mastodon, which is not useful and it only takes up a lot of valuable screen space.]]></summary></entry><entry><title type="html">Spell check and auto correction of commands in zsh</title><link href="https://hunden.linuxkompis.se/2018/08/04/spell-check-and-auto-correction-of-commands-in-zsh.html" rel="alternate" type="text/html" title="Spell check and auto correction of commands in zsh" /><published>2018-08-04T00:00:00+02:00</published><updated>2024-02-16T19:42:13+01:00</updated><id>https://hunden.linuxkompis.se/2018/08/04/spell-check-and-auto-correction-of-commands-in-zsh</id><content type="html" xml:base="https://hunden.linuxkompis.se/2018/08/04/spell-check-and-auto-correction-of-commands-in-zsh.html"><![CDATA[<p>It wasn’t that long ago when I found out about this feature, I was looking for something else and happen to stumble upon this neat feature.</p>

<p>Apparently zsh has the capability of spell checking and auto correcting your misspelled commands. And this is how it looks in action:</p>

<div class="language-plaintext highlighter-rouge"><div class="highlight"><pre class="highlight"><code>$ mr superSecretDatabase.db
Correct mr to rm? [Yes, No, Abort, Edit] y
</code></pre></div></div>

<h2 id="how-to-enable-it">How to enable it</h2>

<p>You enable the feature by adding <code class="language-plaintext highlighter-rouge">setopt correct</code> to your config <code class="language-plaintext highlighter-rouge">~/.zshrc</code> and then resourcing your configuration with the command <code class="language-plaintext highlighter-rouge">source ~/.zshrc</code>.</p>

<h2 id="making-the-output-more-sane">Making the output more sane</h2>

<p>By default the options will be <code class="language-plaintext highlighter-rouge">[nyae]</code> and not <code class="language-plaintext highlighter-rouge">[Yes, No, Abort, Edit]</code> as shown in my example above. You can change this by adding the following line to your configuration:</p>

<div class="language-plaintext highlighter-rouge"><div class="highlight"><pre class="highlight"><code>export SPROMPT="Correct %R to %r? [Yes, No, Abort, Edit] "
</code></pre></div></div>

<h2 id="adding-some-colour-to-the-output">Adding some colour to the output</h2>

<p>Colours makes text easier to read and if you would like it to highlight the triggered word in red and the suggested word in green you can do so by adding this line to your configuration:</p>
<div class="language-plaintext highlighter-rouge"><div class="highlight"><pre class="highlight"><code>export SPROMPT="Correct $fg[red]%R$reset_color to $fg[green]%r$reset_color? [Yes, No, Abort, Edit] "
</code></pre></div></div>

<p>Just make sure that you have  enabled colours in zsh with <code class="language-plaintext highlighter-rouge">autoload -U colors &amp;&amp; colors</code> for it to work.</p>

<h2 id="the-one-annoying-drawback-with-the-spell-check">The one annoying drawback with the spell check</h2>

<p>It sometimes wants to correct completely fine commands for me, like <code class="language-plaintext highlighter-rouge">command</code> to <code class="language-plaintext highlighter-rouge">_command</code>. I don’t know what triggers it, but you can avoid it by creating an alias for said command:</p>

<div class="language-plaintext highlighter-rouge"><div class="highlight"><pre class="highlight"><code>alias &lt;command&gt;="nocorrect &lt;command&gt;"
</code></pre></div></div>

<p style="text-align:right">
	Source: <a href="https://www.refining-linux.org/archives/39-ZSH-Gem-4-Spell-checking-and-auto-correction.html">Refining Linux — ZSH Gem #4: Spell checking and auto correction</a>
</p>]]></content><author><name></name></author><category term="[&quot;Tips &amp; Trix&quot;]" /><category term="zsh" /><category term="Spellchecking" /><summary type="html"><![CDATA[It wasn’t that long ago when I found out about this feature, I was looking for something else and happen to stumble upon this neat feature.]]></summary></entry><entry><title type="html">My workaround for mpv in fullscreen sometimes spawning on the wrong monitor</title><link href="https://hunden.linuxkompis.se/2018/07/28/my-workaround-for-mpv-in-fullscreen-sometimes-spawning-on-the-wrong-monitor.html" rel="alternate" type="text/html" title="My workaround for mpv in fullscreen sometimes spawning on the wrong monitor" /><published>2018-07-28T00:00:00+02:00</published><updated>2024-02-16T19:42:13+01:00</updated><id>https://hunden.linuxkompis.se/2018/07/28/my-workaround-for-mpv-in-fullscreen-sometimes-spawning-on-the-wrong-monitor</id><content type="html" xml:base="https://hunden.linuxkompis.se/2018/07/28/my-workaround-for-mpv-in-fullscreen-sometimes-spawning-on-the-wrong-monitor.html"><![CDATA[<p>When I run mpv with the flag <code class="language-plaintext highlighter-rouge">--fullscreen</code> in my window manager i3, the client sometimes spawns on the wrong monitor. The reason for this behaviour is due to the fact that i3 doesn’t support the EMMH hint called “<a href="https://specifications.freedesktop.org/wm-spec/wm-spec-latest.html#idm140200472531472">_NET_WM_FULLSCREEN_MONITORS</a>”, which is something you can read more about on their issue tracker <a href="https://github.com/i3/i3/issues/2116">here</a>.</p>

<p>But as a workaround for this issue I created a rule for mpv in i3 that only gets called when I run mpv with the flag <code class="language-plaintext highlighter-rouge">--title mvpFullscreen</code>:</p>

<div class="language-plaintext highlighter-rouge"><div class="highlight"><pre class="highlight"><code>for_window [title="mpvFullscreen"] border none, floating toggle, move window to position 3840 0, resize set 1920 1080
</code></pre></div></div>

<p>The rule makes mpv float, removes the decoration, moves it to the upper left corner of my third monitor and then rezies it to the same size as my monitor. It’s a fake but instant and flawless looking fullscreen and I’m really happy with it.</p>]]></content><author><name></name></author><category term="[&quot;Tips &amp; Trix&quot;]" /><category term="i3" /><category term="mpv" /><summary type="html"><![CDATA[When I run mpv with the flag --fullscreen in my window manager i3, the client sometimes spawns on the wrong monitor. The reason for this behaviour is due to the fact that i3 doesn’t support the EMMH hint called “_NET_WM_FULLSCREEN_MONITORS”, which is something you can read more about on their issue tracker here.]]></summary></entry><entry><title type="html">How to delete files and folders older than N days</title><link href="https://hunden.linuxkompis.se/2018/07/19/how-to-delete-files-and-folders-older-than-n-days.html" rel="alternate" type="text/html" title="How to delete files and folders older than N days" /><published>2018-07-19T00:00:00+02:00</published><updated>2024-02-16T19:42:13+01:00</updated><id>https://hunden.linuxkompis.se/2018/07/19/how-to-delete-files-and-folders-older-than-n-days</id><content type="html" xml:base="https://hunden.linuxkompis.se/2018/07/19/how-to-delete-files-and-folders-older-than-n-days.html"><![CDATA[<p>There’s a lot of tips and recommendations about how to delete files and folders older than <code class="language-plaintext highlighter-rouge">&lt;N&gt;</code> days on the web, but you can’t as far as I know do it with only one command. And running <code class="language-plaintext highlighter-rouge">rm -rf</code> in the shell without any confirmation feels a bit too risky as well. Because no matter how experienced you are, accidents do happen. :)</p>

<p>That’s why I wrote this little script that let’s you in a safe manner verify both the age and folder before actually doing anything. I named the script <code class="language-plaintext highlighter-rouge">deleteOldFiles.sh</code> and it works by you first specifying the days followed by the path.</p>

<div class="language-plaintext highlighter-rouge"><div class="highlight"><pre class="highlight"><code>$ deleteOldFiles.sh 3 Nextcloud/tmp

These are the files and/or folders that will be deleted:

Nextcloud/tmp/2018-07-15-224841_628x482_scrot.png
Nextcloud/tmp/IMG_20180719_114053.jpg
Nextcloud/tmp/IMG_20180719_172601.jpg

Are you sure you want to continue? [y/n]
</code></pre></div></div>

<p>And here’s the script:</p>

<div class="language-sh highlighter-rouge"><div class="highlight"><pre class="highlight"><code><span class="c">#!/bin/bash</span>
<span class="nb">set</span> <span class="nt">-e</span>
<span class="nb">set</span> <span class="nt">-u</span>

<span class="nv">files</span><span class="o">=</span><span class="si">$(</span>find <span class="s2">"</span><span class="nv">$2</span><span class="s2">"</span> <span class="nt">-mtime</span> +<span class="s2">"</span><span class="nv">$1</span><span class="s2">"</span> <span class="nt">-print</span><span class="si">)</span>

<span class="nb">printf</span> <span class="s2">"</span><span class="se">\n</span><span class="s2">These are the files and/or folders that will be deleted:</span><span class="se">\n\n</span><span class="s2">"</span>
<span class="nb">printf</span> <span class="s2">"</span><span class="nv">$files</span><span class="s2">"</span>
<span class="nb">printf</span> <span class="s2">"</span><span class="se">\n\n</span><span class="s2">"</span>
<span class="nb">read</span> <span class="nt">-p</span> <span class="s1">$'Are you sure you want to continue? [y/n] '</span> <span class="nt">-n</span> 1 <span class="nt">-r</span>
<span class="nb">echo
</span><span class="k">if</span> <span class="o">[[</span> <span class="nv">$REPLY</span> <span class="o">=</span>~ ^[Yy]<span class="nv">$ </span><span class="o">]]</span>
    <span class="k">then
		</span>find <span class="s2">"</span><span class="nv">$2</span><span class="s2">"</span> <span class="nt">-mtime</span> +<span class="s2">"</span><span class="nv">$1</span><span class="s2">"</span> <span class="nt">-delete</span>
        <span class="nb">echo</span> <span class="nt">-e</span> <span class="s1">'\nDone!'</span>
    <span class="k">else
        </span><span class="nb">echo</span> <span class="nt">-e</span> <span class="s1">'\nAborted!'</span>
<span class="k">fi</span>
</code></pre></div></div>

<p>I’m not a programmer in any way, so if you have any feedback about it (good or bad) let me know. :)</p>

<h2 id="updates">Updates</h2>

<p><strong>July 24, 2018</strong></p>

<p>I got some feedback <a href="https://niu.moe/@ayo/100401613024749344">here</a> and I was told that using the flag <code class="language-plaintext highlighter-rouge">-delete</code> with <code class="language-plaintext highlighter-rouge">find</code> is a better and more secure way of doing it. So I changed my script to use the <code class="language-plaintext highlighter-rouge">-delete</code> flag as well as adding the feature that it now prints the files and/or folders that’s going to get deleted.</p>

<p><strong>July 24, 2018</strong></p>

<p>I got more feedback! And even a <a href="https://gitlab.com/Hund0b1/hund0b1.gitlab.io/merge_requests/1">merge request</a> with some further improvements to my script. Thanks! :)</p>]]></content><author><name></name></author><category term="[&quot;Tips &amp; Trix&quot;]" /><category term="Scripts" /><category term="File management" /><summary type="html"><![CDATA[There’s a lot of tips and recommendations about how to delete files and folders older than &lt;N&gt; days on the web, but you can’t as far as I know do it with only one command. And running rm -rf in the shell without any confirmation feels a bit too risky as well. Because no matter how experienced you are, accidents do happen. :)]]></summary></entry><entry><title type="html">Automatically hide your mouse cursor with Unclutter</title><link href="https://hunden.linuxkompis.se/2018/07/13/automatically-hide-your-mouse-cursor-with-unclutter.html" rel="alternate" type="text/html" title="Automatically hide your mouse cursor with Unclutter" /><published>2018-07-13T00:00:00+02:00</published><updated>2024-02-16T19:42:13+01:00</updated><id>https://hunden.linuxkompis.se/2018/07/13/automatically-hide-your-mouse-cursor-with-unclutter</id><content type="html" xml:base="https://hunden.linuxkompis.se/2018/07/13/automatically-hide-your-mouse-cursor-with-unclutter.html"><![CDATA[<p>If you almost never use the computer mouse like me, you are most likely also finding the mouse cursor distracting and in the way of your work. But there’s actually a way of automatically hiding it when it’s not being used and it’s made possible with the tool <a href="http://www.ibiblio.org/pub/X11/contrib/utilities/unclutter-8.README">Unclutter</a>, or more preferably with <a href="https://github.com/Airblader/unclutter-xfixes">unclutter-xfixes</a>.</p>

<p>Unclutter is actually an old tool, and <a href="https://www.ibiblio.org/pub/X11/contrib/utilities/">the latest version</a> of it dates back to 1996, this is why the user <a href="https://github.com/Airblader">Airblader</a> (the person behind <a href="https://github.com/Airblader/i3">i3-gaps</a>) decided to fork the project under the name unclutter-xfixes and bring it up to date.</p>

<p>But with that said, I’ve been using the old Unclutter until recently and I have never had any issues with it. So it should work just fine, but unclutter-xfixes is the recommended choice.</p>

<h2 id="usage">Usage</h2>

<p>Using Unclutter/unclutter-xfixes is nothing more than running the command <code class="language-plaintext highlighter-rouge">unclutter</code>. And if you check out the manual, you will find a few optional flags to tinker with, like the flag <code class="language-plaintext highlighter-rouge">--timeout &lt;n&gt;</code> which changes the number of seconds after which the cursor should be hidden.</p>

<h2 id="installation">Installation</h2>

<h3 id="unclutter">Unclutter</h3>

<p>Unclutter is both available in the repositories for Arch Linux and Ubuntu as <code class="language-plaintext highlighter-rouge">unclutter</code>:</p>

<p><strong>Arch Linux:</strong></p>

<div class="language-plaintext highlighter-rouge"><div class="highlight"><pre class="highlight"><code># pacman -S unclutter
</code></pre></div></div>

<p><strong>Ubuntu:</strong></p>

<div class="language-plaintext highlighter-rouge"><div class="highlight"><pre class="highlight"><code># apt install unclutter
</code></pre></div></div>

<h3 id="unclutter-xfixes">unclutter-xfixes</h3>

<p><strong>Arch Linux:</strong></p>

<p>unclutter-xfixes is available via the Arch User Repo as the package <a href="https://github.com/Airblader/unclutter-xfixes">unclutter-xfixes-git</a>.</p>

<p><strong>Ubuntu:</strong></p>

<p>If you’re using Ubuntu (or most likely any other Linux distribution) you then need to compile it yourself.</p>

<p>Start with installing the dependencies:</p>

<div class="language-plaintext highlighter-rouge"><div class="highlight"><pre class="highlight"><code># apt install build-essential libev-dev libx11-dev libxfixes-dev libxi-dev pkg-config
</code></pre></div></div>

<p>And optionally you also might want to install the package <code class="language-plaintext highlighter-rouge">asciidoc</code> if you want to include the manual. Do note that I needed to download more than 700MB worth of packages for that, which is why I only added it as a optional dependency. But it’s only needed when compiling the package, so it’s okay to uninstall it when you done compiling unclutter-xfixes.</p>

<p>And lastly, continue to download the source code and compile it:</p>

<div class="language-plaintext highlighter-rouge"><div class="highlight"><pre class="highlight"><code>$ git clone https://github.com/Airblader/unclutter-xfixes
$ cd unclutter-xfixes
$ make
# make install
</code></pre></div></div>]]></content><author><name></name></author><category term="[&quot;Applications &amp; Tools&quot;]" /><category term="Unclutter" /><category term="Mouse" /><summary type="html"><![CDATA[If you almost never use the computer mouse like me, you are most likely also finding the mouse cursor distracting and in the way of your work. But there’s actually a way of automatically hiding it when it’s not being used and it’s made possible with the tool Unclutter, or more preferably with unclutter-xfixes.]]></summary></entry><entry><title type="html">Trash-cli - A command-line interface to the FreeDesktop.org Trash</title><link href="https://hunden.linuxkompis.se/2018/07/09/trash-cli-a-command-line-interface-to-the-freedesktop.org-trash.html" rel="alternate" type="text/html" title="Trash-cli - A command-line interface to the FreeDesktop.org Trash" /><published>2018-07-09T00:00:00+02:00</published><updated>2024-02-16T19:42:13+01:00</updated><id>https://hunden.linuxkompis.se/2018/07/09/trash-cli-a-command-line-interface-to-the-freedesktop.org-trash</id><content type="html" xml:base="https://hunden.linuxkompis.se/2018/07/09/trash-cli-a-command-line-interface-to-the-freedesktop.org-trash.html"><![CDATA[<p>So, I’m sure I’m not the only user who has in the past mistakenly deleted the wrong file(s) in the shell. And it always seems to be that one super important document you just spent like five sweaty hours on as well. :/</p>

<p>This is where <a href="https://github.com/andreafrancia/trash-cli">trash-cli</a> comes into the picture. It’s a simple and straightforward command-line tool written in Python that works as a interface to the <a href="https://specifications.freedesktop.org/trash-spec/trashspec-latest.html">FreeDesktop.org trash</a>. And instead of straight up deleting your files with the command <code class="language-plaintext highlighter-rouge">rm</code>, you can use <code class="language-plaintext highlighter-rouge">trash</code> to put them in your FreeDesktop.org trash and then recycle them at a later stage.</p>

<h2 id="usage">Usage</h2>

<p>You put a file or folder in the trash with the command <code class="language-plaintext highlighter-rouge">trash-put &lt;file&gt;</code> or just <code class="language-plaintext highlighter-rouge">trash &lt;file</code>. To list your trashed files you use the command <code class="language-plaintext highlighter-rouge">trash-list</code>:</p>

<div class="language-plaintext highlighter-rouge"><div class="highlight"><pre class="highlight"><code>$ trash-list
2018-07-09 14:14:04 /home/johan/Unpack-4461
2018-07-09 14:13:46 /home/johan/rsync-bosco-2018-06-17.log
2018-07-09 14:13:17 /home/johan/lol_felt_bad.jpg
</code></pre></div></div>

<p>To restore a file or a folder you use the command <code class="language-plaintext highlighter-rouge">trash-restore</code> followed by the corresponding number:</p>

<div class="language-plaintext highlighter-rouge"><div class="highlight"><pre class="highlight"><code>$ trash-restore
   1 2018-07-09 14:14:04 /home/johan/Unpack-4461
   2 2018-07-09 14:13:46 /home/johan/rsync-bosco-2018-06-17.log
   3 2018-07-09 14:13:17 /home/johan/lol_felt_bad.jpg
What file to restore [0..3]: 3
</code></pre></div></div>

<p>If you wish to recycle all your trashed files you can do so with the command <code class="language-plaintext highlighter-rouge">trash-empty</code>. Note that it’s also possible to only recycle files older than a specified value, for an example this example will only recycle files older than 30 days:</p>

<div class="language-plaintext highlighter-rouge"><div class="highlight"><pre class="highlight"><code>trash-empty 30
</code></pre></div></div>

<h2 id="installation">Installation</h2>

<p>It’s available in both the official repositories for Arch Linux, Ubuntu and via the Python package manager pip with the name <code class="language-plaintext highlighter-rouge">trash-cli</code>.</p>

<p><strong>Arch Linux:</strong></p>

<div class="language-plaintext highlighter-rouge"><div class="highlight"><pre class="highlight"><code># pacman -S trash-cli
</code></pre></div></div>

<p><strong>Ubuntu:</strong></p>

<div class="language-plaintext highlighter-rouge"><div class="highlight"><pre class="highlight"><code># apt install trash-cli
</code></pre></div></div>

<p><strong>pip:</strong></p>

<div class="language-plaintext highlighter-rouge"><div class="highlight"><pre class="highlight"><code>$ pip install trash-cli --user
</code></pre></div></div>]]></content><author><name></name></author><category term="[&quot;Applications &amp; Tools&quot;]" /><category term="Trash" /><category term="Command-line" /><category term="File Management" /><category term="Productivity" /><summary type="html"><![CDATA[So, I’m sure I’m not the only user who has in the past mistakenly deleted the wrong file(s) in the shell. And it always seems to be that one super important document you just spent like five sweaty hours on as well. :/]]></summary></entry><entry><title type="html">Abook - A Ncurses address book application</title><link href="https://hunden.linuxkompis.se/2018/06/25/abook-a-ncurses-adress-book-program.html" rel="alternate" type="text/html" title="Abook - A Ncurses address book application" /><published>2018-06-25T00:00:00+02:00</published><updated>2025-11-17T21:02:08+01:00</updated><id>https://hunden.linuxkompis.se/2018/06/25/abook-a-ncurses-adress-book-program</id><content type="html" xml:base="https://hunden.linuxkompis.se/2018/06/25/abook-a-ncurses-adress-book-program.html"><![CDATA[<p><a href="http://abook.sourceforge.net">Abook</a> is a simple Ncurses address book application. It’s the perfect choice for those seeking something simple, both in terms of footprint and usability. Or perhaps you’re just tired of keeping everything in the cloud. :)</p>

<p>And as a little bonus, it also works well with the e-mail clients <a href="http://www.mutt.org">Mutt</a> and <a href="https://neomutt.org">NeoMutt</a>, which I will cover further down in this blog post.</p>

<div class="gallery" style="margin-bottom:1em;">
    <a href="/../img/abook.png"><img src="/../img/t/abook.png" /></a>
    <a href="/../img/abook_edit.png"><img src="/../img/t/abook_edit.png" /></a>
</div>

<h1 id="hej">Hej</h1>
<h2 id="installation">Installation</h2>
<h3 id="hej-1">Hej</h3>

<p>It’s available in the official repositories as <code class="language-plaintext highlighter-rouge">abook</code> in both Arch Linux and Ubuntu. I assume it’s the case for most other distros as well.</p>

<p>But if you want support for vCards (.csv) you need to patch and compile it yourself. If you choose to do so, jump to <a href="http://abook.sourceforge.net/#download">their download page</a> and download the latest version.</p>

<p>Unpack the archive and <code class="language-plaintext highlighter-rouge">cd</code> to the directory:</p>

<div class="language-plaintext highlighter-rouge"><div class="highlight"><pre class="highlight"><code>$ tar -zxvf abook-0.6.0pre2.tar.gz
</code></pre></div></div>

<div class="language-plaintext highlighter-rouge"><div class="highlight"><pre class="highlight"><code>$ cd abook-0.6.0pre2
</code></pre></div></div>

<p>Download the patch:</p>

<div class="language-plaintext highlighter-rouge"><div class="highlight"><pre class="highlight"><code>$ wget http://abook.sourceforge.net/patches/abook_vcard_import.patch
</code></pre></div></div>

<p>I’m not sure if this is needed for all, but I needed <a href="https://git.archlinux.org/svntogit/packages.git/tree/trunk/gcc5.patch?h=packages/abook">this patch</a> for it to successfully compile on Arch Linux:</p>

<div class="language-plaintext highlighter-rouge"><div class="highlight"><pre class="highlight"><code>$ wget -O gcc5.patch https://git.archlinux.org/svntogit/packages.git/plain/trunk/gcc5.patch?h=packages/abook
</code></pre></div></div>
<p>And now apply the patches:</p>

<div class="language-plaintext highlighter-rouge"><div class="highlight"><pre class="highlight"><code>$ patch -p1 -i abook_vcard_import.patch
</code></pre></div></div>
<div class="language-plaintext highlighter-rouge"><div class="highlight"><pre class="highlight"><code>$ patch -p1 -i abook_vcard_import.patch
</code></pre></div></div>

<p>Lastly compile and install it:</p>

<div class="language-plaintext highlighter-rouge"><div class="highlight"><pre class="highlight"><code>$ ./configure
</code></pre></div></div>
<div class="language-plaintext highlighter-rouge"><div class="highlight"><pre class="highlight"><code>$ make
</code></pre></div></div>
<div class="language-plaintext highlighter-rouge"><div class="highlight"><pre class="highlight"><code># make install
</code></pre></div></div>

<h2 id="configuration">Configuration</h2>

<p>I’m using Arch Linux (with the binary from their repositories) and the flag <code class="language-plaintext highlighter-rouge">--help</code> only mention this regarding a configuration:</p>

<div class="language-plaintext highlighter-rouge"><div class="highlight"><pre class="highlight"><code>-C  --config    &lt;file&gt;      use an alternative configuration file
</code></pre></div></div>

<p>And the manual only mention this:</p>

<div class="language-plaintext highlighter-rouge"><div class="highlight"><pre class="highlight"><code>-C --config &lt;filename&gt;
    Use an alternative configuration file (default is $HOME/.abook/abookrc).
</code></pre></div></div>

<p>But I did <code class="language-plaintext highlighter-rouge">some digging</code> and found the file <code class="language-plaintext highlighter-rouge">/usr/share/man/man5/abookrc.5.gz</code>, which I extracted and found a manual with more information — including variables for the configuration. Why is this not the default manual? Anyway, I converted it to HTML and uploaded it <a href="/../files/abook_manpage.html">here</a>.</p>

<p>And this is what my configuration looks like:</p>

<div class="language-plaintext highlighter-rouge"><div class="highlight"><pre class="highlight"><code># Automatically save database on exit
set autosave=true

# Show all email addresses in list
set show_all_emails=true

# frequently used values:
#    -1          disabled
#    phone       Home Phone
#    workphone   Work Phone
#    fax         Fax
#    mobile      Mobile Phone
#    nick        Nickname/Alias
#    url         URL

# Command used to start mutt
set mutt_command=mutt

# Command used to print
set print_command=lpr

# Command used to start the web browser
set www_command=w3m

# address style [eu|us|uk]
set address_style=eu

# use ASCII characters only
set use_ascii_only=false

# Prevent double entry
set add_email_prevent_duplicates=false

# field to be used with "sort by field" command
set sort_field=nick

# show cursor in main display
set show_cursor=false

set index_format=" {name:30} {mobile:20} {workphone:20} {email:35}"
</code></pre></div></div>

<h2 id="usage">Usage</h2>

<p>When you start <code class="language-plaintext highlighter-rouge">abook</code> you get a menu on top hinting you about the three most common shortcuts; <code class="language-plaintext highlighter-rouge">?</code> for help, <code class="language-plaintext highlighter-rouge">a</code> to add an entry and <code class="language-plaintext highlighter-rouge">r</code> to remove an entry. The help shows you as expected all available commands:</p>

<table>
  <tbody>
    <tr>
      <td>?</td>
      <td>help</td>
    </tr>
    <tr>
      <td>q</td>
      <td>quit</td>
    </tr>
    <tr>
      <td>Q</td>
      <td>quit without saving</td>
    </tr>
    <tr>
      <td>P</td>
      <td>quit and output selected item(s) to stderr</td>
    </tr>
    <tr>
      <td>^L</td>
      <td>refresh screen</td>
    </tr>
    <tr>
      <td> </td>
      <td> </td>
    </tr>
    <tr>
      <td>arrows / j,k</td>
      <td>scroll list</td>
    </tr>
    <tr>
      <td>enter</td>
      <td>view/edit item</td>
    </tr>
    <tr>
      <td>a</td>
      <td>add item</td>
    </tr>
    <tr>
      <td>r / del</td>
      <td>remove selected items</td>
    </tr>
    <tr>
      <td>M</td>
      <td>merge selected items (into top one)</td>
    </tr>
    <tr>
      <td>D</td>
      <td>duplicate item</td>
    </tr>
    <tr>
      <td>U</td>
      <td>remove duplicates</td>
    </tr>
    <tr>
      <td> </td>
      <td> </td>
    </tr>
    <tr>
      <td>space</td>
      <td>select item</td>
    </tr>
    <tr>
      <td>+</td>
      <td>select all</td>
    </tr>
    <tr>
      <td>-</td>
      <td>unselect all</td>
    </tr>
    <tr>
      <td>*</td>
      <td>invert selection</td>
    </tr>
    <tr>
      <td> </td>
      <td> </td>
    </tr>
    <tr>
      <td>w</td>
      <td>write database to disk</td>
    </tr>
    <tr>
      <td>l</td>
      <td>read database from disk</td>
    </tr>
    <tr>
      <td>C</td>
      <td>clear whole database</td>
    </tr>
    <tr>
      <td>i</td>
      <td>import database</td>
    </tr>
  </tbody>
</table>

<h2 id="importing-an-address-book">Importing an address book</h2>

<p>To import an adress book you use this syntax:</p>

<div class="language-plaintext highlighter-rouge"><div class="highlight"><pre class="highlight"><code>abook --convert --infile &lt;file&gt; --informat &lt;input format&gt; --outfile ~/.abook/addressbook --outformat &lt;output format&gt;
</code></pre></div></div>

<p>As an example, let’s import a vCart adress book:</p>

<div class="language-plaintext highlighter-rouge"><div class="highlight"><pre class="highlight"><code>abook --convert --infile example.csv --informat csv --outfile ~/.abook/addressbook --outformat abook
</code></pre></div></div>

<p>There’s also support for importing these two kinds of address books:</p>

<ul>
  <li>ldif (Netscape Address books)</li>
  <li>Pine aldress books</li>
</ul>

<p>But I have no idea who uses those two?</p>

<h2 id="exporting-an-address-book">Exporting an address book</h2>

<p>For some reason it supports exporting to more formats than it can import. The website lists these as compatible formats:</p>

<ul>
  <li>ldif / Netscape address book (.4ld)</li>
  <li>Pine address book</li>
  <li>HTML</li>
  <li>mutt alias</li>
  <li>GnomeCard (VCard) address book</li>
  <li>elm alias</li>
  <li>plain text</li>
  <li>Spruce address book</li>
</ul>

<p>Exporting an adress book works as expected in the same way as importing an adress book. In this example I’m exporting my adress book to a plain text file:</p>

<div class="language-plaintext highlighter-rouge"><div class="highlight"><pre class="highlight"><code>$ abook --convert --infile ~/.config/abook/addressbook --informat abook --outfile hund.text --outformat text
</code></pre></div></div>
<p>And the result is a plain text file looking like this:</p>

<div class="language-plaintext highlighter-rouge"><div class="highlight"><pre class="highlight"><code>-----------------------------------------
Hund's address book
-----------------------------------------


-----------------------------------------

Hund

hund@example.com

hund0b1.gitlab.io

-----------------------------------------

Katt

katt@example.com

Home Phone: 123 456 789

-----------------------------------------
</code></pre></div></div>

<h2 id="using-abook-with-mutt">Using Abook with Mutt</h2>

<p>As I previously mentioned, it’s possible to use Abook with Mutt, which is partly the reason I chose to go with Abook a long time ago.</p>

<p>For Abook to work with Mutt you need to add this part to your Mutt configuration:</p>

<div class="language-plaintext highlighter-rouge"><div class="highlight"><pre class="highlight"><code>set query_command = "abook --mutt-query '%s'"
macro generic,index,pager \ca "&lt;shell-escape&gt;abook&lt;return&gt;" "launch abook"
macro index,pager A "&lt;pipe-message&gt;abook --add-email&lt;return&gt;" "add the sender address to abook"
</code></pre></div></div>

<p>Now when you’re composing a new message you can either just <code class="language-plaintext highlighter-rouge">&lt;tab&gt;</code> to bring out a list with all your contacts. It’s also possible to type some letters to filter out some results before tabbing.</p>

<p>And if you want to add a contact to Abook, you just use the key <code class="language-plaintext highlighter-rouge">A</code> when you’re either reading the message or when it’s selected in the mailbox.</p>]]></content><author><name></name></author><category term="[&quot;Applications &amp; Tools&quot;]" /><category term="Abook" /><category term="Address book" /><category term="Mutt" /><category term="NeoMutt" /><category term="Productivity" /><summary type="html"><![CDATA[Abook is a simple Ncurses address book application. It’s the perfect choice for those seeking something simple, both in terms of footprint and usability. Or perhaps you’re just tired of keeping everything in the cloud. :)]]></summary></entry><entry><title type="html">µTimer - A command-line timer</title><link href="https://hunden.linuxkompis.se/2018/06/24/utimer-a-command-line-timer.html" rel="alternate" type="text/html" title="µTimer - A command-line timer" /><published>2018-06-24T00:00:00+02:00</published><updated>2024-02-16T19:42:13+01:00</updated><id>https://hunden.linuxkompis.se/2018/06/24/utimer-a-command-line-timer</id><content type="html" xml:base="https://hunden.linuxkompis.se/2018/06/24/utimer-a-command-line-timer.html"><![CDATA[<p><a href="https:/img/launchpad.net/utimer">µTimer</a> is a neat little command-line tool that features a timer, countdown and stopwatch.</p>

<p>It’s straight forward, to set a timer you use the flag <code class="language-plaintext highlighter-rouge">-t</code> and to set a countdown you use the flag <code class="language-plaintext highlighter-rouge">-c</code> with the time like <code class="language-plaintext highlighter-rouge">1d2h3m</code>, <code class="language-plaintext highlighter-rouge">5m30s</code> or just <code class="language-plaintext highlighter-rouge">5m</code>:</p>

<div class="language-plaintext highlighter-rouge"><div class="highlight"><pre class="highlight"><code>$ utimer -c 5m30s
Time Remaining: 0 days 00:05:26.358 (326.358 seconds)
</code></pre></div></div>

<div class="language-plaintext highlighter-rouge"><div class="highlight"><pre class="highlight"><code>$ utimer -t 5m
Elapsed Time: 0 days 00:00:04.353 (4.353 seconds)
</code></pre></div></div>

<p>You can use the following in any combination for the timer and countdown:</p>

<table>
  <tbody>
    <tr>
      <td>d</td>
      <td>days</td>
    </tr>
    <tr>
      <td>h</td>
      <td>hours</td>
    </tr>
    <tr>
      <td>m</td>
      <td>minutes</td>
    </tr>
    <tr>
      <td>s</td>
      <td>seconds</td>
    </tr>
    <tr>
      <td>ms</td>
      <td>milliseconds</td>
    </tr>
  </tbody>
</table>

<p>And to start a stopwatch:</p>

<div class="language-plaintext highlighter-rouge"><div class="highlight"><pre class="highlight"><code>$ utimer -s
Elapsed Time: 0 days 00:00:03.482 (3.482 seconds)
</code></pre></div></div>

<p>To stop the stopwatch you use the key <code class="language-plaintext highlighter-rouge">q</code>. And for more information you can always consult the flag <code class="language-plaintext highlighter-rouge">--help</code>.</p>

<h2 id="installation">Installation</h2>

<p>If you have access to the Arch User Repo you can install it via there, the name of the package is <a href="https:/img/aur.archlinux.org/packages/utimer/">utimer</a>. But if you’re using something else you probably need to compile it yourself.</p>

<p>I tried compiling it in my virtual machine with Ubuntu 16.04, so I could verify the instructions and add them here, but it didn’t go as planned. When I ran <code class="language-plaintext highlighter-rouge">./configure</code> it complained about two packages:</p>

<blockquote>
  <p>checking for GLIB… configure: error: Package requirements (glib-2.0 &gt;= 2.16.6 gobject-2.0) were not met:</p>

  <p>No package ‘glib-2.0’ found
No package ‘gobject-2.0’ found</p>
</blockquote>

<p>I started with the first dependency by installing the package <code class="language-plaintext highlighter-rouge">libglib-2.0-dev</code> using <code class="language-plaintext highlighter-rouge">apt</code>:</p>

<div class="language-plaintext highlighter-rouge"><div class="highlight"><pre class="highlight"><code># apt install libglib2.0-dev
[sudo] password for johan:
Reading package lists... Done
Building dependency tree
Reading state information... Done
Some packages could not be installed. This may mean that you have
requested an impossible situation or if you are using the unstable
distribution that some required packages have not yet been created
or been moved out of Incoming.
The following information may help to resolve the situation:

The following packages have unmet dependencies.
 libglib2.0-dev : Depends: libpcre3-dev (&gt;= 1:8.31) but it is not going to be installed
E: Unable to correct problems, you have held broken packages.
</code></pre></div></div>

<p>I have held broken packages? Let’s check them out:</p>

<div class="language-plaintext highlighter-rouge"><div class="highlight"><pre class="highlight"><code>$ apt-mark showhold
$
</code></pre></div></div>

<p>OK? Am I doing something wrong here or what? Anyway I also tried my luck with <code class="language-plaintext highlighter-rouge">aptitude</code>:</p>

<div class="language-plaintext highlighter-rouge"><div class="highlight"><pre class="highlight"><code># aptitude install libglib2.0-dev
The following NEW packages will be installed:
  libglib2.0-bin{a} libglib2.0-dev libpcre3-dev{ab} libpcre32-3{a} zlib1g-dev{a}
0 packages upgraded, 5 newly installed, 0 to remove and 0 not upgraded.
Need to get 2,246 kB of archives. After unpacking 12.6 MB will be used.
The following packages have unmet dependencies:
 libpcre3-dev : Depends: libpcre3 (= 2:8.38-3.1) but 2:8.41-1.1+ubuntu14.04.1+deb.sury.org+4 is installed.
The following actions will resolve these dependencies:

     Keep the following packages at their current version:
1)     libglib2.0-dev [Not Installed]
2)     libpcre3-dev [Not Installed]

Accept this solution? [Y/n/q/?] y
No packages will be installed, upgraded, or removed.
0 packages upgraded, 0 newly installed, 0 to remove and 0 not upgraded.
Need to get 0 B of archives. After unpacking 0 B will be used.
</code></pre></div></div>

<p>If anyone is reading this and is actually using Debian (or anything based on it) and knows how to fix this, please let me know via any of the links in the footer.</p>]]></content><author><name></name></author><category term="[&quot;Applications &amp; Tools&quot;]" /><category term="uTimer" /><category term="Command-line" /><category term="Productivity" /><category term="Timer" /><summary type="html"><![CDATA[µTimer is a neat little command-line tool that features a timer, countdown and stopwatch.]]></summary></entry><entry><title type="html">toot - A Mastodon CLI client</title><link href="https://hunden.linuxkompis.se/2018/06/17/toot-a-cli-mastodon-client.html" rel="alternate" type="text/html" title="toot - A Mastodon CLI client" /><published>2018-06-17T00:00:00+02:00</published><updated>2024-02-16T19:42:13+01:00</updated><id>https://hunden.linuxkompis.se/2018/06/17/toot-a-cli-mastodon-client</id><content type="html" xml:base="https://hunden.linuxkompis.se/2018/06/17/toot-a-cli-mastodon-client.html"><![CDATA[<p>My main Mastodon client is Bitlbee with the plugin <a href="https://github.com/kensanata/bitlbee-mastodon">bitlbee-mastodon</a>, it’s nice having both IRC, XMPP and Mastodon under the same roof, but it only comes with the basic features; reading, replying, liking and boosting posts. Which is for the most part enough for me, but I sometimes post  and maybe want to check out a profile.</p>

<p>This is where <a href="https://github.com/ihabunek/toot">toot</a> comes into the picture. toot is a Mastodon client for the command-line interface and it’s packed with a lot of features that bitlbee-mastodon doesn’t have.</p>

<p>The command <code class="language-plaintext highlighter-rouge">toot</code> will list all the commands available for you:</p>

<div class="language-plaintext highlighter-rouge"><div class="highlight"><pre class="highlight"><code>$ toot
toot - a Mastodon CLI client
v0.18.0

Authentication:
  toot login           Log in from the console, does NOT support two factor authentication
  toot login_browser   Log in using your browser, supports regular and two factor authentication
  toot activate        Switch between logged in accounts.
  toot logout          Log out, delete stored access keys
  toot auth            Show logged in accounts and instances

Read:
  toot whoami          Display logged in user details
  toot whois           Display account details
  toot instance        Display instance details
  toot search          Search for users or hashtags
  toot timeline        Show recent items in your public timeline
  toot curses          An experimental timeline app (doesn't work on Windows)

Post:
  toot post            Post a status text to your timeline
  toot upload          Upload an image or video file

Accounts:
  toot follow          Follow an account
  toot unfollow        Unfollow an account
  toot mute            Mute an account
  toot unmute          Unmute an account
  toot block           Block an account
  toot unblock         Unblock an account

To get help for each command run:
  toot &lt;command&gt; --help
</code></pre></div></div>

<p>It’s fairly straight forward and if you want to know more about a specific command you can show more information by passing the flag <code class="language-plaintext highlighter-rouge">--help</code>:</p>

<div class="language-plaintext highlighter-rouge"><div class="highlight"><pre class="highlight"><code>$ toot post --help
usage: toot post [-h] [-m MEDIA] [-v VISIBILITY] [--no-color] [--debug]
                 [-u USING]
                 [text]

Post a status text to your timeline

positional arguments:
  text                  The status text to post.

optional arguments:
  -h, --help            show this help message and exit
  -m MEDIA, --media MEDIA
                        path to the media file to attach
  -v VISIBILITY, --visibility VISIBILITY
                        post visibility, one of: public, unlisted, private,
                        direct
  --no-color            don't use ANSI colors in output
  --debug               show debug log in console
  -u USING, --using USING
                        the account to use, overrides active account

https://github.com/ihabunek/toot
</code></pre></div></div>

<p>Here’s an example of what it looks like when you show your timelime:</p>

<div class="language-plaintext highlighter-rouge"><div class="highlight"><pre class="highlight"><code>$ toot timeline
───────────────────────────────┼────────────────────────────────────────────────────────────────────────────────────────
F-Droid                        │ Aurora Store: Download apks from #GooglePlayStore#AuroraStore is a #fork of
@fdroidorg                     │ #YalpStore by Sergey Yeriomin. It lets you download apps directly from Google
2018-06-17 10:29               │ Play Store as #apk files. It can search for #updates of installed #apps and lets
Reblogged @Aznorth             │ you search for other apps.Aurora Store provides a #MaterialUI to #Yalp
                               │ #Store.https://f-droid.org/app/com.dragons.aurora#fdroidorg #fdroid #libre #app
                               │ @fdroidorg #altenative
───────────────────────────────┼────────────────────────────────────────────────────────────────────────────────────────
F-Droid                        │ This weeks #twif is live:
@fdroidorg                     │ https://f-droid.org/en/2018/06/14/this-week-in-fdroid-w24.htmlEnjoy!
2018-06-17 08:23               │ 
───────────────────────────────┼────────────────────────────────────────────────────────────────────────────────────────
</code></pre></div></div>
<p>If you want to list the public timeline just add the flag <code class="language-plaintext highlighter-rouge">--public</code> and to list the timeline for you instance only you add the flags <code class="language-plaintext highlighter-rouge">--public --local</code>.</p>

<p>And here’s what it looks like when you do a search and look up a profile:</p>

<div class="language-plaintext highlighter-rouge"><div class="highlight"><pre class="highlight"><code>$ toot search pixelfed

Accounts:
* @pixelfed@mastodon.social PixelFed

Hashtags:
#pixelfed, #pixelfedlogo, #pixelfed_replaces_instagaram, #pixelfed_replaces_instagram
</code></pre></div></div>

<div class="language-plaintext highlighter-rouge"><div class="highlight"><pre class="highlight"><code>$ toot whois @pixelfed@mastodon.social

@pixelfed@mastodon.social PixelFed

Federated Image Sharing powered by ActivityPub.Created by @dansupPress
Inquiries: hello@pixelfed.org

ID: 50992
Since: 2018-05-17 @ 21:27:57

Followers: 1239
Following: 0
Statuses: 249

https://mastodon.social/@pixelfed
</code></pre></div></div>

<p>And why not follow them so we can monitor the progress of the awesome project <a href="https://pixelfed.social">PixelFed</a>? :)</p>

<div class="language-plaintext highlighter-rouge"><div class="highlight"><pre class="highlight"><code>$ toot follow @pixelfed@mastodon.social
✓ You are now following @pixelfed@mastodon.social
</code></pre></div></div>

<p>That’s about it. toot is a great little tool if you prefer doing things in the shell like me.</p>

<h2 id="installation">Installation</h2>

<p>You need the dependencies <code class="language-plaintext highlighter-rouge">python-requests</code>, <code class="language-plaintext highlighter-rouge">python-beautifulsoup4</code> and the make dependency <code class="language-plaintext highlighter-rouge">python-setuptools</code>. You can then download the latest version of toot on GitHub <a href="https://github.com/ihabunek/toot/releases">here</a>.</p>

<p>Unpack the archive and simply install it with the command <code class="language-plaintext highlighter-rouge">python setup.py install</code>.</p>

<h2 id="configuration">Configuration</h2>

<p>Before you can use toot you need to add your account(s). You can do so by running the command <code class="language-plaintext highlighter-rouge">toot login</code> or <code class="language-plaintext highlighter-rouge">toot login_browser</code> if you’re using two factor authentication, you will be then directed to your Mastodon instance via your web browser and then asked to authorize toot.</p>

<p>toot supports multiple accounts at the same time, you just have to repeat what you just did for your other instance and you can then view your logged in accounts with the command <code class="language-plaintext highlighter-rouge">toot auth</code>. The active account will have the flag <code class="language-plaintext highlighter-rouge">ACTIVE</code> next to it. You can then use the command <code class="language-plaintext highlighter-rouge">toot activate</code> to switch between your accounts, or just use the flag <code class="language-plaintext highlighter-rouge">--using</code> in combination with your command to use an account temporarily.</p>

<p>If you wish to delete your access token you can do so by logging out using the command <code class="language-plaintext highlighter-rouge">toot logout</code>.</p>]]></content><author><name></name></author><category term="[&quot;Applications &amp; Tools&quot;]" /><category term="toot" /><category term="Mastodon" /><category term="Command-line" /><summary type="html"><![CDATA[My main Mastodon client is Bitlbee with the plugin bitlbee-mastodon, it’s nice having both IRC, XMPP and Mastodon under the same roof, but it only comes with the basic features; reading, replying, liking and boosting posts. Which is for the most part enough for me, but I sometimes post and maybe want to check out a profile.]]></summary></entry><entry><title type="html">StreamCurse - A Ncurses frontend for Streamlink</title><link href="https://hunden.linuxkompis.se/2018/04/18/streamlink-curses-a-ncurses-client-for-streamlink.html" rel="alternate" type="text/html" title="StreamCurse - A Ncurses frontend for Streamlink" /><published>2018-04-18T00:00:00+02:00</published><updated>2024-02-16T19:42:13+01:00</updated><id>https://hunden.linuxkompis.se/2018/04/18/streamlink-curses-a-ncurses-client-for-streamlink</id><content type="html" xml:base="https://hunden.linuxkompis.se/2018/04/18/streamlink-curses-a-ncurses-client-for-streamlink.html"><![CDATA[<p>When I’m at the computer I often like to have some background noise to keep me company at nights. <a href="https://twitch.tv">Twitch</a> and other livestreaming services is perfect for that, you really don’t get distracted and you don’t miss anything if you don’t pay attention to it either.</p>

<p>For this I like to use the application <a href="https://github.com/RadicalEd360/StreamCurse">StreamCurse</a>, which is a Ncurses frontend to <a href="https://github.com/streamlink/streamlink">Streamlink</a>, a CLI-tool that lets you extract livestreams from <a href="https://streamlink.github.io/plugin_matrix.html">various services</a> and play them via your media player of choice, mine happens to be <a href="https://mpv.io">mpv</a>.</p>

<p><img src="/img/streamcurse.png" alt="" /></p>

<p>What StreamCurse does is that it lets you collect all your favourite livestreams from various services in one place and it will then keep you updated about the livestreams that’s currently broadcasting. The nice thing with this solution is that I can fully avoid bloated and/or sites that tracks you, like Twitch and YouTube. I also don’t need an account to follow anyone and don’t even have to leave the safety of my own desktop. :)</p>

<p>The interface is fairly straight forward, it uses a Vi-like navigation with few and simple keybindings, I have listed some of the more common ones down below:</p>

<table>
  <tbody>
    <tr>
      <td>a</td>
      <td>Add stream</td>
    </tr>
    <tr>
      <td>d</td>
      <td>Delete stream</td>
    </tr>
    <tr>
      <td>Enter</td>
      <td>Start stream</td>
    </tr>
    <tr>
      <td>r</td>
      <td>Change stream resolution</td>
    </tr>
    <tr>
      <td>n</td>
      <td>Change stream name</td>
    </tr>
    <tr>
      <td>u</td>
      <td>Change stream URL</td>
    </tr>
    <tr>
      <td>?</td>
      <td>List all shortcuts</td>
    </tr>
  </tbody>
</table>

<p>You can set a default resolution for all new streams, but it’s also possible to change the resolution per stream with the key <code class="language-plaintext highlighter-rouge">r</code>. This is something I currently have to do for livestreams from YouTube due to the streams at 1080p/60FPS is using <a href="https://en.wikipedia.org/wiki/Dynamic_Adaptive_Streaming_over_HTTP">DASH</a>, which is <a href="https://github.com/streamlink/streamlink/pull/225#issuecomment-263821938">not yet supported</a> and as a workaround I have limited the resolution to 1080p/30FPS for those streams.</p>

<h2 id="installation">Installation</h2>

<p>The package <code class="language-plaintext highlighter-rouge">streamlink</code> is available in the repositories for both Gentoo Linux and Arch Linux. It’s as far as I know not available in Ubuntu, but since it’s just a regular Python application you can install it via <code class="language-plaintext highlighter-rouge">pip</code>:</p>

<div class="language-plaintext highlighter-rouge"><div class="highlight"><pre class="highlight"><code>pip install streamlink --user
</code></pre></div></div>

<p>To install <code class="language-plaintext highlighter-rouge">streamcurse</code> you need to download the source code from the git repository and manually install it yourself:</p>

<div class="language-plaintext highlighter-rouge"><div class="highlight"><pre class="highlight"><code>$ git clone https://github.com/RadicalEd360/streamcurse
$ cd streamcurse
# python3 setup.py install
</code></pre></div></div>

<h2 id="configuration">Configuration</h2>

<p>You can start adding streams right away, but if you do have a Twitch-account you can choose to sync all the channels you follow with the keybinding <code class="language-plaintext highlighter-rouge">w</code> followed by your username.</p>

<p>The configuration can be found in the folder <code class="language-plaintext highlighter-rouge">$CONFIG/streamcurse</code>, if you want to change any settings like the colors or permanently adding your Twitch-username.</p>]]></content><author><name></name></author><category term="[&quot;Applications &amp; Tools&quot;]" /><category term="StreamCurse" /><category term="Streamlink" /><category term="Twitch" /><category term="Ncurses" /><summary type="html"><![CDATA[When I’m at the computer I often like to have some background noise to keep me company at nights. Twitch and other livestreaming services is perfect for that, you really don’t get distracted and you don’t miss anything if you don’t pay attention to it either.]]></summary></entry><entry><title type="html">sxiv - A simple Vi-like image viewer</title><link href="https://hunden.linuxkompis.se/2018/04/12/sxiv-a-simple-vi-like-image-viewer.html" rel="alternate" type="text/html" title="sxiv - A simple Vi-like image viewer" /><published>2018-04-12T00:00:00+02:00</published><updated>2024-02-16T19:42:13+01:00</updated><id>https://hunden.linuxkompis.se/2018/04/12/sxiv-a-simple-vi-like-image-viewer</id><content type="html" xml:base="https://hunden.linuxkompis.se/2018/04/12/sxiv-a-simple-vi-like-image-viewer.html"><![CDATA[<p><a href="https://github.com/muennich/sxiv/">sxiv</a> is a fast Vi-like image viewer with a <a href="https://suckless.org/">suckless</a> approach to it. It’s fairly lightweight in terms on its footprint, but it still has everything that you can expect from an image viewer and on top of that it’s also scriptable.</p>

<div class="grid-container">
    <div class="grid-item">
        <a href="/img/sxiv.jpg">
            <img src="/img/t/sxiv.jpg" alt="A picture of the image viewer sxiv." />
            <figcaption></figcaption>
        </a>
    </div><!-- END grid-item -->
    <div class="grid-item">
        <a href="/img/sxiv-thubmnails.jpg">
            <img src="/img/t/sxiv-thumbnails.jpg" alt="A picture of the image viewer sxiv." />
            <figcaption></figcaption>
        </a>
    </div><!-- END grid-item -->
</div>
<!-- END grid-container -->

<p>And when I say it’s fast I really mean it! Loading huge  with a file size at 50 MB takes 1-2 seconds on my 8 year old computer, while regular sized  are instant.</p>

<p>The website lists these features:</p>

<ul>
  <li>Basic image operations, e.g. zooming, panning, rotating</li>
  <li>Customizable key and mouse button mappings (in config.h)</li>
  <li>Thumbnail mode: grid of selectable previews of all</li>
  <li>Ability to cache thumbnails for fast re-loading</li>
  <li>Basic support for multi-frame</li>
  <li>Load all frames from GIF files and play GIF animations</li>
  <li>Display image information in status bar</li>
</ul>

<p>The second point is one of the few things I dislike with the suckles-philosophy though. They don’t use configuration files, which means that if you want to change any of the settings you need to edit the source code. It’s for the most part straight forward, but it also means that you need to download the source and compile it yourself. I would prefer if I could just create a configuration file in my folder <code class="language-plaintext highlighter-rouge">$CONFIG</code>, that I can also easily share with my friends and/or across my own computers with my other <a href="https://gitlab.com/Hund0b1/dotfiles">dotfiles</a>. With that said, it’s still a great image viewer and you’re most likely not going to need to change any of the settings anyway.</p>

<h2 id="using-sxiv">Using sxiv</h2>

<p>To use sxiv you either open an image directly with <code class="language-plaintext highlighter-rouge">sxiv &lt;file&gt;</code> or by open a folder in thumbnail mode: <code class="language-plaintext highlighter-rouge">xsiv -tr &lt;folder&gt;</code> or <code class="language-plaintext highlighter-rouge">xsiv -tr {&lt;folder&gt;,&lt;second folder&gt;}</code> for multiple folders. The flag <code class="language-plaintext highlighter-rouge">-r</code> tells it to search the given directory (or directories) recursively for  to view and the flag <code class="language-plaintext highlighter-rouge">-t</code> tells it to start in thumbnail mode.</p>

<p>There’s a lot of shortcuts for sxiv – but they’re all listed in the <a href="http://muennich.github.io/sxiv/sxiv.1.html">man page for sxiv</a> – so I’m only going to mention the most common ones to get you started:</p>

<table>
  <tbody>
    <tr>
      <td><code class="language-plaintext highlighter-rouge">n</code></td>
      <td>Go to the next image.</td>
    </tr>
    <tr>
      <td><code class="language-plaintext highlighter-rouge">p</code></td>
      <td>Go to the previous image.</td>
    </tr>
    <tr>
      <td><code class="language-plaintext highlighter-rouge">g</code></td>
      <td>Jump to the first image.</td>
    </tr>
    <tr>
      <td><code class="language-plaintext highlighter-rouge">G</code></td>
      <td>Jump to the last image</td>
    </tr>
    <tr>
      <td><code class="language-plaintext highlighter-rouge">f</code></td>
      <td>Toggle fullscreen mode.</td>
    </tr>
    <tr>
      <td><code class="language-plaintext highlighter-rouge">b</code></td>
      <td>Toggle the bar.</td>
    </tr>
    <tr>
      <td><code class="language-plaintext highlighter-rouge">+</code></td>
      <td>Zoom in.</td>
    </tr>
    <tr>
      <td><code class="language-plaintext highlighter-rouge">-</code></td>
      <td>Zoom out.</td>
    </tr>
    <tr>
      <td><code class="language-plaintext highlighter-rouge">e</code></td>
      <td>Fit image to the window width.</td>
    </tr>
    <tr>
      <td><code class="language-plaintext highlighter-rouge">E</code></td>
      <td>Fit image to the window height.</td>
    </tr>
    <tr>
      <td><code class="language-plaintext highlighter-rouge">q</code></td>
      <td>Exit sxiv.</td>
    </tr>
  </tbody>
</table>

<h2 id="make-sxiv-show-the-image-size-and-file-size-in-the-bar">Make sxiv show the image size and file size in the bar</h2>

<p>For it to show the image size and file size you need to install the packages <code class="language-plaintext highlighter-rouge">exiv2</code> and <code class="language-plaintext highlighter-rouge">imagemagick</code>, then create the file <code class="language-plaintext highlighter-rouge">~/.config/sxiv/exec/image-info</code> with this content:</p>

<div class="language-bash highlighter-rouge"><div class="highlight"><pre class="highlight"><code><span class="c">#!/bin/sh</span>

<span class="c"># Example for ~/.config/sxiv/exec/image-info</span>
<span class="c"># Called by sxiv(1) whenever an image gets loaded,</span>
<span class="c"># with the name of the image file as its first argument.</span>
<span class="c"># The output is displayed in sxiv's status bar.</span>

<span class="nv">s</span><span class="o">=</span><span class="s2">" | "</span> <span class="c"># field separator</span>

<span class="nv">filename</span><span class="o">=</span><span class="si">$(</span><span class="nb">basename</span> <span class="s2">"</span><span class="nv">$1</span><span class="s2">"</span><span class="si">)</span>
<span class="nv">filesize</span><span class="o">=</span><span class="si">$(</span><span class="nb">du</span> <span class="nt">-Hh</span> <span class="s2">"</span><span class="nv">$1</span><span class="s2">"</span> | <span class="nb">cut</span> <span class="nt">-f</span> 1<span class="si">)</span>

<span class="c"># The '[0]' stands for the first frame of a multi-frame file, e.g. gif.</span>
<span class="nv">geometry</span><span class="o">=</span><span class="si">$(</span>identify <span class="nt">-format</span> <span class="s1">'%wx%h'</span> <span class="s2">"</span><span class="nv">$1</span><span class="s2">[0]"</span><span class="si">)</span>

<span class="nv">tags</span><span class="o">=</span><span class="si">$(</span>exiv2 <span class="nt">-q</span> <span class="nb">pr</span> <span class="nt">-pi</span> <span class="s2">"</span><span class="nv">$1</span><span class="s2">"</span> | <span class="nb">awk</span> <span class="s1">'$1~"Keywords" { printf("%s,", $4); }'</span><span class="si">)</span>
<span class="nv">tags</span><span class="o">=</span><span class="k">${</span><span class="nv">tags</span><span class="p">%,</span><span class="k">}</span>

<span class="nb">echo</span> <span class="s2">"</span><span class="k">${</span><span class="nv">filesize</span><span class="k">}${</span><span class="nv">s</span><span class="k">}${</span><span class="nv">geometry</span><span class="k">}${</span><span class="nv">tags</span>:+<span class="nv">$s</span><span class="k">}${</span><span class="nv">tags</span><span class="k">}${</span><span class="nv">s</span><span class="k">}${</span><span class="nv">filename</span><span class="k">}</span><span class="s2">"</span>
</code></pre></div></div>

<p>Source: <a href="https://wiki.archlinux.org/index.php/Sxiv#Showing_the_image_size_in_the_status_bar">ArchWiki</a>.</p>

<h2 id="adding-shortcuts-to-sxiv">Adding shortcuts to sxiv</h2>

<p>It’s also possible to add shortcuts to sxiv that let’s you execute any shell command you like. Let’s start with creating the file `$CONFIG/.sxiv/exec/key-handler and adding this example content to it:</p>

<div class="language-sh highlighter-rouge"><div class="highlight"><pre class="highlight"><code><span class="c">#!/bin/sh</span>
<span class="k">while </span><span class="nb">read </span>file
<span class="k">do
    case</span> <span class="s2">"</span><span class="nv">$1</span><span class="s2">"</span> <span class="k">in</span>
    <span class="s2">"C-u"</span><span class="p">)</span>
        exiftool <span class="nt">-all</span><span class="o">=</span> <span class="s2">"</span><span class="nv">$file</span><span class="s2">"</span> <span class="o">&amp;&amp;</span> shareLinkCreator <span class="s2">"</span><span class="nv">$file</span><span class="s2">"</span> <span class="p">;;</span>
    <span class="s2">"C-w"</span><span class="p">)</span>
        feh <span class="nt">--bg-fill</span> <span class="s2">"</span><span class="nv">$file</span><span class="s2">"</span> <span class="p">;;</span>
    <span class="s2">"C-d"</span><span class="p">)</span>
        trash-put <span class="s2">"</span><span class="nv">$file</span><span class="s2">"</span> <span class="p">;;</span>
    <span class="k">esac</span>
<span class="k">done</span>
</code></pre></div></div>

<p>This is the shortcuts I use and it works by first pressing <code class="language-plaintext highlighter-rouge">Ctrl+x</code> and then the shortcut, like <code class="language-plaintext highlighter-rouge">Ctrl+d</code> to move the selected file to my trash.</p>]]></content><author><name></name></author><category term="[&quot;Applications &amp; Tools&quot;]" /><category term="sxiv" /><category term="Image viewer" /><category term="File management" /><summary type="html"><![CDATA[sxiv is a fast Vi-like image viewer with a suckless approach to it. It’s fairly lightweight in terms on its footprint, but it still has everything that you can expect from an image viewer and on top of that it’s also scriptable.]]></summary></entry><entry><title type="html">Converting Markdown to HTML</title><link href="https://hunden.linuxkompis.se/2018/04/09/converting-markdown-to-html.html" rel="alternate" type="text/html" title="Converting Markdown to HTML" /><published>2018-04-09T00:00:00+02:00</published><updated>2024-02-16T19:42:13+01:00</updated><id>https://hunden.linuxkompis.se/2018/04/09/converting-markdown-to-html</id><content type="html" xml:base="https://hunden.linuxkompis.se/2018/04/09/converting-markdown-to-html.html"><![CDATA[<p>To convert Markdown-documents to HMTL-documents I use <a href="https://github.com/trentm/python-markdown2">Markdown2</a>, which is a complete implementation of Markdown in Python.</p>

<p>It’s available via pip:</p>

<div class="language-plaintext highlighter-rouge"><div class="highlight"><pre class="highlight"><code>$ pip install markdown2 --user
</code></pre></div></div>

<p>To convert a document you simply use the command:</p>

<div class="language-plaintext highlighter-rouge"><div class="highlight"><pre class="highlight"><code>$ markdown2 input_file.md &gt; output_file.html
</code></pre></div></div>

<p>But if you use tables in your document it will not render them correctly unless you add the flag <code class="language-plaintext highlighter-rouge">-x tables</code>:</p>

<div class="language-plaintext highlighter-rouge"><div class="highlight"><pre class="highlight"><code>$ markdown2 input.md &gt; output.html -x tables
</code></pre></div></div>

<p>The default styling of tables is bad as you can see in this before and after picture:</p>

<p><a href="/img/markdown2html.png"><img src="/img/markdown2html-preview.png" alt="" /></a></p>

<p>The styling I added was this:</p>

<div class="language-html highlighter-rouge"><div class="highlight"><pre class="highlight"><code><span class="nt">&lt;style&gt;</span>
	<span class="nt">table</span> <span class="p">{</span> <span class="nl">border-collapse</span><span class="p">:</span> <span class="nb">collapse</span><span class="p">;</span> <span class="nl">width</span><span class="p">:</span><span class="m">100%</span><span class="p">;</span> <span class="p">}</span>
	<span class="nt">td</span><span class="o">,</span> <span class="nt">th</span> <span class="p">{</span> <span class="nl">border</span><span class="p">:</span> <span class="m">1px</span> <span class="nb">solid</span> <span class="nx">#ddd</span><span class="p">;</span> <span class="nl">padding</span><span class="p">:</span> <span class="m">8px</span><span class="p">;</span> <span class="p">}</span>
	<span class="nt">tr</span><span class="nd">:nth-child</span><span class="o">(</span><span class="nt">even</span><span class="o">)</span><span class="p">{</span><span class="nl">background-color</span><span class="p">:</span> <span class="nx">#f2f2f2</span><span class="p">;}</span>
	<span class="nt">tr</span><span class="nd">:hover</span> <span class="p">{</span><span class="nl">background-color</span><span class="p">:</span> <span class="nx">#ddd</span><span class="p">;}</span>
	<span class="nt">th</span> <span class="p">{</span> <span class="nl">padding-top</span><span class="p">:</span> <span class="m">12px</span><span class="p">;</span> <span class="nl">padding-bottom</span><span class="p">:</span> <span class="m">12px</span><span class="p">;</span> <span class="nl">background-color</span><span class="p">:</span> <span class="nx">#ddd</span><span class="p">;</span> <span class="p">}</span>
<span class="nt">&lt;/style&gt;</span>
</code></pre></div></div>

<p>But manually adding that to every document with tables isn’t going to be fun, so I wrote a simple script called <code class="language-plaintext highlighter-rouge">md2html.sh</code> to do it for me:</p>

<div class="language-bash highlighter-rouge"><div class="highlight"><pre class="highlight"><code><span class="c">#!/bin/sh</span>
markdown2 <span class="nv">$1</span> <span class="o">&gt;</span> <span class="nv">$2</span> <span class="nt">-x</span> tables
<span class="nb">sed</span> <span class="nt">-i</span> <span class="s1">'1 i\&lt;style&gt;table { border-collapse: collapse; width:100%; }	td, th { border: 1px solid #ddd; padding: 8px; } tr:nth-child(even){background-color: #f2f2f2;}	tr:hover {background-color: #ddd;} th { padding-top: 12px; padding-bottom: 12px; background-color: #ddd; }&lt;/style&gt;'</span> <span class="nv">$2</span>
</code></pre></div></div>

<p>And to use it:</p>

<div class="language-plaintext highlighter-rouge"><div class="highlight"><pre class="highlight"><code>$ md2html.py input.md output.html
</code></pre></div></div>

<p>If I want to convert it to a PDF-document I just print it to a PDF-document via my web browser, which saves me from installing additional packages for something that I rarely ever use anyway.</p>]]></content><author><name></name></author><category term="[&quot;Applications &amp; Tools&quot;]" /><category term="Markdown" /><category term="HTML" /><category term="Command-line" /><summary type="html"><![CDATA[To convert Markdown-documents to HMTL-documents I use Markdown2, which is a complete implementation of Markdown in Python.]]></summary></entry><entry><title type="html">My keyboard - The Black Diamond</title><link href="https://hunden.linuxkompis.se/2018/01/19/my-keyboard-the-black_diamond.html" rel="alternate" type="text/html" title="My keyboard - The Black Diamond" /><published>2018-01-19T00:00:00+01:00</published><updated>2024-02-16T19:42:13+01:00</updated><id>https://hunden.linuxkompis.se/2018/01/19/my-keyboard-the-black_diamond</id><content type="html" xml:base="https://hunden.linuxkompis.se/2018/01/19/my-keyboard-the-black_diamond.html"><![CDATA[<p>This is my second custom built keyboard. I named it the Black Diamond since the case is called Diamond in Chinese, which sounds way better than the international name which is “5°”.</p>

<p><a href="/img/keyboards/black_diamond.jpg"><img src="/img/keyboards/thumbnails/black_diamond.jpg" alt="" /></a></p>

<table>
  <tbody>
    <tr>
      <td>Size:</td>
      <td>60%</td>
    </tr>
    <tr>
      <td>Case:</td>
      <td><a href="https://kbdfans.myshopify.com/collections/case/products/pre-orderkbdfans-5-60-case">Diamond</a>, KBDfans</td>
    </tr>
    <tr>
      <td>PCB:</td>
      <td><a href="https://sentraq.com/collections/parts-1/products/60-rgb-underglow-pcb">S60-X</a>, Sentraq</td>
    </tr>
    <tr>
      <td>Switches:</td>
      <td><a href="https://zealpc.net/collections/switches/products/tealios">Tealios</a>, ZealPC</td>
    </tr>
    <tr>
      <td>Springs:</td>
      <td><a href="https://www.candykeys.com/product/60g-mx-springs-sprit-edition-100x/">SPRiT Edition (60g)</a>, SPRiT</td>
    </tr>
    <tr>
      <td>Keycaps:</td>
      <td><a href="https://www.massdrop.com/buy/blank-pbt-keycaps?utm_source=linkshare&amp;referer=CPRCE7">PBT Blanks</a>, NPKC</td>
    </tr>
    <tr>
      <td>Artisan:</td>
      <td><a href="https://skdcables.com/index.php/product/blanks/">Cherry Blank</a>, SKD Cables</td>
    </tr>
  </tbody>
</table>]]></content><author><name></name></author><category term="[&quot;My Keyboards&quot;]" /><category term="Keyboards" /><category term="Hund" /><summary type="html"><![CDATA[This is my second custom built keyboard. I named it the Black Diamond since the case is called Diamond in Chinese, which sounds way better than the international name which is “5°”.]]></summary></entry><entry><title type="html">My keyboard - Let’s Split</title><link href="https://hunden.linuxkompis.se/2017/07/29/my-keyboard-lets-split.html" rel="alternate" type="text/html" title="My keyboard - Let’s Split" /><published>2017-07-29T00:00:00+02:00</published><updated>2024-02-16T19:42:13+01:00</updated><id>https://hunden.linuxkompis.se/2017/07/29/my-keyboard-lets-split</id><content type="html" xml:base="https://hunden.linuxkompis.se/2017/07/29/my-keyboard-lets-split.html"><![CDATA[<p>This is the first keyboard that I have built myself. I wanted something easy and fairly inexpensive to start with since I didn’t have any previous experience with soldering. I also wanted to try both a ortholinear keyboard and a split layout.</p>

<p><a href="/img/keyboards/lets_split.jpg"><img src="/img/keyboards/thumbnails/lets_split.jpg" alt="" /></a></p>

<p>I enjoyed building it and the soldering job turned out pretty good for being a self-taught first timer. And I really liked having a split keyboard, but the ortholinear layout is not for me. :)</p>

<table>
  <tbody>
    <tr>
      <td>Size:</td>
      <td>40%</td>
    </tr>
    <tr>
      <td>Case:</td>
      <td>Let’s Split, Smashing Acrylic [<a href="https://smashingacrylics.co.uk/product/lets-split-acrylic-cases/">Website</a>]</td>
    </tr>
    <tr>
      <td>PCB:</td>
      <td>Let’s Split, Smashing Acrylic [<a href="https://smashingacrylics.co.uk/product/lets-split-pcb-kits/">Website</a>]</td>
    </tr>
    <tr>
      <td>Switches:</td>
      <td>Gateron Yellow</td>
    </tr>
    <tr>
      <td>Keycaps:</td>
      <td>NPKC PBT blanks</td>
    </tr>
  </tbody>
</table>]]></content><author><name></name></author><category term="[&quot;My Keyboards&quot;]" /><category term="Keyboards" /><category term="Hund" /><summary type="html"><![CDATA[This is the first keyboard that I have built myself. I wanted something easy and fairly inexpensive to start with since I didn’t have any previous experience with soldering. I also wanted to try both a ortholinear keyboard and a split layout.]]></summary></entry><entry><title type="html">My keyboard - Filco Majestouch 2</title><link href="https://hunden.linuxkompis.se/2017/06/09/my-keyboard-filco-majestouch-2.html" rel="alternate" type="text/html" title="My keyboard - Filco Majestouch 2" /><published>2017-06-09T00:00:00+02:00</published><updated>2024-02-16T19:42:13+01:00</updated><id>https://hunden.linuxkompis.se/2017/06/09/my-keyboard-filco-majestouch-2</id><content type="html" xml:base="https://hunden.linuxkompis.se/2017/06/09/my-keyboard-filco-majestouch-2.html"><![CDATA[<p>This keyboard is about a year old now, but I recently got my new custom and expensive cable for it, so I thought it was time to share it here.</p>

<p><a href="/img/keyboards/filco_majestouch_2_tkl.jpg"><img src="/img/keyboards/thumbnails/filco_majestouch_2_tkl.jpg" alt="" /></a></p>

<p>It’s also rocking a custom controller called <a href="http://bathroomepiphanies.com/controllers/">The Pegasus Hoof</a>, which makes it fully programmable via the open source <a href="https://github.com/tmk/tmk_keyboard">TMK firmware</a>. This adds a lot of neat features like layers and macros.</p>

<table>
  <tbody>
    <tr>
      <td>Brand:</td>
      <td>Filco</td>
    </tr>
    <tr>
      <td>Model:</td>
      <td>Majestouch 2</td>
    </tr>
    <tr>
      <td>Size:</td>
      <td>TKL / 80%</td>
    </tr>
    <tr>
      <td>Switches:</td>
      <td>Cherry MX Red</td>
    </tr>
    <tr>
      <td>Keycaps:</td>
      <td>NPKC PBT blanks</td>
    </tr>
    <tr>
      <td>Cable:</td>
      <td>Custom, PexonPCs [<a href="https://pexonpcs.co.uk">Website</a>]</td>
    </tr>
  </tbody>
</table>]]></content><author><name></name></author><category term="[&quot;My Keyboards&quot;]" /><category term="Keyboards" /><category term="Hund" /><summary type="html"><![CDATA[This keyboard is about a year old now, but I recently got my new custom and expensive cable for it, so I thought it was time to share it here.]]></summary></entry><entry><title type="html">My keyboard - KBParadise V60</title><link href="https://hunden.linuxkompis.se/2017/02/20/my-keyboard-the-kbd-v60.html" rel="alternate" type="text/html" title="My keyboard - KBParadise V60" /><published>2017-02-20T00:00:00+01:00</published><updated>2024-02-16T19:42:13+01:00</updated><id>https://hunden.linuxkompis.se/2017/02/20/my-keyboard-the-kbd-v60</id><content type="html" xml:base="https://hunden.linuxkompis.se/2017/02/20/my-keyboard-the-kbd-v60.html"><![CDATA[<p>This is my slightly modded KBParadise V60 with new keycaps and a custom cable. It’s also my first and last ANSI keyboard.</p>

<p><a href="/img/keyboards/kbparadise_v60.jpg"><img src="/img/keyboards/thumbnails/kbparadise_v60.jpg" alt="" /></a></p>

<table>
  <tbody>
    <tr>
      <td>Brand:</td>
      <td>KBParadise</td>
    </tr>
    <tr>
      <td>Model:</td>
      <td>V60</td>
    </tr>
    <tr>
      <td>Size:</td>
      <td>60%</td>
    </tr>
    <tr>
      <td>Switches:</td>
      <td>Gateron Red</td>
    </tr>
    <tr>
      <td>Keycaps:</td>
      <td>NPKC PBT blanks</td>
    </tr>
    <tr>
      <td>Artisan:</td>
      <td>Idea23 [<a href="https://idea23.com">Website</a>]</td>
    </tr>
    <tr>
      <td>Cable:</td>
      <td>Custom, PexonPCs [<a href="https:/img/pexonpcs.co.uk">Website</a>]</td>
    </tr>
  </tbody>
</table>]]></content><author><name></name></author><category term="[&quot;My Keyboards&quot;]" /><category term="Keyboards" /><category term="Hund" /><summary type="html"><![CDATA[This is my slightly modded KBParadise V60 with new keycaps and a custom cable. It’s also my first and last ANSI keyboard.]]></summary></entry></feed>